
1. Introduction
This manual provides detailed instructions for the safe and effective operation of your Airiton AR-152 Ham Radio. Please read this manual thoroughly before using the device and retain it for future reference. The Airiton AR-152 is a powerful, military-grade handheld two-way radio designed for long-range communication, featuring a 12000mAh battery and dual-band capabilities.

Figure 1: Airiton AR-152 Ham Radio displaying frequency and power settings.
2. Package Contents
Verify that all items listed below are present in your package:
- Airiton AR-152 Radio Unit (Host)
- 12000mAh Li-ion Battery (Model: BL-152)
- Antenna (SMA-Female connector)
- Wall Charger
- User's Manual
- Lanyard
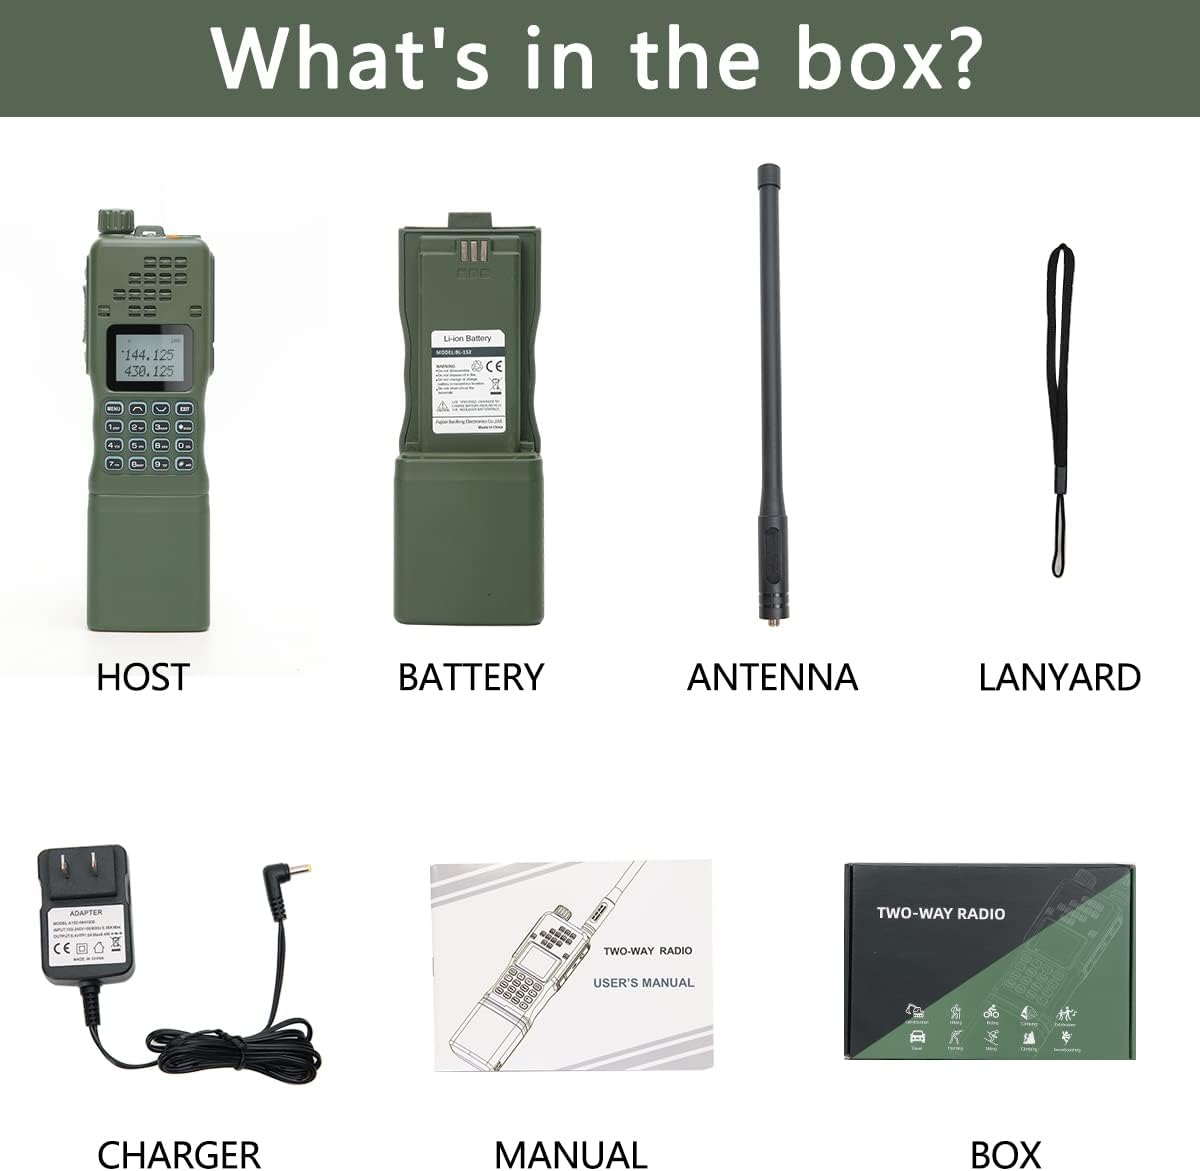
Figure 2: Included items in the Airiton AR-152 package.
3. Setup
3.1 Battery Installation
- Align the 12000mAh Li-ion battery with the battery compartment on the back of the radio unit.
- Slide the battery into place until it clicks securely.

Figure 3: Battery installation process for the AR-152 radio.
3.2 Antenna Attachment
- Locate the SMA-Female connector on the top of the radio.
- Screw the provided antenna clockwise onto the connector until it is finger-tight. Do not overtighten.

Figure 4: Attaching the SMA-Female antenna to the radio unit.
3.3 Protective Film Removal
Remove the protective film from the display screen for optimal visibility.
4. Operating Instructions
4.1 Power On/Off and Volume Control
The power knob is located at the top of the radio. Rotate it clockwise to power on the device and adjust the volume. Rotate counter-clockwise to decrease volume and power off.
4.2 Keypad and Side Buttons
The radio features a clear keypad for frequency input and menu navigation. Side buttons include a Push-to-Talk (PTT) button, mode changing buttons, and a flashlight button.
4.3 Operating Modes (Walkie-Talkie and FM Radio)
The AR-152 operates in two primary modes: Walkie-Talkie (default) and FM Radio. Press the Mode button to switch between these modes. In Walkie-Talkie mode, you can easily navigate between different frequencies or stored channels. The radio supports two main types of frequency modes: Frequency Mode for direct frequency input and Channel Mode for selecting pre-stored channels. Use the up/down arrow keys to toggle between frequencies or channels.
4.4 Power Transmission Modes
The radio offers three power transmission modes: High (H), Medium (M), and Low (L). Press the # button to cycle through these power levels. The current power level is indicated on the display.

Figure 5: Display indicating different power transmission modes (High, Mid, Low).
4.5 Flashlight and Alarm Functions
A dedicated button on the side activates the built-in LED flashlight. A single press turns it on, a second press makes it flash, and a third press turns it off. The radio also includes an alarm function; press and hold the designated button to activate it in case of emergency.
5. Charging
The Airiton AR-152 supports multiple charging methods:
- Wall Charger: Use the standard wall charger provided in the package.
- USB Charger: Compatible with USB charging cables for convenient charging via USB ports.
- Car Charger: A car charger can be used for charging on the go (sold separately).

Figure 6: Various charging options for the AR-152 radio.
6. External Accessories
The radio features a K-port (2 Pin) on the side, protected by a rubber flap. This port is compatible with external headsets, speaker microphones, and programming cables, allowing for enhanced functionality and hands-free operation.
Video 1: Demonstrates the K-port (2 Pin) for connecting external accessories like headsets and speaker mics, and shows the various charging methods for the AR-152 radio.
7. Specifications
| Feature | Specification |
|---|---|
| Brand | Airiton |
| Model Number | AR-152 |
| Color | Green |
| Number of Channels | 40 |
| Frequency Range | 136-174 MHz, 400-512 MHz |
| Talking Range Maximum | 15 Kilometers |
| Water Resistance Level | Waterproof |
| Product Dimensions (D x W x H) | 1.57"D x 2.6"W x 17.87"H |
| Item Weight | 1.65 Pounds |
| Battery Average Life | 6 days |
| Tuner Type | UHF, VHF |

Figure 7: Physical dimensions of the AR-152 radio.
8. Maintenance
- Keep the radio clean by wiping it with a soft, damp cloth. Avoid harsh chemicals.
- Ensure the battery charging port is covered when not in use to prevent moisture and dust ingress.
- Store the radio in a cool, dry place away from direct sunlight and extreme temperatures.
- Regularly check the antenna connection for tightness.
9. Troubleshooting
- No Power: Ensure the battery is correctly installed and fully charged. Check the power/volume knob.
- Poor Reception/Transmission: Verify the antenna is securely attached. Check the selected frequency or channel. Ensure you are within range. Adjust power transmission mode (High, Medium, Low).
- Audio Issues: Adjust the volume knob. Ensure no external headset is improperly connected.
- Display Not Working: Check power. If issues persist, contact customer support.
10. Safety and Licensing Information
Important: In the United States, an amateur radio license is required to transmit with this high-power walkie-talkie. While listening to frequencies is generally permitted without a license, transmitting without proper authorization is illegal and can result in penalties. Always ensure compliance with local regulations and licensing requirements for radio operation.
Avoid transmitting on frequencies not licensed or authorized to prevent interference with licensed users. The FCC may pursue action against individuals who cause interference.
The product is designed to be dust and splash-proof, but it is not fully waterproof. Avoid submerging the device in water.
Video 2: A comprehensive demonstration of the Airiton AR-152 Ham Radio, including unboxing, assembly, keypad and button functions, switching between walkie-talkie and FM modes, adjusting power levels, using the flashlight and alarm, and important licensing considerations for transmission.
11. Warranty and Support
For warranty information or technical support, please refer to the contact details provided with your purchase documentation or visit the official Airiton website. Keep your proof of purchase for warranty claims.