1. Introduction
The Tenda TEG205E is a lightweight 5-port Gigabit managed switch designed for efficient network management. It offers advanced features such as web-based management, IGMP snooping, DSCP prioritization, and VLAN support. The switch can automatically detect network loops and incorrectly connected routers, providing alerts to streamline network maintenance.
Key Features
- 5 Gigabit RJ45 Ports: Provides 10/100/1000 Mbps transmission speeds with Auto-MDI/MDIX and Auto-negotiation support.
- Smart Management: Web-based interface for configuration, protection, and monitoring, including QoS, IGMP, and VLAN.
- Enhanced Security: Features MAC address binding to prevent unauthorized access and DHCP Snooping to guard against spoofing attacks.
- Network Stability: Designed to ensure a stable network environment, minimizing interruptions.
- Flexible Installation: Compact, fanless design supports desktop or wall mounting for quiet operation.
- 6 KV Lightning Protection: Equipped for durability in various environments, including industrial settings.
- EEE Green Energy Saving: Supports IEEE802.3az (requires software update) for reduced power consumption and manual LED control.
2. Package Contents
Please verify the package contents upon opening:
- Tenda TEG205E 5-Port Gigabit Managed Switch
- Power Adapter
- User Manual (this document)
- Mounting Accessories (if applicable)
3. Physical Overview
Familiarize yourself with the ports and indicators on your TEG205E switch.

Figure 3.1: Front Panel of the TEG205E Switch. This image displays the five RJ45 Gigabit Ethernet ports labeled 1 through 5, along with the DC 5V power input port and a reset button.

Figure 3.2: All Gigabit Switch. This image highlights the 5 Gigabit ports, emphasizing smooth transmission of large files and videos, and support for MAC address whitelist binding, port isolation, and VLAN.
LED Indicators
- Power LED: Indicates power status. On (green) for normal operation.
- Link/Act LEDs (per port): Indicates network connection and activity. On (green) for a stable link, blinking for data transmission.
4. Setup
4.1 Hardware Installation
- Placement: Place the switch on a stable, flat surface or mount it to a wall using the provided accessories. Ensure adequate ventilation around the device.
- Connect Devices: Connect your network devices (computers, printers, servers, etc.) to the RJ45 ports (1-5) on the front panel using standard Ethernet cables.
- Power On: Connect the power adapter to the DC 5V port on the switch and then plug the adapter into a power outlet. The Power LED should illuminate.

Figure 4.1: Flexible Installation Options. The switch can be wall-mounted or placed on a desktop, adapting to various space requirements.
4.2 Initial Configuration (Web Interface Access)
To access the web management interface for advanced configuration:
- Connect a PC: Connect a computer directly to one of the switch's RJ45 ports.
- Configure PC IP: Set your PC's IP address to be in the same subnet as the switch's default IP. The default IP address for the TEG205E is typically 10.16.16.168 with a subnet mask of 255.255.255.0. You may need to temporarily set your PC's IP to something like 10.16.16.10.
- Open Web Browser: Launch a web browser (e.g., Chrome, Firefox) and enter the switch's default IP address (10.16.16.168) in the address bar.
- Login: Enter the default username and password (usually 'admin' for both). You will be prompted to change the password for security.
- Access Interface: Once logged in, you can access the management interface to configure various network settings.

Figure 4.2: Abundant Management Functionalities. The web interface allows for comprehensive network configuration and monitoring.
5. Operating
5.1 Basic Network Connectivity
Once the hardware is connected, the switch operates automatically to provide network connectivity. Devices connected to the switch will communicate with each other and with the wider network (if connected to a router) at Gigabit speeds.
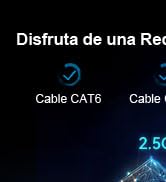
Figure 5.1: Optimized Wired Connectivity. The switch connects various devices like routers, game consoles, computers, TVs, and printers.
5.2 Advanced Features
The TEG205E offers several advanced features configurable via the web management interface:
- VLAN (Virtual Local Area Network): Allows you to segment your network into smaller, isolated broadcast domains. This enhances security and network performance.

Figure 5.2: VLAN Segmentation. This diagram shows how the switch can separate network traffic for surveillance, office, and guest networks, improving security and efficiency.
- QoS (Quality of Service): Prioritizes network traffic for critical applications (e.g., video streaming, VoIP, gaming) to ensure smooth performance.
- IGMP Snooping: Optimizes multicast traffic delivery, improving performance for applications like IPTV.
- MAC Address Binding: Enhances security by allowing only specified MAC addresses to access the network.
- DHCP Snooping: Prevents unauthorized DHCP servers from operating on the network, protecting against IP spoofing and other attacks.

Figure 5.3: Superior Performance Features. This image highlights IGMP for efficient data transfer, QoS for optimizing network resources, and Web UI for comprehensive network management.
6. Maintenance
6.1 Firmware Updates
Periodically check the Tenda official website for firmware updates. Firmware updates can improve performance, add new features, and fix bugs. Updates are typically performed via the web management interface.
6.2 Cleaning
To maintain optimal performance, keep the switch clean. Use a soft, dry cloth to wipe the exterior. Do not use liquid or aerosol cleaners.
7. Troubleshooting
7.1 Common Issues
- No Power: Ensure the power adapter is securely connected to the switch and a working power outlet. Check the Power LED.
- No Link/Activity: Verify that Ethernet cables are properly connected to both the switch and the connected device. Check the Link/Act LED for the corresponding port. Ensure the connected device is powered on and functioning correctly.
- Cannot Access Web Interface: Double-check your PC's IP address configuration to ensure it's in the same subnet as the switch. Verify the switch's IP address. Try clearing your browser's cache or using a different browser.
- Slow Network Speed: Ensure all connected devices and cables support Gigabit Ethernet. Check for network loops (the switch can detect these and generate alerts).
7.2 Resetting the Switch
If you encounter persistent issues or forget your login password, you can reset the switch to its factory default settings. Locate the reset button on the device (refer to Figure 3.1). With the switch powered on, use a paperclip or similar pointed object to press and hold the reset button for approximately 5-10 seconds until the LEDs flash. Release the button, and the switch will restart with factory defaults.
8. Specifications
| Feature | Description |
|---|---|
| Model Number | TEG205E |
| Number of Ports | 5 x RJ45 Gigabit Ethernet |
| Data Transfer Rate | 10/100/1000 Mbps |
| Dimensions (L x W x H) | 10 x 6.4 x 2.5 cm (3.94 x 2.52 x 0.98 inches) |
| Weight | 132 g (0.29 lbs) |
| Housing Material | Metal |
| Color | Black |
| Power Input | DC 5V (Power Adapter included) |
| Voltage | 240 Volts (AC, for adapter) |
| Compatible Devices | Printers, Computers, Laptops, etc. |
| Features | Managed (Web UI), IGMP Snooping, QoS, VLAN, MAC Address Binding, DHCP Snooping, Auto-MDI/MDIX, Auto-negotiation, 6 KV Lightning Protection, Fanless Design, EEE Green Energy Saving |
| Country of Origin | China |
9. Safety Information
- Do not open or attempt to repair the device.
- Use only the provided power adapter.
- Keep the device away from water, fire, and high temperatures.
- Ensure proper ventilation to prevent overheating.
- Dispose of the device and its accessories responsibly according to local regulations.
10. Warranty and Support
Tenda products come with a limited warranty. For detailed warranty information, please refer to the warranty card included with your product or visit the official Tenda website. For technical support, product registration, or to download the latest drivers and firmware, please visit www.tendacn.com or contact Tenda customer service.


