Introduction
This manual provides instructions for the Redlemon Retro Wireless Controller. It covers setup, operation, maintenance, and troubleshooting to ensure optimal performance and longevity of your device. This controller is designed for use with Nintendo Switch, Switch Lite, Switch OLED, PC, Android, and PS3 systems.

Image: Redlemon Retro Wireless Controller, front view. This image displays the overall design of the controller, featuring a classic retro aesthetic with modern button layouts including dual analog sticks, a D-pad, action buttons (A, B, X, Y), and system buttons.
Setup
Charging the Controller
Before initial use, fully charge the controller. Connect the included USB-C cable to the controller's charging port and the other end to a USB power source (e.g., Nintendo Switch dock, PC, or USB wall adapter). The controller's LEDs will indicate charging status. A full charge typically takes approximately 2 hours and provides up to 5 hours of continuous use.
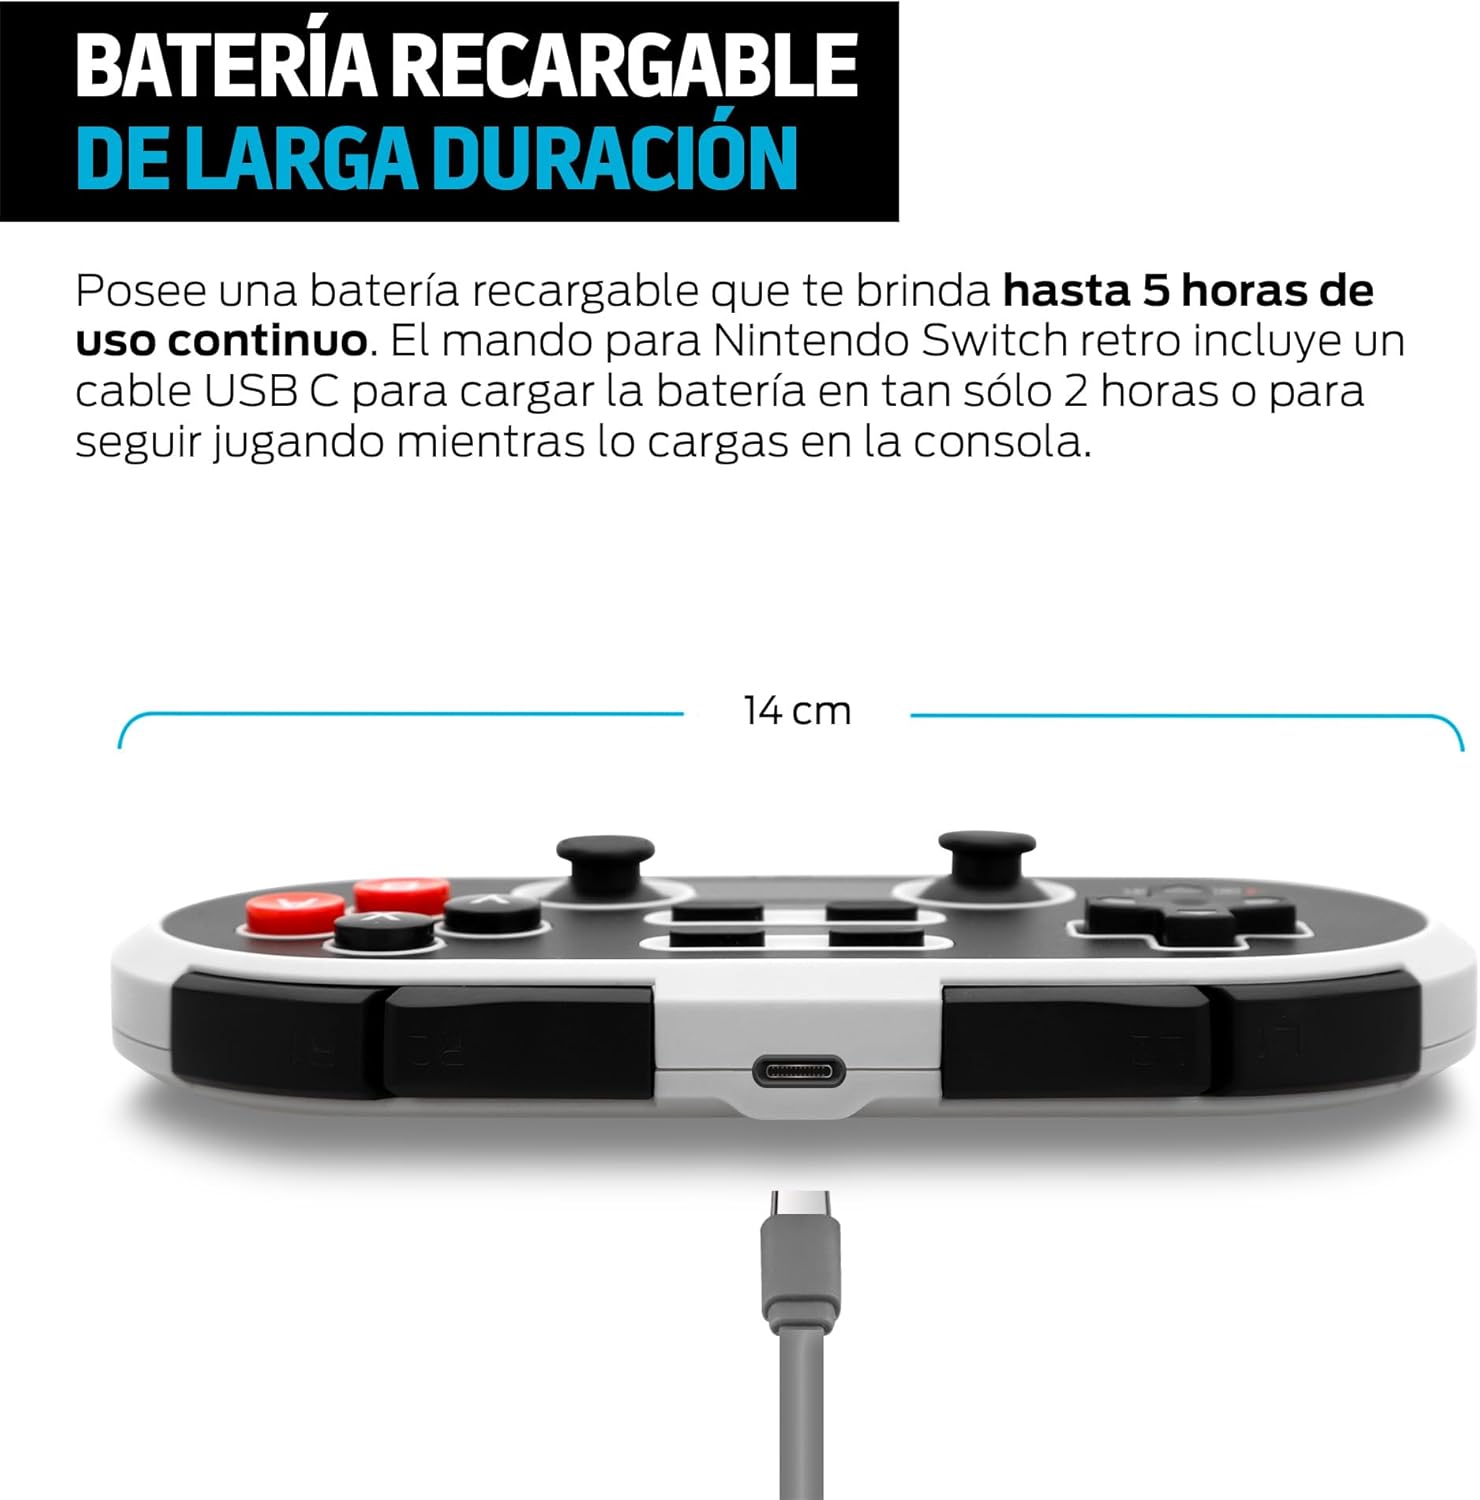
Image: Side view of Redlemon Retro Wireless Controller showing USB-C charging port and cable. This image highlights the USB-C port on the top edge of the controller, with a charging cable connected, illustrating the charging process.
Pairing with Devices
The controller supports wireless Bluetooth connection and wired connection via USB-C.
Wireless Pairing (Bluetooth)
- For Nintendo Switch:
- On your Nintendo Switch, go to the HOME Menu, select "Controllers," then "Change Grip/Order."
- Press and hold the B button and the Start button simultaneously on the Redlemon controller until the LED indicators begin to flash rapidly.
- Once paired, the controller's LED will light up solid, indicating a successful connection.
- For PC (Windows), Android, PS3:
- Ensure Bluetooth is enabled on your device.
- On the Redlemon controller, press and hold the B button and the Start button simultaneously until the LED indicators flash rapidly.
- On your device, search for new Bluetooth devices and select "Redlemon Controller" (or similar) from the list.
- Confirm pairing. The controller's LED will light up solid upon successful connection.
Wired Connection
Connect the controller to your PC or PS3 using the included USB-C cable. The controller will be recognized automatically by most systems. This method also allows you to play while charging.

Image: Redlemon Retro Wireless Controller compatibility with Nintendo Switch, Switch Lite, Switch OLED, PC, Android, and iOS devices. This image visually confirms the controller's broad compatibility across multiple platforms, showing icons for each supported system.
Operating Instructions
Controller Layout and Functions
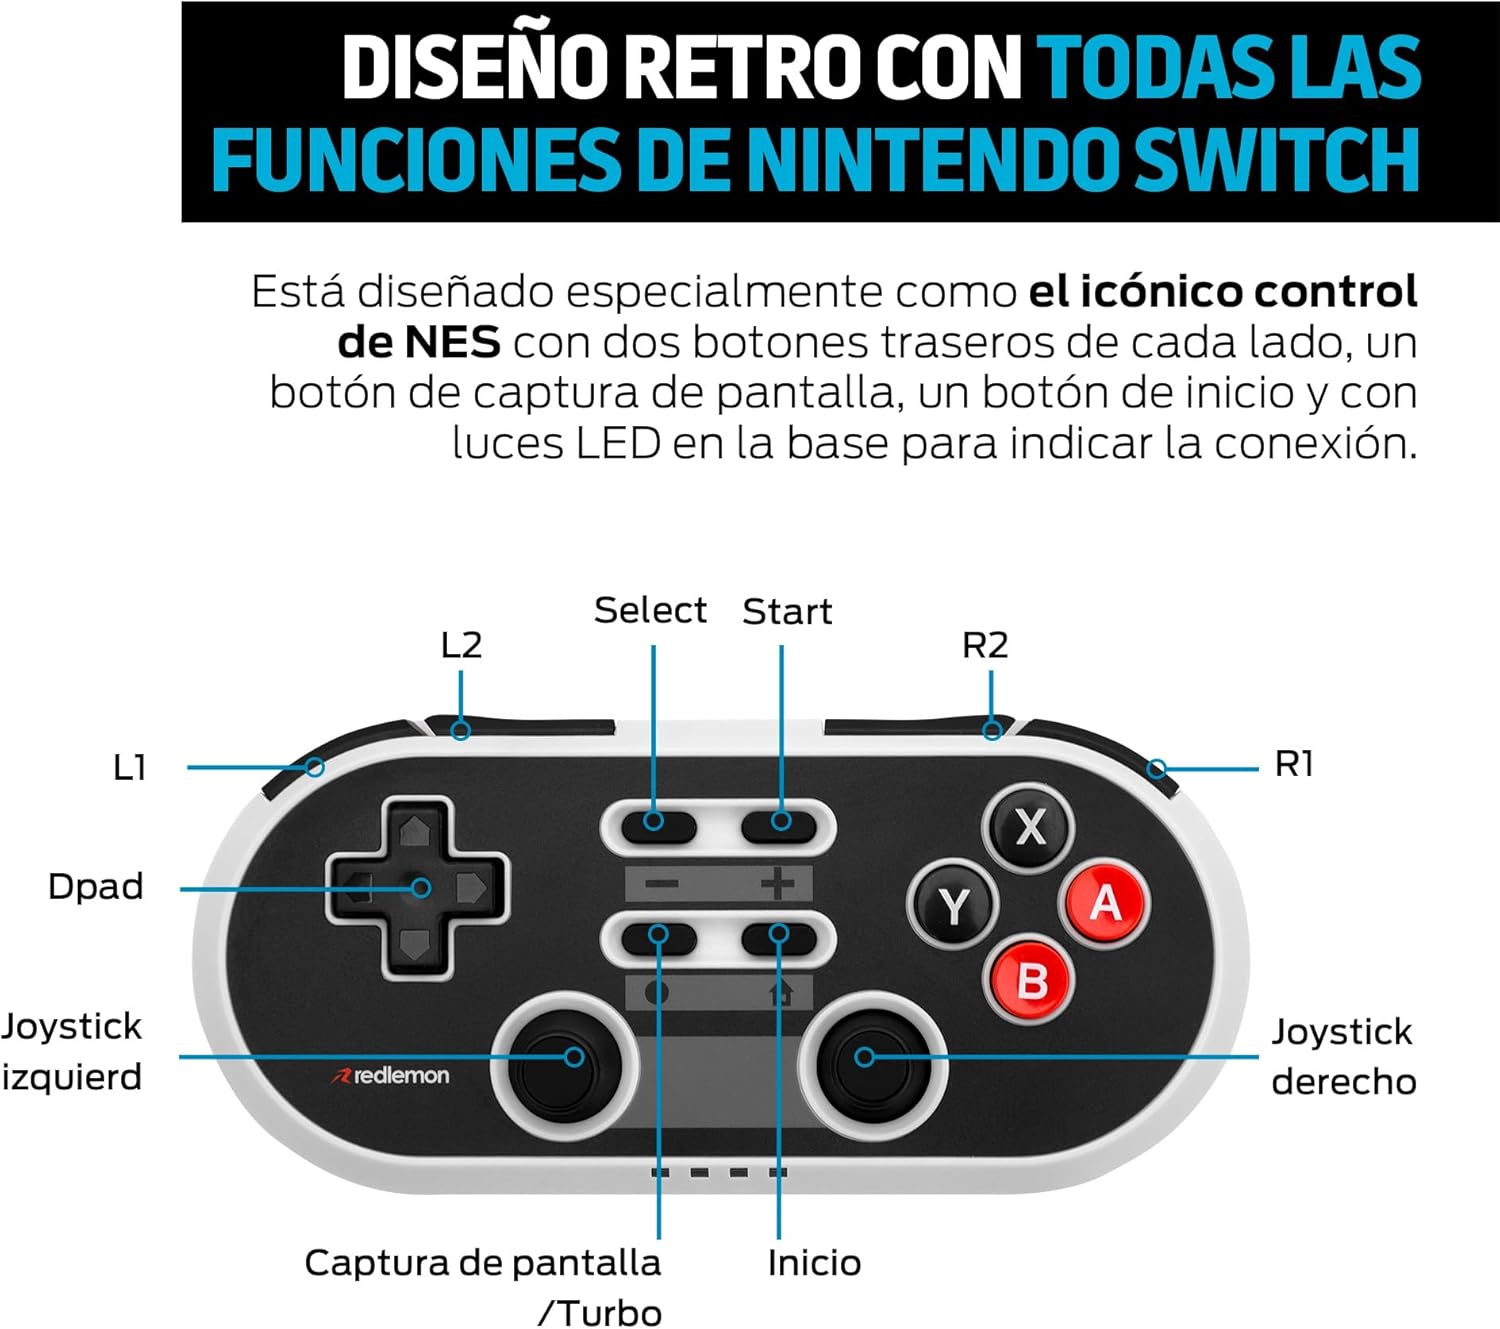
Image: Diagram of Redlemon Retro Wireless Controller buttons and their labels. This detailed diagram labels all buttons and joysticks, including L1, L2, R1, R2, Dpad, Left Joystick, Right Joystick, Select, Start, Capture/Turbo, Home, and action buttons (X, Y, A, B).
- D-Pad: Directional input.
- Left/Right Joysticks: Analog movement input.
- A, B, X, Y Buttons: Action buttons.
- L1, R1: Shoulder buttons.
- L2, R2: Trigger buttons.
- Select (-): System function button.
- Start (+): System function button.
- Home Button: Returns to the system's home menu.
- Capture/Turbo Button: Takes screenshots (Switch) or activates Turbo function.
- LED Indicators: Located at the base, these lights indicate connection status and player number.
Turbo Function
The Turbo function allows for rapid, repeated input of a button press. To activate or deactivate Turbo mode:
- Press and hold the Capture/Turbo button.
- While holding the Capture/Turbo button, press the desired action button (A, B, X, Y) or shoulder/trigger button (L1, R1, L2, R2) you wish to apply Turbo to.
- Release both buttons. The Turbo function is now active for that specific button.
- To deactivate, repeat the process.
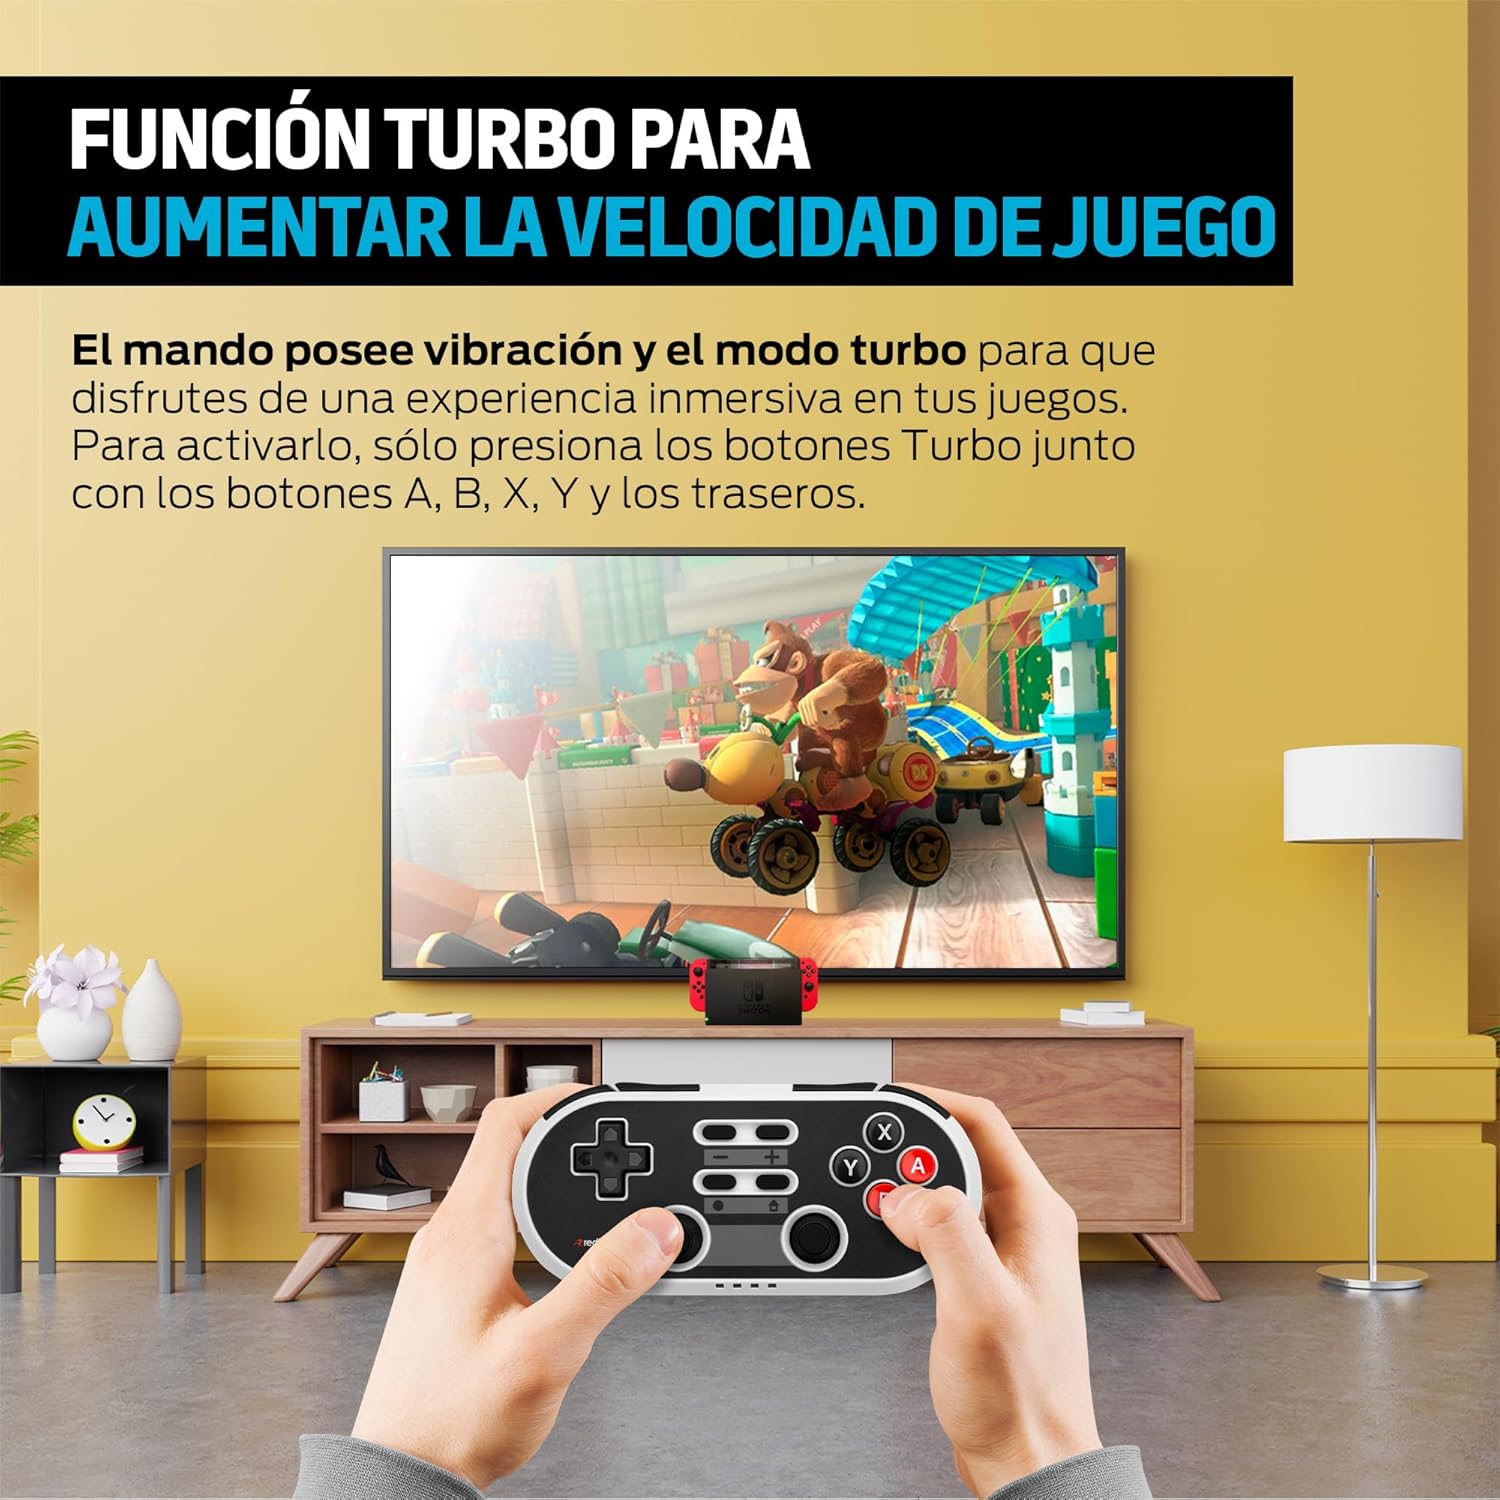
Image: User playing a game with the Redlemon Retro Wireless Controller, demonstrating the Turbo function. This image shows a user actively engaged in gameplay, holding the controller, with a game displayed on a television screen in the background, illustrating the practical use of the controller's features.
Maintenance
Cleaning
To clean the controller, use a soft, dry cloth. For stubborn dirt, slightly dampen the cloth with water. Avoid using harsh chemicals, solvents, or abrasive materials, as these can damage the controller's surface and internal components.
Storage
Store the controller in a cool, dry place away from direct sunlight, extreme temperatures, and high humidity. Do not place heavy objects on the controller.
Battery Care
To prolong battery life, avoid fully discharging the controller frequently. If the controller will not be used for an extended period, charge it to approximately 50% before storing and recharge it every few months.
Troubleshooting
- Controller does not turn on: Ensure the battery is charged. Connect the controller to a power source using the USB-C cable.
- Controller does not connect via Bluetooth:
- Ensure the controller is in pairing mode (LEDs flashing rapidly).
- Check that Bluetooth is enabled on your device.
- Remove any previous pairings of the controller from your device's Bluetooth settings and attempt to pair again.
- Ensure the controller is within the 10-meter Bluetooth range.
- Buttons are unresponsive or delayed:
- Ensure the controller is fully charged. Low battery can affect performance.
- Try resetting the controller (if a reset button is available, otherwise power cycle).
- Ensure there are no obstructions or strong interference sources between the controller and the device.
- Controller disconnects frequently:
- Ensure the controller is fully charged.
- Reduce the distance between the controller and the device.
- Minimize potential sources of wireless interference (e.g., Wi-Fi routers, other Bluetooth devices).
Specifications
| Feature | Specification |
|---|---|
| Connectivity | Bluetooth Wireless, USB-C Wired |
| Wireless Range | Up to 10 meters |
| Battery Type | 1 Lithium Ion (included) |
| Battery Life | Up to 5 hours continuous use |
| Charging Time | Approximately 2 hours |
| Compatibility | Nintendo Switch, Switch Lite, Switch OLED, PC, Android, PS3 |
| Dimensions | 15.6 x 8.5 x 4.4 cm |
| Weight | 190 g |
Warranty and Support
Warranty Information
This product is covered by the manufacturer's standard warranty. Please refer to the warranty card included with your purchase or visit the official Redlemon website for detailed warranty terms and conditions.
Customer Support
For technical assistance, troubleshooting, or product inquiries, please contact Redlemon customer support. Contact information can typically be found on the Redlemon official website or on the product packaging.


