1. Introduction
Thank you for purchasing the ODS RADIOFLY Space Challenger 33. This remote-controlled quadricopter is designed for recreational flight. Please read this manual carefully before operating the device to ensure safe and optimal performance. This guide provides essential information on setup, operation, maintenance, and troubleshooting.
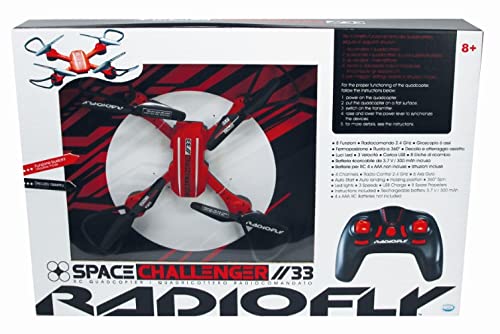
Image 1: The ODS RADIOFLY Space Challenger 33 quadricopter.
2. Safety Information
- Adult Supervision: This product is recommended for users aged 8 and above. Adult supervision is advised for younger users.
- Flight Environment: Operate the drone in open, clear areas, away from people, animals, buildings, and power lines. Avoid flying in strong winds or rain.
- Battery Safety: Use only the specified battery type (Lithium-ion). Do not overcharge, short-circuit, or expose batteries to extreme temperatures. Dispose of batteries responsibly.
- Propeller Safety: Keep fingers, hair, and loose clothing away from rotating propellers. Do not touch the drone while propellers are spinning.
- Impact Avoidance: Avoid collisions with obstacles. Repeated impacts can damage the drone.
- Water Exposure: Do not expose the drone or remote control to water or moisture.
3. Package Contents
Please check the package to ensure all items are present:
- ODS RADIOFLY Space Challenger 33 Quadricopter
- Remote Control
- Rechargeable Lithium-ion Battery (for drone)
- USB Charging Cable
- Spare Propellers (if included)
- User Manual (this document)
4. Setup
4.1 Charging the Drone Battery
- Locate the drone's Lithium-ion battery.
- Connect the USB charging cable to the drone's battery port.
- Plug the other end of the USB cable into a standard USB power adapter (not included) or a computer USB port.
- The charging indicator light will illuminate during charging and turn off or change color when fully charged. Charging typically takes 60-90 minutes.
- Do not leave the battery charging unattended.
4.2 Installing Remote Control Batteries
The remote control requires 3x AAA batteries (not included).
- Open the battery compartment on the back of the remote control.
- Insert 3x AAA batteries, ensuring correct polarity (+/-).
- Close the battery compartment securely.
4.3 Pairing the Drone and Remote Control
- Place the drone on a flat, level surface.
- Turn on the drone by pressing its power button. The drone's indicator lights will flash.
- Turn on the remote control. The remote's indicator light will flash.
- Push the left joystick (throttle) all the way up, then pull it all the way down.
- Both the drone and remote indicator lights will become solid, indicating successful pairing.
5. Operating Instructions
5.1 Basic Controls
- Left Joystick (Throttle):
- Push up: Increase altitude (Ascend)
- Pull down: Decrease altitude (Descend)
- Push left/right: Rotate drone left/right (Yaw)
- Right Joystick (Directional):
- Push up: Fly forward
- Pull down: Fly backward
- Push left: Fly left (Strafe)
- Push right: Fly right (Strafe)
- Trim Buttons: Used to fine-tune the drone's stability if it drifts in a certain direction. Adjust slightly until stable.
- One-Key Take-off/Landing Button: Press to automatically take off or land.
5.2 First Flight Tips
- Start in a large, open indoor space or a calm outdoor area with no wind.
- Practice gentle throttle control to maintain a stable hover.
- Learn to use the trim buttons to correct any unwanted drift.
- Keep the drone within your line of sight at all times.
- If you lose control, immediately pull the throttle down to land or use the emergency stop function (if available, refer to remote diagram).
6. Maintenance
6.1 Cleaning
- Wipe the drone and remote control with a soft, dry cloth.
- Do not use water or chemical cleaners.
- Remove any debris from the propellers and motors.
6.2 Storage
- Store the drone and remote control in a cool, dry place, away from direct sunlight.
- Remove batteries from the remote control if storing for extended periods to prevent leakage.
- Store the drone's Lithium-ion battery at approximately 50% charge for optimal longevity.
6.3 Battery Care
- Do not puncture, drop, or disassemble the battery.
- If the battery swells, leaks, or shows signs of damage, discontinue use immediately and dispose of it properly.
- Always use the provided charging cable.
7. Troubleshooting
| Problem | Possible Cause | Solution |
|---|---|---|
| Drone does not respond to remote. | Not paired; low battery in drone or remote; remote out of range. | Re-pair the drone and remote; charge drone battery; replace remote batteries; ensure drone is within range. |
| Drone drifts during flight. | Improper trim settings; uneven take-off surface; wind interference. | Adjust trim buttons; ensure take-off on a flat surface; fly in calm conditions. |
| Drone cannot take off or flies weakly. | Low drone battery; damaged propellers; debris in motors. | Charge drone battery fully; check and replace damaged propellers; clean motors. |
| Propellers do not spin. | Drone not powered on; battery not connected; motor malfunction. | Ensure drone is powered on; check battery connection; contact support if motors are faulty. |
8. Specifications
| Feature | Detail |
|---|---|
| Model Number | 40017 |
| Material | Plastic |
| Drone Battery Type | Lithium-ion |
| Remote Control Batteries | AAA (not included) |
| Assembly Required | No |
| Recommended Age | 8+ (Adult supervision advised) |
9. Warranty and Support
This product is covered by a standard manufacturer's warranty against defects in materials and workmanship. Please retain your proof of purchase for warranty claims.
For technical support, spare parts, or warranty inquiries, please contact ODS customer service through their official website or the retailer where the product was purchased. Contact information can typically be found on the product packaging or ODS's official channels.


