1. Setup
1.1 Unpacking and Parts List
Carefully unpack all components and verify against the parts list. Ensure all items are present before proceeding with installation.
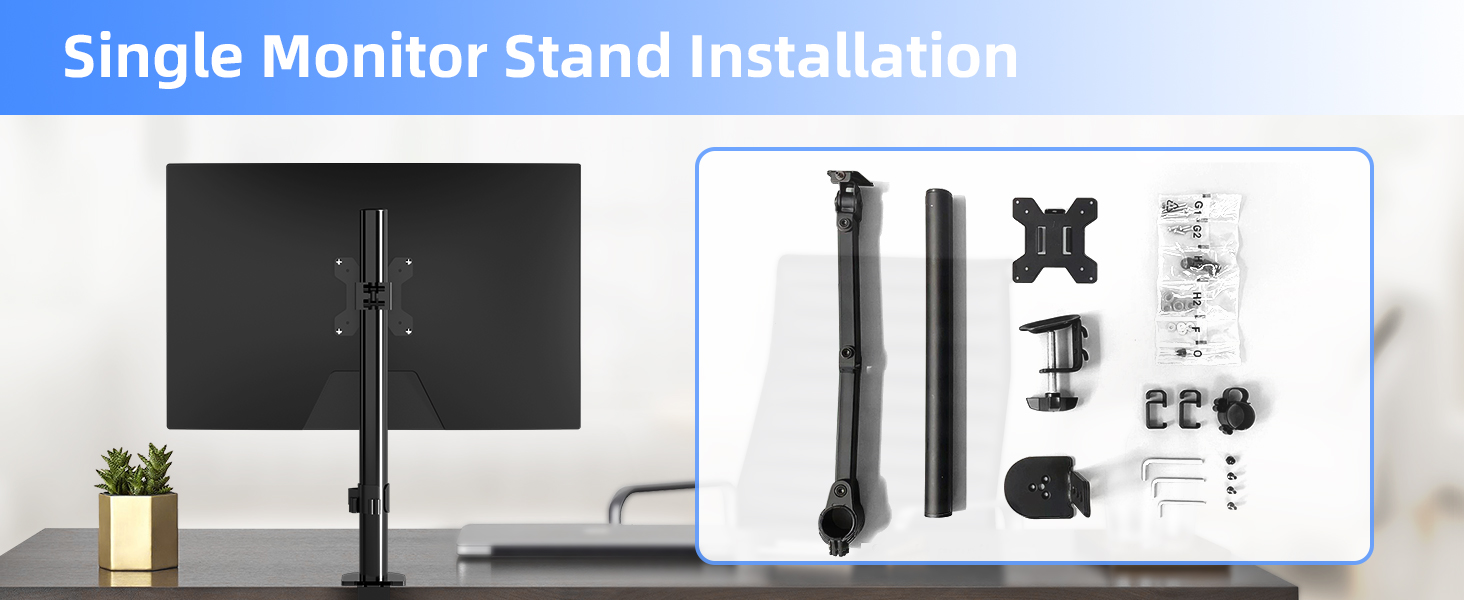
Image: All components of the Pholiten Single Monitor Arm Desk Mount, including the arm, pole, C-clamp, grommet base, VESA plate, and various screws and tools.
1.2 Mounting Options
The Pholiten Single Monitor Arm Desk Mount offers two installation methods: C-Clamp and Grommet Base. Choose the method best suited for your desk.
C-Clamp Installation
Attach the C-clamp to the edge of your desk. Ensure the clamp is securely tightened to provide a stable base for the monitor arm.
Grommet Base Installation
If your desk has a grommet hole, use the grommet base for installation. This method provides a flush mount through the desk surface.
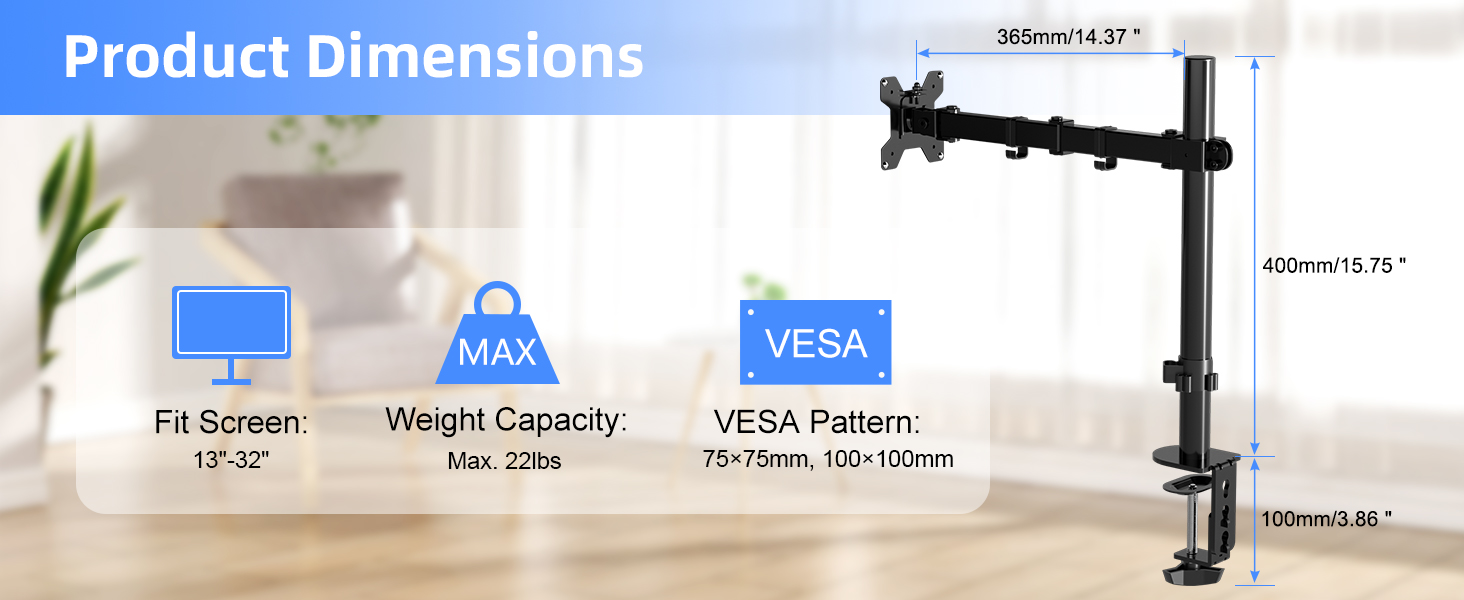
Image: Visual representation of the C-clamp and grommet base mounting options, showing how each attaches to a desk.
1.3 Attaching VESA Plate to Monitor
Align the VESA plate with the mounting holes on the back of your monitor (75x75mm or 100x100mm). Secure the plate using the provided screws and washers. Ensure the screws are tightened firmly but do not overtighten.
Video: This video demonstrates the process of attaching the VESA plate to the back of a monitor, including securing it with screws.
1.4 Attaching Monitor to Arm
Once the VESA plate is securely attached to your monitor, slide the monitor onto the arm's mounting head. Ensure it clicks into place or is secured with the locking mechanism, if applicable.
2. Operating
2.1 Adjusting Monitor Position
The Pholiten monitor arm allows for extensive adjustments to achieve optimal viewing comfort and ergonomic posture. Adjustments include height, tilt, swivel, and rotation.
- Height Adjustment: Loosen the collar on the main pole to slide the arm up or down, then re-tighten.
- Tilt: The monitor can be tilted up or down to reduce glare and optimize viewing angles.
- Swivel: Rotate the monitor horizontally to share your screen or adjust for different tasks.
- Rotation: Rotate the monitor 360 degrees to switch between landscape and portrait orientations.
Video: This video illustrates the various adjustment capabilities of the monitor arm, including tilt, swivel, and rotation, demonstrating its flexibility.

Image: A visual guide detailing the swivel (±90°), rotate (360°), and tilt (±90°) functions of the monitor arm for precise positioning.
2.2 Cable Management
Utilize the integrated cable clips along the arm and pole to route and organize your monitor cables. This helps maintain a tidy workspace and prevents cable clutter.

Image: A monitor arm with cables neatly organized using the built-in cable management clips, contributing to a clean desk setup.
3. Maintenance
3.1 Cleaning
Wipe the monitor arm with a soft, damp cloth. Avoid using abrasive cleaners or solvents that could damage the finish.
3.2 Checking Connections
Periodically check all screws and connections to ensure they remain tight and secure. Re-tighten if necessary to maintain stability and prevent monitor sagging.
4. Troubleshooting
4.1 Monitor Head Sinking
If the monitor head is sinking, it may indicate that the tension is too loose. Adjust the tension screw on the monitor head clockwise to increase resistance until the monitor holds its position.
4.2 Difficulty Rotating Arm Sections
If you experience difficulty rotating the middle section of the arm or the connection between the arm and the circular tube, loosen the corresponding screws counter-clockwise slightly to reduce tension. Test the rotation and adjust as needed.
Video: This video provides solutions for common issues such as monitor head sinking and difficulty rotating the arm, demonstrating how to adjust tension screws.
5. Specifications
| Brand | Pholiten |
| Model Number | MD97421 |
| Screen Size Compatibility | 13-32 inches (up to 38 inches for ultrawide monitors) |
| Weight Capacity | Up to 22 lbs |
| VESA Compatibility | 75x75mm, 100x100mm |
| Mounting Type | C-Clamp, Grommet Base |
| Material | Metal |
| Movement Type | Articulating |
| Maximum Tilt Angle | 90 Degrees |
6. Warranty and Support
For warranty information or technical support, please refer to the product packaging or contact Pholiten customer service directly. Contact details can typically be found on the manufacturer's official website or included documentation.