1. Product Overview
This manual provides essential information for the installation, operation, and maintenance of your new CW-AutoParts 3-Row All Aluminum Radiator. Designed for optimal cooling performance, this radiator is a direct replacement for specific Bobcat skid-steer loader models. It features a durable 3-row core construction made from AA5052 aluminum, ensuring efficient heat dissipation and longevity.
The package includes one 3-Row AA5052 Aluminum Radiator and one CNC Machined Radiator Cap.
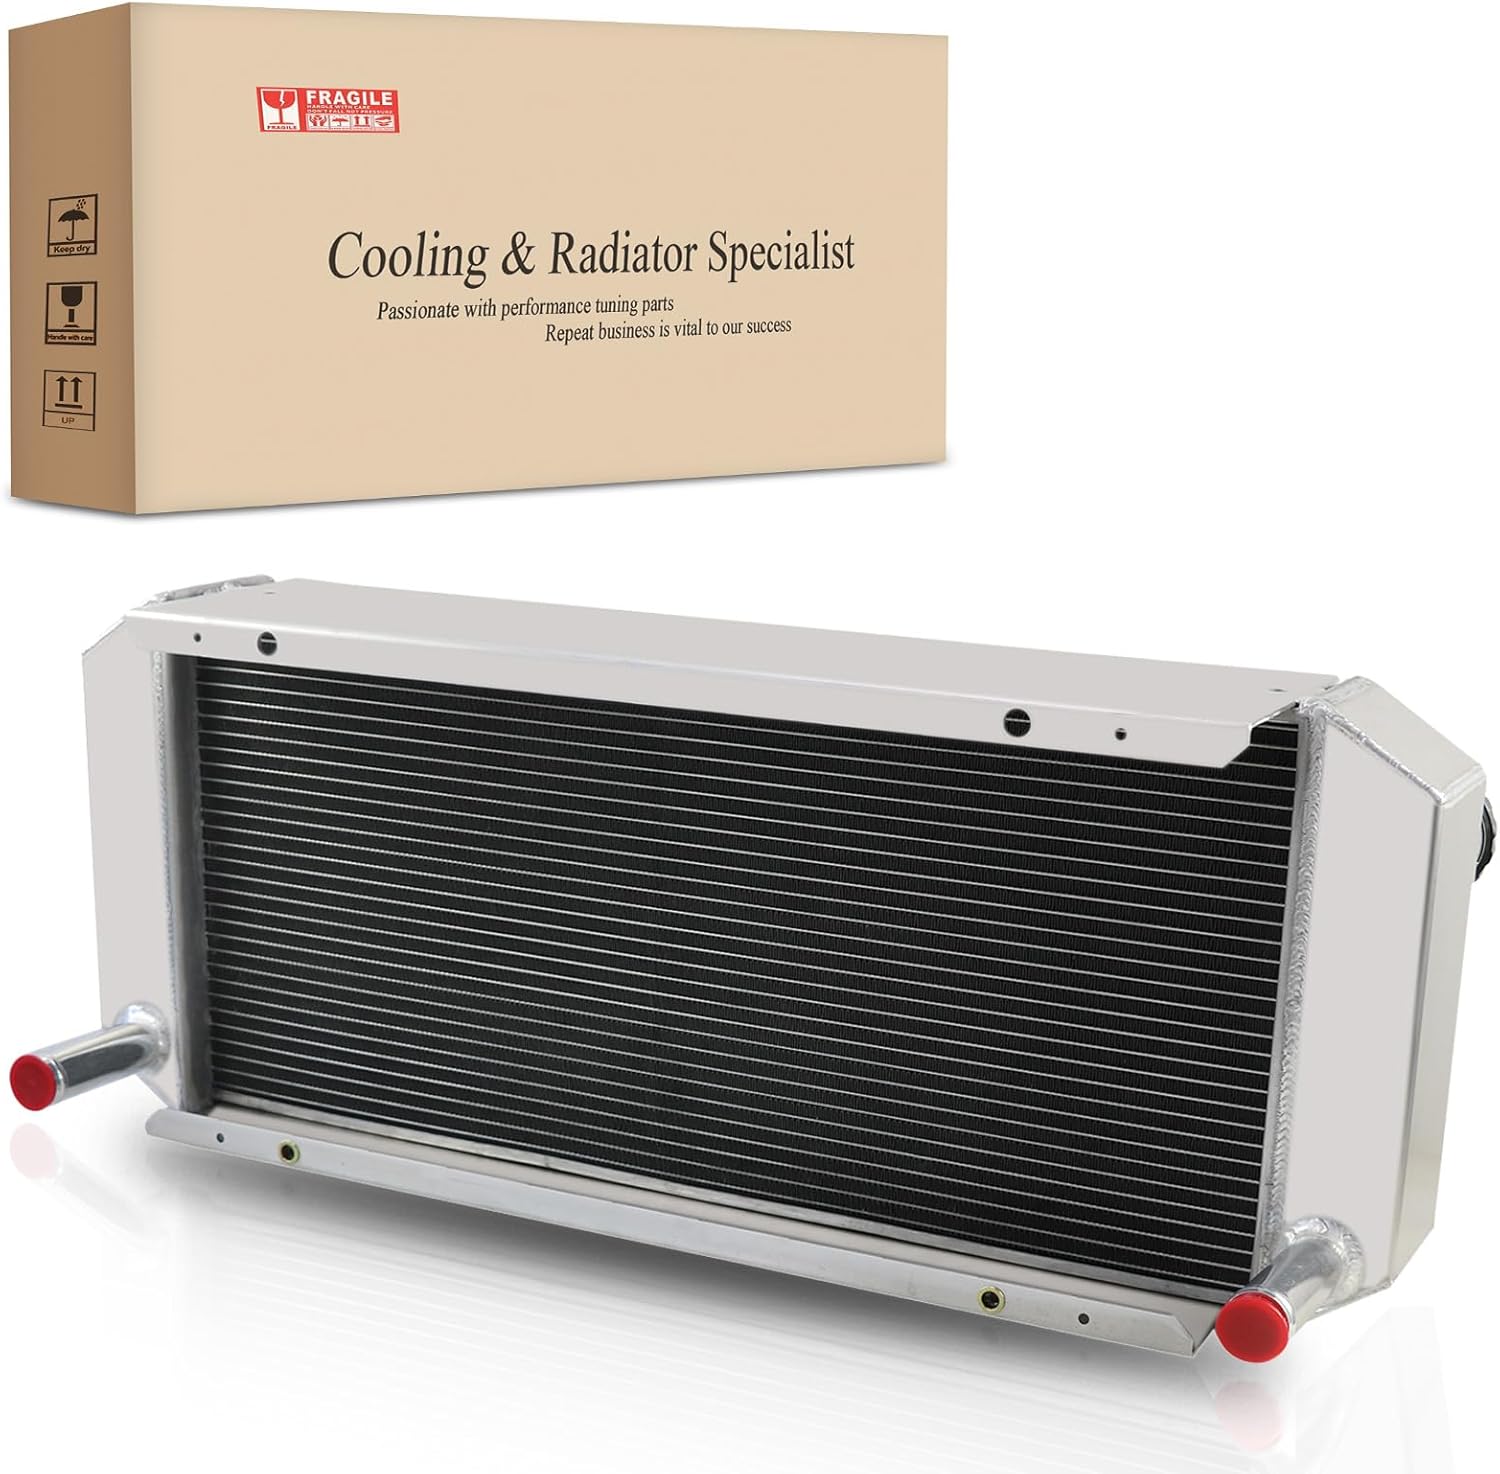
Image 1.1: The CW-AutoParts 3-Row All Aluminum Radiator shown with its packaging box. The box indicates "Cooling & Radiator Specialist" and "Fragile" handling instructions.
2. Vehicle Fitment
This radiator is specifically designed for the following Bobcat Skid-Steer Loader models:
- Bobcat S130
- Bobcat 653
- Bobcat 751
- Bobcat 753
- Bobcat 763
- Bobcat 773
- Bobcat 7753
Refer to your vehicle's service manual to confirm compatibility. The OEM part numbers for this radiator are 666384 and 6666384.
3. Specifications
Key dimensions and features of the CW-AutoParts 3-Row All Aluminum Radiator:
- Core Type: 3-Row of tubes Core Racing Design
- Material: AA5052 Aluminum
- Core Height (Between Tanks): 26-1/8 inches (66.36 cm)
- Core Width (Fin Area Only): 12 inches (30.48 cm)
- Inlet Neck Diameter: 1-1/4 inches (3.175 cm)
- Outlet Neck Diameter: 1-1/4 inches (3.175 cm)
- Item Weight: Approximately 20.3 pounds (9.21 kg)
- Package Dimensions: 34.2 x 15 x 11.25 inches (86.87 x 38.1 x 28.57 cm)
- Manufacturer Part Number: CW-AutoParts-0058-1

Image 3.1: Front view of the radiator, showcasing the 3-row core design and aluminum construction.

Image 3.2: Top-down view of the radiator, highlighting the overall dimensions and tank design.

Image 3.3: Detailed view of the radiator's inlet neck and the included CNC machined radiator cap.
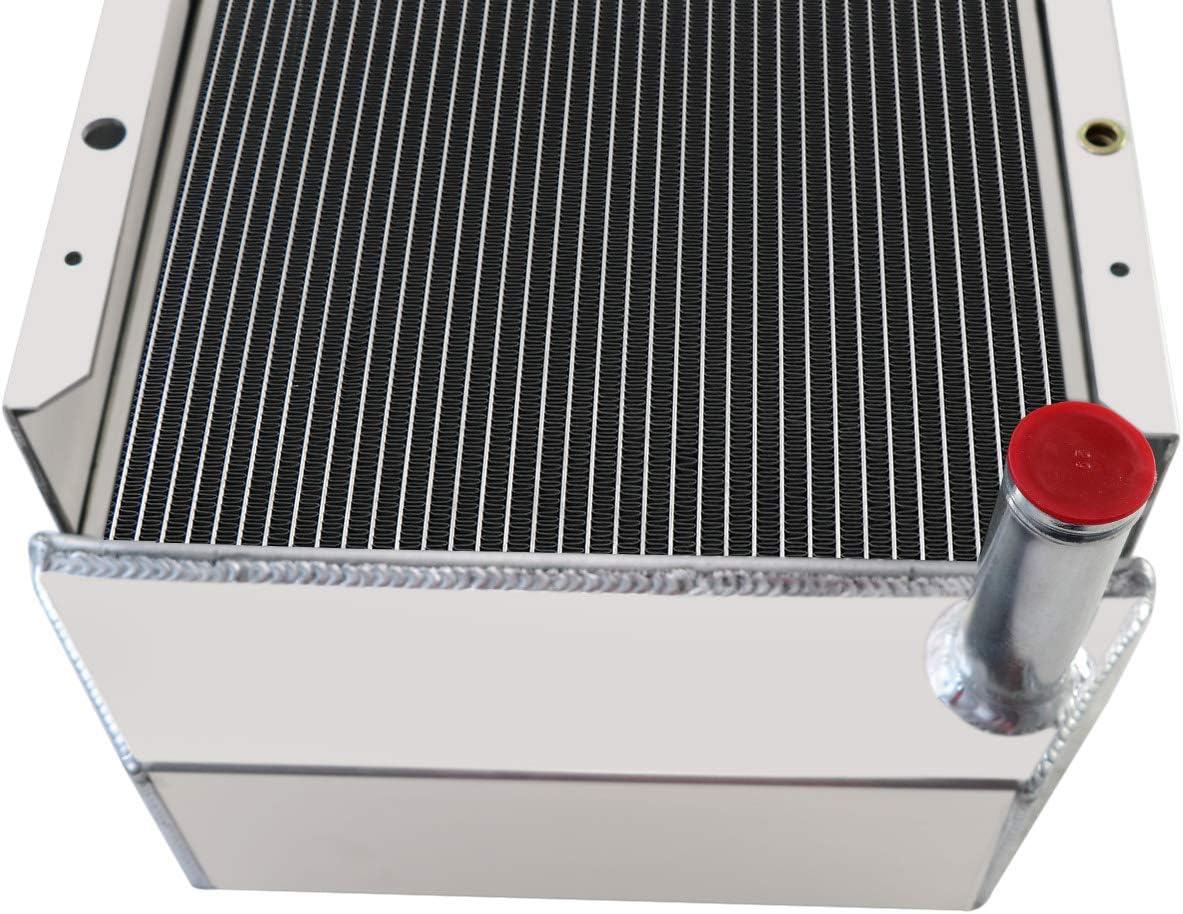
Image 3.4: Detailed view of the radiator's outlet neck, showing its diameter and construction.

Image 3.5: Side profile of the radiator, illustrating the core thickness and tank welding.

Image 3.6: Close-up of a mounting bracket or connection point on the radiator, showing the quality of welds.
4. Setup and Installation
Important: Radiator installation can be complex and may require specialized tools and knowledge. It is highly recommended that installation be performed by a qualified mechanic or service technician. Improper installation can lead to damage to the radiator, the vehicle, or personal injury.
General Installation Steps (Consult your Bobcat service manual for specific procedures):
- Safety First: Ensure the vehicle is turned off, cooled down, and parked on a level surface. Disconnect the battery.
- Drain Coolant: Place a suitable drain pan under the radiator. Open the drain cock (if present) or disconnect the lower radiator hose to drain the old coolant. Dispose of coolant responsibly.
- Remove Old Radiator: Disconnect all hoses (upper, lower, overflow) and electrical connections (if any) from the old radiator. Remove any mounting bolts or clamps securing the radiator. Carefully lift and remove the old radiator.
- Inspect Area: Clean the radiator mounting area and inspect hoses, clamps, and other cooling system components for wear or damage. Replace as necessary.
- Install New Radiator: Carefully position the new CW-AutoParts radiator into the vehicle's radiator support. Secure it with the appropriate mounting bolts and clamps. Ensure it is seated correctly and stable.
- Connect Hoses and Cap: Reconnect all radiator hoses, ensuring clamps are tight. Install the provided CNC machined radiator cap.
- Refill Coolant: Fill the cooling system with the manufacturer-recommended coolant mixture. Fill slowly to allow air to escape.
- Bleed Air from System: Start the engine with the radiator cap off (or at the highest point of the cooling system) and allow it to reach operating temperature. Monitor the coolant level and add more as needed. Squeeze radiator hoses to help release trapped air. Once the thermostat opens and coolant circulates, replace the radiator cap.
- Check for Leaks: After installation and initial operation, thoroughly inspect all connections for any signs of leaks.
- Test Drive: Perform a short test drive, monitoring the engine temperature gauge. Recheck coolant levels and for leaks after the test drive.
5. Operating Principles
The radiator is a critical component of your Bobcat skid-steer loader's engine cooling system. Its primary function is to dissipate excess heat generated by the engine into the ambient air. Coolant circulates through the engine, absorbing heat, and then flows into the radiator. Inside the radiator, the hot coolant passes through a series of tubes (the 3-row core in this model) with fins attached. Air flowing over these fins cools the coolant, which then returns to the engine to absorb more heat. This continuous cycle maintains the engine at its optimal operating temperature, preventing overheating and ensuring efficient performance.
6. Maintenance
Regular maintenance of your cooling system, including the radiator, is essential for the longevity and performance of your Bobcat loader.
- Coolant Level Check: Regularly check the coolant level in the overflow reservoir and the radiator (when cold). Top up with the recommended coolant mixture as needed.
- Coolant Quality: Follow your Bobcat manufacturer's recommendations for coolant replacement intervals. Old or contaminated coolant can reduce cooling efficiency and cause corrosion.
- Radiator Exterior Cleaning: Periodically inspect the radiator fins for debris (dirt, leaves, insects). Carefully clean the fins with compressed air or a soft brush to ensure unobstructed airflow. Avoid using high-pressure washers directly on the fins, as this can bend them.
- Hose and Clamp Inspection: Check all radiator hoses for cracks, bulges, or softness. Ensure all hose clamps are secure and free from corrosion. Replace any damaged components.
- Radiator Cap Inspection: Inspect the radiator cap gasket for cracks or wear. A faulty cap can lead to pressure loss and overheating.
- Leak Detection: Regularly inspect the radiator and hose connections for any signs of coolant leaks. Address leaks promptly.
7. Troubleshooting
If you experience issues with your cooling system, consider the following common problems and potential solutions:
| Problem | Possible Cause | Solution |
|---|---|---|
| Engine Overheating | Low coolant level, clogged radiator fins, faulty thermostat, water pump failure, air in system, restricted coolant flow. | Check coolant level and add if low. Clean radiator fins. Inspect thermostat. Bleed air from system. Consult a mechanic for pump or flow issues. |
| Coolant Leaks | Loose hose clamps, damaged hoses, radiator core damage, faulty radiator cap, cracked overflow tank. | Tighten clamps. Replace damaged hoses. Inspect radiator for visible damage. Replace radiator cap. Inspect overflow tank. |
| Low Coolant Level (Frequent) | External leak (see above), internal engine leak (head gasket), faulty radiator cap. | Check for external leaks. Have engine inspected for internal leaks. Replace radiator cap. |
If troubleshooting steps do not resolve the issue, it is recommended to seek professional assistance from a certified mechanic.
8. Warranty and Customer Support
Your CW-AutoParts radiator is designed for high performance and durability. For specific warranty information, please refer to the terms provided at the time of purchase or contact your retailer.
If you have any questions or concerns regarding this product, please contact our customer service representatives. We are available to assist you promptly.
Return Policy: This product typically includes a 30-day refund/replacement return policy. Please check your purchase details for specific return conditions.


