
1. Introduction
This manual provides comprehensive instructions for the safe and efficient use of your Instant Pot Pro 10-in-1 Pressure Cooker and the accompanying Tempered Glass Lid. The Instant Pot Pro is a versatile kitchen appliance designed to simplify cooking with its multi-functional capabilities, including pressure cooking, slow cooking, sous vide, sautéing, rice cooking, sterilizing, yogurt making, food warming, cake baking, and steaming. The included tempered glass lid is ideal for use with the "Keep-Warm," "Sauté," and "Slow Cook" programs, and can also be used in the oven with the inner cooking pot.
Please read all instructions thoroughly before operating the appliance to ensure proper function and safety.
2. Important Safety Information
When using electrical appliances, basic safety precautions should always be followed. Failure to follow these instructions may result in electric shock, fire, or serious injury.
- Read all instructions before operating the appliance.
- Do not touch hot surfaces. Use handles or knobs.
- To protect against electrical shock, do not immerse cord, plugs, or the appliance in water or other liquid.
- Close supervision is necessary when any appliance is used by or near children.
- Unplug from outlet when not in use and before cleaning. Allow to cool before putting on or taking off parts.
- Do not operate any appliance with a damaged cord or plug, or after the appliance malfunctions or has been damaged in any manner.
- The use of accessory attachments not recommended by the appliance manufacturer may cause injuries.
- Do not use outdoors.
- Do not let cord hang over edge of table or counter, or touch hot surfaces.
- Do not place on or near a hot gas or electric burner, or in a heated oven.
- Extreme caution must be used when moving an appliance containing hot oil or other hot liquids.
- Always attach plug to appliance first, then plug cord into the wall outlet. To disconnect, turn any control to "off", then remove plug from wall outlet.
- Do not use appliance for other than intended use.
- This appliance cooks under pressure. Improper use may result in scalding injury. Make certain unit is properly closed before operating.
- Do not fill the unit over 2/3 full. When cooking foods that expand during cooking, such as rice or dried vegetables, do not fill the unit over 1/2 full.
- Always check the pressure release valve and float valve for clogging before use.
- Do not open the pressure cooker until the unit has cooled and internal pressure has been released.
3. Product Overview
The Instant Pot Pro is designed for efficiency and versatility in your kitchen. It combines multiple appliances into one compact unit.
3.1 Components

Figure 3.1: Instant Pot Pro 10-in-1 Pressure Cooker and Tempered Glass Lid. This image displays the main pressure cooker unit alongside the separate tempered glass lid, providing a complete view of the product package.
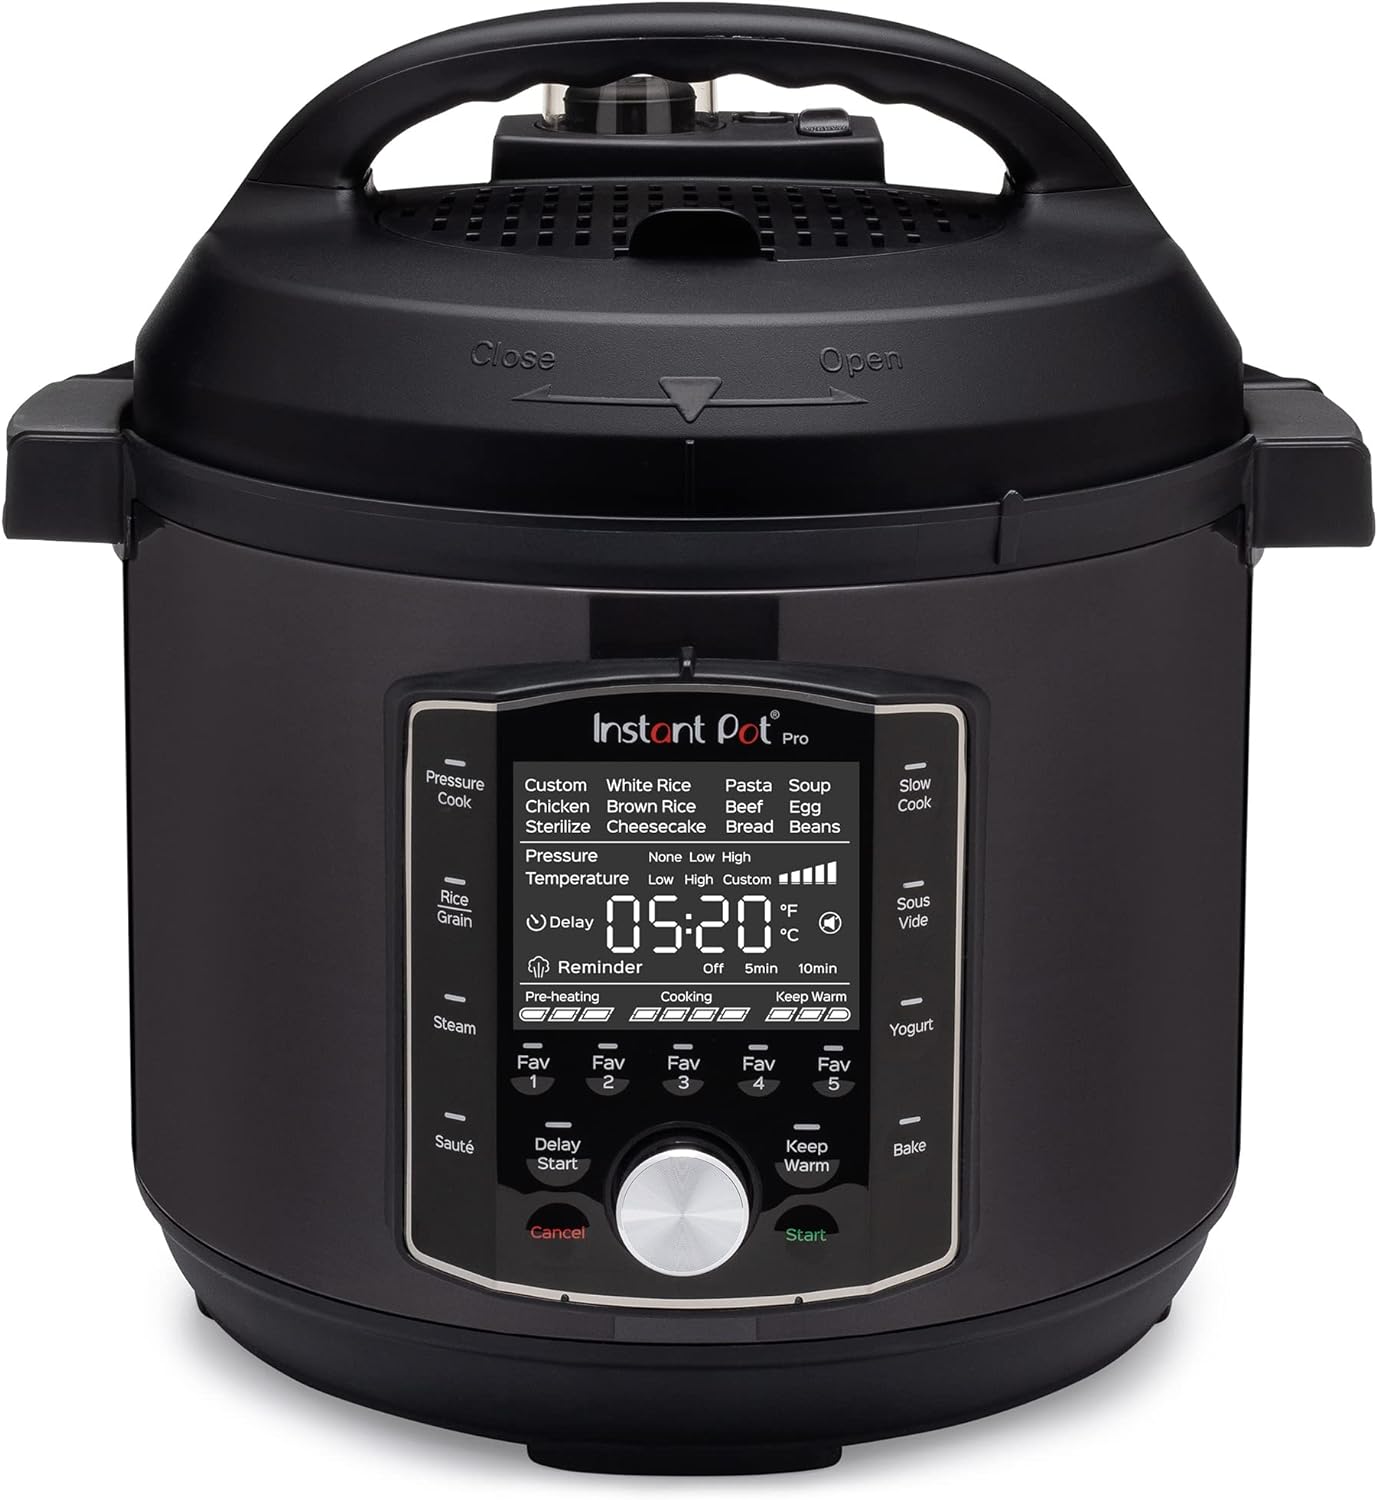
Figure 3.2: Instant Pot Pro Control Panel. A detailed view of the Instant Pot Pro's front panel, highlighting the digital display, control dial, and various cooking program buttons such as Pressure Cook, Slow Cook, Sauté, and Yogurt.

Figure 3.3: Instant Pot Tempered Glass Lid. This image shows the clear tempered glass lid with a stainless steel rim and handle, designed for easy monitoring of food during slow cooking or sautéing.
3.2 Key Features
- 10-in-1 Functionality: Pressure Cook, Slow Cook, Sous Vide, Sauté, Rice/Grain Cooker, Sterilizer, Yogurt Maker, Food Warmer, Cake Baker, and Steamer.
- Faster Cooking: Up to 70% faster cooking overall with 20% faster pre-heating.
- Smart Programs: Features 28 smart cooking programs and 5 new Favorite program settings for customized cooking.
- Upgraded Steam Release: Quieter and less messy steam release with a diffusing cover.
- User-Friendly Design: Easy Grip handles on the stainless steel inner pot, large and easy-to-read LCD display, and an auto-sealing lid.
- Tempered Glass Lid: 10.2-inch (8-Qt) tempered glass lid with steam vent, stainless steel rim, and handle, ideal for "Keep-Warm," "Sauté," and "Slow Cook" modes. Oven-safe up to 428°F (220°C) when used with the inner cooking pot.
- Dishwasher Safe: Inner pot and tempered glass lid are dishwasher safe for easy cleaning.

Figure 3.4: Visual representation of the 10-in-1 functionalities of the Instant Pot Pro, listing each cooking method.
4. Setup and First Use
Before using your Instant Pot Pro for the first time, follow these steps:
- Unpack: Carefully remove all components from the packaging. Retain packaging materials for future storage or transport.
- Clean Components:
- Wash the stainless steel inner pot and the tempered glass lid with warm, soapy water. Rinse thoroughly and dry completely.
- Wipe the exterior of the cooker base with a damp cloth. Do not immerse the cooker base in water.
- Remove the sealing ring from the lid and wash it with warm, soapy water. Reinstall the sealing ring, ensuring it is properly seated in the sealing ring rack.
- Install Condensation Collector: Attach the condensation collector to the back of the cooker base.
- Perform Water Test (Initial Test Run): This is crucial to ensure the pressure cooker is functioning correctly and to familiarize yourself with its operation.
- Add 3 cups (750 ml) of water to the inner pot.
- Place the inner pot into the cooker base.
- Close the lid, ensuring it is properly aligned and locked. The auto-sealing lid will automatically set the steam release handle to the Sealing position.
- Select the "Pressure Cook" program, set the time to 5 minutes at High Pressure.
- Once cooking is complete, allow the pressure to release naturally for a few minutes, then carefully turn the steam release handle to the Venting position to quick release any remaining pressure.
- Open the lid and discard the water. The cooker is now ready for use.
5. Operating Instructions
The Instant Pot Pro offers a variety of cooking functions. This section provides general guidance on using its primary modes.
5.1 Control Panel Overview
The control panel features a large LCD display, a central dial for program selection and adjustment, and dedicated buttons for various functions. Refer to Figure 3.2 for a visual guide.
- Display: Shows cooking time, pressure level, temperature, and status indicators.
- Central Dial: Rotate to scroll through cooking programs and adjust settings. Press to confirm selection.
- Program Buttons: Dedicated buttons for common functions like Pressure Cook, Slow Cook, Sauté, Rice, Steam, Yogurt, Sterilize, Sous Vide, Keep Warm, Delay Start, and Cancel.
- Favorite Programs (F1-F5): Allows saving custom cooking settings for quick access.
5.2 Cooking Functions
Below are brief descriptions of the main cooking functions. Detailed recipes and specific instructions for each program can be found in the Instant Pot recipe book or online resources.
- Pressure Cook: For fast cooking under pressure. Ideal for meats, stews, beans, and tough vegetables.
- Add ingredients and liquid to the inner pot.
- Secure the pressure cooking lid. Ensure the steam release handle is in the Sealing position.
- Select "Pressure Cook" and adjust time/pressure level using the dial.
- Press "Start" to begin.
- Slow Cook: For traditional slow cooking.
- Add ingredients to the inner pot.
- Use the tempered glass lid for easy monitoring, or the pressure cooking lid with the steam release handle in the Venting position.
- Select "Slow Cook" and adjust time/temperature (Low, Medium, High).
- Press "Start" to begin.
- Sauté: For browning, simmering, or thickening sauces.
- Select "Sauté" and adjust temperature (Less, Normal, More).
- Add oil/fat to the inner pot.
- Once hot, add ingredients. Stir as needed.
- Use the tempered glass lid to cover if simmering.
- Rice/Grain Cooker: Optimized for various types of rice and grains.
- Add rice/grains and water according to recipe.
- Secure the pressure cooking lid.
- Select "Rice" or specific grain program.
- Press "Start" to begin.
- Steam: For steaming vegetables, fish, and more.
- Add water to the inner pot and place a steam rack.
- Place food on the steam rack.
- Secure the pressure cooking lid.
- Select "Steam" and adjust time.
- Press "Start" to begin.
- Sous Vide: For precise temperature cooking.
- Fill inner pot with water.
- Place vacuum-sealed food into the water.
- Secure the pressure cooking lid (or tempered glass lid).
- Select "Sous Vide" and set desired temperature and time.
- Press "Start" to begin.
- Yogurt Maker: For making homemade yogurt.
- Follow a specific yogurt recipe.
- Use the tempered glass lid or pressure cooking lid (venting).
- Select "Yogurt" and follow prompts for heating/fermenting.
- Sterilize: For sterilizing baby bottles, jars, etc.
- Add water and items to be sterilized.
- Secure the pressure cooking lid.
- Select "Sterilize" and adjust time.
- Press "Start" to begin.
- Keep Warm: Automatically activates after most cooking programs or can be selected manually.
- Press "Keep Warm" button.
- Use the tempered glass lid for serving or keeping food warm.
6. Maintenance and Cleaning
Regular cleaning and maintenance will ensure the longevity and optimal performance of your Instant Pot Pro.
- Inner Pot: The stainless steel inner pot is dishwasher safe. For stubborn food residue, soak with warm soapy water before cleaning.
- Tempered Glass Lid: The tempered glass lid is dishwasher safe. Hand wash with warm soapy water and a soft cloth for best results.
- Sealing Ring: Remove the sealing ring from the lid after each use and wash it with warm, soapy water. Allow it to air dry completely before reinstalling. Replace the sealing ring every 12-18 months, or sooner if you notice deformation or damage.
- Lid (Pressure Cooking): Wash the lid (including the steam release valve, float valve, and anti-block shield) with warm, soapy water. Ensure all components are free of food debris. The lid is not dishwasher safe.
- Cooker Base: Wipe the exterior of the cooker base with a damp cloth. Never immerse the cooker base in water or any other liquid.
- Condensation Collector: Empty and wash the condensation collector after each use.
- Exterior: Clean the exterior with a soft, damp cloth. Do not use harsh chemical cleaners or abrasive pads.
7. Troubleshooting
This section addresses common issues you might encounter with your Instant Pot Pro. For more detailed troubleshooting, refer to the official Instant Pot support resources.
| Problem | Possible Cause | Solution |
|---|---|---|
| Cooker not building pressure. | Lid not properly closed, sealing ring not installed correctly, steam release handle in Venting position, insufficient liquid. | Ensure lid is fully locked. Check sealing ring for proper placement and damage. Turn steam release handle to Sealing. Add more liquid if necessary. |
| Steam leaking from lid. | Sealing ring dirty or damaged, food debris on rim, lid not properly closed. | Clean or replace sealing ring. Clean lid rim and inner pot rim. Ensure lid is properly closed and locked. |
| Float valve not rising. | Insufficient liquid, float valve clogged, sealing ring not working. | Add more liquid. Clean float valve. Check sealing ring. |
| Food is undercooked. | Insufficient cooking time, pressure not reached, too much food. | Increase cooking time. Ensure pressure is reached and maintained. Reduce food quantity. |
| Display shows error code. | Specific internal issue. | Refer to the full Instant Pot manual or contact customer support with the specific error code. Unplug and replug the unit. |
8. Specifications
| Feature | Detail |
|---|---|
| Brand | Instant |
| Model | Instant Pot Pro 10-in-1 Pressure Cooker (8QT) |
| Capacity | 8 Quarts |
| Material | Stainless steel (inner pot), Tempered Glass (lid) |
| Color | Black |
| Finish Type | Matte |
| Special Features | Dishwasher Safe (inner pot, glass lid), Keep Warm Setting |
| Control Method | Touch, Dial |
| Operation Mode | Automatic |
| Voltage | 120 Volts |
| ASIN | B09L4ZH193 |
| First Available | November 5, 2021 |
9. Warranty and Support
Instant Brands Inc. (the manufacturer of Instant Pot products) provides a limited warranty for its products. Please refer to the official Instant Pot website or the warranty card included with your product for the most current and detailed warranty information, including terms, conditions, and registration procedures.
For customer support, technical assistance, or to inquire about replacement parts, please visit the official Instant Pot support website or contact their customer service department. Contact information can typically be found on the manufacturer's website or in the product packaging.
Online Resources: Visit the Instant Store on Amazon

