1. Introduction
Thank you for choosing the AEG Automotive Wallbox FF 22 KW. This charging station is designed to provide efficient and safe charging for your electric or hybrid vehicle. This manual contains important information regarding the installation, operation, maintenance, and troubleshooting of your Wallbox. Please read it carefully before installation and use, and keep it for future reference.
2. Safety Information
Important Safety Instructions:
- Installation must be performed by a qualified electrician in accordance with all local and national electrical codes and regulations.
- Do not attempt to open, disassemble, repair, or modify the Wallbox. This can cause serious injury, electric shock, or fire, and will void the warranty.
- Ensure the Wallbox is securely mounted on a solid surface capable of supporting its weight.
- Keep children and pets away from the charging station during operation.
- Do not use the Wallbox if it is damaged, wet, or shows any signs of malfunction.
- Always ensure the charging cable and connector are free from damage before use.
- The integrated circuit breaker (Type A) provides reliable protection against overvoltage and electric shock. Do not bypass or tamper with this safety feature.
3. Product Overview
3.1 Key Features
- Efficient Charging: Provides fast and efficient charging power up to 22 kW via 3-phase 400 V AC.
- Universal Compatibility: Equipped with a Type 2 charging connector, compliant with IEC 62196 standard, suitable for most electric and hybrid vehicles.
- Enhanced Safety: Features an integrated circuit breaker (Type A) for reliable protection against overvoltage and electric shock.
- User-Friendly Interface: A five-color LED display with five lighting modes indicates operational status and error messages.
- Convenient Cable Length: The permanently attached charging cable is 5 meters long, offering flexibility during charging.
- Smart Grid Ready: Includes an RS485 bus interface for connection to photovoltaic systems and intelligent control electronics, supporting energy management.
- Simple Operation: Designed for quick and easy use without requiring user authentication.
- Robust Design: IP45 certified for protection against jet water and splashes.
3.2 Components
The AEG Automotive Wallbox FF 22 KW includes the following main components:
- Wallbox charging unit
- Integrated 5-meter Type 2 charging cable with connector
- Wall mounting bracket
- Installation hardware (screws, anchors)
- User manual and documentation
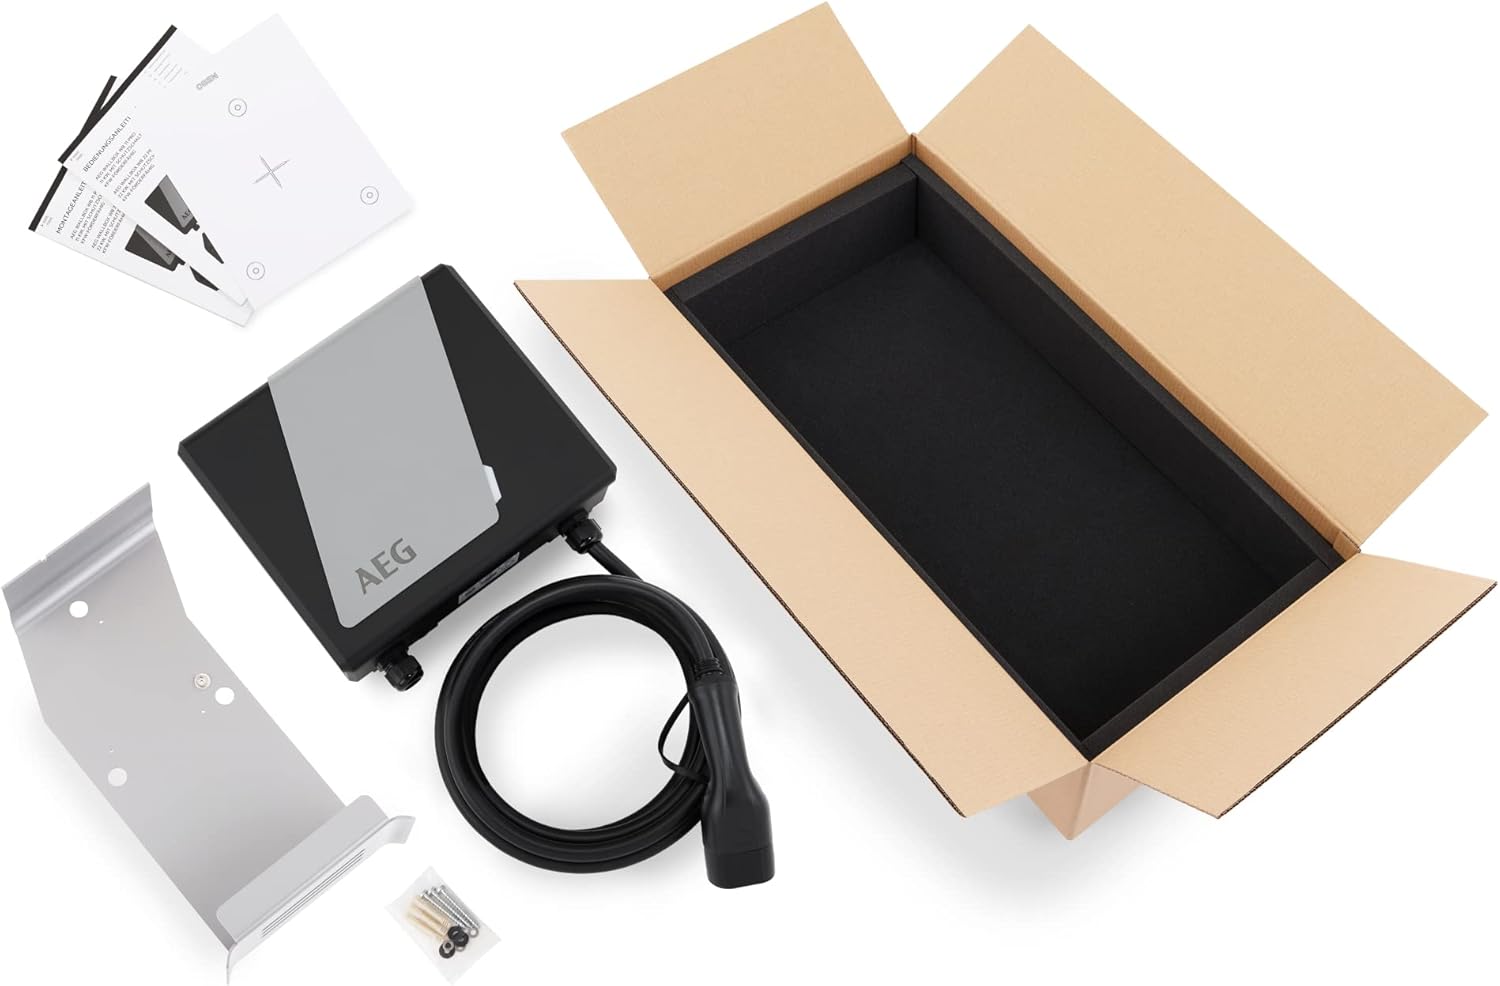
Figure 1: Package contents of the AEG Wallbox FF 22 KW.
4. Setup and Installation
Professional installation by a qualified electrician is mandatory.
4.1 Pre-Installation Checklist
- Verify that the electrical supply meets the Wallbox requirements (3-phase 400V AC).
- Ensure the installation location is suitable, protected from direct sunlight and heavy rain (though the unit is IP45 rated).
- Confirm the mounting surface is structurally sound.
- Have all necessary tools and safety equipment ready.
4.2 Mounting the Wallbox
- Choose a suitable mounting height, ensuring the charging cable can comfortably reach the vehicle's charging port.
- Use the provided mounting bracket as a template to mark drilling points on the wall.
- Drill holes and insert appropriate wall anchors.
- Securely attach the mounting bracket to the wall using the provided screws.
- Mount the Wallbox unit onto the bracket.

Figure 2: Properly mounted AEG Wallbox FF 22 KW.
4.3 Electrical Connection
This step must be performed by a qualified electrician.
- Turn off the main power supply at the circuit breaker.
- Connect the Wallbox to the dedicated 3-phase 400V AC circuit according to the wiring diagram provided in the full installation manual.
- Ensure all connections are tight and secure.
- Verify proper grounding.
- Close the Wallbox housing securely.
- Restore power and check the LED indicator for initial status.

Figure 3: Internal components and wiring (for qualified electricians only).
5. Operating Instructions
5.1 Understanding the LED Indicator
The Wallbox features a five-color LED display that indicates its operational status:
- Green (Solid): Ready for charging.
- Blue (Pulsing): Charging in progress.
- Red (Solid): Error or fault. Refer to troubleshooting.
- Yellow (Solid): Waiting for vehicle connection.
- White (Solid): Standby mode.
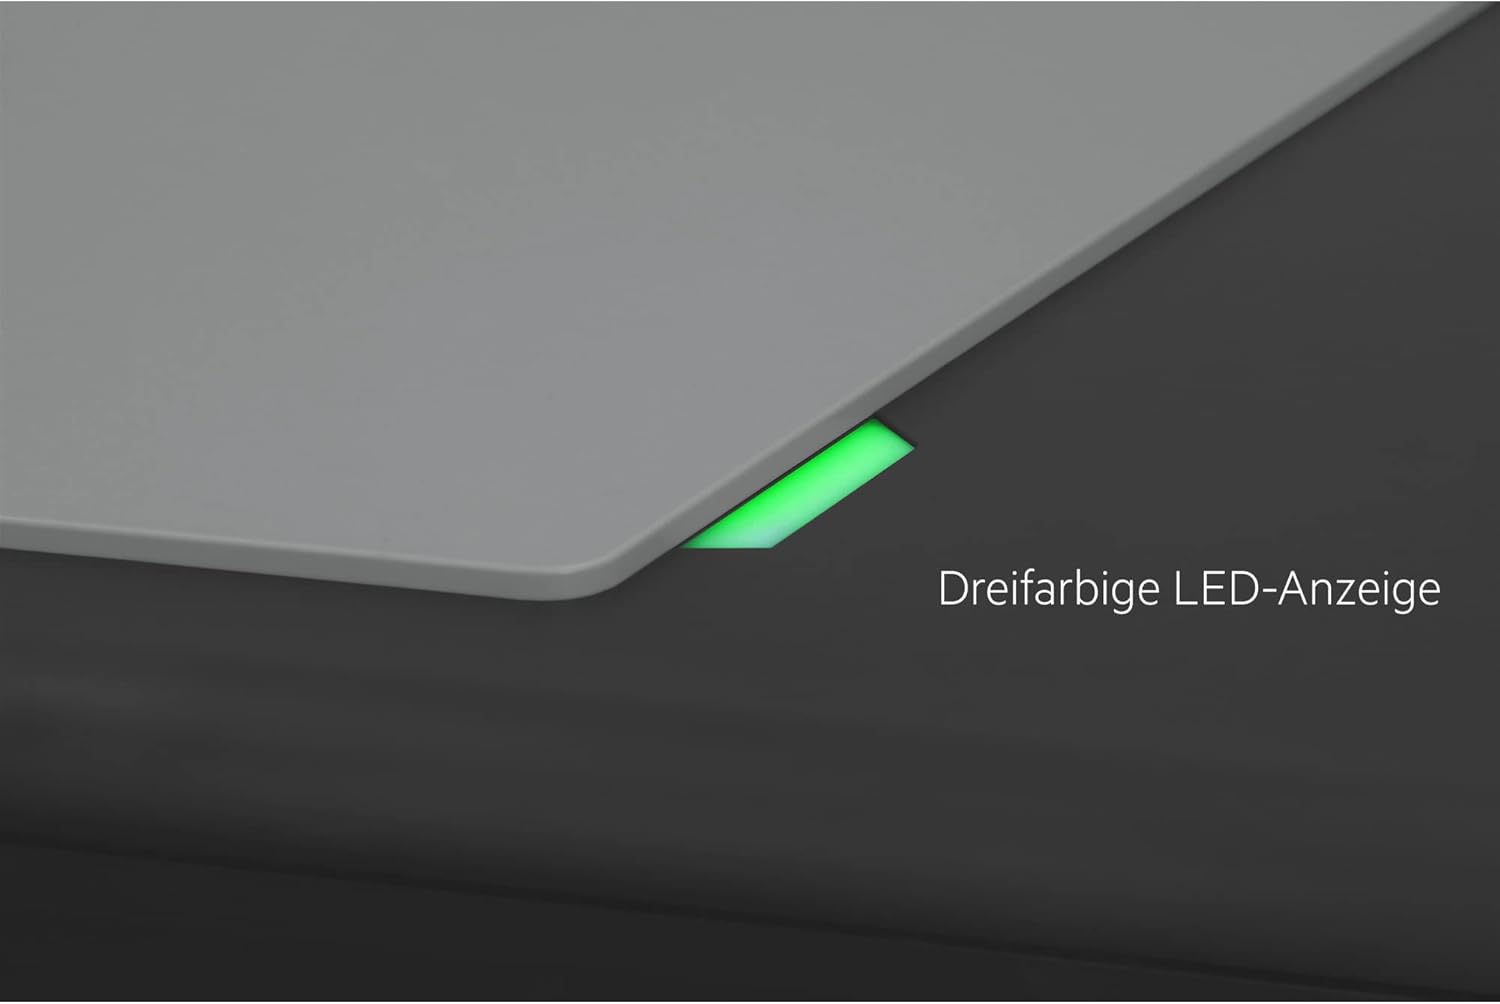
Figure 4: LED status indicator.
5.2 Initiating a Charging Session
- Ensure the Wallbox LED is green (ready).
- Remove the protective cap from the Type 2 charging connector.
- Insert the Type 2 connector firmly into your vehicle's charging port.
- The Wallbox LED will change to blue (pulsing) to indicate that charging has started. Your vehicle's dashboard or charging indicator will also confirm the charging status.

Figure 5: Connecting the Type 2 charging connector.

Figure 6: Vehicle charging in progress.
5.3 Ending a Charging Session
- Most vehicles allow you to stop charging via their onboard system or app. Alternatively, simply disconnect the charging connector from your vehicle.
- The Wallbox LED will return to green (ready).
- Replace the protective cap on the Type 2 connector and coil the cable neatly on the Wallbox's integrated holder.

Figure 7: Cable management after charging.
6. Maintenance
The AEG Automotive Wallbox FF 22 KW requires minimal maintenance.
- Cleaning: Periodically wipe the exterior of the Wallbox with a soft, damp cloth. Do not use abrasive cleaners or solvents. Ensure the unit is powered off before cleaning.
- Cable and Connector Inspection: Regularly inspect the charging cable and connector for any signs of wear, cuts, cracks, or damage. If any damage is found, discontinue use immediately and contact a qualified technician.
- Environmental Protection: Although the Wallbox is IP45 rated, protecting it from extreme weather conditions (e.g., heavy snow, prolonged direct sunlight) can extend its lifespan.

Figure 8: IP45 protection against water splashes.
7. Troubleshooting
If you encounter issues with your Wallbox, refer to the following troubleshooting guide:
| Problem | Possible Cause | Solution |
|---|---|---|
| Wallbox LED is Red | Internal fault, overcurrent, or short circuit. | Disconnect the vehicle. Turn off the Wallbox's power supply for 5 minutes, then turn it back on. If the error persists, contact customer support. |
| No charging initiated (LED remains Green/Yellow) | Connector not fully inserted, vehicle not ready to charge, or vehicle fault. | Ensure the connector is fully and securely inserted. Check your vehicle's charging settings. Try restarting the charging process. |
| Slow charging speed | Vehicle limitation, grid voltage fluctuation, or other electrical issues. | Verify your vehicle's maximum charging capacity. Consult an electrician to check the grid voltage and installation. |
| Wallbox is unresponsive | No power supply. | Check the main circuit breaker for the Wallbox. Ensure the power supply is active. |
If the problem persists after attempting these solutions, please contact AEG Automotive customer support or a qualified electrician.
8. Specifications
| Specification | Value |
|---|---|
| Brand | AEG |
| Model Number | 11206 |
| Color | Black/Grey |
| Input Voltage | 400 Volts AC |
| Output Voltage | 400 Volts AC |
| Max Charging Power | 22 kW |
| Charging Cable Length | 5 meters |
| Connector Type | Type 2 (IEC 62196) |
| Protection Class | IP45 |
| Integrated Safety | Circuit Breaker Type A |
| Country of Origin | Germany |
9. Warranty Information
For detailed warranty information, please refer to the warranty card included with your product or visit the official AEG Automotive website. Keep your proof of purchase for warranty claims.
10. Customer Support
If you have any questions, require technical assistance, or need to report a fault, please contact AEG Automotive customer support. Contact details can typically be found on the product packaging, the official website, or in the included documentation.
Online Resources:
- Visit the AEG Brand Store for more information and products.


