1. Product Overview
The Ideal Standard Ceraplan single-lever basin mixer is designed for bathroom sinks, featuring a fixed spout and a 5 liter per minute aerator for water efficiency. It includes a M24x1 aerator, an exhaust control rod, and a 1-1/4" waste. The mixer is equipped with a 38 mm cartridge with an EKO system, contributing to water saving. Its spout height is 88 mm, and it utilizes the Easy Fix+ system for straightforward installation. The finish is chrome.
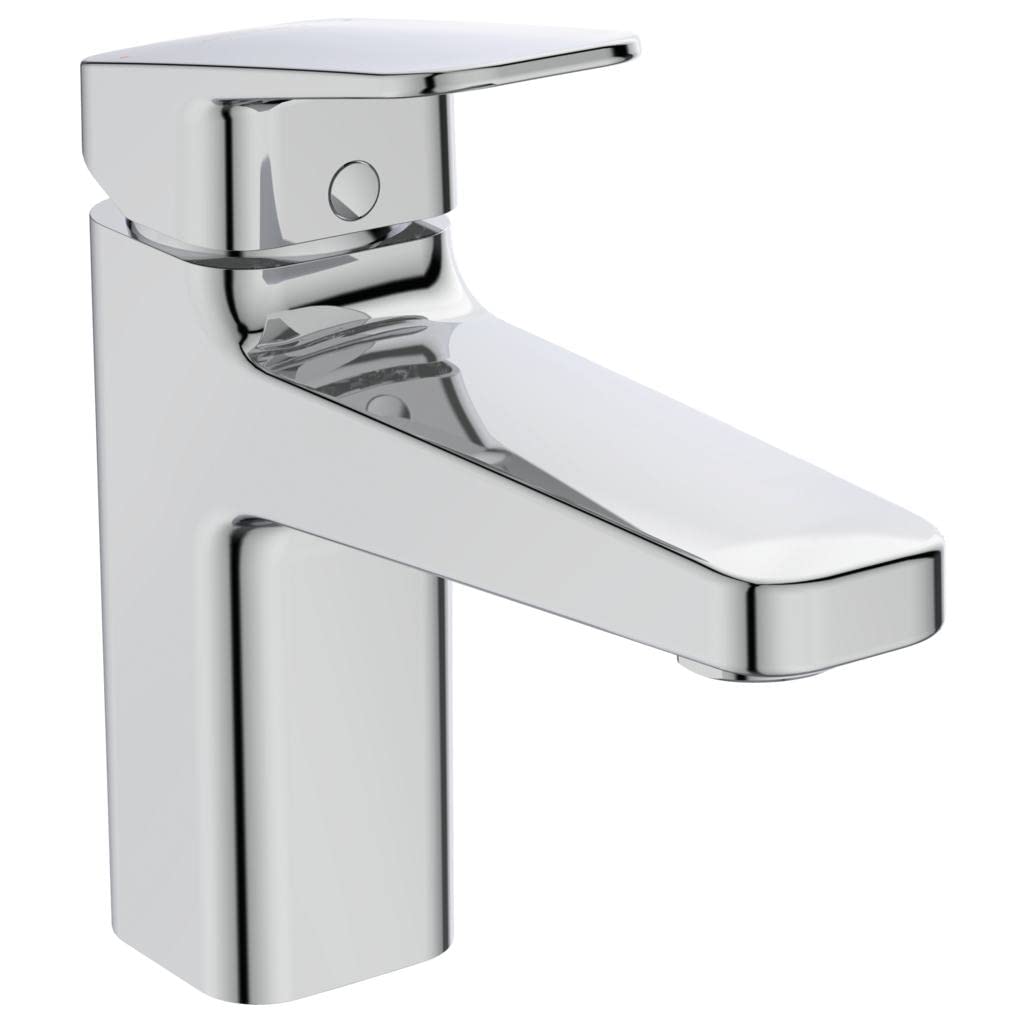
Figure 1: Side view of the Ideal Standard Ceraplan Single-Lever Basin Mixer.
Key Features:
- Single-lever operation for precise control of water flow and temperature.
- Integrated 5 l/min aerator for reduced water consumption.
- Fixed spout design.
- M24x1 aerator and 1-1/4" waste with control rod.
- 38 mm ceramic cartridge with EKO system.
- 88 mm spout height.
- Easy Fix+ installation system.
- Durable chrome finish.
2. Safety Information
Please read all instructions carefully before installation and use. Failure to follow these instructions may result in property damage or personal injury.
- Ensure the main water supply is turned off before beginning any installation or maintenance.
- If you are unsure about any part of the installation process, consult a qualified plumber.
- Do not use abrasive cleaners or harsh chemicals on the chrome finish, as this may damage the surface.
- Protect the product from freezing temperatures, which can cause damage to internal components.
- Keep small parts out of reach of children.
3. Package Contents
Verify that all components are present before starting installation.
- 1 x Ideal Standard Ceraplan Single-Lever Basin Mixer
- 1 x Set of flexible connection hoses
- 1 x Easy Fix+ mounting kit (gasket, washer, nut)
- 1 x 1-1/4" Waste with control rod
- 1 x Instruction Manual
4. Setup and Installation
This section provides general guidelines for installing your basin mixer. For detailed steps, refer to the technical drawing and consult a professional if needed.
Tools Required (not included):
- Adjustable wrench
- Screwdriver
- Sealant tape (PTFE tape)
- Basin wrench (optional)
Installation Steps:
- Prepare the Basin: Ensure the mounting hole on your basin is clean and free of debris. The mixer requires a single mounting hole.
- Install the Mixer: Place the mixer onto the basin, ensuring the base gasket is correctly positioned.
- Secure the Mixer: From underneath the basin, slide the washer and then the fixing nut onto the threaded rod of the mixer. Tighten the nut securely using the Easy Fix+ system to prevent movement.
- Connect Water Hoses: Attach the flexible hot and cold water supply hoses to the corresponding inlets on the mixer. Use sealant tape on the threads for a watertight seal. Connect the other ends of the hoses to your hot and cold water supply lines.
- Install the Waste: Assemble the 1-1/4" waste according to its separate instructions, ensuring all seals are correctly placed. Insert the waste into the basin's drain hole and secure it from underneath. Connect the control rod to the mixer's lever mechanism.
- Test for Leaks: Slowly turn on the main water supply. Check all connections for leaks. If leaks occur, tighten connections as necessary.
- Flush the System: Run both hot and cold water through the mixer for a few minutes to flush out any debris from the new installation.
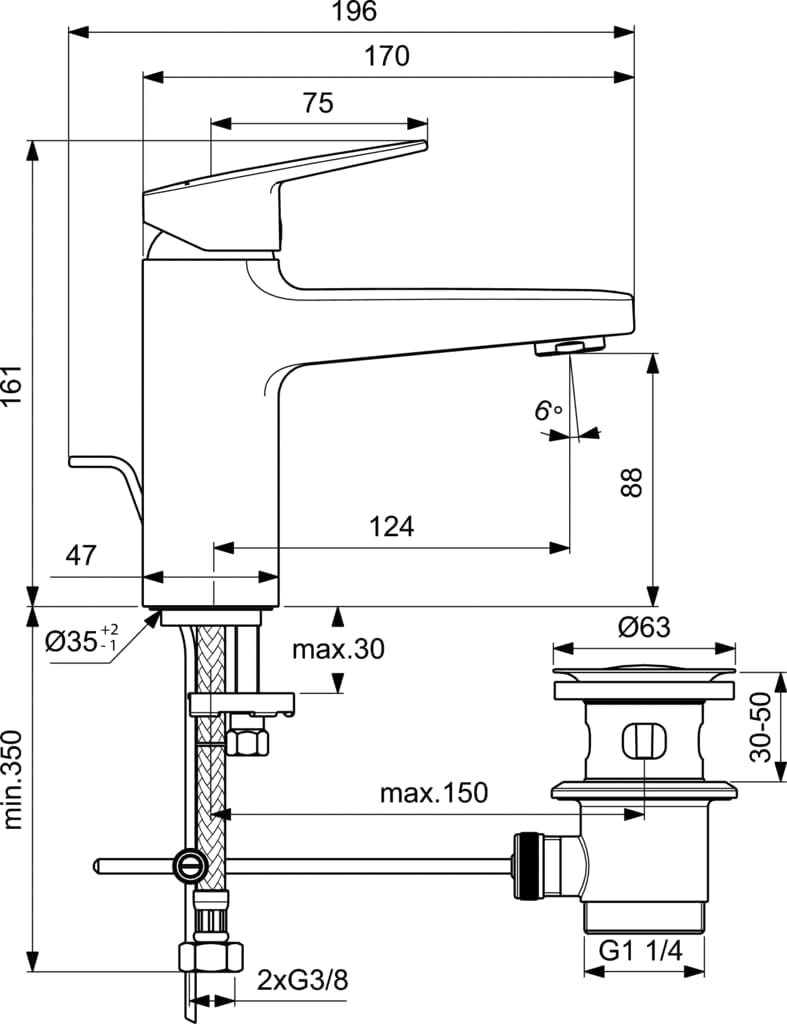
Figure 2: Technical drawing with dimensions and installation components.
5. Operating Instructions
The Ideal Standard Ceraplan basin mixer features a single lever for intuitive control.
- Water Flow Control: Lift the lever upwards to increase water flow. Push it downwards to decrease flow and turn off the water.
- Temperature Control: Move the lever to the left for hot water and to the right for cold water. Adjust the position between left and right to achieve the desired water temperature.
- Waste Operation: Use the control rod located at the back of the mixer to open and close the basin waste. Pull the rod up to close the waste and fill the basin; push it down to open the waste and drain the basin.

Figure 3: Top view of the mixer with hot (red) and cold (blue) indicators.
6. Maintenance
Regular maintenance will ensure the longevity and optimal performance of your Ideal Standard Ceraplan basin mixer.
Cleaning the Mixer:
- Clean the chrome finish regularly with a soft cloth and mild soap or a non-abrasive cleaner specifically designed for chrome.
- Rinse thoroughly with clean water and dry with a soft cloth to prevent water spots.
- Do not use: Abrasive sponges, scouring pads, harsh detergents, or cleaners containing alcohol, ammonia, or phosphoric acid, as these can damage the finish.
Aerator Maintenance:
If water flow decreases or becomes uneven, the aerator may be clogged with sediment.
- Unscrew the aerator from the end of the spout.
- Separate the aerator components and rinse them under running water.
- Use a soft brush or toothpick to remove any stubborn mineral deposits or debris.
- Reassemble the aerator and screw it back onto the spout. Do not overtighten.
7. Troubleshooting
This section addresses common issues you might encounter with your basin mixer.
| Problem | Possible Cause | Solution |
|---|---|---|
| Low water flow | Clogged aerator; partially closed stopcock; debris in supply lines. | Clean the aerator (see Maintenance); ensure stopcocks are fully open; flush supply lines. |
| Leaking from spout | Damaged cartridge; debris in cartridge. | Contact customer support for cartridge replacement or professional service. |
| Leaking from base of mixer | Loose mounting nut; damaged base gasket. | Tighten mounting nut; inspect and replace base gasket if damaged. |
| Water temperature inconsistent | Issues with water heater; unbalanced water pressure. | Check water heater settings; consult a plumber to balance water pressure. |
If the problem persists after attempting these solutions, please contact Ideal Standard customer support or a qualified plumber.
8. Specifications
| Feature | Detail |
|---|---|
| Model Number | BD227AA |
| Brand | Ideal Standard |
| Product Dimensions (L x W x H) | 4.7 x 19.6 x 16.1 cm |
| Item Weight | 1.71 Kilograms |
| Material | Metal |
| Color/Finish | Chrome |
| Number of Handles | 1 (Single-Lever) |
| Number of Holes Required | 1 (Monotrou) |
| Spout Height | 88 mm (3.46 inches) |
| Maximum Flow Rate | 5 Liters per minute |
| Valve Type | Cartridge Valve (38 mm EKO System) |
| Special Feature | Water-saving system, Easy Fix+ installation |
| Recommended Use | Bathroom |
9. Warranty and Support
Ideal Standard products are manufactured to high-quality standards and are backed by a manufacturer's warranty. For specific warranty details, please refer to the documentation included with your purchase or visit the official Ideal Standard website.
For technical assistance, spare parts, or any other inquiries, please contact Ideal Standard customer support. Contact information can typically be found on the product packaging or the official Ideal Standard website.
Online Resources: You may find additional support, FAQs, and product information on the Ideal Standard official website.


