
liriuda 21100-11190
liriuda Carburetor 21100-11190 Instruction Manual
Model: 21100-11190, 21100-11191, H2092 | Brand: liriuda
Introduction
This instruction manual provides essential information for the proper installation, operation, and maintenance of your liriuda Carburetor, model 21100-11190. Please read this manual thoroughly before attempting any installation or service to ensure safe and effective use of the product.
Product Overview
The liriuda Carburetor 21100-11190 is a replacement part designed to meet or exceed OEM standards. It is crucial for regulating the air-fuel mixture in your vehicle's engine, ensuring optimal combustion and performance.

Figure 1: Front view of the liriuda Carburetor 21100-11190, showing the main body and various connections.

Figure 2: Top view of the carburetor, highlighting the LIRUIDA brand logo and overall structure.
Compatibility
This carburetor is compatible with the following Toyota vehicle models:
- 1984-1990 Toyota TOYOTA TERCEL
- 1984-1990 Toyota TOYOTA Corsa
- 1984-1990 Toyota TOYOTA Starlet
- 1984-1987 Toyota TOYOTA COROLLA (EE80)
Important: Please verify the part number 21100-11190 (or 21100-11191, H2092) against your existing part before purchase and installation to ensure proper fitment.
Package Contents
Upon opening the package, please ensure all components are present and undamaged. The package typically includes:
- 1 x liriuda Carburetor (Model 21100-11190)
- Additional small components as shown in product images (e.g., plastic cap)
Figure 3: The carburetor as packaged, including a small white plastic cap.
Installation
Disclaimer: Installation of automotive parts can be complex and may require specialized tools and knowledge. If you are not confident in your ability to perform this installation, it is highly recommended to seek assistance from a qualified mechanic.
Safety Precautions:
- Ensure the vehicle's engine is cool before beginning work.
- Disconnect the vehicle's battery to prevent electrical hazards.
- Work in a well-ventilated area.
- Wear appropriate personal protective equipment (PPE), such as gloves and eye protection.
- Have a fire extinguisher readily available.
General Installation Steps (Consult Vehicle Service Manual for Specifics):
- Preparation: Gather all necessary tools. Locate the existing carburetor on your vehicle.
- Fuel System Depressurization: Safely relieve fuel pressure according to your vehicle's service manual.
- Disconnect Components: Carefully disconnect all fuel lines, vacuum lines, electrical connectors, and throttle linkage from the old carburetor. Label them if necessary to aid reassembly.
- Remove Old Carburetor: Unbolt and remove the old carburetor from the intake manifold. Be mindful of any gaskets.
- Clean Mounting Surface: Thoroughly clean the intake manifold mounting surface to ensure a proper seal with the new carburetor. Remove any old gasket material.
- Install New Gasket: Place a new carburetor gasket onto the intake manifold.
- Mount New Carburetor: Carefully position the new liriuda carburetor onto the intake manifold, aligning it with the bolt holes.
- Secure Carburetor: Install and tighten the mounting bolts evenly to the manufacturer's specified torque settings.
- Reconnect Components: Reconnect all fuel lines, vacuum lines, electrical connectors, and throttle linkage to the new carburetor. Double-check all connections for security.
- Final Checks: Reconnect the battery. Inspect for any fuel leaks or loose connections before starting the engine.
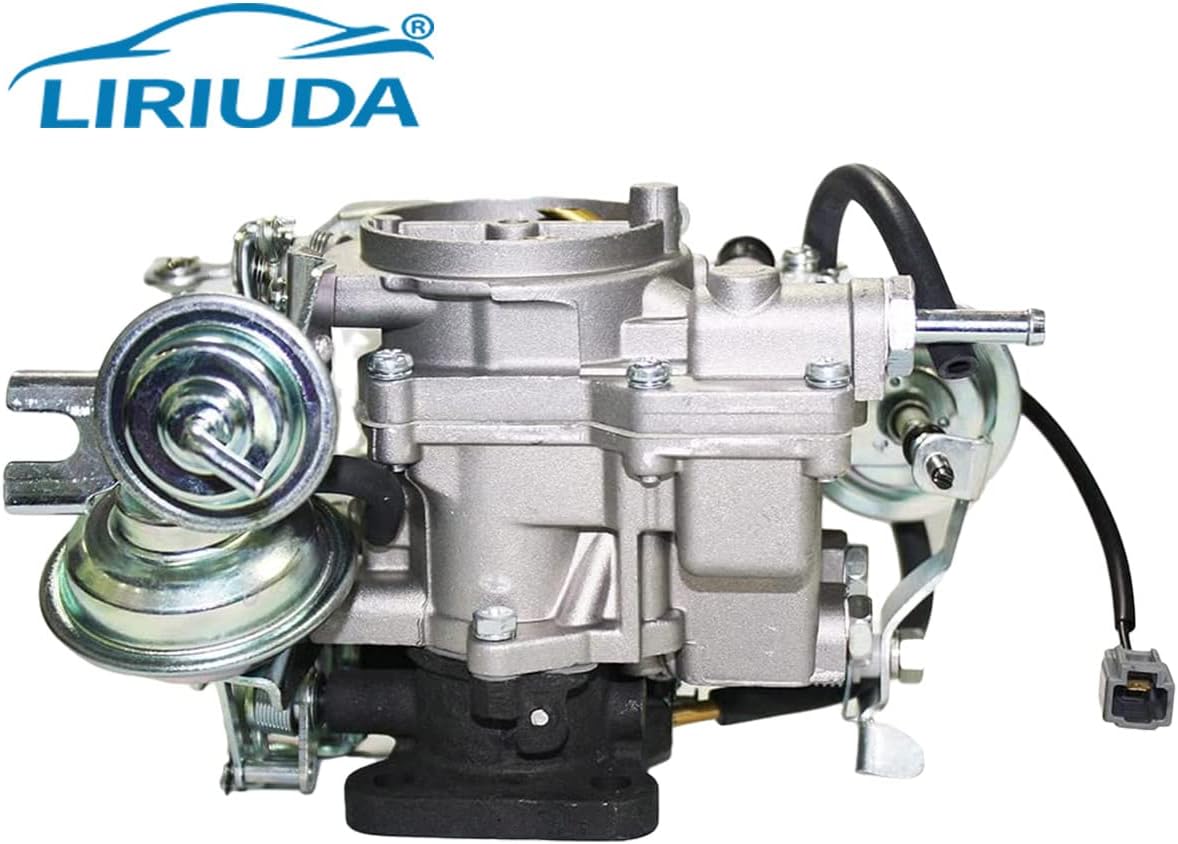
Figure 4: Side view of the carburetor, illustrating the various ports and connections that need to be properly attached during installation.

Figure 5: Detailed view of the carburetor's linkage mechanisms, which control throttle and choke operation.
Operation
Once installed, the carburetor operates automatically to mix air and fuel for the engine. Proper operation relies on correct installation and calibration. After installation, it is recommended to:
- Initial Start-up: Start the engine and allow it to reach operating temperature.
- Idle Adjustment: If necessary, adjust the idle speed and mixture screws according to your vehicle's service manual specifications to ensure a smooth idle.
- Test Drive: Perform a test drive to confirm proper acceleration, deceleration, and overall engine performance.
The carburetor is designed for reliable performance. Any significant changes in engine behavior after installation may indicate an issue requiring further inspection.
Maintenance
Regular maintenance of your vehicle's fuel system, including the carburetor, is essential for longevity and optimal performance. While the carburetor itself requires minimal direct maintenance, consider the following:
- Fuel Filter Replacement: Regularly replace your vehicle's fuel filter to prevent contaminants from reaching the carburetor.
- Air Filter Inspection: Ensure the air filter is clean and free of obstructions to allow proper airflow to the carburetor.
- Vacuum Line Inspection: Periodically check all vacuum lines connected to the carburetor for cracks, leaks, or disconnections.
- Linkage Lubrication: Lightly lubricate throttle and choke linkages as recommended by your vehicle's service manual.
- Fuel Quality: Use high-quality fuel to minimize deposits and clogging within the carburetor.

Figure 6: Underside view of the carburetor, illustrating the fuel bowl and base plate, critical areas for fuel delivery.
Troubleshooting
If you experience issues after installing the new carburetor, consider the following common problems and potential solutions:
| Problem | Possible Cause | Solution |
|---|---|---|
| Engine Idles Rough or Stalls | Incorrect idle mixture/speed, vacuum leak, clogged fuel filter, faulty spark plugs. | Adjust idle, check all vacuum lines, replace fuel filter, inspect/replace spark plugs. |
| Poor Acceleration/Hesitation | Improper fuel delivery, clogged jets, accelerator pump issue, timing issues. | Check fuel lines, inspect carburetor jets for clogs, verify accelerator pump function, check engine timing. |
| Fuel Leaks | Loose connections, damaged gasket, cracked fuel line. | Tighten connections, replace gasket, replace damaged fuel lines. |
| Hard Starting (Cold or Hot) | Choke not functioning correctly, fuel delivery issues, ignition problems. | Inspect choke mechanism, check fuel pump and filter, verify ignition system components. |
If these steps do not resolve the issue, it is advisable to consult a professional automotive technician.
Specifications
| Attribute | Detail |
|---|---|
| Brand | liriuda |
| Manufacturer Part Number | 21100-11190, 21100-11191, H2092 |
| Vehicle Service Type | Car |
| UPC | 761594348724 |
| Quality Standard | Meets or exceeds OEM standards, IATF 16949 Certified |

Figure 7: LIRUIDA's commitment to quality, including IATF 16949 certification.
Warranty and Support
liriuda stands behind the quality of its products. This carburetor comes with a 12-month warranty. For any dissatisfaction or issues, please contact the seller or liriuda customer support. They are committed to providing assistance and resolving concerns.
Contact information for support can typically be found on your purchase receipt or the seller's platform.
Ask a question about this manual
Ask about setup, troubleshooting, compatibility, parts, safety, or missing instructions. Manuals+ will review the question and use this page’s manual context to help answer it.