1. Introduction
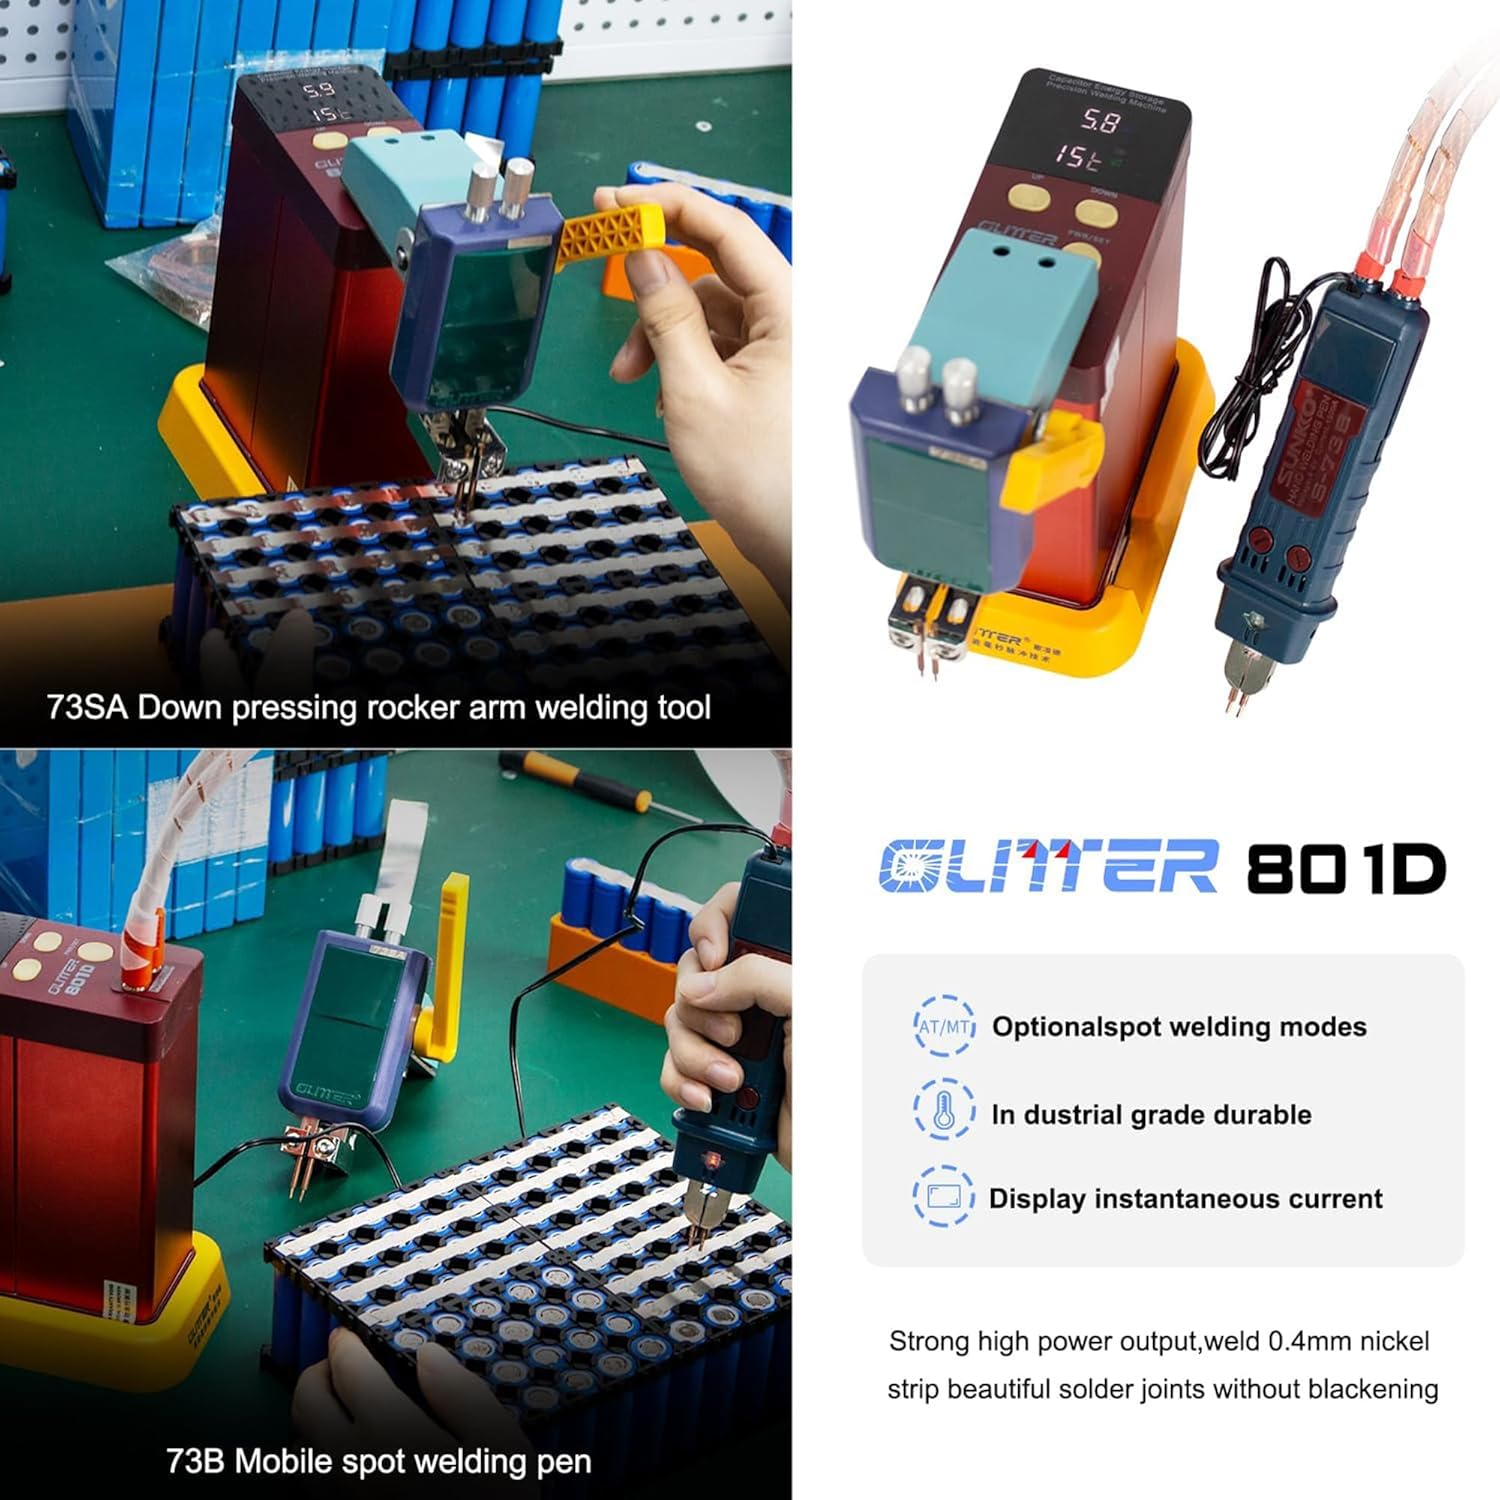
The GLITTER 801D is a capacitor energy storage pulse spot welder designed for precision welding tasks, particularly for lithium battery pack assembly. This manual provides essential information for the safe and effective operation, maintenance, and troubleshooting of your GLITTER 801D unit. It features a maximum pulse welding power of 12 KW, supports welding of up to 0.4mm nickel-plated and 0.35mm pure nickel, and offers both auto-trigger (AT) and manual-trigger (MT) welding modes.
2. Safety Instructions
Read all safety warnings and instructions carefully before using this product.
- Always wear appropriate personal protective equipment, including safety glasses and gloves, when operating the spot welder.
- Ensure adequate ventilation in the work area to prevent the accumulation of fumes.
- Do not touch the welding electrodes or the workpiece immediately after welding, as they will be hot.
- Keep the welding area clean and free of flammable materials.
- Never operate the welder with damaged cables or components. Inspect the unit before each use.
- Keep children and unauthorized personnel away from the welding equipment.
- Ensure the power adapter is connected to a grounded outlet.
- Avoid direct contact with live electrical parts.
3. Package Contents
Verify that all items listed below are included in your package:
- GLITTER 801D Main Unit
- 73B Mobile Welding Pen
- 73SA Downward Welding Head
- Foot Pedal
- Power Adapter (AC100-240V)
- Anti-static Tweezers
- USB Cable
- Soldering Iron Stand
- Wire
- Flux
- Desoldering Pump
- Soldering Iron Tips
- Hex Wrench
- Nickel Strips (sample)
- Battery Holder

4. Setup
4.1. Connecting the Power Adapter and Initial Charge
- Locate the power input port on the rear of the GLITTER 801D main unit.
- Connect the provided power adapter to the unit.
- Plug the power adapter into a standard AC100-240V wall socket.
- Press the PWR/SET button on the front panel to turn on the welder. The display will show the charging status.
- Allow the unit to charge for approximately 20-30 minutes, or until the capacitor voltage displayed on the screen stabilizes between 5.2V and 5.8V. This ensures optimal performance.
4.2. Attaching Welding Pens/Heads
The GLITTER 801D supports two types of welding tools: the 73B mobile welding pen and the 73SA downward welding head.
- Identify the two 'Pulse Output' ports on the front of the main unit.
- For the 73B Mobile Welding Pen: Insert the two leads from the welding pen securely into the 'Pulse Output' ports. Ensure a firm connection.
- For the 73SA Downward Welding Head: Insert the two leads from the welding head securely into the 'Pulse Output' ports. This head is typically used for stationary welding with a foot pedal.


5. Operating Instructions
5.1. Powering On and Setting Parameters
- Ensure the unit is charged (voltage between 5.2V and 5.8V).
- Press the PWR/SET button to turn on the welder.
- Use the 'UP' and 'DOWN' buttons to adjust the welding power level. The range is typically 0-99.
- The LED screen displays welding power, capacitor voltage, and actual welding current.


5.2. Welding Modes (AT/MT)
The GLITTER 801D offers two welding modes:
- AT (Auto Trigger) Mode: The welder automatically triggers a pulse when the welding electrodes make proper contact with the workpiece. This mode is suitable for high-efficiency welding.
- MT (Manual Trigger) Mode: Welding is initiated by pressing the foot pedal (if connected). This mode provides greater precision and control over the welding process.

5.3. Welding Procedure (General)
- Prepare the workpiece: Ensure the surfaces to be welded are clean and free of oxidation or debris.
- Place the nickel strip or material onto the battery terminal or workpiece.
- Position the welding electrodes firmly and squarely onto the nickel strip, ensuring good contact with both the strip and the underlying material. Apply consistent pressure.
- If in AT mode, the weld will trigger automatically. If in MT mode, press the foot pedal to initiate the weld.
- After the weld, lift the electrodes carefully. Inspect the weld for strength and appearance. A good weld should be firm, without blackening, and show no signs of false welding.
5.4. Welding Parameter Table
The following table provides recommended energy levels for welding various thicknesses of nickel and nickel-plated strips. These are starting points; actual settings may vary based on material quality and desired weld strength.
| Material | Thickness | Energy Level (t) |
|---|---|---|
| Pure Nickel | 0.1mm | 06-08t |
| 0.15mm | 22-25t | |
| 0.2mm | 30-35t | |
| 0.3mm | 70-80t | |
| Nickel Plated | 0.1mm | 03-04t |
| 0.15mm | 20-22t | |
| 0.2mm | 25-28t | |
| 0.3mm | 50-60t | |
| 0.4mm | 70-80t |
5.5. Specific Welding Applications
The GLITTER 801D is suitable for various battery and metal welding applications:
- 18650/14500 Lithium Battery Packs: Ideal for building and repairing battery packs for electric appliances and vehicles.
- LiFePO4 Batteries: Capable of welding aluminum/copper terminals on large-capacity LiFePO4 batteries.
- Common Metals: Can be used for spot welding stainless steel, iron, nickel, copper, aluminum, and titanium.
6. Maintenance
Proper maintenance ensures the longevity and optimal performance of your spot welder.
- Cleaning: Regularly clean the main unit and welding pens/heads with a dry, soft cloth. Avoid using abrasive cleaners or solvents.
- Electrode Tips: The welding electrode tips can accumulate carbon and wear down over time. Clean the tips with a fine abrasive sponge or file after welding a group of batteries to maintain good conductivity and consistent welds. Replace worn-out tips as needed.
- Storage: Store the unit in a cool, dry place away from direct sunlight and excessive dust.
- Cable Inspection: Periodically inspect all cables and connections for signs of wear, damage, or loose connections. Replace any damaged components immediately.
7. Troubleshooting
This section addresses common issues you might encounter with your GLITTER 801D spot welder.
- Unit does not power on:
- Ensure the power adapter is securely connected to both the welder and a functional wall outlet.
- Verify the wall outlet has power.
- Check if the PWR/SET button is pressed correctly.
- Poor or inconsistent welds:
- Insufficient Charge: Ensure the capacitor is fully charged (voltage between 5.2V and 5.8V). Charging can take 20-30 minutes initially.
- Incorrect Power Setting: Adjust the welding power (t-value) according to the material thickness. Refer to the Welding Parameter Table in Section 5.4. Some users report needing higher settings than initially recommended.
- Dirty/Worn Electrodes: Clean or replace the welding electrode tips. Carbon buildup or wear can reduce conductivity.
- Improper Pressure: Apply firm, consistent pressure on the welding electrodes.
- Workpiece Preparation: Ensure nickel strips and battery terminals are clean and free of oxidation.
- Error Code E-2: This error typically indicates an internal fault. Try turning the unit off and on again. If the error persists, contact customer support.
- Slow Charging: The capacitor-based design requires a charging period. Initial charging can take 20-30 minutes. If charging is excessively slow (e.g., several hours), ensure the power adapter is functioning correctly and the unit is not in a very cold environment.
8. Specifications
| Feature | Specification |
|---|---|
| Brand | Glitter |
| Model | 801D |
| Wattage | 12 KW |
| Power Source | AC (100-240V) |
| Item Weight | 2.08 Kilograms (4.58 pounds) |
| Product Dimensions | 6.38 x 2.56 x 5.08 inches |
| Special Feature | Portable |
| UPC | 888107099727 |
| Welding Thickness (Nickel-plated) | Up to 0.4mm |
| Welding Thickness (Pure Nickel) | Up to 0.35mm |
9. Warranty Information
The GLITTER 801D Battery Spot Welder is covered by a manufacturer's warranty against defects in materials and workmanship. The specific terms and duration of the warranty may vary. Please retain your proof of purchase for warranty claims. For detailed warranty information, refer to the documentation included with your product or contact the seller/manufacturer directly.
10. Customer Support
If you have any questions, require technical assistance, or need to report an issue with your GLITTER 801D Battery Spot Welder, please contact the seller or manufacturer through the platform where the product was purchased. Provide your product model number (801D) and a detailed description of the issue to facilitate a quicker resolution.