1. Introduction
Thank you for choosing the YIKA YK-2101 2-in-1 Handheld Clothes Steamer and Iron. This versatile appliance is designed for efficient wrinkle removal, offering both powerful steaming and traditional ironing functions. Its compact and lightweight design makes it ideal for both home use and travel. Please read this manual thoroughly before operation to ensure safe and optimal performance.
2. Important Safety Instructions
- Read all instructions before using the appliance.
- Use the appliance only for its intended household use as described in this manual.
- To reduce the risk of electric shock, do not immerse the appliance in water or other liquids.
- Always turn the appliance OFF before plugging or unplugging from the outlet. Never pull on the cord to disconnect from the outlet; instead, grasp the plug and pull to disconnect.
- Do not allow the cord to touch hot surfaces. Let the appliance cool completely before putting away. Loop cord loosely around the appliance when storing.
- Always disconnect the appliance from the electrical outlet when filling with water or emptying, and when not in use.
- Do not operate the appliance with a damaged cord or if the appliance has been dropped or damaged. To avoid the risk of electric shock, do not disassemble the appliance. Contact qualified service personnel for examination and repair. Incorrect reassembly can cause a risk of electric shock when the appliance is used.
- Close supervision is necessary for any appliance used by or near children. Do not leave the appliance unattended while connected.
- Burns can occur from touching hot metal parts, hot water, or steam. Use caution when turning the appliance upside down—there may be hot water in the reservoir.
- Use distilled or demineralized water only to prevent mineral buildup and prolong the life of the appliance.
- This appliance is compatible with 120V outlets only.
3. Package Contents
Your YIKA YK-2101 package should include the following items:
- YIKA YK-2101 2-in-1 Steamer & Iron
- Water Measuring Cup
- Heat-Resistant Resting Base
- User Manual
4. Product Overview

Image 1: Overview of the YIKA YK-2101, highlighting its 1200W power, 2-in-1 efficiency (dry iron + 2 steam levels), and portable size (6.3" x 5.5" x 2.75", 1.5 lbs).

Image 2: Detail of the large alloy soleplate, emphasizing its high efficiency and fabric-friendly nonstick coating. Shows three temperature gears for various fabrics.

Image 3: Close-up of the control panel, featuring the power button and indicators for different steam levels (Dry Iron, Steam I, Steam II).
5. Setup
5.1 Filling the Water Tank
- Ensure the appliance is unplugged from the power outlet and completely cool.
- Locate the water tank cap, usually found on the top or side of the unit. Slide the cover to open the water inlet.
- Using the provided measuring cup, carefully fill the water tank with distilled or demineralized water. The tank has a capacity of 160ml. Do not overfill.
- Close the water tank cap securely to prevent leakage.
Video 1: Demonstrates how to fill the water tank and prepare the YIKA YK-2101 for use. This video shows the process of opening the water inlet, pouring water using the measuring cup, and closing the cap.
5.2 Power Connection
- Plug the power cord into a standard 120V electrical outlet.
- Press and hold the power button until the indicator lights illuminate. The appliance will begin to heat up.
- The appliance heats up in approximately 45 seconds. The indicator light will stop blinking when it reaches the desired temperature and is ready for use.
6. Operating Instructions
6.1 Ironing Mode (Dry Iron)
- Place the garment flat on an ironing board or a heat-resistant surface.
- Select the desired temperature setting using the dial (3 gears: 203℉-302℉).
- Once the indicator light is steady, gently glide the nonstick soleplate over the fabric to remove wrinkles.
- Use the heat-resistant resting base to safely place the iron when not actively ironing.

Image 4: The YIKA YK-2101 being used in dry ironing mode on a garment laid flat, with the resting base nearby.
6.2 Steaming Mode (Vertical Steaming)
- Hang the garment on a hanger.
- Select the desired steam level (Steam I or Steam II) by pressing the steam button. The maximum steam output is 20g/min.
- Hold the steamer upright, keeping the soleplate a few inches away from the fabric.
- Move the steamer slowly up and down over the wrinkled areas. The powerful steam will penetrate the fabric to relax wrinkles.
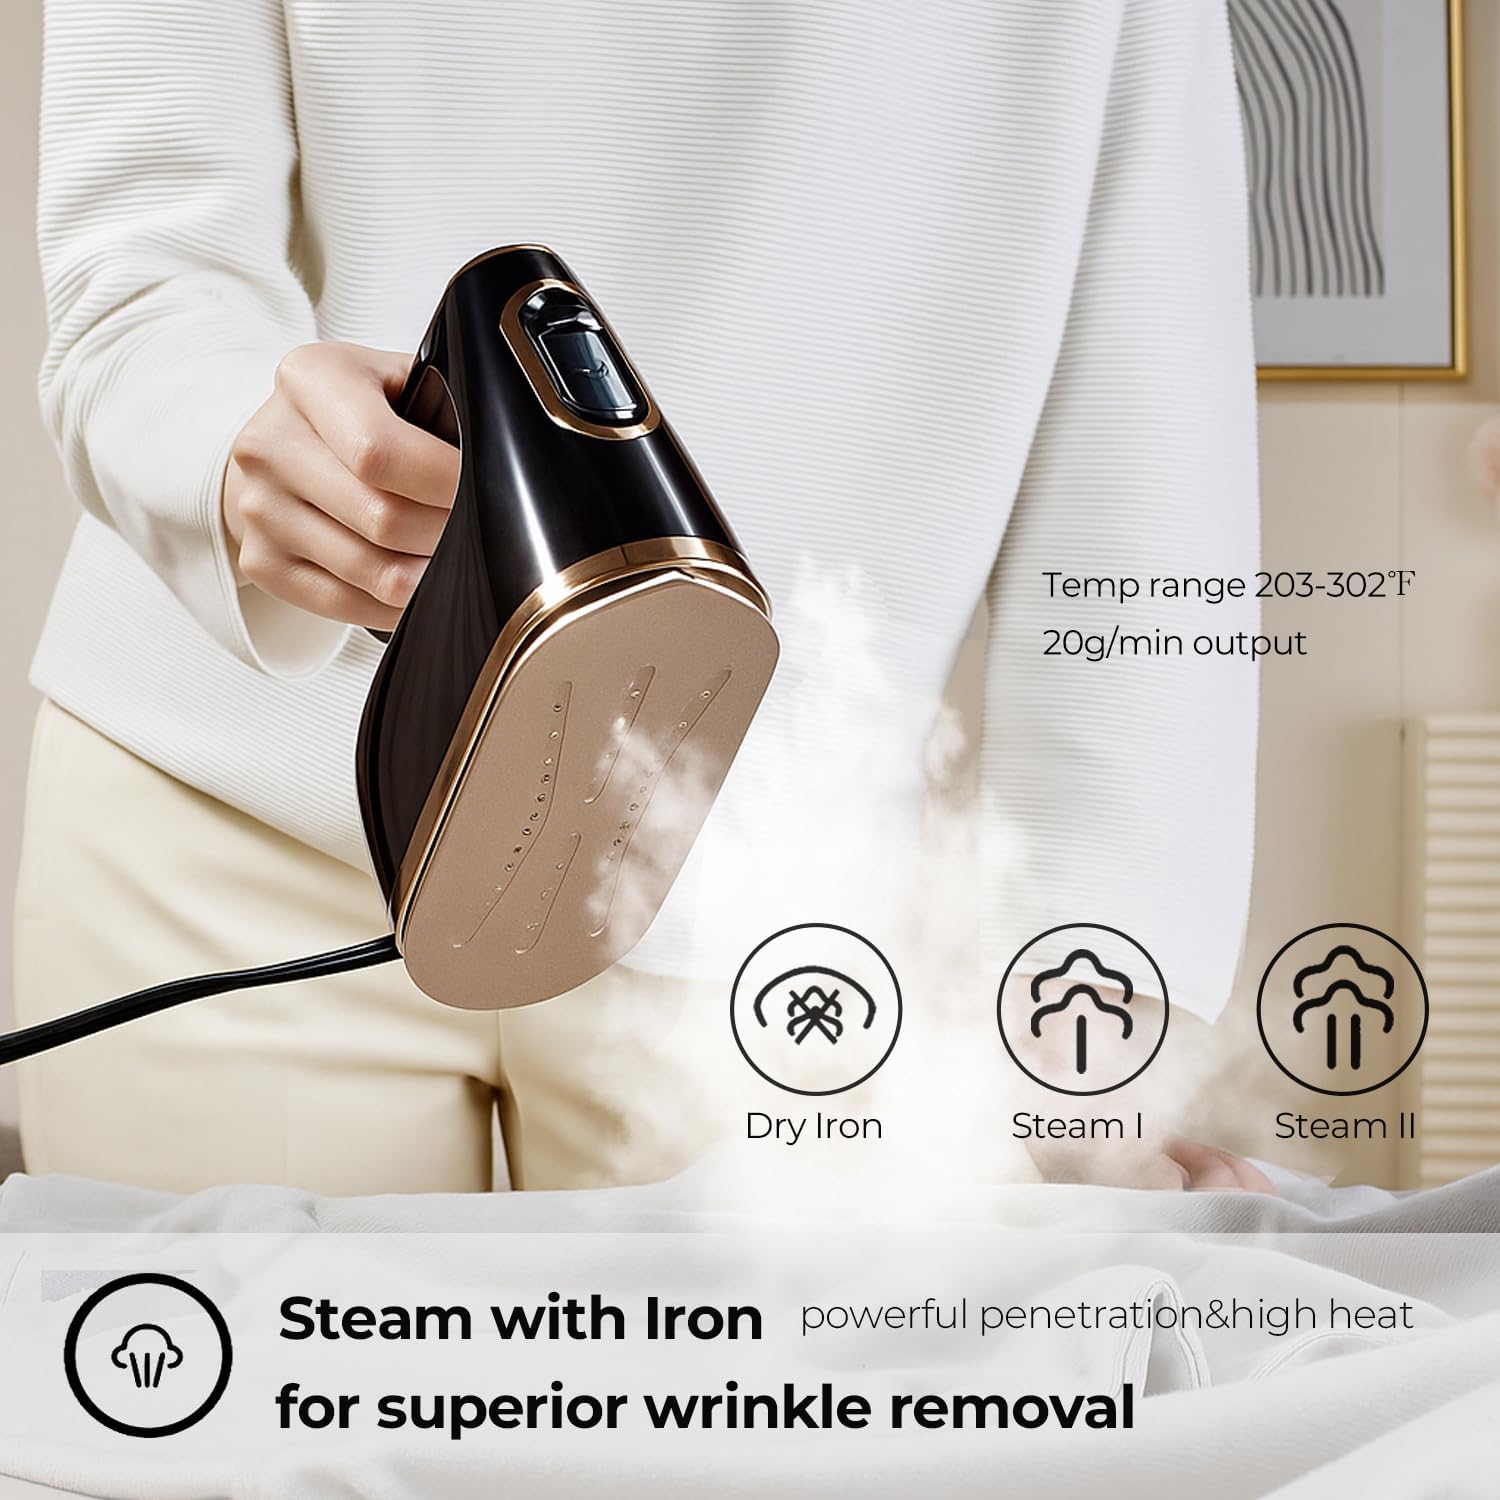
Image 5: The YIKA YK-2101 in use for vertical steaming, showing steam being applied to a hanging garment for wrinkle removal.
6.3 2-in-1 Steaming and Ironing
For superior wrinkle removal, especially on stubborn creases, combine the heat of the iron with the power of steam. Gently press the soleplate against the fabric while activating the steam function.
Video 2: This video demonstrates the combined use of ironing and steaming functions for effective wrinkle removal. It shows the appliance being used on a garment, highlighting its dual functionality.
7. Maintenance
7.1 Cleaning
- Always unplug the appliance and allow it to cool completely before cleaning.
- Wipe the exterior with a soft, damp cloth. Do not use abrasive cleaners or solvents.
- Clean the soleplate with a damp cloth and a non-abrasive liquid cleaner if necessary.
- Empty any remaining water from the tank after each use.
7.2 Descaling
To prevent mineral buildup, especially if using tap water (though distilled water is recommended), descale the appliance periodically:
- Mix a solution of 50% white vinegar and 50% water.
- Fill the water tank with this solution.
- Plug in the appliance and let it heat up. Activate the steam function until the tank is empty.
- Repeat the process with clean distilled water to rinse out any vinegar residue.
7.3 Storage
- Ensure the appliance is completely cool and dry before storing.
- Empty the water tank.
- Store the appliance in its heat-resistant resting base in a cool, dry place.
- The compact design allows for easy storage in small spaces or luggage.

Image 6: The compact YIKA YK-2101 neatly packed inside luggage, demonstrating its travel-friendly design.
8. Troubleshooting
| Problem | Possible Cause | Solution |
|---|---|---|
| No steam produced. | Water tank is empty. Appliance not heated sufficiently. | Refill water tank. Wait for the indicator light to stop blinking. |
| Water leaking from soleplate. | Water tank overfilled. Appliance not hot enough for steam. | Do not overfill the tank. Wait for the indicator light to stop blinking before using steam. |
| Appliance not heating up. | Not plugged in correctly. Power button not pressed. | Check power connection. Press and hold the power button. |
| White residue on fabric. | Mineral buildup in the tank/soleplate. | Descale the appliance as per maintenance instructions. Use distilled water. |
9. Specifications
- Brand: YIKA
- Model Name: YK-2101
- Wattage: 1200 watts
- Water Tank Capacity: 160ml (provides approx. 9 minutes continuous steaming)
- Heat-up Time: Approx. 45 seconds
- Temperature Settings: 3 gears (203℉-302℉)
- Steam Output: Max 20g/min (2 gears)
- Soleplate Material: Nonstick Alloy (Ceramic coated)
- Product Dimensions: 6.7"L x 5.5"W
- Item Weight: 1.5 pounds
- Special Features: Anti-Drip, Lightweight, Non-Stick Soleplate, Rapid Heating, Vertical Steaming
- Power Input: 120V
10. Warranty and Support
YIKA products are manufactured to the highest quality standards. For any questions, concerns, or warranty claims, please contact YIKA customer support through your original purchase platform. Please retain your proof of purchase for warranty validation.


