1. Introduction
Thank you for choosing the Briloner 7050-036 LED Recessed Spotlights. This manual provides essential information for the safe installation, operation, and maintenance of your new lighting fixtures. Please read these instructions carefully before installation and retain them for future reference.

Image 1.1: Overview of the Briloner 7050-036 LED Recessed Spotlights, highlighting key features.
2. Package Contents
Ensure all components are present and undamaged before proceeding with installation. If any parts are missing or damaged, contact your retailer.
- 3 x Briloner 7050-036 LED Recessed Spotlights (White, Metal)
- 3 x GU10 LED Bulbs (5W, 3000K Warm White)
- Instruction Manual
3. Safety Instructions
WARNING: Risk of electric shock. Installation should only be performed by a qualified electrician.
- Always disconnect power at the main circuit breaker before installation, maintenance, or bulb replacement.
- Ensure the supply voltage matches the fixture's requirements (230V AC).
- Do not modify the product in any way. Unauthorized modifications may void the warranty and pose safety risks.
- This product is rated IP23, suitable for indoor use in dry environments. Avoid installation in areas with direct water exposure.
- Keep packaging materials out of reach of children.
- Ensure proper ventilation around the fixture to prevent overheating.
4. Setup and Installation
Follow these steps for safe and correct installation of your recessed spotlights.
- Prepare the Installation Area: Ensure the power supply to the installation area is switched off at the main circuit breaker. Mark the desired locations for each spotlight on the ceiling.
- Cut the Mounting Holes: Using a suitable hole saw, cut circular holes in the ceiling. The required cut-out diameter is 68 mm. Ensure there is a minimum recessed depth of 60 mm available above the ceiling for the fixture.
- Connect Wiring: Carefully pull the electrical wires through the cut-out hole. Connect the fixture's wiring to your household electrical system according to local electrical codes. Ensure all connections are secure and properly insulated.
- Insert the Bulb: Insert the provided GU10 LED bulb into the spotlight fixture.
- Install the Fixture: Fold back the spring clips on the sides of the spotlight. Insert the spotlight into the cut-out hole. The spring clips will hold the fixture securely in place against the ceiling.
- Restore Power: Once all spotlights are installed, restore power at the main circuit breaker.

Image 4.1: Installation dimensions for the recessed spotlight.

Image 4.2: Example of installed recessed spotlights in a room setting.
5. Operating Instructions
Your Briloner LED recessed spotlights offer adjustable light features for optimal ambiance.
- Dimmable Functionality: The spotlights are step-dimmable. By repeatedly switching the light ON and OFF using a standard wall switch (not included), you can cycle through 3 different brightness levels.
- Adjustable Light Direction: The inner module of each spotlight is orientable, allowing you to direct the light beam to specific areas of your room. Gently tilt the inner ring to adjust the angle.
- Light Color: The included GU10 LED bulbs provide a warm white light with a color temperature of 3000 Kelvin.
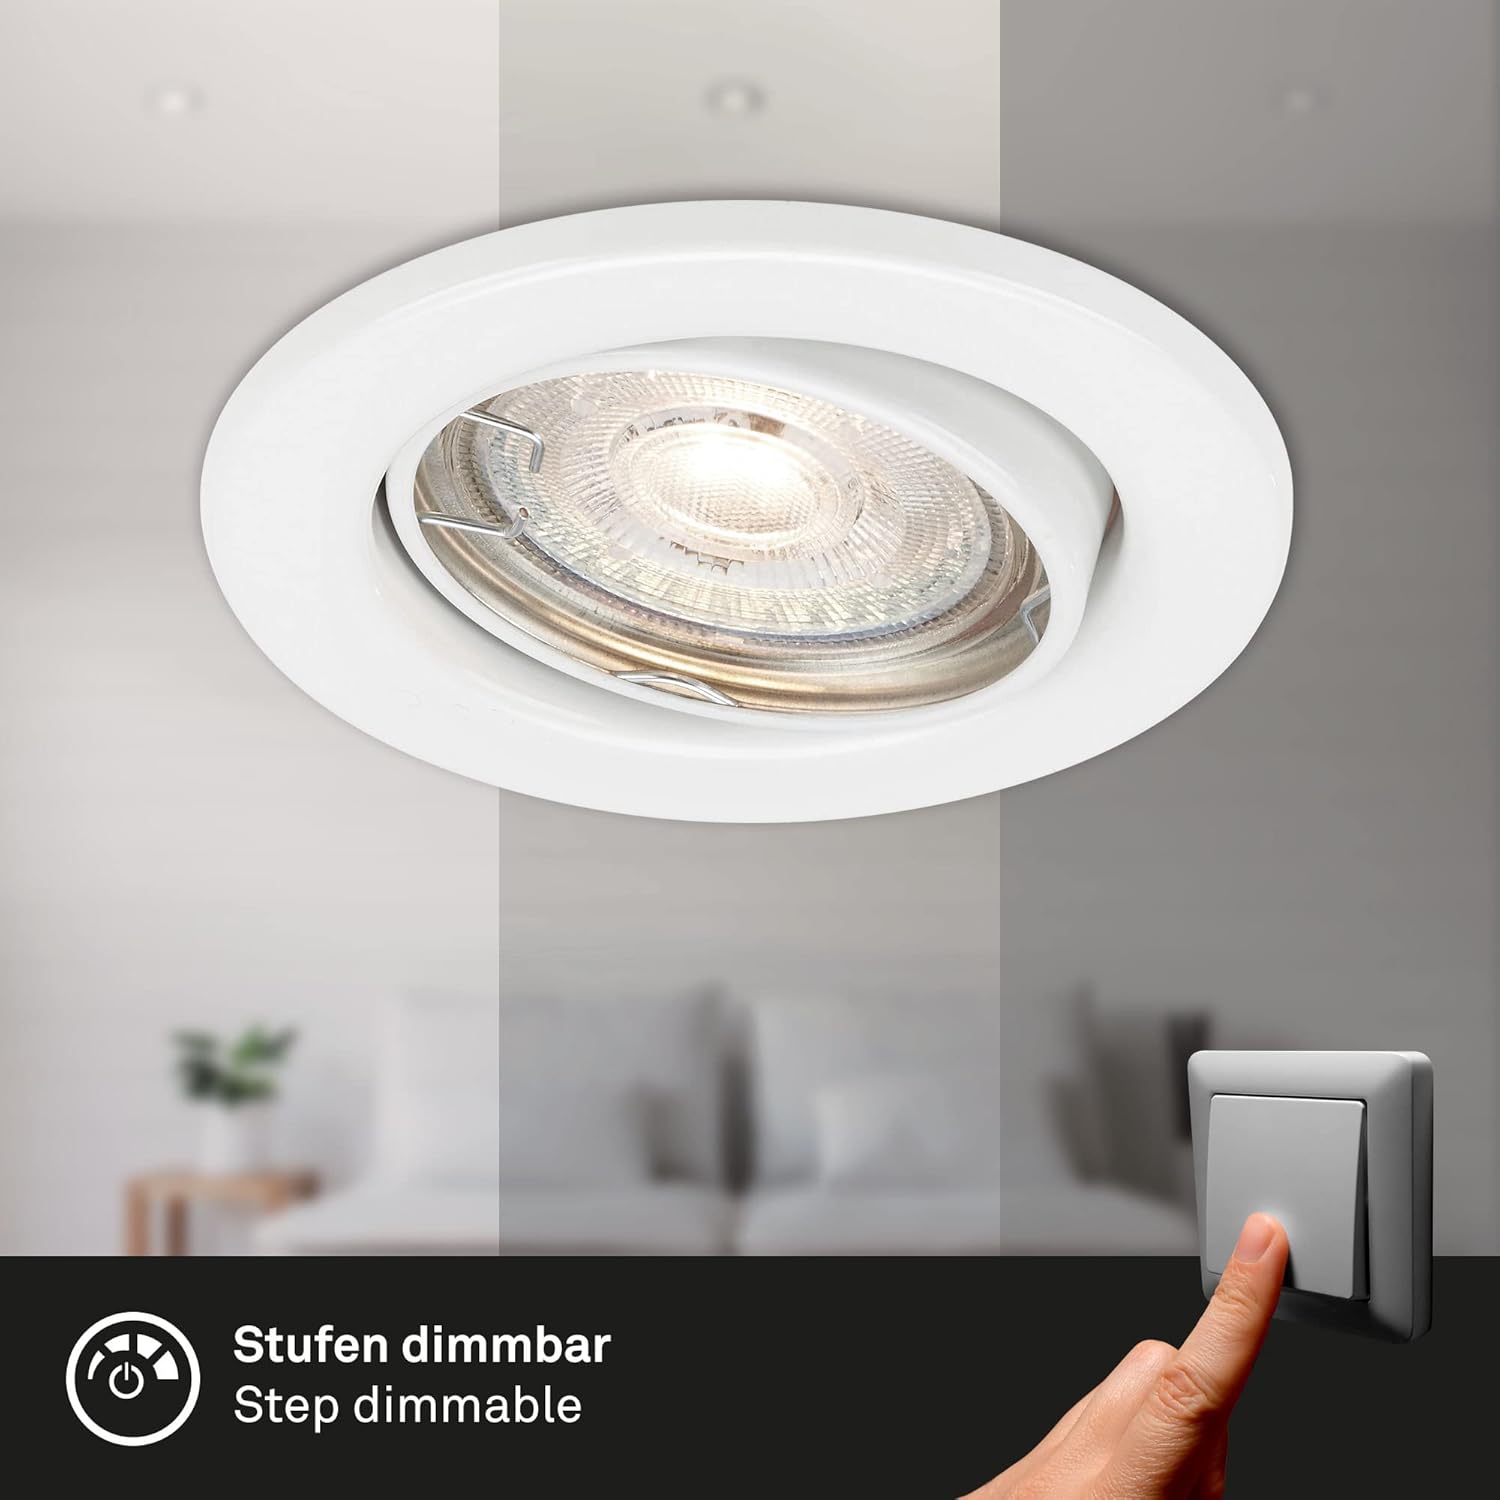
Image 5.1: Demonstration of the step-dimmable function.

Image 5.2: The adjustable light module allows for directional lighting.
6. Maintenance
- Cleaning: Disconnect power before cleaning. Wipe the fixture with a soft, dry cloth. Do not use abrasive cleaners or solvents, as these may damage the finish.
- Bulb Replacement: The included GU10 LED bulbs have an average lifespan of approximately 25,000 hours. When replacement is necessary, ensure power is disconnected. Allow the bulb to cool completely before handling. Twist the old GU10 bulb counter-clockwise to remove it, then insert a new GU10 LED bulb by twisting clockwise until secure. Use only GU10 LED bulbs of compatible wattage (max 5W) and voltage.
7. Troubleshooting
If your spotlight is not functioning correctly, refer to the following common issues and solutions:
- Light does not turn ON:
- Check if the power supply to the fixture is active at the main circuit breaker.
- Ensure the bulb is correctly inserted and not loose.
- Replace the bulb with a known working GU10 LED bulb to check if the original bulb is faulty.
- Verify electrical connections are secure.
- Light flickers:
- Ensure the bulb is fully seated in the socket.
- Check for loose wiring connections.
- If using a dimmer switch (other than the integrated step-dimming), ensure it is compatible with LED bulbs.
If the problem persists after performing these checks, consult a qualified electrician.
8. Specifications
| Feature | Specification |
|---|---|
| Model Number | 7050-036 |
| Brand | Briloner |
| Product Dimensions (D x H) | 86 x 70 mm |
| Recessed Depth | 60 mm |
| Cut-out Diameter | 68 mm |
| Material | Metal |
| Color | White |
| Voltage | 230 Volts (AC) |
| Bulb Type | GU10 LED |
| Number of Bulbs | 3 (included) |
| Wattage (per bulb) | 5 Watts |
| Luminous Efficacy (per bulb) | 460 Lumens |
| Color Temperature | 3000 Kelvin (Warm White) |
| Dimmable | Yes (3-step dimmable via switch) |
| Adjustable | Yes (Orientable module) |
| IP Rating | IP23 |
| Average Lifespan | Approx. 25,000 hours |
| Energy Efficiency Class | F |
| Weight (per item) | 300 Grams |
9. Warranty and Support
Briloner products are manufactured to high-quality standards. For warranty information or technical support, please refer to the documentation provided with your purchase or contact your retailer. Keep your proof of purchase for warranty claims.