1. Introduction
This manual provides instructions for the VBTER WBT-V8 Walkie Talkies. These portable FRS two-way radios are designed for reliable communication across various environments. Please read this manual thoroughly before operating the device to ensure proper usage and optimal performance.
2. Package Contents
The VBTER WBT-V8 Walkie Talkies package includes the following items:
- 2 x Portable Radio Units
- 2 x Antennas
- 2 x Li-ion Battery Packs (1200 mAh)
- 2 x Desk Chargers
- 2 x Spring-loaded Back Clips
- 2 x Earpieces
- 2 x USB Cables
- 1 x User's Manual
3. Product Overview
Familiarize yourself with the main components of your VBTER WBT-V8 Walkie Talkie:

Figure 3.1: VBTER WBT-V8 Walkie Talkie Components. This diagram labels the Antenna, Power Switch, Channel Switch, PTT Button, Moni Button, Lanyard Buckle, SP/MIC Jacks, Belt Clip, and USB Charging port.
- Antenna: For transmitting and receiving radio signals.
- Power Switch: Rotates to turn the device on/off and adjust volume.
- Channel Switch: Rotates to select one of the 14 available channels.
- PTT Button (Push-to-Talk): Press and hold to transmit, release to receive.
- Moni Button (Monitor): Press to temporarily disable squelch and listen for weak signals.
- Lanyard Buckle: Attachment point for a lanyard.
- SP/MIC Jacks: Ports for connecting an earpiece with microphone.
- Belt Clip: For attaching the radio to a belt or clothing.
- USB Charging Port: For direct charging via a USB cable.
4. Setup
4.1 Battery Installation

Figure 4.1: Battery Compartment Access. This image shows how to push and slide the battery cover to install or remove the battery pack.
- Ensure the walkie talkie is powered off.
- Locate the battery compartment cover on the back of the unit.
- Push the release tab (if present) and slide the cover downwards to open.
- Insert the Li-ion battery pack, ensuring the contacts align correctly.
- Slide the battery cover back into place until it clicks securely.
4.2 Charging the Battery
The VBTER WBT-V8 Walkie Talkies offer multiple charging options:
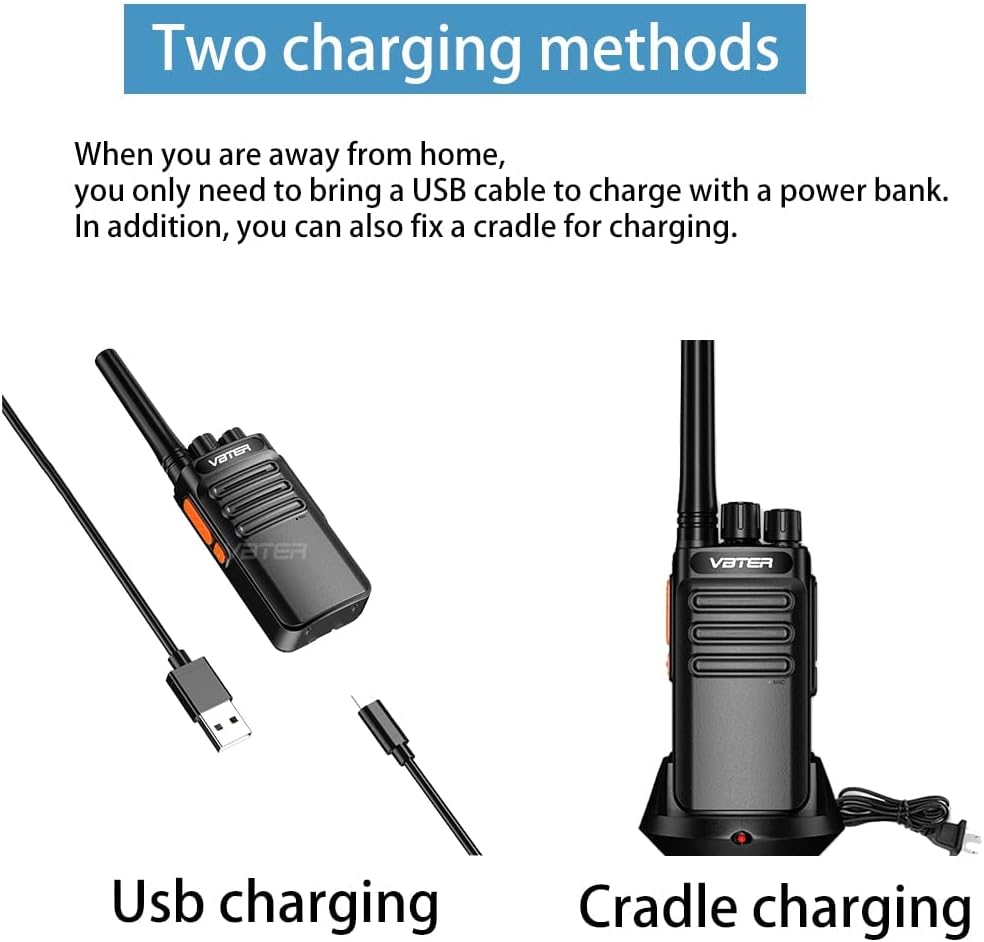
Figure 4.2: USB and Cradle Charging Methods. This image displays both USB cable charging and desk cradle charging options for the walkie talkie.

Figure 4.3: Charging with Radio in Cradle. The image shows the walkie talkie placed in its charging cradle. A red light indicates active charging, and a green light indicates a full charge.

Figure 4.4: Charging Battery Separately. This image demonstrates charging the battery pack independently in the desk cradle. A red light indicates active charging, and a green light indicates a full charge.
- Using the Desk Charger: Place the walkie talkie (with battery installed) or the battery pack alone into the charging cradle. Connect the desk charger to a power outlet. The indicator light will be red during charging and turn green when fully charged.
- Using the USB Cable: Connect the provided micro USB cable to the USB charging port on the walkie talkie and to a compatible USB power source (e.g., PC, car charger, phone charger, power bank). The charging indicator on the radio will show charging status.
A full charge typically takes approximately 3 hours. A fully charged 1200 mAh Li-ion battery provides 8-12 hours of transmission working time and up to 5-7 days of standby time.
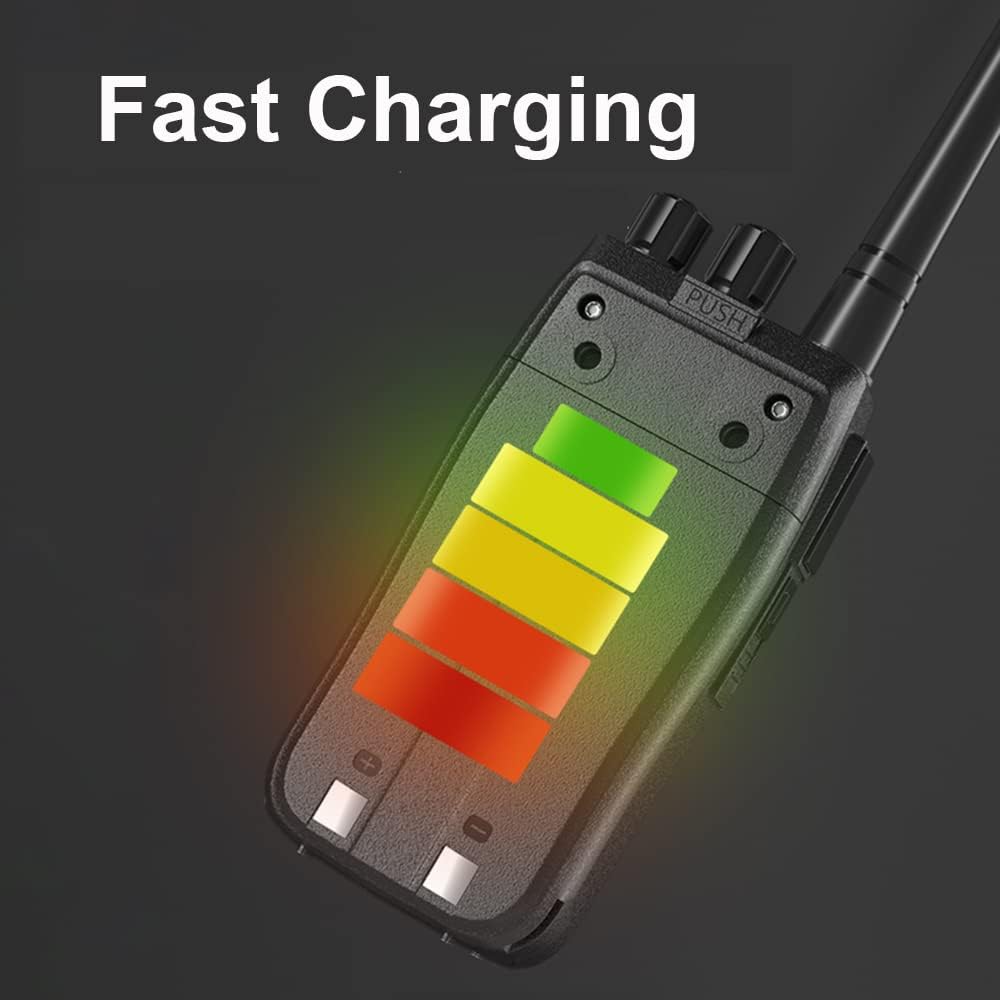
Figure 4.5: Battery Charging Indicator. This image shows a visual representation of the battery charging process.
4.3 Attaching the Belt Clip and Earpiece
- Belt Clip: Align the belt clip with the screw holes on the back of the radio and secure it with the provided screws.
- Earpiece: Insert the earpiece plug into the SP/MIC jacks on the side of the radio. Ensure it is fully inserted for proper connection.
5. Operating Instructions
5.1 Power On/Off and Volume Adjustment
- To power on the walkie talkie, rotate the Power Switch knob (top right) clockwise. You will hear a click and a voice prompt.
- Continue rotating the Power Switch knob clockwise to increase the volume. Rotate counter-clockwise to decrease the volume.
- To power off, rotate the Power Switch knob counter-clockwise until you hear a click.
5.2 Channel Selection
- Rotate the Channel Switch knob (top left) to select one of the 14 available channels.
- Ensure all walkie talkies intended for communication are set to the same channel.
5.3 Transmitting and Receiving
- To transmit, press and hold the PTT (Push-to-Talk) button on the side of the radio. Speak clearly into the microphone.
- Release the PTT button to stop transmitting and return to receive mode.
- When receiving a signal, the radio will automatically output the audio.
5.4 Monitor Function
- Press and hold the Moni (Monitor) button to temporarily disable the squelch function.
- This allows you to listen for weak signals on the current channel that might otherwise be suppressed by the squelch.
5.5 Squelch Function
The WBT-V8 features an intelligent squelch function (Level 0-9) to reduce static interference and background noise, ensuring clear voice communication.

Figure 5.1: Intelligent Squelch Feature. This image highlights the intelligent squelch capability of the walkie talkie, which helps in reducing background noise.
The squelch level is typically pre-set. For advanced adjustments, specialized programming software and a programming cable may be required, which are not included in the standard package.
6. Maintenance
6.1 Cleaning
- Wipe the radio's surface with a soft, damp cloth. Do not use harsh chemicals or abrasive cleaners.
- Ensure no moisture enters the charging port or earpiece jacks.
6.2 Battery Care
- Avoid fully discharging the battery frequently to prolong its lifespan.
- If storing the radio for an extended period, charge the battery to about 50% and remove it from the unit.
- Store batteries in a cool, dry place.
6.3 Storage
- Store the walkie talkies in a dry, dust-free environment away from direct sunlight and extreme temperatures.
- Do not store near corrosive materials.
7. Troubleshooting
| Problem | Possible Cause | Solution |
|---|---|---|
| Radio does not power on. | Battery is depleted or not installed correctly. | Charge the battery. Ensure the battery is properly installed and secured. |
| Cannot transmit or receive. | Incorrect channel selected. Out of range. Battery low. | Verify both radios are on the same channel. Move closer to the other radio. Charge the battery. |
| Poor audio quality / Static. | Weak signal. Interference. Squelch level too low. | Move to an area with fewer obstructions. Adjust squelch level if programmable. |
| Charging indicator not working. | Charger or cable faulty. Poor connection. | Check charger and cable connections. Try a different USB port or power outlet. |
| Earpiece not working. | Earpiece not fully inserted. Faulty earpiece. | Ensure earpiece plug is fully inserted into the jack. Try a different earpiece if available. |
8. Specifications
| Feature | Specification |
|---|---|
| Model Number | WBT-V8 |
| Item Weight | 5.4 ounces (approx. 153g) |
| Product Dimensions | 6.3 x 2.17 x 1.18 inches (approx. 16 x 5.5 x 3 cm) |
| Battery Type | 1200 mAh Lithium Ion (included) |
| Number of Channels | 14 |
| Frequency Range | UHF |
| Talking Range (Maximum) | 3 Miles (approx. 4.8 km) in open areas; 0.5-1.5 miles in urban areas |
| Voltage | 3.7 Volts |
| Water Resistance Level | Not Water Resistant |
| Display Type | No Display |
9. Official Product Video
Video 9.1: VBTER V8 FRS Radio Overview. This official product video demonstrates the features and usage of the VBTER WBT-V8 FRS Radio, including battery capacity, range, charging methods, and sound quality.
10. Warranty and Support
VBTER Walkie Talkies come with a 30-day money-back guarantee and a 12-month warranty. For any assistance or support, please contact our customer service team.
- Warranty Period: 12 Months
- Return Policy: 30-day money-back guarantee
- Support: 24 x 7 Email Support (Please refer to your purchase documentation for specific contact details.)