
1. Introduction
This manual provides instructions for the HCDZ Replacement Remote Control, designed for use with various Epson 3LCD 4K Large Venue Laser Projectors. This remote offers direct functionality without the need for programming.
Package Contents:
- 1 x HCDZ Replacement Remote Control
Note: Batteries and additional instructions are not included in the package.
2. Setup
2.1 Battery Installation
The remote control requires two AAA batteries (not included). Follow these steps to install them:
- Locate the battery compartment cover on the back of the remote control.
- Slide the cover downwards or press the latch and lift to open the compartment.
- Insert two AAA batteries, ensuring the positive (+) and negative (-) terminals align correctly with the markings inside the compartment.
- Replace the battery compartment cover, sliding it back into place until it clicks securely.

Image: Back of the remote control with the battery compartment open, illustrating correct AAA battery placement.
2.2 Initial Use
Once batteries are correctly installed, the remote control is ready for immediate use. No programming or pairing is required. Point the remote directly at your Epson projector's infrared (IR) sensor.
3. Operating the Remote Control
This remote control provides full functionality for your compatible Epson projector. Refer to your projector's original user manual for specific functions of each button.
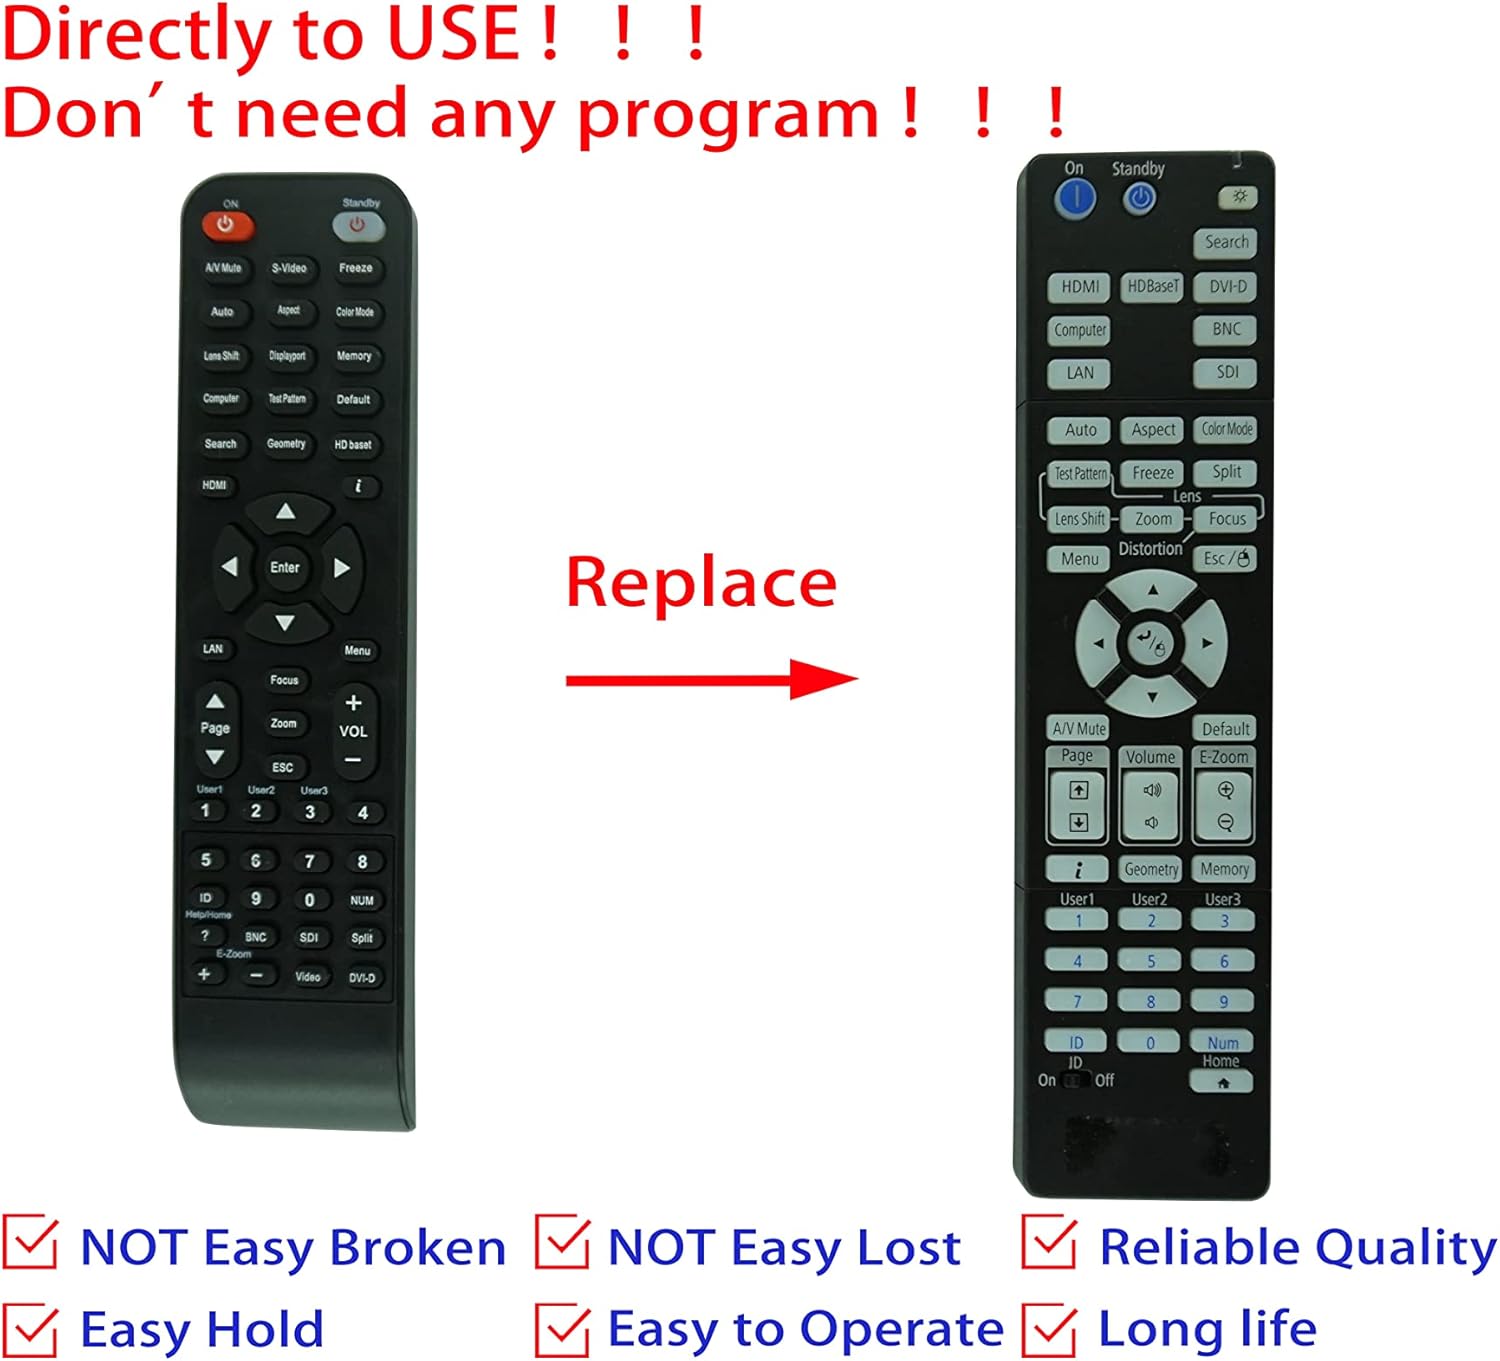
Image: Comparison of an original Epson remote (left) and the HCDZ replacement remote (right), highlighting the replacement functionality.
3.1 Key Functions (General)
- Power On/Off: Typically a dedicated button, often red or clearly marked.
- Input Selection: Buttons for HDMI, Computer, Video, etc., to switch input sources.
- Navigation: Arrow keys (Up, Down, Left, Right) and an Enter/OK button for menu navigation.
- Menu: Accesses the projector's on-screen display (OSD) menu.
- Volume: Adjusts audio output if the projector has built-in speakers or audio pass-through.
- Zoom/Focus: Adjusts the projected image size and clarity.
- Numeric Keypad: For direct input or selecting specific functions.
4. Maintenance and Care
To ensure the longevity and proper functioning of your remote control, observe the following guidelines:
- Cleaning: Wipe the remote with a soft, dry cloth. Do not use liquid cleaners or abrasive materials.
- Environment: Avoid exposing the remote to extreme temperatures, high humidity, or direct sunlight.
- Battery Replacement: Replace both batteries simultaneously. Do not mix new and old batteries, or different types of batteries.
- Storage: If the remote will not be used for an extended period, remove the batteries to prevent leakage and potential damage.
- Impact: Avoid dropping the remote or subjecting it to strong impacts.

Image: Rear view of the HCDZ remote control, illustrating its design.
5. Troubleshooting
If you experience issues with your remote control, try the following troubleshooting steps:
- Remote Not Responding:
- Ensure batteries are inserted correctly with the correct polarity.
- Replace old batteries with fresh AAA batteries.
- Check for any obstructions between the remote and the projector's IR sensor.
- Ensure you are within the effective range and pointing the remote directly at the projector.
- Intermittent Functionality:
- Strong light sources (e.g., direct sunlight, fluorescent lights) can interfere with IR signals. Try operating the remote in a different lighting condition.
- Ensure the battery contacts are clean and free of corrosion.
6. Specifications
| Feature | Detail |
|---|---|
| Brand | HCDZ |
| Compatibility | Epson EB-PU2010B, EB-PU1007B, EB-PU2010W, EB-PU1007W, EB-PU1008B, EB-PU1006W, EB-PU1008W Projectors |
| Connectivity Technology | Infrared (IR) |
| Power Source | 2 x AAA Batteries (not included) |
| Programming Required | No |
| Color | Black |
7. Warranty and Support
This HCDZ replacement remote control comes with a 90-day warranty from the date of purchase. This warranty covers manufacturing defects under normal use.
For warranty claims or technical support, please contact your retailer or the HCDZ customer service department with your purchase details.
Please retain your proof of purchase for warranty purposes.