1. Introduction
This manual provides essential information for the proper installation, operation, and maintenance of your Risco Lumin8 Bidirectional Radio External Siren. Please read this manual thoroughly before attempting to install or operate the device. Retain this manual for future reference.
The Risco Lumin8 is an advanced external siren designed to provide audible and visual alarm indications for security systems. Its bidirectional radio communication ensures reliable and secure interaction with compatible Risco control panels.
2. Product Overview
The Risco Lumin8 siren is a robust, weather-resistant unit intended for outdoor installation. It features a powerful sounder and a bright luminous indicator to effectively alert in case of an alarm event. Its bidirectional radio capability allows for real-time status reporting and remote diagnostics.
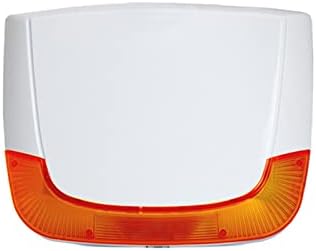
Figure 1: Front view of the Risco Lumin8 Bidirectional Radio External Siren. This image displays the siren's compact design with a white main body and a prominent orange translucent section at the bottom, which serves as the luminous indicator.
Key Features:
- Bidirectional Radio Communication: Ensures reliable and secure wireless connection with the control panel.
- High Sound Output: Produces a loud 105 dB alarm sound.
- Luminous Indicator: Provides visual alarm indication and status feedback.
- Weather-Resistant Design: Suitable for outdoor installation.
- Tamper Protection: Built-in mechanisms to detect unauthorized removal or opening.
3. Setup
3.1 Unpacking
Carefully unpack the siren and verify that all components are present. The package should contain the Risco Lumin8 siren unit and mounting hardware. If any items are missing or damaged, contact your supplier immediately.
3.2 Mounting Location
Select a suitable outdoor location for mounting the siren. Consider the following:
- Visibility: Ensure the luminous indicator is clearly visible.
- Audibility: Position the siren where its sound can be heard effectively.
- Accessibility: Avoid locations that are easily accessible to unauthorized persons.
- Environmental Factors: Protect from direct exposure to extreme weather conditions if possible, although the unit is weather-resistant.
3.3 Installation Steps
- Prepare the Mounting Surface: Ensure the surface is flat and secure.
- Mark Drilling Points: Use the siren's backplate as a template to mark the drilling points.
- Drill Holes: Drill appropriate holes for the mounting screws.
- Secure the Backplate: Attach the siren's backplate to the wall using the provided screws and wall plugs.
- Power Connection: Connect the 15 Volt (DC) power supply to the designated terminals inside the siren. Ensure correct polarity. Refer to the wiring diagram provided with your specific control panel for detailed connection instructions.
- Pairing with Control Panel: Follow the instructions in your Risco control panel's manual to pair the Lumin8 siren. This typically involves putting the control panel into pairing mode and activating the siren's pairing function.
- Attach Siren to Backplate: Secure the main siren unit to the mounted backplate. Ensure the tamper switch is properly engaged.
- Test Functionality: Perform a full system test to confirm the siren activates correctly and communicates with the control panel.
4. Operating
The Risco Lumin8 siren operates in conjunction with a compatible Risco security control panel. It does not have user-operable controls on the unit itself.
4.1 Alarm Activation
When the security system detects an intrusion or an alarm event, the control panel will send a signal to the Lumin8 siren. Upon receiving this signal, the siren will:
- Emit a loud audible alarm (105 dB).
- Activate its luminous indicator, typically flashing or illuminating steadily, depending on the alarm type and system configuration.
4.2 Bidirectional Communication
The bidirectional radio link allows the siren to send status updates back to the control panel, such as:
- Battery status (if applicable, for internal backup battery).
- Tamper status.
- Communication supervision (heartbeat signals).
This ensures the control panel is aware of the siren's operational health.
5. Maintenance
Regular maintenance helps ensure the longevity and optimal performance of your Risco Lumin8 siren.
5.1 Cleaning
Clean the exterior of the siren periodically using a soft, damp cloth. Do not use abrasive cleaners, solvents, or harsh chemicals, as these can damage the casing or luminous cover.
5.2 Battery Replacement (if applicable)
If your siren model includes an internal backup battery, it will require replacement after several years of service. The control panel will typically indicate a low battery condition. Refer to your control panel's manual and the siren's specific installation guide for instructions on safe battery replacement. Always disconnect main power before servicing.
5.3 Regular Checks
- Functionality Test: Periodically test the siren's operation by triggering an alarm from your control panel.
- Physical Inspection: Visually inspect the siren for any signs of damage, loose mounting, or obstruction.
6. Troubleshooting
This section provides solutions to common issues you might encounter with your Risco Lumin8 siren.
6.1 Siren Does Not Activate
- Check Power: Ensure the siren is receiving 15V DC power. Verify connections.
- Check Pairing: Confirm the siren is properly paired with the control panel. Re-pair if necessary.
- Communication Range: Ensure the siren is within the effective radio communication range of the control panel.
- Control Panel Status: Verify that the control panel is armed and functioning correctly.
6.2 Luminous Indicator Not Working
- Check Power: Insufficient power can affect light output.
- System Configuration: Ensure the control panel is configured to activate the luminous indicator for the specific alarm type.
6.3 Tamper Alarm
- Secure Mounting: Ensure the siren is securely mounted and the tamper switch is fully depressed.
- Casing Closure: Verify that the siren's casing is properly closed and secured.
If problems persist after attempting these solutions, contact a qualified technician or Risco technical support.
7. Specifications
| Attribute | Value |
|---|---|
| Model Number | RWS401A8000B |
| Dimensions (L x W x H) | 27.3 x 26 x 6.4 cm |
| Voltage | 15 Volt (DC) |
| Sound Level | 105 dB |
| ASIN | B09JKX8LFR |
| UPC | 879196006840 |
8. Warranty and Support
8.1 Warranty Information
Risco products are manufactured to the highest quality standards. This product is covered by a limited warranty against defects in materials and workmanship. The specific terms and duration of the warranty are typically provided with the product packaging or available on the official Risco website. Please retain your proof of purchase for warranty claims.
8.2 Technical Support
For technical assistance, troubleshooting beyond this manual, or warranty inquiries, please contact your authorized Risco dealer or visit the official Risco support website. Provide your product model number (RWS401A8000B) and a detailed description of the issue when seeking support.


