
1. Introduction
Thank you for choosing the GRIFEMA GC3003 Espresso and Cappuccino Machine. This manual provides essential information for the safe operation, installation, use, and maintenance of your new coffee machine. Please read these instructions thoroughly before first use and retain them for future reference.
2. Safety Instructions
- Always connect the appliance to a grounded power outlet.
- Do not immerse the appliance, power cord, or plug in water or other liquids.
- Keep the appliance out of reach of children.
- Unplug the machine from the power outlet before cleaning and when not in use.
- Do not operate the machine if the power cord or plug is damaged.
- Use only cold, fresh water in the water tank.
- Exercise caution when operating the steam wand, as hot steam can cause burns.
- Never remove the portafilter during the brewing process.
3. Product Overview
Familiarize yourself with the components of your GRIFEMA GC3003 machine:

Figure 3.1: Front view of the GRIFEMA GC3003 Espresso and Cappuccino Machine, showcasing its stainless steel finish, control panel, pressure gauge, portafilter, and steam wand.

Figure 3.2: Side-by-side comparison illustrating the compact dimensions of the GRIFEMA GC3003 Espresso Machine, measuring 145mm in width and 300mm in height.

Figure 3.3: Visual representation of key features including 1350W high power, 2-in-1 filter holder, easy cleaning, steam wand, and removable water tank.

Figure 3.4: Display of various coffee types that can be made (Cappuccino, Latte, Mocha) and included accessories such as the cup warmer grill, 2-in-1 portafilter, detachable drip tray, and non-slip suckers.

Figure 3.5: Close-up view of the 1.4L detachable water tank, highlighting its easy-view design and simple removal mechanism for refilling and cleaning.

Figure 3.6: The GRIFEMA GC3003 machine displayed with its portafilter and two different filter baskets, ready for coffee preparation.
4. Setup
4.1 Unpacking
Carefully remove all packaging materials. Check that all components are present and undamaged. Dispose of packaging responsibly.
4.2 First Use & Cleaning
- Fill the water tank with fresh, cold water up to the MAX level.
- Place a cup under the coffee outlet and another under the steam wand.
- Turn on the machine. Allow it to heat up until the indicator light stabilizes.
- Run a cycle of hot water through the coffee outlet without coffee.
- Activate the steam function to release steam for a few seconds.
- Repeat steps 4 and 5 once more. This primes the system and cleans internal components.
5. Operating Instructions
5.1 Making Espresso
- Ensure the water tank is filled with fresh water.
- Select the desired filter basket (single or double shot) and place it into the portafilter.
- Add finely ground coffee to the filter basket. Tamp the coffee evenly with a tamper.
- Wipe any excess coffee from the rim of the portafilter.
- Insert the portafilter into the group head and twist firmly to lock it into place.
- Place one or two pre-warmed cups under the portafilter spouts.
- Press the 1-cup or 2-cup button to start brewing. The machine will automatically stop when the preset volume is reached.
- Once brewing is complete, carefully remove the portafilter and discard the used coffee grounds.
5.2 Frothing Milk (Cappuccino/Latte)
- Fill a stainless steel frothing pitcher with cold milk (dairy or non-dairy) to just below the spout.
- Turn the control knob to the steam function. Wait for the steam indicator light to illuminate steadily, indicating the machine has reached steaming temperature.
- Purge the steam wand briefly into the drip tray to release any condensed water.
- Submerge the tip of the steam wand just below the surface of the milk.
- Open the steam valve by turning the control knob.
- Angle the pitcher to create a swirling motion in the milk. For froth, keep the tip near the surface; for hot milk, submerge it deeper.
- Continue until the milk reaches the desired temperature and texture. The milk should be hot but not boiling.
- Close the steam valve and remove the pitcher. Immediately wipe the steam wand with a damp cloth to prevent milk residue from drying.
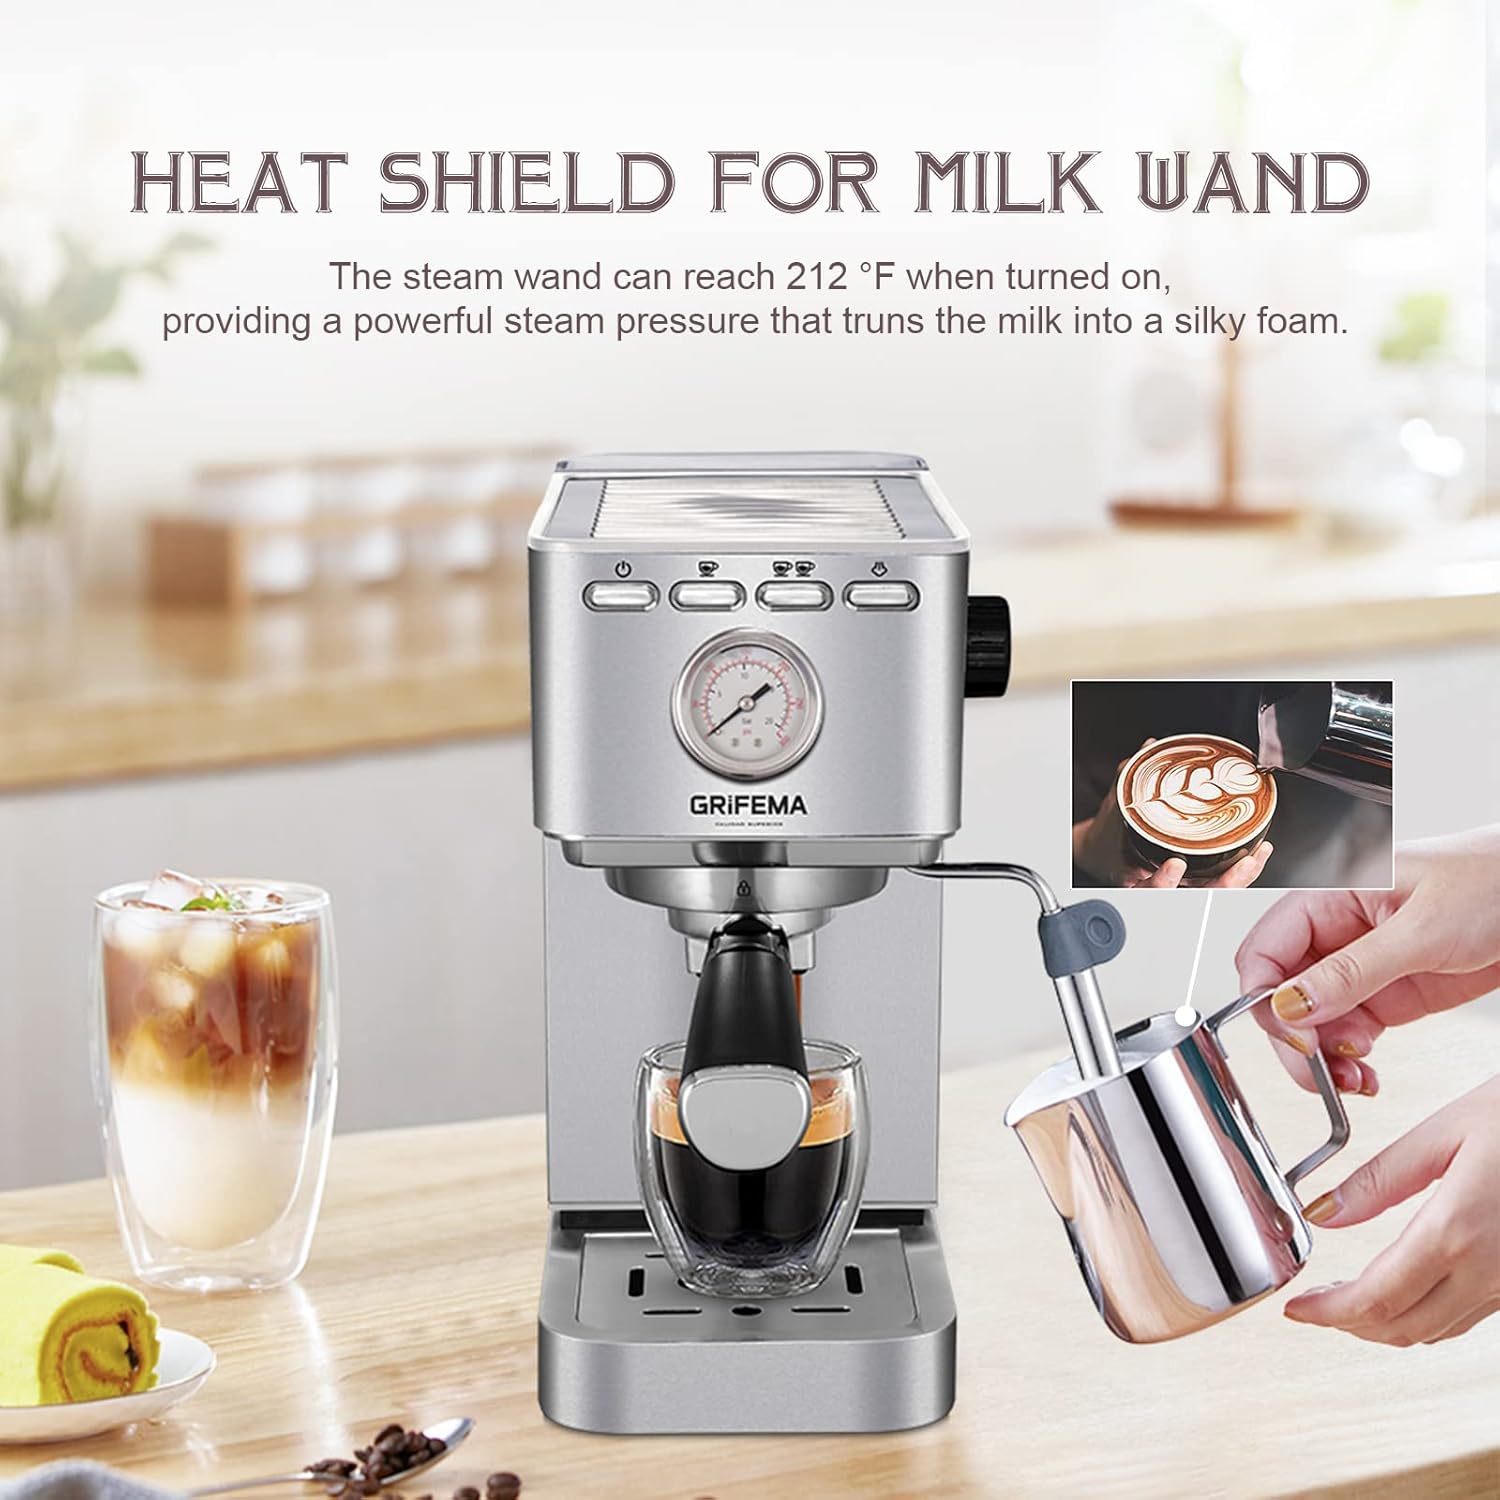
Figure 5.1: The GRIFEMA GC3003 steam wand being used to froth milk in a pitcher, demonstrating the process for creating cappuccino or latte foam.
6. Maintenance and Cleaning
6.1 Daily Cleaning
- Portafilter and Filter Baskets: After each use, remove and rinse the portafilter and filter basket under running water.
- Steam Wand: Immediately after frothing milk, wipe the steam wand with a damp cloth. Purge steam briefly to clear any internal milk residue.
- Drip Tray: Empty and rinse the drip tray and grid daily.
- Water Tank: Empty and rinse the water tank daily. Refill with fresh water for each use.
- Exterior: Wipe the exterior of the machine with a soft, damp cloth. Do not use abrasive cleaners.
6.2 Descaling
Descaling is essential to remove mineral buildup and maintain optimal performance. The frequency depends on water hardness and usage, but generally every 2-3 months. Use a commercial descaling solution specifically designed for coffee machines and follow the product's instructions carefully.
7. Troubleshooting
| Problem | Possible Cause | Solution |
|---|---|---|
| No coffee dispenses | No water in tank; clogged filter; machine not heated | Fill water tank; clean filter; allow machine to heat up |
| Coffee brews too slowly | Coffee ground too fine; too much coffee; clogged filter | Use coarser grind; reduce coffee amount; clean filter |
| Coffee brews too quickly | Coffee ground too coarse; too little coffee; insufficient tamping | Use finer grind; increase coffee amount; tamp more firmly |
| Steam wand not producing steam | Clogged wand; machine not at steam temperature | Clean steam wand; wait for steam indicator light |
| Water leaking from machine | Water tank not seated correctly; drip tray full | Reseat water tank; empty drip tray |
8. Specifications
- Model: GRIFEMA GC3003
- Power: 1350 Watts
- Voltage: 240 Volts
- Pump Pressure: 20 Bars
- Water Tank Capacity: 1.4 Litres
- Dimensions (L x W x H): 31 x 14.5 x 30 cm
- Weight: 4.42 Kilograms
- Material: Stainless Steel
- Special Feature: Cup Warmer
9. Warranty and Support
For warranty information and customer support, please refer to the documentation provided at the time of purchase or contact GRIFEMA customer service through their official website or your retailer. Keep your proof of purchase for warranty claims.