
Safeguard Supply ERA-DOOR ALARM
Safeguard Supply ERA-DOOR ALARM Wireless Doorbell System Instruction Manual
Model: ERA-DOOR ALARM
Introduction
This manual provides comprehensive instructions for the installation, operation, and maintenance of your Safeguard Supply ERA-DOOR ALARM Wireless Doorbell System. This system is designed to provide reliable entry alerts for both residential and commercial applications, featuring a long-range wireless connection, a loud siren, and a flashing strobe light.
Product Components
The ERA-DOOR ALARM system typically includes the following components:
- ERA Receiver Unit: The main unit that produces the chime/siren and activates the strobe.
- Wireless Push Button Transmitter: For manual activation of the chime/alarm.
- Magnetic Door Contact Sensor: Detects when a door or window is opened.
- Flashing Strobe/Siren Unit: Provides visual and audible alerts.
- Mounting hardware and batteries (CR2 battery for transmitters, power adapter for receiver).

Image: Safeguard Supply ERA Receiver Unit. This is the central unit that receives signals from transmitters and produces alerts.
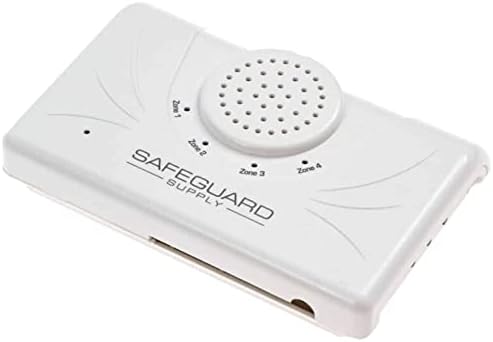
Image: Safeguard Supply Wireless Push Button and Magnetic Contact Sensor. These devices transmit signals to the receiver when activated.
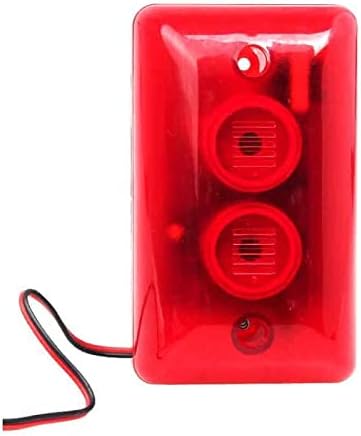
Image: Safeguard Supply Flashing Strobe and Siren Unit. This accessory provides additional visual and audible alert capabilities.
Setup and Installation
1. Receiver Placement and Power
Place the ERA Receiver Unit in a central location within your desired alert area. Ensure it is within range of all planned transmitters. Plug the receiver into a standard electrical outlet using the provided power adapter.
2. Transmitter Battery Installation
For the wireless push button and magnetic contact sensor, install the included CR2 battery. Open the battery compartment, insert the battery with the correct polarity, and close the compartment securely.
3. Mounting the Push Button
Mount the wireless push button near the entry point where it will be used. Use the provided screws or adhesive tape. Ensure the mounting surface is clean and dry for adhesive application.

Image: A finger pressing the wireless push button. This illustrates the typical use of the push button transmitter.
4. Mounting the Magnetic Door Contact Sensor
Install the magnetic contact sensor on a door or window frame. The main sensor unit should be mounted on the stationary frame, and the smaller magnet unit on the moving part (door/window). Ensure the two parts are aligned and within 1/2 inch of each other when the door/window is closed. Use screws or adhesive for secure mounting.

Image: A woman standing in a doorway, with a small white door contact sensor visible on the door frame. This shows a typical installation of the magnetic door contact sensor.
5. Pairing Transmitters with the Receiver
The system allows pairing up to 12 Safeguard Supply ERA transmitters. Refer to the receiver's specific instructions for pairing mode. Typically, this involves pressing a pairing button on the receiver, then activating the transmitter (pressing the push button or opening the door with the contact sensor) to link them.
Operating Instructions
1. Basic Operation
Once transmitters are paired, the receiver will emit an alert (chime or siren) and activate the flashing strobe when a paired transmitter is triggered. For example, pressing the wireless push button or opening a door with a magnetic contact sensor will activate the alert.

Image: A person in a balaclava opening a door. This illustrates a scenario where the door contact sensor would trigger an alarm.
2. Adjusting Settings
- Volume Control: The receiver unit typically has buttons or a dial to adjust the alert volume.
- Chime/Siren Selection: Some models allow selection between different chime melodies or a siren sound. Consult your receiver's specific controls for this feature.
- Strobe Activation: The flashing strobe unit activates simultaneously with the audible alert.
Maintenance
1. Battery Replacement
Transmitters (push button, door contact sensor) are powered by CR2 batteries. Replace batteries when the signal range decreases or the unit stops functioning. The average battery life is approximately 2 years. To replace, open the battery compartment, remove the old battery, insert a new CR2 battery with correct polarity, and close the compartment.
2. Cleaning
Wipe the units with a soft, dry cloth. Do not use abrasive cleaners or immerse units in water.
Troubleshooting
| Problem | Possible Cause | Solution |
|---|---|---|
| Receiver does not alert when transmitter is triggered. |
|
|
| Alert is too quiet or too loud. | Volume setting is incorrect. | Adjust the volume control on the receiver unit. |
| False alarms from door contact sensor. | Magnet and sensor misaligned or too far apart. | Re-align and re-mount the sensor and magnet to ensure they are within 1/2 inch when closed. |
Specifications
- Model: ERA-DOOR ALARM
- Wireless Range: Up to 3/4 mile (approximately 4000 feet) in open air. Actual range may vary based on environmental factors.
- Sound Level: Up to 120 Decibels (Siren)
- Power Source (Receiver): AC Power Adapter (included)
- Power Source (Transmitters): 1 x CR2 Battery (included)
- Average Battery Life (Transmitters): 2 years
- Material: ABS
- Installation Method: Multiple (Wall Mount)
- Special Features: Wireless, Flashing Strobe, Multi-Function
- Item Weight: 1.74 pounds (total package)
- Package Dimensions: 11.46 x 8.94 x 3.46 inches
Support
Safeguard Supply is a Veteran Owned Small Business committed to providing excellent customer service and support. If you encounter any issues or have questions regarding your ERA-DOOR ALARM system, please contact our support team for assistance. Our products are designed for self-installation, and we are here to help with any setup or operational queries.
For further assistance, please visit the Safeguard Supply Store on Amazon.
Ask a question about this manual
Ask about setup, troubleshooting, compatibility, parts, safety, or missing instructions. Manuals+ will review the question and use this page’s manual context to help answer it.