Introduction
Thank you for choosing the AUNLPB 60-Inch Wooden Ceiling Fan. This modern ceiling fan is designed for both indoor and sheltered outdoor use, featuring a quiet DC motor, reversible airflow for all seasons, and convenient remote control operation. This manual provides detailed instructions for installation, operation, and maintenance to ensure safe and efficient use of your new ceiling fan.
Safety Information
Please read all instructions carefully before beginning installation. Failure to do so could result in electric shock, fire, or personal injury.
- Ensure the power is turned off at the circuit breaker before installation or maintenance.
- All wiring must be in accordance with national and local electrical codes. If you are unfamiliar with wiring, consult a qualified electrician.
- The mounting structure must be capable of supporting a minimum of 35 lbs (15.9 kg).
- Do not operate the fan with damaged blades. Replace any damaged blades immediately.
- Keep hands, hair, and clothing away from the fan blades when the fan is in operation.
- This fan is suitable for damp locations but should not be directly exposed to water.
Package Contents
Verify that all components listed below are included in your package:
- Ceiling Fan Motor Assembly (1)
- Solid Wood Blades (3)
- Remote Control (1)
- Downrods: 8-inch, 12-inch, and 24-inch (1 each)
- Mounting Bracket and Hardware Kit
- Instruction Manual (this document)
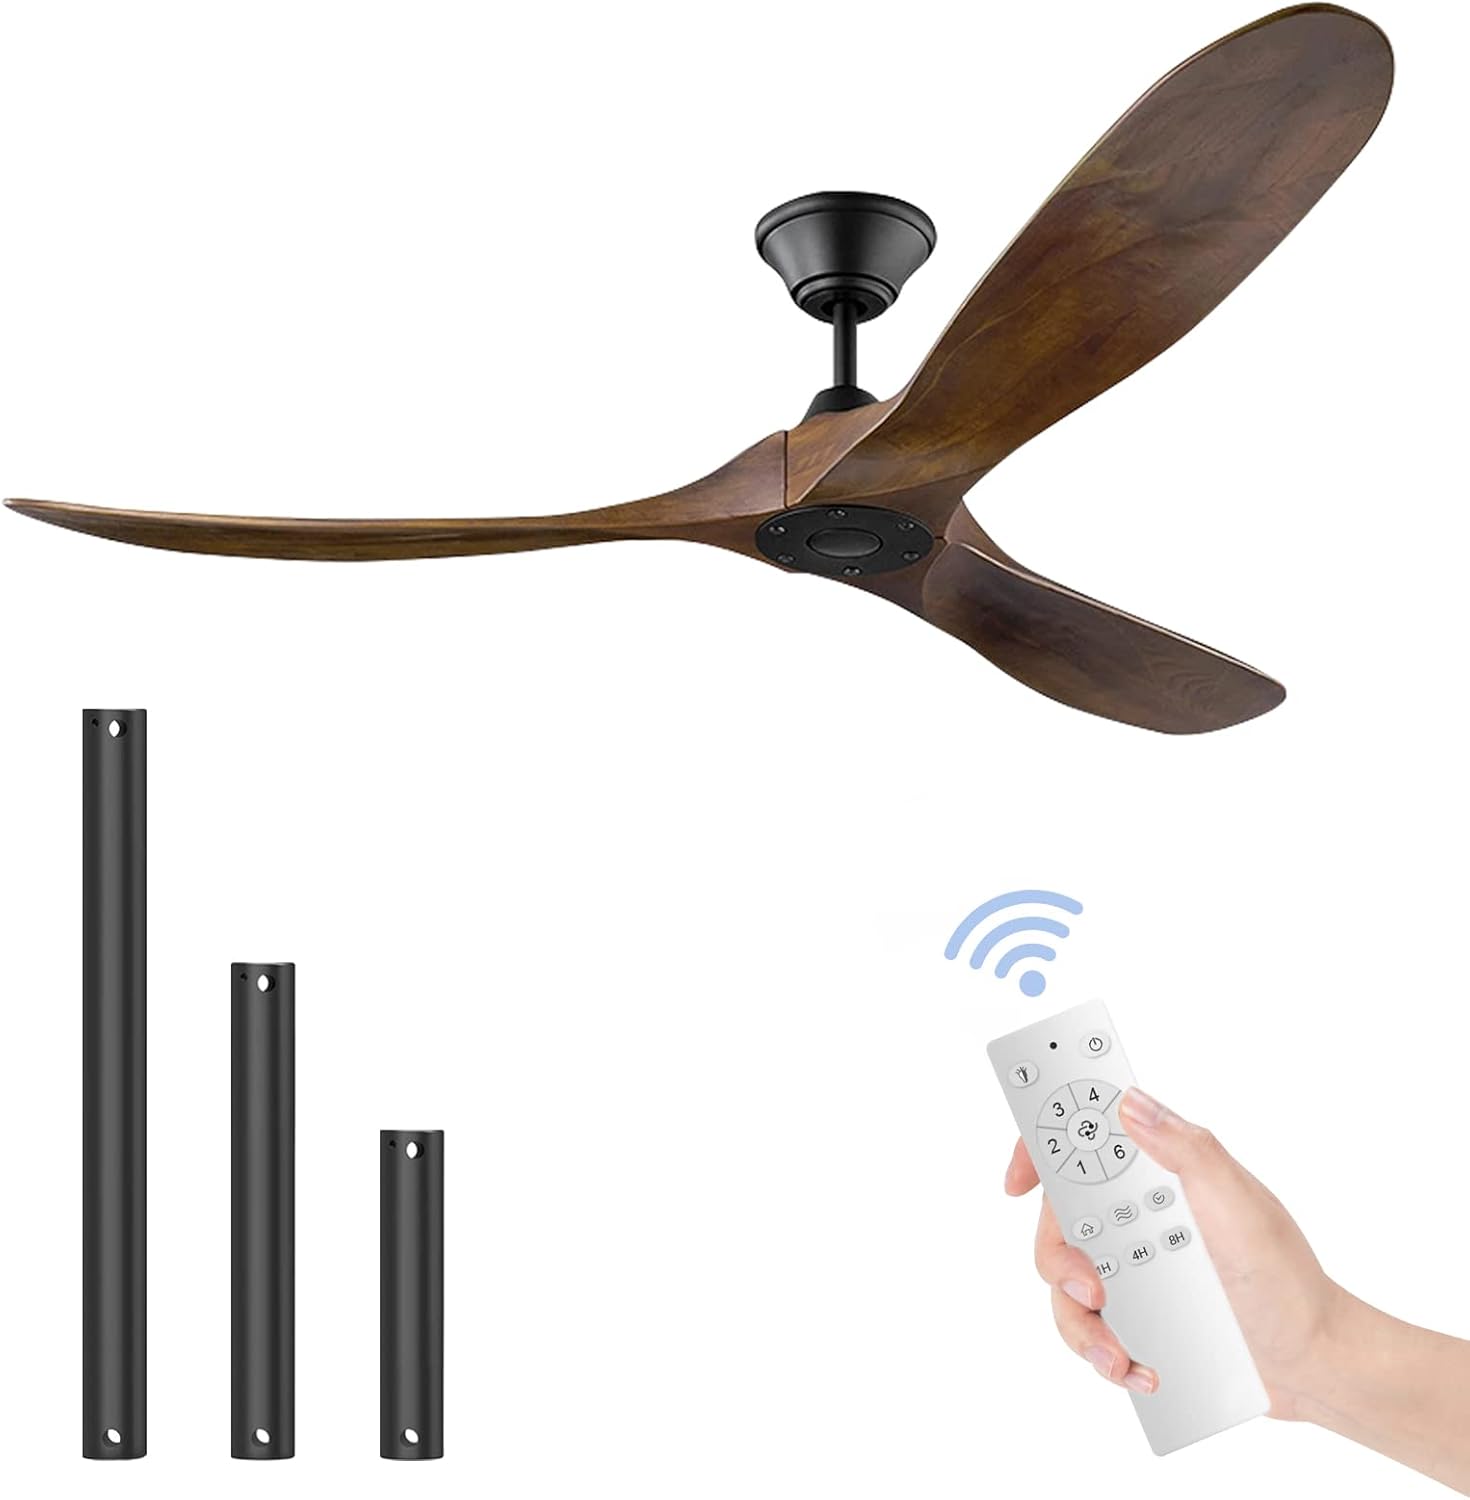
Image: Main components of the AUNLPB 60-inch ceiling fan, including the fan body, three wooden blades, the remote control, and three different length downrods (5, 10, and 24 inches).
Product Overview
The AUNLPB 60-inch ceiling fan features a sleek design with three solid wood blades and a powerful, energy-efficient DC motor. It is designed for quiet operation and includes a multi-function remote control for ease of use.

Image: Detailed diagram illustrating the 60-inch diameter of the fan and the two standard downrod lengths (12.5cm/4.92in and 25cm/9.84in) that can be used, along with icons representing quality materials like copper wiring and bearings.

Image: Visual representation of key fan features including 6 speed settings, reversible DC motor, 3 timing levels, super quiet operation, energy saving capabilities, and the inclusion of 3 downrods.
Installation Guide
This section provides step-by-step instructions for installing your ceiling fan. It is recommended to have two people for installation.
1. Prepare for Installation
- Turn off power at the main circuit breaker.
- Ensure the mounting location is structurally sound and can support the fan's weight.
- Unpack all components and lay them out to ensure nothing is missing.
2. Mount the Bracket
Attach the mounting bracket to the ceiling junction box using the provided screws and washers. Ensure it is securely fastened.
3. Assemble the Downrod and Fan Motor
Choose the appropriate downrod length (8-inch, 12-inch, or 24-inch) for your ceiling height. Insert the downrod through the canopy and connect it to the fan motor assembly. Secure with the provided pin and screw.

Image: Illustration of the three included downrod lengths (24 inches, 10 inches, and 5 inches) to accommodate various ceiling heights and installation preferences.
4. Hang the Fan and Make Electrical Connections
Carefully lift the fan assembly and hang it on the mounting bracket. Connect the electrical wires according to the wiring diagram (typically black to black, white to white, and ground to ground). Ensure all connections are secure.
5. Attach the Blades
Securely attach the three solid wood blades to the fan motor hub using the provided screws. Ensure they are tightened evenly.
6. Secure the Canopy
Slide the canopy up to the ceiling and secure it to the mounting bracket with the screws. Ensure all wires are tucked neatly inside.
7. Sloped Ceiling Installation
This fan supports installation on sloped ceilings up to a maximum angle of 30 degrees. Ensure the mounting bracket is correctly installed for sloped surfaces.

Image: Diagram illustrating the fan's compatibility with sloped ceilings, indicating a maximum angle of 30 degrees for safe and proper installation.
Operating Instructions
Your AUNLPB ceiling fan comes with a convenient remote control for easy operation.
Remote Control Functions:
- Power On/Off: Turns the fan on or off.
- Fan Speed Control: Adjusts fan speed from 1 (lowest) to 6 (highest).
- Timer Settings: Set the fan to turn off automatically after 1, 2, or 4 hours.
- Forward/Reverse Rotation (R/F): Changes the direction of blade rotation.

Image: A child sleeping peacefully, illustrating the fan's quiet operation, alongside a remote control and a diagram showing the 1-hour, 4-hour, and 8-hour timer settings, and the R/F (Reverse/Forward) function.
Reversible Airflow Function:
The reversible function allows you to optimize airflow for different seasons:
- Summer Mode (Downward Airflow): Blades rotate counter-clockwise, creating a downward breeze that provides a cooling effect.
- Winter Mode (Upward Airflow): Blades rotate clockwise, drawing cool air up and pushing warm air down from the ceiling, helping to redistribute heat and reduce energy costs.

Image: A visual comparison of the fan's forward and reverse rotation functions. The left side shows "Summer positive turn" with blue arrows indicating downward airflow for cooling, while the right side shows "Winter reversal" with orange arrows indicating upward airflow to circulate warm air.
Maintenance
Regular maintenance will help prolong the life and performance of your ceiling fan.
- Cleaning: To clean the fan, wipe with a soft, damp cloth. Do not use abrasive cleaners or solvents. Ensure power is off before cleaning.
- Blade Care: Periodically check the blades for dust buildup. Clean them gently to maintain balance and efficiency.
- Tightness: Check all screws and connections periodically to ensure they are secure.
Troubleshooting
If you experience issues with your fan, refer to the following common problems and solutions:
| Problem | Possible Cause | Solution |
|---|---|---|
| Fan does not start | No power to the fan; Loose wire connections; Remote control battery dead. | Check circuit breaker; Verify all wire connections are secure; Replace remote control battery. |
| Fan wobbles | Loose blade screws; Unbalanced blades; Loose mounting bracket. | Tighten all blade screws; Check blade balance (a balancing kit may be needed); Ensure mounting bracket is securely fastened. |
| Remote control not working | Battery dead; Remote not paired with receiver. | Replace battery; Refer to remote pairing instructions (usually involves pressing a button on the remote within a few seconds of turning on power to the fan). |
| Fan is noisy | Loose screws; Motor hum; Blades hitting an obstruction. | Check and tighten all screws; Ensure fan is installed correctly and not touching anything; DC motors are generally quiet, but a slight hum is normal. |
Specifications
- Model Name: wood ceiling fan
- ASIN: B09J8YPB1S
- Brand: AUNLPB
- Product Dimensions: 60"D x 60"W x 19.99"H
- Blade Count: 3 Solid Wood Blades
- Motor Type: DC Motor
- Voltage: 120 Volts (DC)
- Wattage: 50 watts
- Noise Level: 30 dB
- Control Method: Remote Control
- Special Features: Adjustable Height (with included downrods), Remote Controlled, Timer (1/2/4 hr), Reversible Airflow
- Indoor/Outdoor Usage: Indoor, Outdoor (Damp Rated for sheltered outdoor environments)
- Item Weight: 11.02 pounds (5000 Grams)
- Compatible Ceiling Angle: Up to 30 degrees (sloped ceiling)
Warranty and Support
All AUNLPB fans are covered with a 12-month worry-free warranty from the date of purchase. This warranty covers defects in materials and workmanship under normal use.
For technical support, warranty claims, or general inquiries, please contact AUNLPB customer service through the retailer's platform or visit the official AUNLPB store page on Amazon:
Visit the AUNLPB Store on Amazon
Please have your model number (ceiling fan no light) and purchase date ready when contacting support.


