1. Introduction
This manual provides comprehensive instructions for the installation and use of the RED WOLF Radio Wire Harness, Model XC22-2150. This harness is designed to simplify the installation of an aftermarket stereo system in compatible Hyundai and Kia vehicles by providing a direct connection without the need to cut or modify the vehicle's original wiring.
The RED WOLF wire harness ensures a secure and reliable electrical connection, maintaining the integrity of your vehicle's factory wiring system.

Image 1.1: The RED WOLF Radio Wire Harness (Model XC22-2150) featuring two white connectors with multiple colored wires for various electrical functions.
2. Vehicle Compatibility
The RED WOLF Radio Wire Harness (Model XC22-2150) is compatible with the following vehicle models and years:
Compatible with Hyundai:
- 2013-2017 Elantra
- 2010-2015 Tucson
- 2012-2014 Sonata
- 2012-2015 Accent
- 2013-2017 Santa Fe/Sport
- 2012-2014 Veloster
Compatible with Kia:
- 2010-2015 Sportage
- 2011-2016 Optima
- 2014-2018 Forte
- 2012-2016 Soul
- 2014-2018 Sorento

Image 2.1: Visual representation of compatible Hyundai and Kia vehicle models and their respective year ranges.
3. Product Features and Components
The RED WOLF Radio Wire Harness is engineered for ease of use and reliable performance. Key features include:
- No OEM Wire Cutting: Designed to plug directly into the factory harness, preserving original vehicle wiring.
- Perfect Match: Connectors are designed to precisely fit compatible vehicle and aftermarket stereo interfaces.
- Excellent Conductivity: Constructed with professional copper core wiring for optimal signal transfer.
- Durable Construction: Features a flexible and wear-resistant PVC shell for long-lasting use.

Image 3.1: Diagram illustrating the functions of the wire harness, including connections for 4 speakers, antenna control, 12V accessory power, ground, and steering wheel control.

Image 3.2: Close-up views highlighting the good conductivity of the copper core wires and the flexible, wear-resistant PVC shell of the harness.
4. Setup and Installation
Before beginning installation, ensure your vehicle's battery is disconnected to prevent electrical shorts or damage. Professional installation is recommended if you are unfamiliar with car audio wiring.
Required Tools (Not Included):
- Wire strippers/crimpers
- Electrical tape or heat shrink tubing
- Screwdriver set (for dash disassembly)
Installation Steps:
- Disconnect Battery: Locate your vehicle's battery and disconnect the negative terminal to ensure safety during the installation process.
- Remove Factory Stereo: Carefully remove the vehicle's factory stereo unit from the dashboard. This typically involves removing trim panels and screws. Refer to your vehicle's service manual for specific instructions.
- Identify Factory Harness: Locate the factory wiring harness that was connected to your original stereo.
- Prepare Aftermarket Stereo Wiring: Refer to your aftermarket stereo's instruction manual to identify its corresponding wiring functions (e.g., power, ground, speaker outputs, accessory).
- Connect RED WOLF Harness to Aftermarket Stereo: Match the colored wires of the RED WOLF harness to the corresponding wires of your aftermarket stereo's harness. Use appropriate wire connectors (crimp caps, solder, or heat shrink connectors) to create secure and insulated connections. Ensure each wire function (e.g., constant 12V, accessory 12V, ground, speaker wires, antenna remote) is correctly matched.
- Connect RED WOLF Harness to Vehicle: Plug the RED WOLF harness directly into the vehicle's factory wiring harness. The connectors are designed for a precise fit.
- Test Connections: Before fully reassembling the dashboard, reconnect the vehicle's battery. Turn on the ignition and test the aftermarket stereo's functionality (power, sound from all speakers, radio reception, etc.).
- Secure and Reassemble: Once all functions are verified, carefully route and secure all wiring to prevent pinching or interference. Reinstall the aftermarket stereo and all dashboard trim panels.
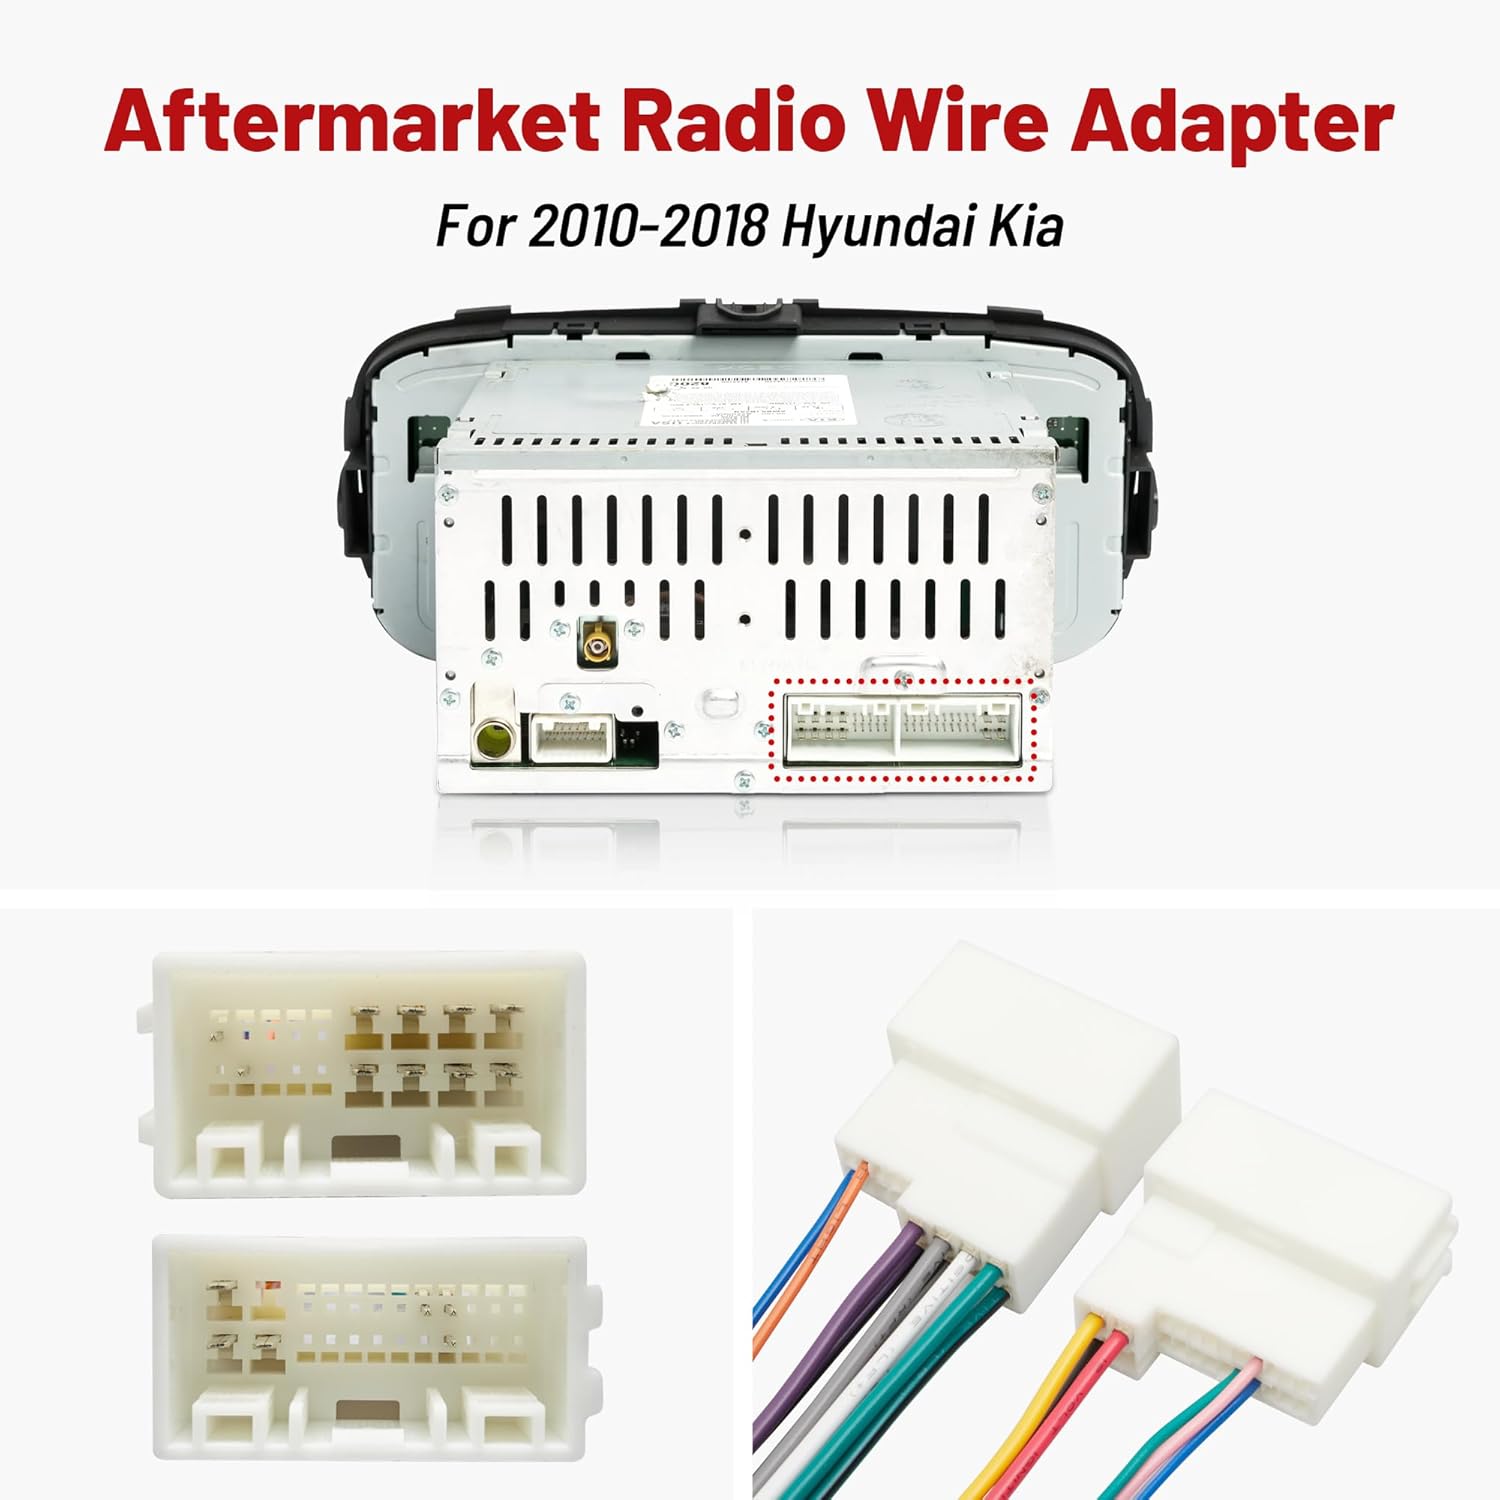
Image 4.1: Illustration showing how the RED WOLF wire harness connects to the back of an aftermarket radio, highlighting the specific connector port.

Image 4.2: Depiction of the wire harness in a car interior, demonstrating its purpose for upgrading a factory stereo or connecting an aftermarket receiver.
5. Operating Instructions
Once the RED WOLF Radio Wire Harness is correctly installed, the operation of your aftermarket stereo will follow the instructions provided by the stereo manufacturer. The harness facilitates the electrical connection, allowing the stereo to receive power, ground, and audio signals from the vehicle, as well as send signals for antenna control or steering wheel controls if applicable and wired correctly.
Refer to your aftermarket stereo's user manual for detailed operating instructions, feature usage, and settings adjustments.
6. Maintenance
The RED WOLF Radio Wire Harness is a passive component and requires no routine maintenance after proper installation. It is designed for long-term reliability within your vehicle's electrical system.
If you experience any issues with your aftermarket stereo after installation, it is advisable to check the harness connections for security and proper insulation as part of your troubleshooting process.
7. Troubleshooting
If you encounter problems after installing the RED WOLF Radio Wire Harness, consider the following troubleshooting steps:
- No Power to Stereo:
- Check the vehicle's fuse box for any blown fuses related to the radio or accessory power.
- Verify that the constant 12V (yellow wire) and accessory 12V (red wire) connections from the RED WOLF harness to the aftermarket stereo are secure and correctly matched.
- Ensure the ground wire (black wire) is securely connected.
- No Sound from Speakers:
- Confirm that all speaker wires (e.g., green, purple, white, gray pairs) from the RED WOLF harness are correctly matched and securely connected to the aftermarket stereo's speaker outputs.
- Check the balance and fader settings on your aftermarket stereo.
- Ensure the amplifier remote wire (blue/white) is connected if an external amplifier is used.
- Intermittent Power or Sound:
- Inspect all wire connections for looseness or poor insulation. Re-crimp or re-solder as necessary.
- Ensure the main harness connectors are fully seated into both the vehicle and the aftermarket stereo.
- Radio Not Turning Off with Ignition:
- Verify that the accessory 12V (red wire) is correctly connected and receiving power only when the ignition is on.
If issues persist, consult a qualified car audio technician or contact RED WOLF customer support.
8. Specifications
| Specification | Detail |
|---|---|
| Model Number | XC22-2150 |
| Brand | RED WOLF |
| Product Dimensions | 0.7 x 3.9 x 2.3 inches |
| Item Weight | 1.45 ounces (0.04 Kilograms) |
| Material | Copper core, PVC shell |
| Connector Type | Plug-and-play (requires splicing to aftermarket stereo harness) |
9. Warranty and Support
For warranty information and customer support regarding your RED WOLF Radio Wire Harness (Model XC22-2150), please refer to the documentation included with your purchase or contact the seller directly. Specific warranty terms and conditions may vary.
For technical assistance or inquiries, please reach out to RED WOLF customer service through their official channels.


