1. Introduction
This manual provides detailed instructions for the installation, operation, and maintenance of your Zapco Z-150.4 AP 4-Channel Class AB Audiophile Amplifier. Please read this manual thoroughly before attempting to install or operate the amplifier to ensure proper function and safety. The Zapco Z-150.4 AP is designed to deliver high-fidelity audio performance in a car audio environment.
2. Safety Information
Always observe the following safety precautions during installation and operation:
- Disconnect the vehicle's negative battery terminal before any electrical work.
- Ensure all wiring is properly routed and secured to prevent damage or short circuits.
- Use appropriate gauge wiring for power, ground, and speaker connections as specified in this manual.
- Avoid mounting the amplifier in locations exposed to direct sunlight, excessive heat, moisture, or dust.
- Do not attempt to open or modify the amplifier. Refer all servicing to qualified personnel.
- Ensure adequate ventilation around the amplifier to prevent overheating.
3. Product Overview
The Zapco Z-150.4 AP is a high-performance 4-channel Class AB amplifier engineered for audiophile-grade sound reproduction. It features robust construction and precise controls for optimal audio tuning.
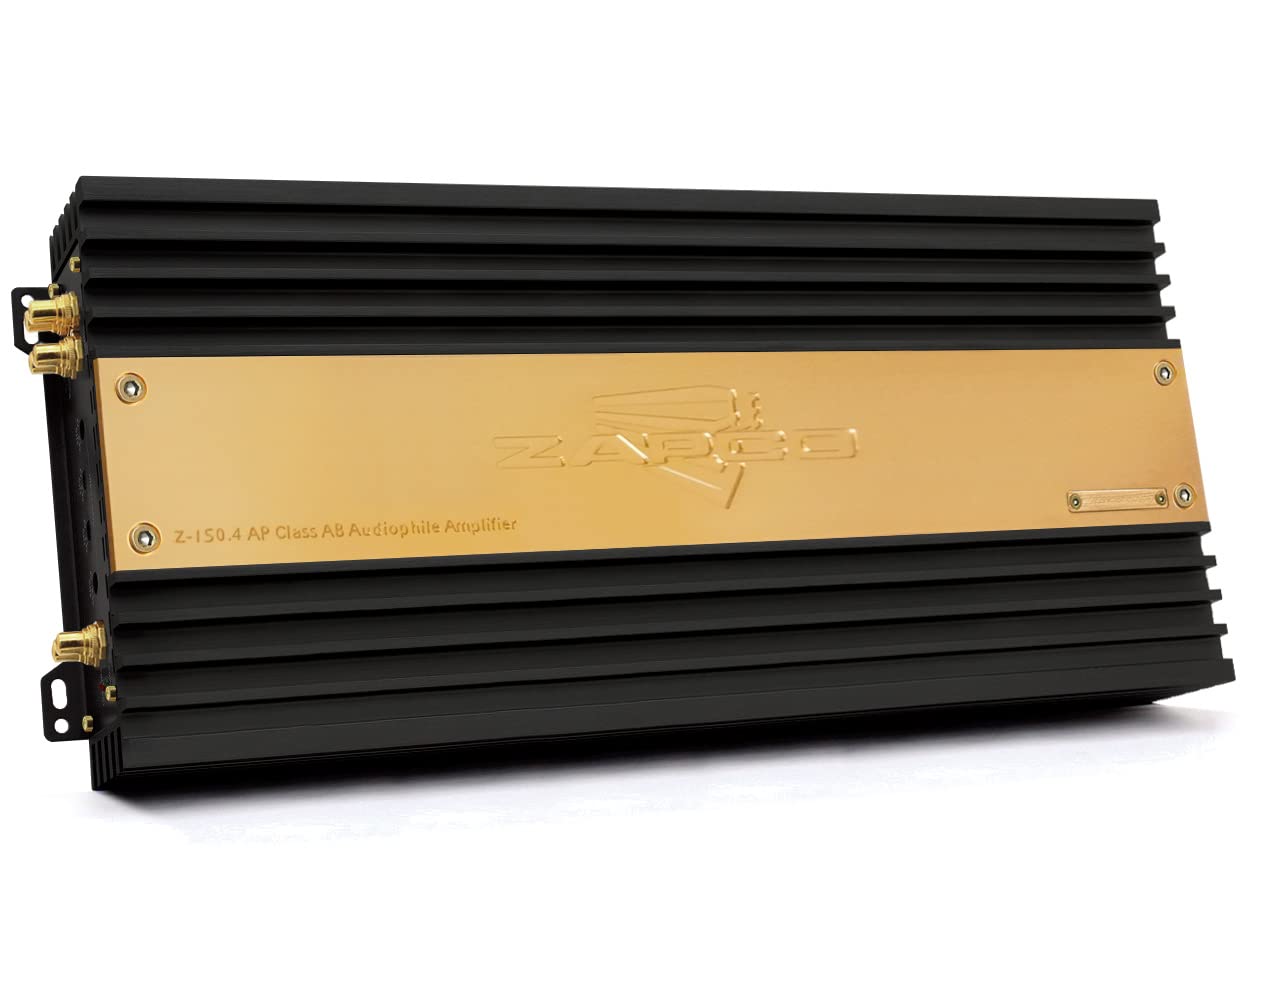
Figure 3.1: Front view of the Zapco Z-150.4 AP amplifier, showcasing its black heatsink fins and gold-colored top plate with the Zapco logo and model number.
3.1 Input and Output Panel

Figure 3.2: Rear view of the amplifier's input and output panel. This side features RCA input jacks for channels 1 through 4, individual input gain controls for each channel, and RCA output jacks labeled 'L' and 'R' for signal pass-through. Status indicators for 'POWER' and 'PROTECT' are also visible.
3.2 Power and Speaker Output Panel
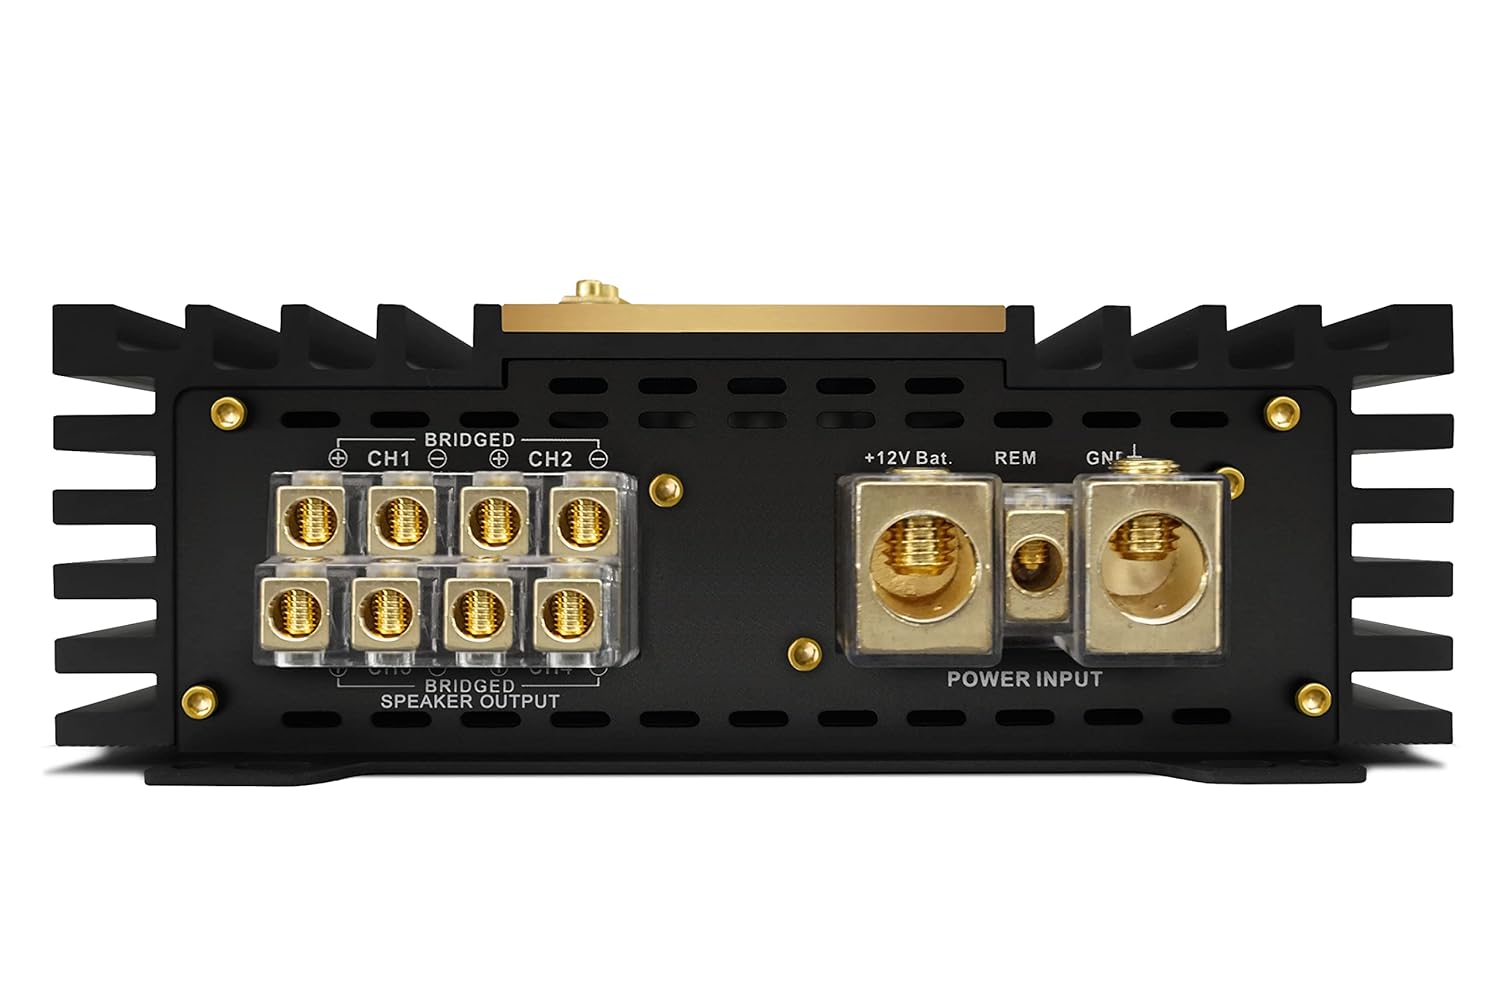
Figure 3.3: Rear view of the amplifier's power and speaker output panel. This section includes heavy-duty screw terminals for '+12V Battery', 'REM' (Remote Turn-On), and 'GND' (Ground) connections. Below these are the 'BRIDGED SPEAKER OUTPUT' terminals for channels 1-2 and 3-4, allowing for flexible speaker configurations.
4. Setup and Installation
Proper installation is crucial for optimal performance and safety. If you are unsure about any part of the installation process, consult a professional installer.
4.1 Mounting the Amplifier
Choose a mounting location that provides adequate ventilation and protection from moisture and physical damage. Secure the amplifier firmly to a solid surface using appropriate hardware.
4.2 Power Wiring
- Ground (GND): Connect a heavy-gauge wire (minimum 4 AWG recommended) from the amplifier's GND terminal to a clean, unpainted metal point on the vehicle's chassis. Ensure a solid electrical connection.
- +12V Battery: Connect a heavy-gauge wire (minimum 4 AWG recommended) from the amplifier's +12V terminal directly to the positive terminal of the vehicle's battery. Install an appropriate fuse holder (e.g., ANL or Mini-ANL) within 18 inches (45 cm) of the battery.
- Remote (REM): Connect a smaller gauge wire (e.g., 18 AWG) from the amplifier's REM terminal to the remote turn-on output of your head unit. This wire signals the amplifier to turn on and off with the head unit.
4.3 Signal Input
Connect RCA cables from your head unit's pre-amp outputs to the corresponding RCA input jacks (CH1, CH2, CH3, CH4) on the amplifier. Ensure correct channel assignment for your audio setup.
4.4 Speaker Output
Connect your speakers to the 'SPEAKER OUTPUT' terminals. Observe correct polarity (+ to + and - to -). For bridged operation, refer to the markings on the amplifier's speaker output panel (Figure 3.3) and ensure the combined impedance of the speakers meets the amplifier's minimum requirements for bridged mode.
4.5 Gain Adjustment
The 'INPUT GAIN' controls (Figure 3.2) adjust the amplifier's sensitivity to match the output voltage of your head unit. Start with the gain set to minimum. Play a familiar track at about 75% of your head unit's maximum volume. Slowly increase the amplifier's gain until you hear slight distortion, then back off slightly. This ensures maximum clean output from the amplifier.
5. Operating the Amplifier
Once properly installed and configured, the amplifier will turn on automatically when your head unit is powered on (via the remote wire). The 'POWER' indicator (Figure 3.2) will illuminate. If the 'PROTECT' indicator illuminates, refer to the Troubleshooting section.
6. Maintenance
The Zapco Z-150.4 AP amplifier requires minimal maintenance. Periodically inspect all wiring connections to ensure they are secure and free from corrosion. Keep the amplifier clean by wiping it with a soft, dry cloth. Do not use harsh chemicals or abrasive cleaners.
7. Troubleshooting
If you experience issues with your amplifier, consult the following guide before seeking professional service:
| Problem | Possible Cause | Solution |
|---|---|---|
| No Power / Amplifier does not turn on | Blown fuse; Loose power/ground/remote connection; Faulty remote wire. | Check and replace fuse; Verify all power, ground, and remote connections are secure; Test remote wire for 12V when head unit is on. |
| No Sound Output | RCA cables disconnected/damaged; Speaker wires disconnected/shorted; Gain set too low; Head unit volume too low. | Check RCA connections; Inspect speaker wiring for shorts or breaks; Adjust gain control; Increase head unit volume. |
| Distorted Sound | Gain set too high; Speaker impedance too low; Damaged speakers; Poor ground connection. | Reduce gain setting; Verify speaker impedance matches amplifier's capabilities; Inspect speakers for damage; Ensure ground connection is solid. |
| Amplifier goes into Protection Mode (PROTECT light on) | Overheating; Speaker short circuit; Speaker impedance too low; DC offset. | Allow amplifier to cool; Check speaker wiring for shorts; Verify speaker impedance; Consult professional if issue persists. |
8. Specifications
The following are key specifications for the Zapco Z-150.4 AP amplifier:
- Model Number: Z-150.4 AP
- Brand: Zapco
- Number of Channels: 4
- Amplifier Class: AB
- Mounting Type: Surface Mount
- Item Weight: 18 Pounds
- Voltage: 1 Volts (Input Sensitivity)
9. Warranty and Support
For warranty information and technical support, please refer to the official Zapco website or contact your authorized Zapco dealer. Keep your purchase receipt as proof of purchase for warranty claims.


