1. Introduction
The HanRongDa HRD-747 is a compact and versatile wide-frequency receiver designed for optimal radio reception across various bands. Utilizing modern DSP digital demodulation technology, it offers enhanced sensitivity, selectivity, and anti-mirror interference capabilities. This manual provides detailed guidance on the features, setup, operation, and maintenance of your HRD-747 radio.
Key capabilities include reception of:
- FM (Frequency Modulation)
- MW (Medium Wave)
- SW (Shortwave) including SSB (Upper Sideband) and LSB (Lower Sideband)
- AIR (Aircraft Band)
- CB (City Band)
- VHF (Very High Frequency Band)
- UHF (Ultra High Frequency Band)
- UBD (User-Defined Band)
- WX (North American National Weather Band)

Figure 1: Front view of the HRD-747 Wide Frequency Scanner Radio.
2. Features Overview
The HRD-747 is equipped with a range of features designed for enhanced usability and performance:
- DSP Digital Demodulation: Improves receiving sensitivity, selectivity, and anti-mirror interference across all bands.
- Wide Frequency Coverage: Comprehensive reception from FM to UHF, including SSB and NOAA Weather Band.
- Multiple Station Selection Methods: Includes Automatic Search Storage (ATS), Manual Search Pre-stored (VM), and Manual Search (VF).
- Memory Storage: Stores up to 1000 radio frequencies with manual deletion support.
- Adjustable Settings: Features like adjustable antenna input attenuation (ATT), various bandwidth circuits (BW), 9-level squelch (SQ), and de-emphasis selection (DE) in FM mode.
- Temperature Display: Shows temperature in Celsius or Fahrenheit.
- Sleep and Boot Timers: Configurable automatic sleep and boot times.
- Backlit Display: Warm orange backlight for night use, activating for 10 seconds with any button press.
- Connectivity: 3.5mm external antenna input, 3.5mm headphone output, and USB Type-C charging jack.
- Portable Design: Compact size with a product clip for easy carrying.
- Rechargeable Battery: Uses a removable BL5C 1000mAh lithium battery for extended use.

Figure 2: The HRD-747 features an orange backlight for improved visibility in low-light conditions.

Figure 3: Detailed views of the radio's components including the speaker, Type-C charging port, and audio jack.
3. What's in the Box
Upon unboxing your HanRongDa HRD-747, please ensure all the following items are present:
- 1 x HRD-747 SSB Shortwave Radio
- 1 x BL-5C Lithium Battery
- 1 x USB-C Charging Cable
- 1 x 3.5mm External Antenna
- 1 x Lanyard Strap
- 1 x Waterproof Pouch
- 1 x In-ear Headphone
- 1 x Owner's Manual (this document)
4. Setup Guide
4.1. Battery Installation
- Locate the battery compartment cover on the back of the radio.
- Slide the cover open.
- Insert the provided BL-5C lithium battery, ensuring the contacts align correctly.
- Close the battery compartment cover securely.
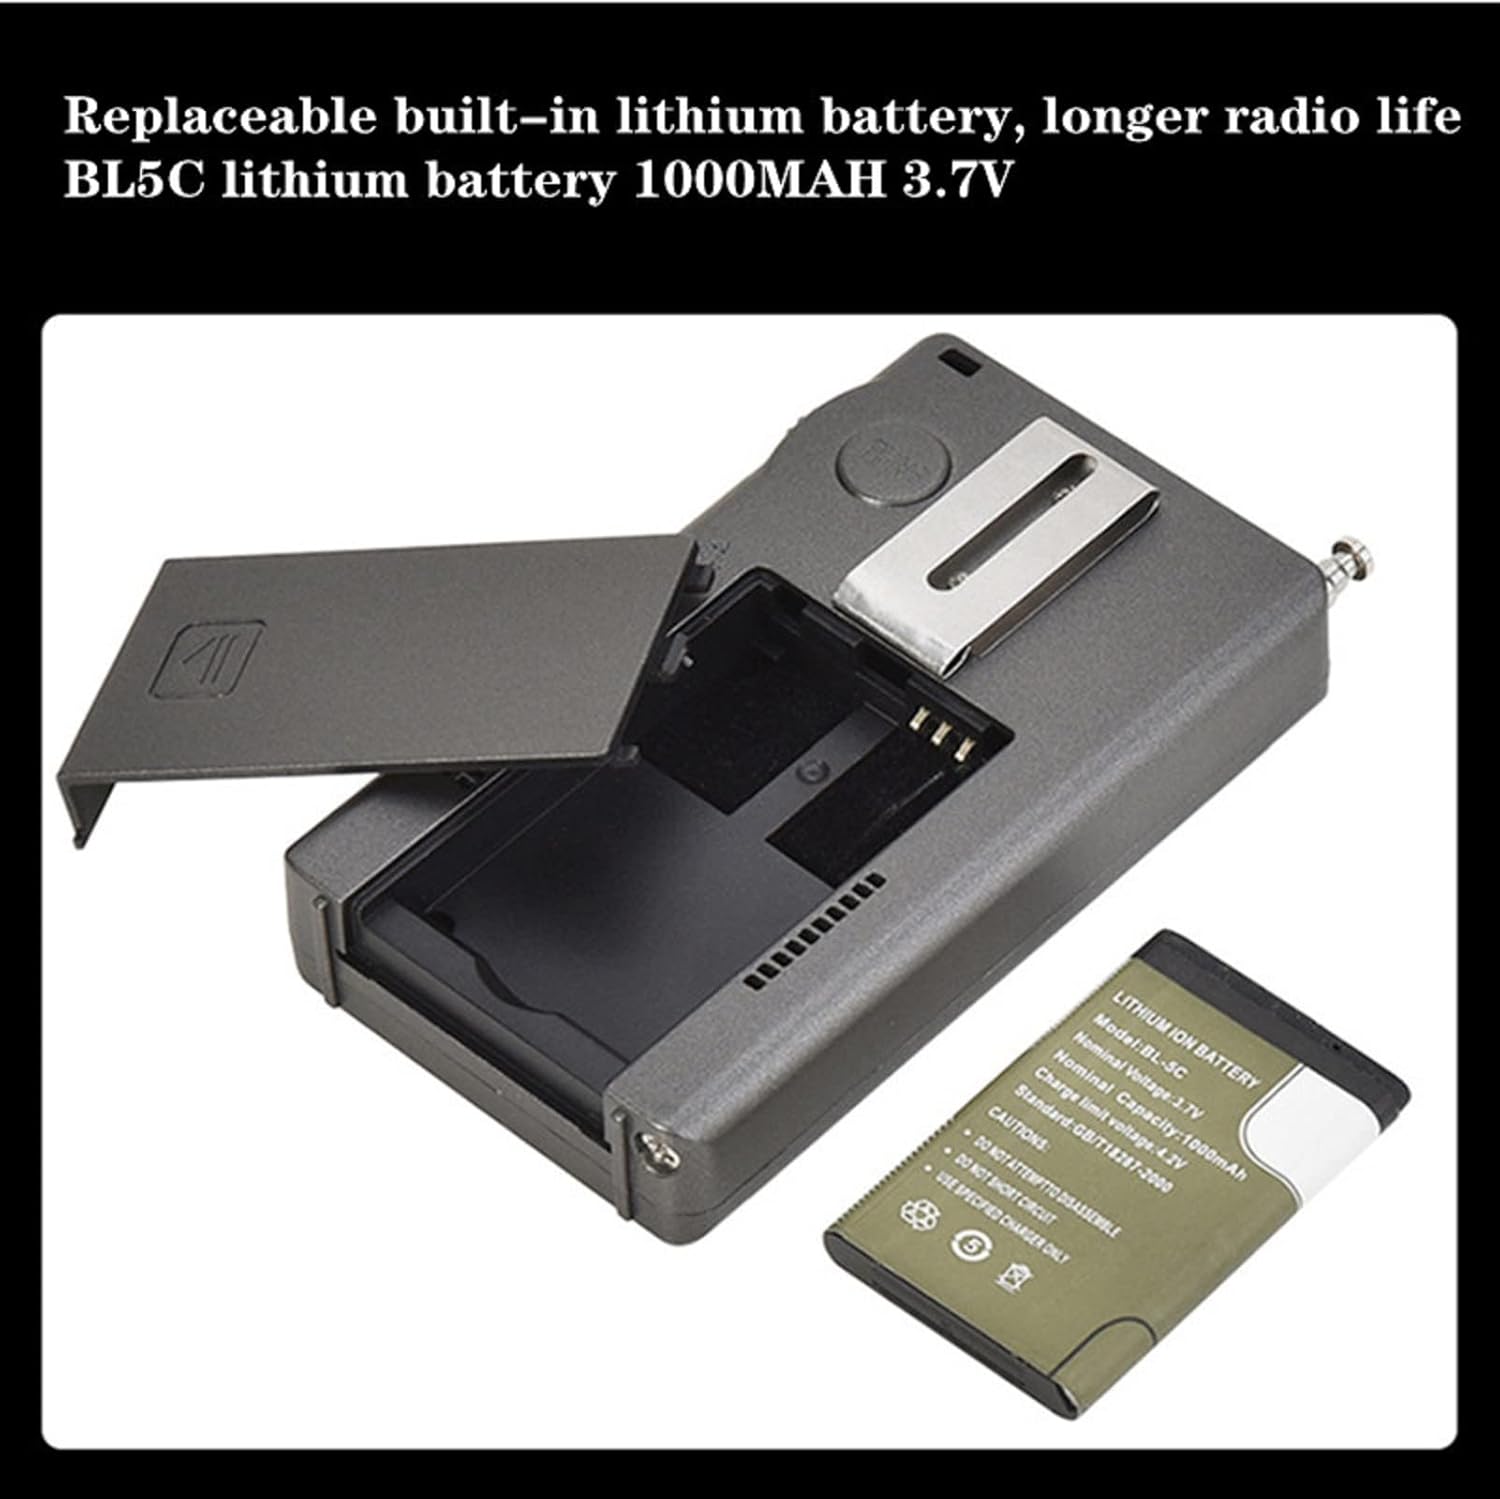
Figure 4: Installing the BL5C lithium battery into the HRD-747.
4.2. Charging the Battery
Before first use, fully charge the radio's battery.
- Connect the supplied USB-C charging cable to the USB Type-C port on the side of the radio.
- Connect the other end of the cable to a standard USB power adapter (not included) or a computer USB port.
- The charging indicator on the display will show charging status. A full charge typically takes a few hours.
4.3. Antenna Connection
For optimal reception, especially on SW, AIR, and other bands, extend the telescopic antenna or connect the external antenna.
- Telescopic Antenna: Gently pull the telescopic antenna upwards until fully extended. For best reception, orient the antenna vertically.
- External Antenna: For enhanced reception, plug the 3.5mm external wire antenna into the 3.5mm antenna input jack on the radio.

Figure 5: Extending the telescopic antenna for broadcast reception.
5. Operating Instructions
5.1. Power On/Off
- Press and hold the POWER button located on the top right of the radio to turn it on or off.
5.2. Band Selection
- Press the BAND button to cycle through available frequency bands (FM, MW, SW, AIR, CB, VHF, UHF, UBD, WX).
5.3. Tuning and Frequency Adjustment
- Shuttle Tuning Knob: Use the TUNE knob on the right side of the radio to adjust the frequency. Rotate it clockwise to increase frequency and counter-clockwise to decrease. The shuttle stepping can be adjusted for faster tuning.
- STEP Button: Press the STEP button to change the tuning step value for the current band. This allows for fine or coarse tuning.
- Up/Down Arrows: Use the up and down arrow buttons below the TUNE knob for incremental frequency adjustments.

Figure 6: The shuttle pulley (tuning knob) allows for precise frequency selection.
5.4. Mode Selection (SSB/LSB)
- When in Shortwave (SW) band, press the MODE button to switch between AM, SSB (Upper Sideband), and LSB (Lower Sideband).
- For SSB/LSB reception, fine-tuning with the TUNE knob is crucial to clarify voice signals.
5.5. Memory Functions (MEMO)
The radio can store up to 1000 radio frequencies.
- Storing a Station: Tune to the desired frequency. Press and hold the MEMO button until the display indicates the station is saved.
- Recalling a Station: Briefly press the MEMO button, then use the TUNE knob or arrow buttons to navigate through stored frequencies.
- Deleting a Station: Select the stored station you wish to delete. Press and hold the DEL button until the display confirms deletion.
5.6. Automatic Search Storage (ATS)
- To automatically scan and store available stations in the current band, press and hold the BAND button. The radio will scan and save strong signals.
5.7. Volume Control
- Use the VOL+ and VOL- buttons to adjust the audio output volume.
5.8. Advanced Settings (SET Menu)
Press the SET button to access advanced settings. Use the TUNE knob or arrow buttons to navigate and the SET button again to confirm selections.
- ATT (Attenuation): Adjusts antenna input attenuation to prevent signal overload, especially with external antennas.
- BW (Bandwidth): Selects various bandwidths for improved signal clarity and interference reduction.
- SQ (Squelch): Adjusts the 9-level squelch to mute weak signals and background noise.
- DE (De-emphasis): Selects de-emphasis settings in FM band mode.
- Country/Region Settings: Adjusts FM and AM band frequencies for different regions.
- STEP: Allows adjustment of step values for each wave band.
- Temperature Unit: Switch between Celsius and Fahrenheit display.
5.9. Lock Function
- Press the LOCK button to lock all buttons and prevent accidental changes. Press again to unlock.
5.10. Sleep Timer and Auto Boot
- These functions can be configured within the SET menu to automatically turn the radio off after a set period or turn it on at a specific time.
6. Maintenance
6.1. Cleaning
- Wipe the radio with a soft, dry cloth. Do not use abrasive cleaners or solvents.
- Avoid exposing the radio to excessive dust or moisture.
6.2. Battery Care
- If the radio will not be used for an extended period, remove the BL-5C battery to prevent leakage.
- Charge the battery regularly, even if not in use, to maintain its lifespan.
6.3. Storage
- Store the radio in a cool, dry place away from direct sunlight and extreme temperatures.
- Use the provided waterproof pouch for protection during travel or storage.
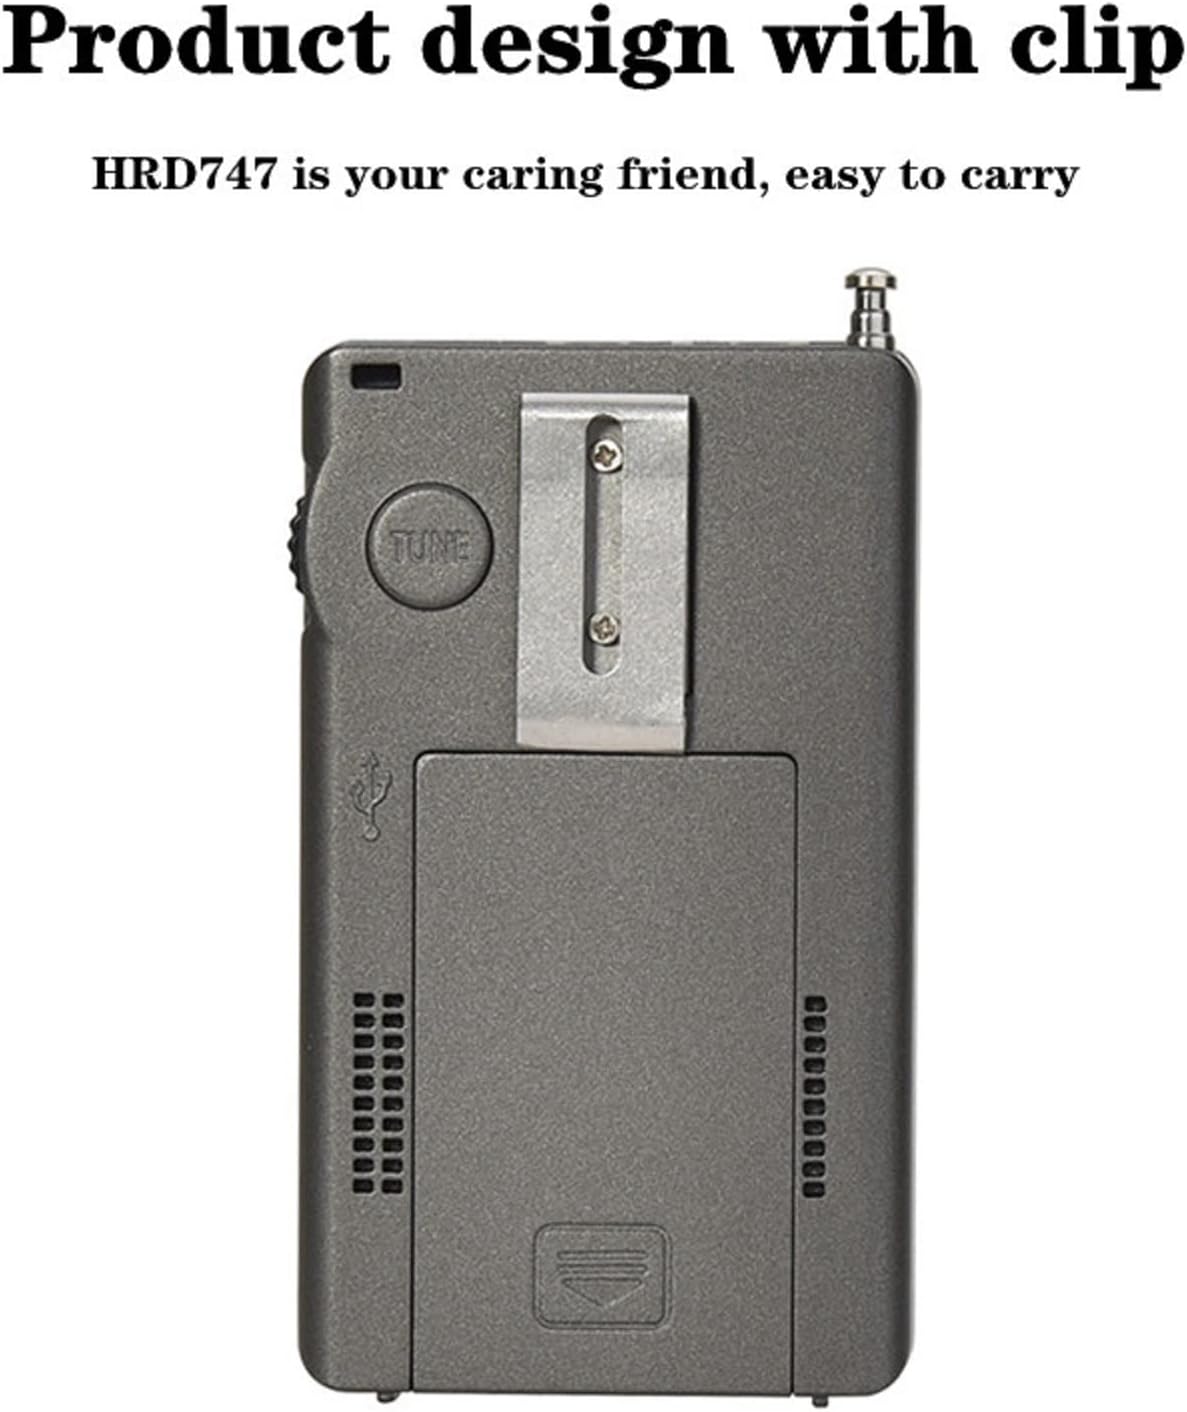
Figure 7: The HRD-747 features a convenient clip for portability.
7. Troubleshooting
| Problem | Possible Cause | Solution |
|---|---|---|
| Radio does not power on. | Battery is low or not installed correctly. | Charge the battery. Ensure the battery is inserted with correct polarity. |
| Poor reception/static. | Antenna not extended or external antenna not connected. Weak signal. Interference. | Fully extend the telescopic antenna or connect the external antenna. Try adjusting the radio's position. Adjust ATT or BW settings in the SET menu. |
| Cannot tune to desired frequency. | Radio is locked. Incorrect tuning step. | Press the LOCK button to unlock. Adjust the tuning step using the STEP button. |
| SSB/LSB audio is distorted. | Fine-tuning required. | Carefully adjust the TUNE knob for precise frequency alignment in SSB/LSB mode. |
| Display backlight not staying on. | Normal operation; backlight is temporary. | The backlight is designed to turn off after 10 seconds to conserve battery. Press any button to reactivate. |
8. Specifications
| Feature | Detail |
|---|---|
| Model Number | HRD-747 |
| Product Dimensions | 4.4 x 2.4 x 0.8 inches (11.18 x 6.1 x 2.03 cm) |
| Item Weight | 3.5 ounces (99.22 grams) |
| Battery | 1 x BL-5C Lithium Ion battery (1000mAh, 3.7V) |
| Charging Port | USB Type-C |
| Tuner Technology | DSP Digital Demodulation |
| Supported Bands | FM, MW, SW (SSB/LSB), AIR, CB, VHF, UHF, UBD, WX (NOAA) |
| Memory Presets | Up to 1000 frequencies |
| Display | Backlit LCD (Orange) |
| Audio Output | Built-in loudspeaker, 3.5mm headphone jack |
| External Antenna Input | 3.5mm |
| Manufacturer | HanRongDa |
| Country of Origin | China |
9. Warranty and Support
For warranty information and technical support, please refer to the warranty card included with your product or contact HanRongDa customer service directly. Contact details are typically provided on the product packaging or the official HanRongDa website.
Please retain your purchase receipt as proof of purchase for any warranty claims.


