1. Introduction
The Phomemo P12 PRO is a compact, portable Bluetooth thermal label maker designed for various labeling needs in home, office, and school environments. This device utilizes thermal printing technology, eliminating the need for ink or toner. It connects wirelessly to your smartphone or tablet via Bluetooth, allowing you to design and print labels using the dedicated 'Print Master' application.
The P12 PRO supports a variety of label materials, including standard plastic labels, satin ribbons, and iron-on labels, offering versatility for organizing, crafting, and personalizing items. Its built-in rechargeable battery ensures portability and convenience.

Figure 1: Phomemo P12 PRO Label Maker with a roll of label tape and a smartphone displaying the 'Print Master' app.
2. Setup
2.1. What's in the Box
- Phomemo P12 PRO Label Maker
- Label Tape Roll (pre-installed or included separately)
- USB Type-C Charging Cable
- User Manual (this document)
2.2. Charging the Device
Before initial use, fully charge the P12 PRO. Connect the provided USB Type-C cable to the charging port on the device and to a standard USB power adapter (not included) or a computer's USB port. The charging indicator light will provide feedback on the charging status.
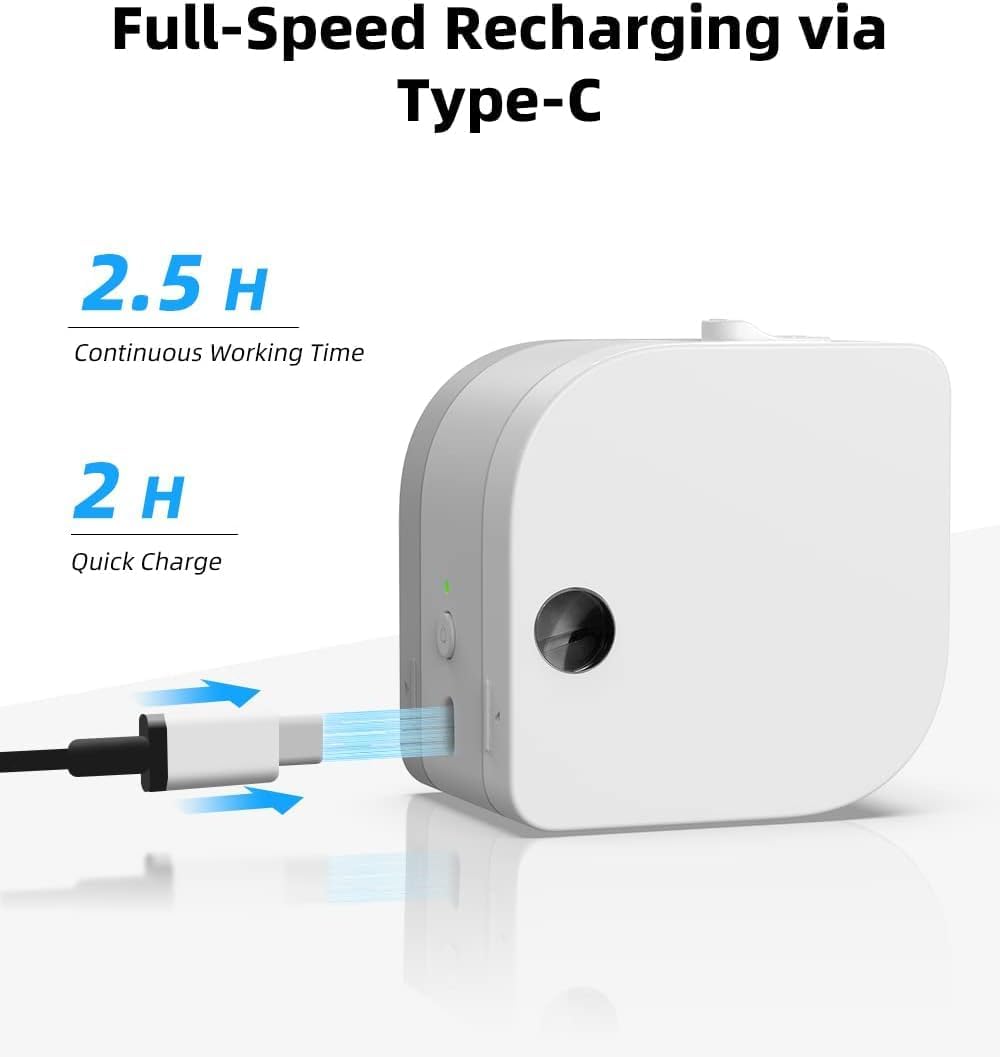
Figure 2: The P12 PRO charging via its Type-C port. A full charge takes approximately 2 hours and provides up to 2.5 hours of continuous working time.
2.3. App Installation and Bluetooth Pairing
The Phomemo P12 PRO operates via the 'Print Master' application. Follow these steps to install the app and pair your device:
- Download the App: Search for 'Print Master' in the Apple App Store (for iOS devices) or Google Play Store (for Android devices) and install it.
- Power On: Press and hold the power button on the P12 PRO until the indicator light turns on.
- Enable Bluetooth: Ensure Bluetooth is enabled on your smartphone or tablet.
- Open App and Connect: Open the 'Print Master' app. The app will automatically search for available Phomemo devices. Select 'P12 PRO' from the list to establish a connection. The device indicator light will change to confirm a successful connection.

Figure 3: The 'Print Master' app interface, demonstrating Bluetooth connectivity and options for customizing labels with borders and icons.
3. Operating Instructions
3.1. Loading Label Tape
- Open Cover: Gently push the cover release button (if present) or lift the top cover of the device.
- Insert Tape: Place the label tape roll into the compartment with the label end extending out through the printer's output slot. Ensure the tape is aligned correctly.
- Close Cover: Close the cover firmly until it clicks into place.
3.2. Creating and Printing Labels
The 'Print Master' app provides extensive customization options for your labels:
- Text Input: Enter your desired text. The app supports multiple lines of text.
- Fonts and Styles: Choose from over 154 fonts and adjust text size, bolding, italics, and alignment.
- Borders and Icons: Select from 78 frames and thousands of icons, graphics, and symbols to enhance your labels.
- Special Features: Create barcodes, QR codes, and utilize various templates for specific applications (e.g., date labels, price tags).

Figure 4: Examples of labels with clear text and icons, suitable for school items and organization.

Figure 5: The P12 PRO's versatility in creating labels for kitchen organization, including date and content labels.
3.3. Supported Label Types
The P12 PRO is compatible with 12mm wide label tapes and supports various materials:
- Plastic Labels: Water-resistant, abrasion-resistant, oil-resistant, and strong adhesive for general use.
- Satin Ribbon Labels: Ideal for gift wrapping, crafts, and decorative purposes.
- Iron-on Labels: For labeling clothing and fabric items.
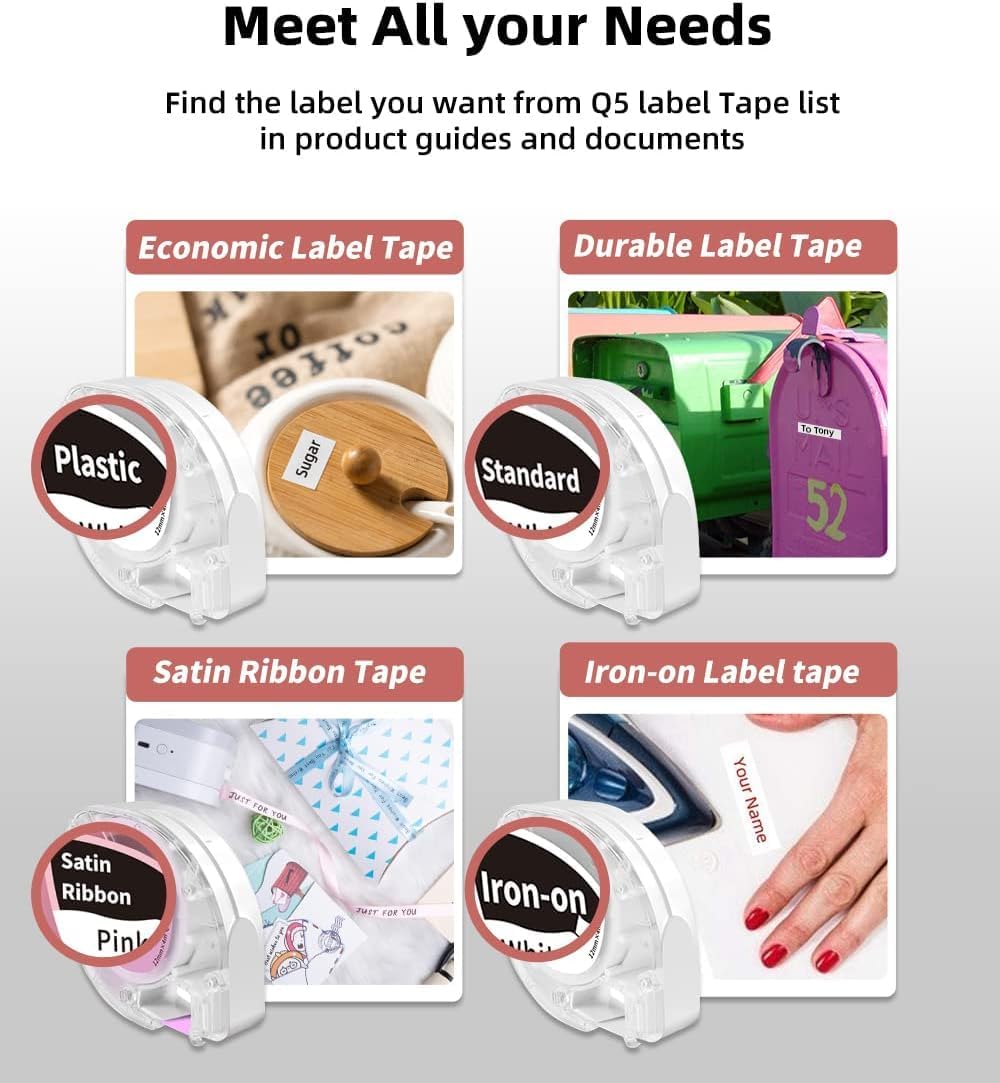
Figure 6: A selection of label tape types compatible with the Phomemo P12 PRO, including plastic, standard, satin ribbon, and iron-on options.

Figure 7: Demonstrating the application of an iron-on label for clothing, a feature supported by the P12 PRO.
3.4. Cutting Labels
After printing, use the built-in serrated tear-off knife to cleanly cut the label from the tape roll. This ensures a smooth and quick cut.
4. Maintenance
4.1. Cleaning the Print Head
To maintain optimal print quality, periodically clean the print head. Use a soft, lint-free cloth lightly dampened with isopropyl alcohol. Gently wipe the print head surface. Ensure the device is powered off before cleaning.
4.2. Battery Care
The P12 PRO features a built-in lithium-ion battery. To prolong battery life:
- Avoid fully discharging the battery frequently.
- Store the device in a cool, dry place when not in use for extended periods.
- If the device will not be used for a long time, charge it to about 50% every few months.
5. Troubleshooting
5.1. Device Not Powering On
- Ensure the device is fully charged. Connect it to a power source using the Type-C cable.
- Press and hold the power button for a few seconds.
5.2. Cannot Connect via Bluetooth
- Verify that the P12 PRO is powered on and within range of your mobile device.
- Ensure Bluetooth is enabled on your mobile device.
- Restart the 'Print Master' app and try connecting again.
- If issues persist, try restarting both the P12 PRO and your mobile device.
5.3. Poor Print Quality
- Check if the label tape is correctly installed and not jammed.
- Clean the print head as described in the Maintenance section.
- Ensure you are using genuine Phomemo label tapes.
- Check the battery level; low battery can affect print quality.
5.4. Label Jamming
- Power off the device immediately.
- Open the cover and carefully remove any jammed label tape.
- Reinstall the label tape, ensuring it is properly aligned.
6. Specifications
| Feature | Detail |
|---|---|
| Model Name | Phomemo P12 Pro |
| Printing Technology | Thermal |
| Resolution | 203 dpi |
| Connectivity | Bluetooth 4.0 or above, USB Type-C |
| Compatible Systems | Android, iOS |
| Max Label Width | 12mm |
| Battery Capacity | 1000mAh Lithium Ion (rechargeable) |
| Charging Time | Approx. 2 hours |
| Continuous Working Time | Approx. 2.5 hours |
| Auto Shut-off | After 15 minutes of inactivity |
| Dimensions | 4.8 x 4.5 x 2.67 inches |
| Item Weight | 7.8 ounces |
7. Warranty and Support
7.1. Warranty Information
The Phomemo P12 PRO Label Maker Machine comes with a 2-year warranty from the date of purchase. This warranty covers manufacturing defects and malfunctions under normal use. Please retain your proof of purchase for warranty claims.
7.2. Customer Support
For technical assistance, troubleshooting not covered in this manual, or warranty inquiries, please contact Phomemo customer support through their official website or the contact information provided with your product packaging. Please have your model number (P12 Pro) and purchase details ready when contacting support.


