Introduction
This user manual provides comprehensive instructions for the GLEDOPTO Zigbee Pro RGBCCT LED Strip Controller (Model: GL-C-008P). This advanced controller is designed for use with Single Color, WW CW, RGB, RGBW, and RGBCCT LED strip lights, offering enhanced control and compatibility with various smart home ecosystems. Please read this manual thoroughly before installation and operation to ensure proper use and optimal performance.
Product Features
- Upgraded Zigbee Pro Version: Offers faster and more stable performance, allowing for smoother adjustments of color, color temperature, and brightness.
- 5-in-1 Controller: Compatible with Single Color, WW CW, RGB, RGBW, and RGBCCT LED Strip Lights, providing versatile lighting solutions.
- Wide Compatibility: Seamlessly integrates with popular smart home platforms such as Samsung SmartThings, Osram Lightify, Amazon Echo Plus, and Ikea Tradfri.
- Single ID Recognition: Functions as a 1ID controller, appearing as a single device in your application, similar to Philips Hue Light Strip Plus.
- Philips Hue App Integration: Fully integrates into the Philips Hue app for managing scenes, dimming controls, colors, and timers.
Package Contents
Please verify that all items listed below are included in your package:
- 1 x Packaging Box
- 1 x GLEDOPTO Zigbee 3.0 RGB+CCT LED Controller (Model: GL-C-008P)
- 1 x User Instruction Manual
- 1 x 3cm Sticker

Figure 1: Contents of the product package, including the controller, manual, and sticker.
Specifications
| Attribute | Value |
|---|---|
| Product Name | ZIGBEE RGB+CCT Strip Controller |
| Model No. | GL-C-008P |
| Voltage | DC12V-24V |
| Output Current/Channel | Max. 6A |
| Total Output Current | Max. 15A |
| Total Power | Max. 270W |
| Product Size | 89 x 48 x 23.5 mm (3.5 x 1.89 x 0.93 inches) |
| Operating Temperature | -20 to +60°C |
| Connectivity Protocol | Zigbee |
| Indoor/Outdoor Usage | Indoor |
| Water Resistance Level | Not Water Resistant |
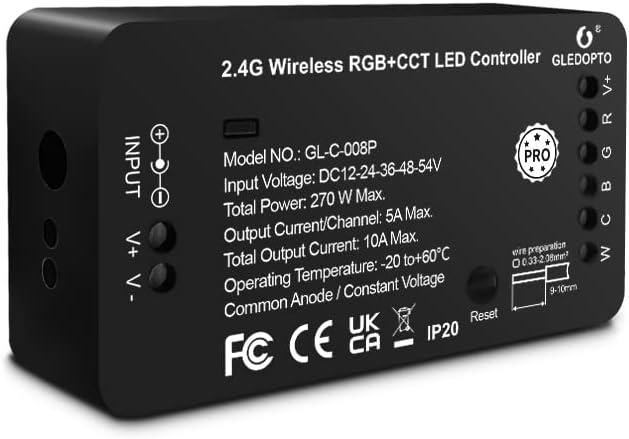
Figure 2: Front view of the GLEDOPTO Zigbee Pro RGBCCT LED Controller, showing model number and input/output details.
Setup Instructions
Follow these steps to set up your GLEDOPTO Zigbee Pro RGBCCT LED Strip Controller:
- Power Your Light Sources: Connect your LED strip product to the controller. Ensure the correct mode is selected if applicable. Use the press-type design for wiring; no screwing is required. Then, connect the controller to a suitable power adapter (DC12V-24V) and plug it into a power socket.
- Set Up Your WiFi Gateway: Plug in your Zigbee Light Link Gateway (e.g., Philips Hue Bridge). It will automatically power up. Connect it to your WiFi router using an Ethernet cable.
- Connect with Gateway (Device Searching):
- Start the device searching function on your Zigbee Light Link Gateway's application. This process may take some time.
- If the Gateway does not find the device, try power cycling the controller (unplug and plug back in) or perform a reset (refer to the Troubleshooting section for reset instructions).
- If issues persist, try restarting your router and gateway.
- Assign and Control: Once the Gateway finds your device, you can assign it to different rooms, zones, or groups within your smart home application. You can now use the application to control the LED strip, including color temperature and brightness.

Figure 3: Wiring diagram for the GLEDOPTO controller, illustrating input and output connections.

Figure 4: Visual guide detailing the four main steps for controller setup, from power connection to app control.
Operating Instructions
The GLEDOPTO Zigbee Pro RGBCCT LED Strip Controller offers flexible control options through compatible smart home applications and voice assistants.
App Control:
Utilize your smart home app (e.g., Philips Hue, SmartThings) to manage your LED strip lights. The app allows for:
- Color Changing: Access a palette of 16 million colors to set the perfect ambiance for any occasion.
- Color Temperature Adjustment: Fine-tune the white light from warm white to cool white to suit your preference.
- Brightness Control: Dim or brighten your lights to the desired intensity.
- Scene Management: Create and activate custom lighting scenes for different moods or activities.
- Timers and Schedules: Set automated on/off times and schedules for your lights.
- Multiple DIY Scenes: Explore and create various personalized lighting scenarios.
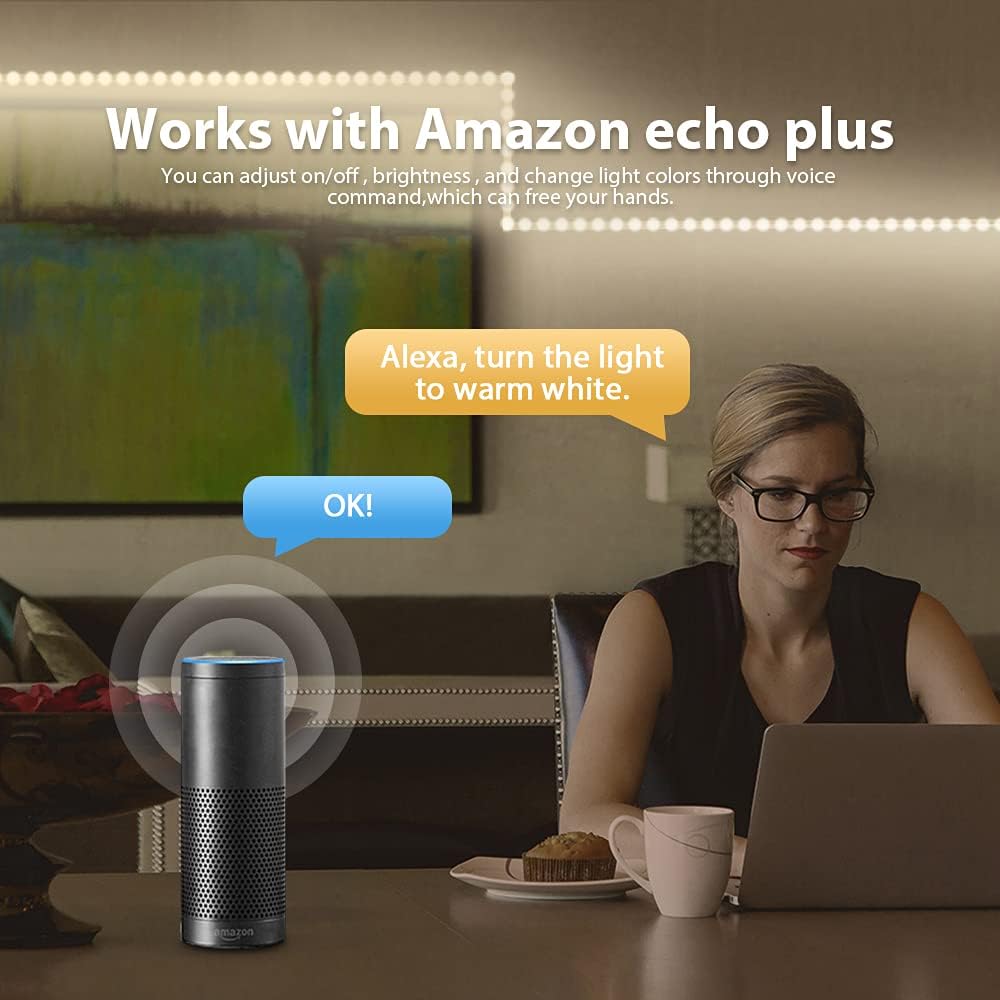
Figure 5: App interface demonstrating the wide range of 16 million colors available for selection.

Figure 6: App interface for adjusting the color temperature of the LED strip lights.
Voice Control:
When connected to compatible voice assistants like Amazon Echo Plus, you can control your lights using simple voice commands. For example, say "Alexa, turn the light to warm white" to adjust the lighting hands-free.

Figure 7: Illustration of voice control functionality with Amazon Echo Plus.
Product Demonstration Video:
Video 1: A demonstration of the Gledopto Zigbee Pro Controller for RGBW RGBCCT LED Strip, showcasing its features and operation within a smart home environment.
Maintenance
To ensure the longevity and optimal performance of your GLEDOPTO Zigbee Pro RGBCCT LED Strip Controller, follow these simple maintenance guidelines:
- Keep the controller in a dry environment, away from moisture and humidity.
- Avoid exposing the device to extreme temperatures.
- Clean the exterior of the controller with a soft, dry cloth. Do not use liquid cleaners or aerosols.
- Ensure proper ventilation around the controller to prevent overheating.
Troubleshooting
If you encounter issues with your GLEDOPTO Zigbee Pro RGBCCT LED Strip Controller, refer to the following common solutions:
| Problem | Possible Cause | Solution |
|---|---|---|
| Gateway does not find the device. | Device not in pairing mode, network interference, or temporary glitch. |
|
| LED strip not responding after reset. | Improper reset procedure or continued network issue. |
|
Reset Function:
The controller features a reset button for easy troubleshooting and re-pairing:
- Short press: Press the reset button once to turn the LED strip on or off.
- Long press (>2 seconds): Press and hold the reset button for more than 2 seconds. The LED strip will blink 3 times, indicating that the reset is successful. This will reset the controller to factory defaults and put it into pairing mode.

Figure 8: Location and function of the reset button on the GLEDOPTO controller.
Warranty and Support
Specific warranty information and detailed support contact details are not provided within this manual. For warranty claims, technical support, or further assistance, please refer to the product packaging, the seller's website, or contact the manufacturer directly through their official channels.


