Wildgame Innovations WGI-WGICM0724
Wildgame Innovations Terra Extreme LIGHTSOUT 18MP Trail Camera User Manual
Model: WGI-WGICM0724
Introduction
This manual provides detailed instructions for the setup, operation, maintenance, and troubleshooting of your Wildgame Innovations Terra Extreme LIGHTSOUT 18MP Trail Camera. Please read this manual thoroughly before using the device to ensure proper functionality and longevity.
The Terra Extreme 18 Lightsout trail camera is designed for capturing photos and videos of wildlife with its 18-megapixel sensor and 720p HD video capabilities. Its Lightsout technology provides invisible infrared flash for discreet operation, making it ideal for monitoring large properties without disturbing game.
Product Overview
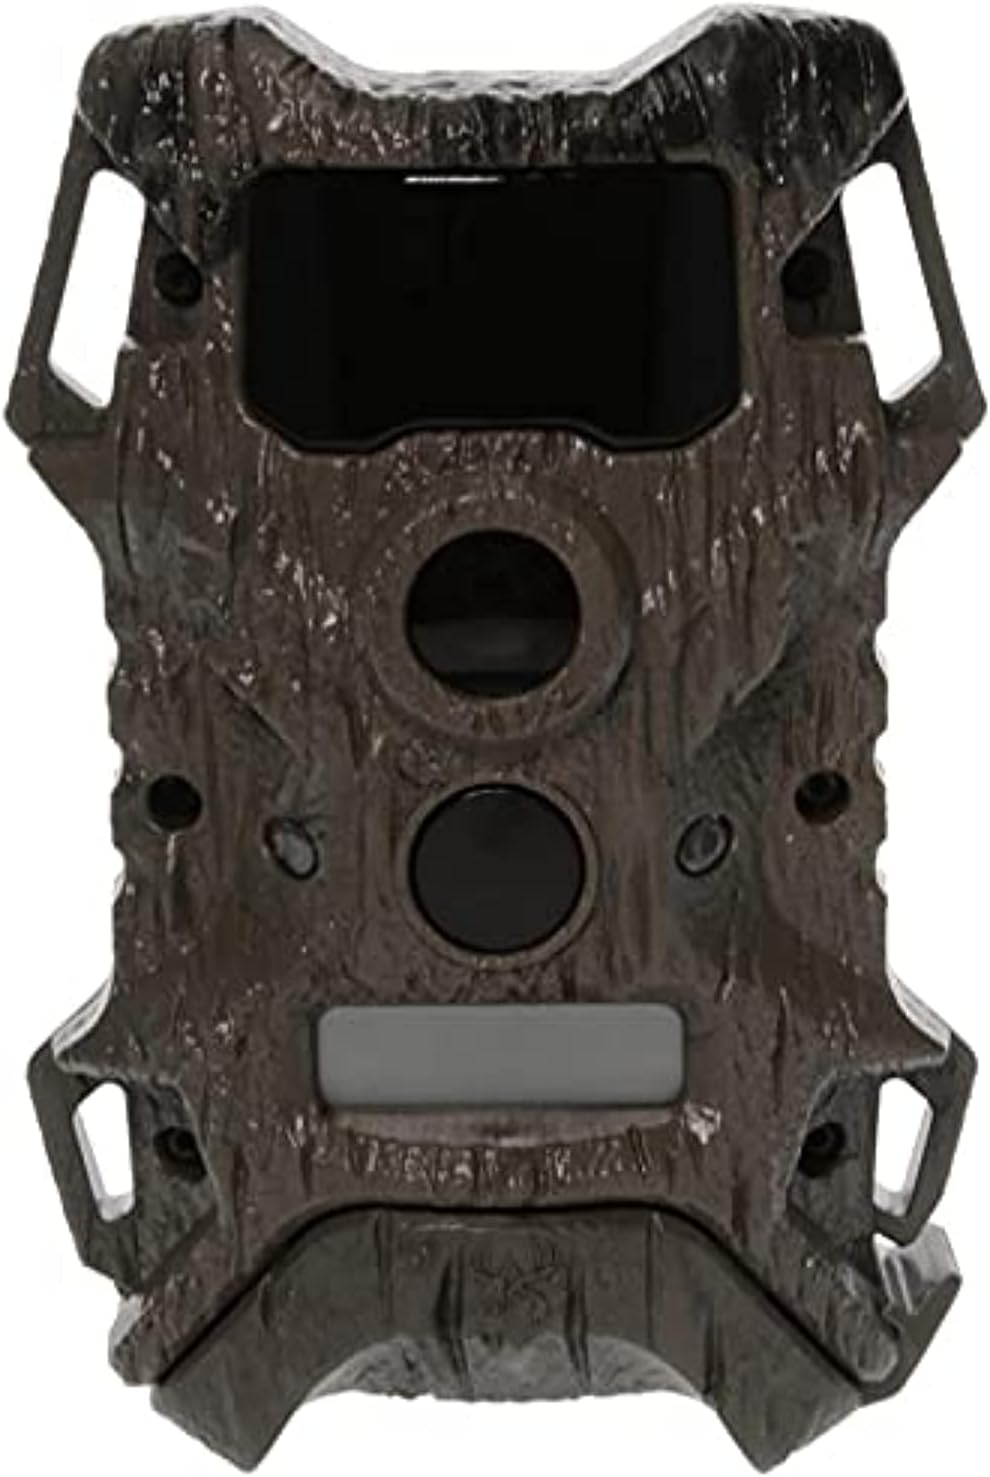
Figure 1: Front view of the Terra Extreme LIGHTSOUT 18MP Trail Camera, showing the lens, infrared LEDs, and motion sensor.

Figure 2: The Terra Extreme LIGHTSOUT 18MP Trail Camera alongside its included bungee cord for mounting.

Figure 3: Interior view of the camera, revealing the battery compartment for 8 AA batteries and the SD card slot.
Setup
1. Battery Installation
The camera requires 8 AA alkaline or rechargeable (Ni-MH, Ni-Cd) batteries. Do not mix old and new batteries, or different battery types.
- Open the camera housing latch.
- Locate the battery compartment.
- Insert 8 AA batteries, ensuring correct polarity (+/-) as indicated inside the compartment.
- Close the battery compartment cover securely.
2. SD Card Installation
A Class 4 or above SD card (up to 32GB) is required for storing photos and videos. The SD card is not included.
- With the camera housing open, locate the SD card slot.
- Insert the SD card with the metal contacts facing down until it clicks into place.
- To remove, press the SD card gently until it pops out.
3. Mounting the Camera
The camera comes with a bungee cord for mounting to a tree or pole.
- Thread the bungee cord through the mounting slots on the back of the camera.
- Wrap the bungee cord around the desired mounting surface (e.g., tree trunk).
- Secure the bungee cord hooks to ensure the camera is stable and level.
- Position the camera to capture the desired area, ensuring no obstructions are in front of the lens or motion sensor.
Operating Instructions
1. Powering On/Off
- To power on, slide the power switch to the "ON" position. The LCD screen will illuminate.
- To power off, slide the power switch to the "OFF" position.
2. Navigating the Menu
Use the control buttons (usually UP, DOWN, OK, MENU) to navigate through the camera's settings on the LCD screen.
- MENU: Enters or exits the settings menu.
- UP/DOWN: Navigates through menu options.
- OK: Confirms selection or enters a sub-menu.
3. Setting Date and Time
It is important to set the correct date and time for accurate timestamping of captured media.
- Enter the menu and navigate to the "Date/Time" setting.
- Use the UP/DOWN buttons to adjust the year, month, day, hour, and minute.
- Press OK to confirm each setting and move to the next.
- Exit the menu when finished.
4. Camera Modes and Settings
The Terra Extreme camera supports various modes and customizable settings:
- Mode: Select between Photo, Video, or Photo+Video.
- Resolution: Set photo resolution (e.g., 18MP) and video resolution (e.g., 720p).
- Delay: Adjust the time delay between detections before the camera triggers again.
- Sensitivity: Set the PIR sensor sensitivity (Low, Medium, High).
- Video Length: For video mode, set the duration of each video clip (up to 30 seconds).
- Format SD Card: This option will erase all data on the SD card. Use with caution.
5. Viewing Media
Captured photos and videos can be viewed on the camera's LCD screen or by removing the SD card and inserting it into a computer or compatible device.
- On the camera, switch to "Playback" mode (if available) or navigate through the menu to view captured files.
- Use the UP/DOWN buttons to scroll through images and videos.
- Press OK to view a selected file or play a video.
Maintenance
- Battery Replacement: Replace all 8 AA batteries when the battery indicator shows low power. Always use fresh batteries of the same type.
- SD Card Management: Regularly check the SD card capacity. Format the SD card periodically to maintain optimal performance and prevent data corruption. Back up important files before formatting.
- Cleaning:
- Clean the camera lens and PIR sensor window with a soft, lint-free cloth. Avoid abrasive materials or harsh chemicals.
- Wipe the camera body with a damp cloth if it becomes dirty. Ensure the battery compartment and other openings are sealed before cleaning.
- Storage: When not in use for extended periods, remove batteries from the camera to prevent leakage and store the camera in a cool, dry place.
- Weather Protection: While the camera features a water-resistant housing, avoid submerging it in water. Ensure the housing latch is securely closed to protect internal components from moisture.
Troubleshooting
| Problem | Possible Cause | Solution |
|---|---|---|
| Camera not powering on |
|
|
| No photos/videos captured |
|
|
| Poor image/video quality |
|
|
| Short battery life |
|
|
Specifications
| Feature | Detail |
|---|---|
| Model Name | TERRA EXTREME LIGHTSOUT 18MP |
| Model Number | WGI-WGICM0724 |
| Image Resolution | 18.0 Megapixels |
| Video Resolution | 720p HD |
| Illumination Range | 60 Feet (Invisible Lightsout Infrared LED Flash) |
| Trigger Speed | Less than 1 second |
| Storage | SD Card (up to 32GB, Class 4 or above recommended) |
| Power Source | 8 AA Batteries (not included) |
| Included Components | Game Camera, Bungee Cord |
| Mounting Type | Tree Mount |
| Dimensions (L x W x H) | 19 x 6.5 x 27.5 cm |
| Weight | 440 g |
| Water Resistance | Water-resistant housing |
Warranty Information
The Wildgame Innovations Terra Extreme LIGHTSOUT 18MP Trail Camera comes with a 1-Year Limited Warranty from the date of purchase. This warranty covers defects in materials and workmanship under normal use.
This warranty does not cover damage caused by misuse, abuse, accident, unauthorized service, or acts of nature. Proof of purchase is required for all warranty claims.
For detailed warranty terms and conditions, please refer to the official Wildgame Innovations website or contact customer support.
Customer Support
For technical assistance, troubleshooting not covered in this manual, or warranty inquiries, please contact Wildgame Innovations customer support.
- Manufacturer: Wildgame Innovations
- Website: www.wildgameinnovations.com
- Phone: Refer to the manufacturer's website for current contact numbers.
- Address: PLANO SYNERGY, 2261 Morgans Hwy, New Roads, LA 70760
- Phone (Plano Synergy): (800) 847-8269
Please have your product model number (WGI-WGICM0724) and proof of purchase ready when contacting support.
Related Documents - WGI-WGICM0724
 |
Wildgame Innovations Terra Extreme User Manual - Setup and Operation Comprehensive user manual for the Wildgame Innovations Terra Extreme Digital Game Scouting Camera (Model WGI-TERAX). Covers battery and SD card installation, power settings, quick sets, date/time configuration, custom photo and video settings, camera modes, mounting, image retrieval, SD card formatting, warranty information, and regulatory compliance. |
 |
Wildgame Innovations Terra Extreme Scouting Camera User Manual and Setup Guide Comprehensive guide to setting up and using the Wildgame Innovations Terra Extreme scouting camera, covering installation, settings, operation, and troubleshooting. |
 |
Wildgame Innovations Terra Extreme User Manual User manual for the Wildgame Innovations Terra Extreme scouting camera, covering battery and SD card installation, power settings, quick sets, date/time configuration, custom settings, photo and video settings, ready and test modes, mounting instructions, image retrieval, SD card formatting, limited warranty, and FCC compliance. |
 |
Wildgame Innovations TERRA EXTREME User's Manual User's manual for the Wildgame Innovations TERRA EXTREME digital game scouting camera, covering setup, operation, image retrieval, and warranty information. |
 |
Terra Cell Cellular Trail Camera User Manual | Wildgame Innovations Comprehensive guide to setting up and using the Terra Cell Cellular Trail Camera by Wildgame Innovations. Learn about app integration, camera settings, mounting, and troubleshooting. |
 |
Wildgame Innovations W6E Infrared Digital Scouting Camera User Manual This user manual provides comprehensive instructions for the Wildgame Innovations W6E Infrared Digital Scouting Camera, covering setup, features, operation, and maintenance for effective wildlife monitoring. |