
1. Introduction
Thank you for choosing the Yamata Speedway SW9000-D4-S Single Needle Lockstitch Direct Drive Industrial Sewing Machine. This machine is engineered for high-efficiency sewing, featuring a direct-drive servomotor, automatic foot lifter, and under trimmer. This manual provides essential information for the safe and effective setup, operation, maintenance, and troubleshooting of your new sewing machine. Please read this manual thoroughly before operating the machine to ensure optimal performance and longevity.
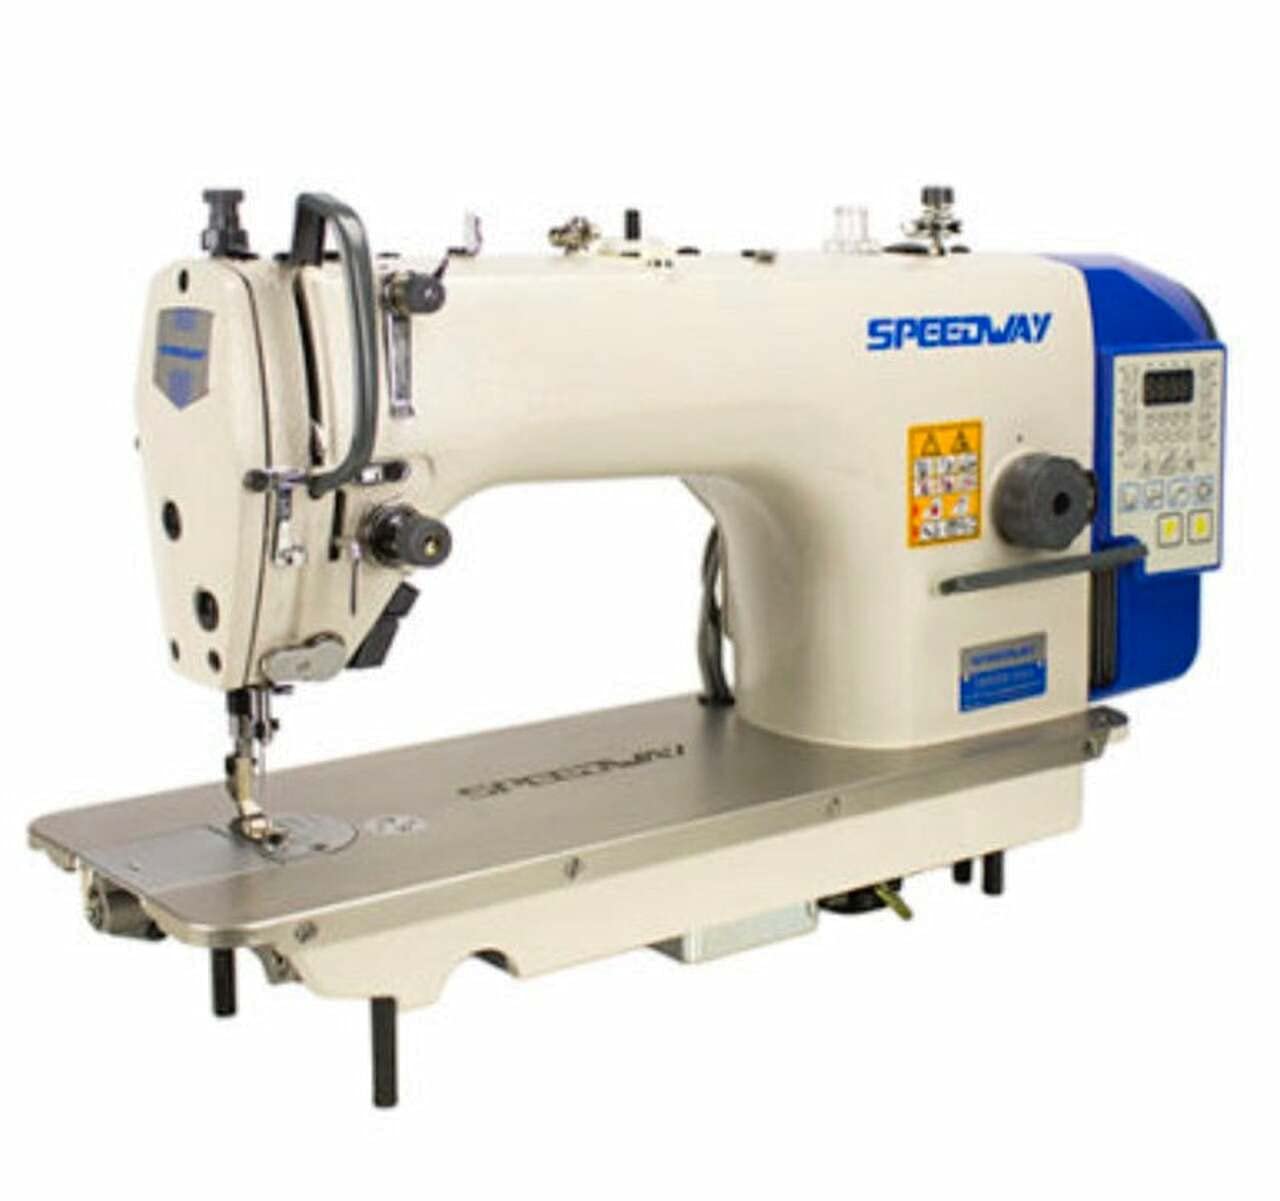
Figure 1.1: Yamata Speedway SW9000-D4-S Single Needle Lockstitch Direct Drive Industrial Sewing Machine. This image shows the complete machine head with its integrated motor and control panel.
2. Safety Instructions
Always observe the following safety precautions to prevent accidents and ensure safe operation:
- Electrical Safety: Ensure the machine is connected to a properly grounded power outlet. Disconnect power before cleaning, servicing, or leaving the machine unattended. Do not operate with wet hands or in damp conditions.
- Moving Parts: Keep fingers, hair, and loose clothing away from the needle, presser foot, handwheel, and other moving parts during operation.
- Needle Safety: Always use the correct needle for your fabric. Replace bent or dull needles immediately. Exercise extreme caution when changing needles.
- Children and Pets: Keep the machine out of reach of children and pets. Do not allow unauthorized persons to operate the machine.
- Maintenance: Only use genuine replacement parts. Refer to the maintenance section for proper cleaning and lubrication procedures.
- Ventilation: Ensure adequate ventilation around the motor to prevent overheating.
3. Components Overview
Familiarize yourself with the main components of your Yamata Speedway SW9000-D4-S sewing machine:

Figure 3.1: Key features and control panel of the Yamata Speedway SW9000-D4-S. This diagram highlights the energy-saving servomotor, compact control box, wide sewing range, new tension spring, newly-developed hook, feed-cam timing adjustment, direct-drive type, thread trimming unit, and needle bar thread holder.
- Machine Head: The main body containing the needle bar, presser foot, and sewing mechanisms.
- Direct Drive Servomotor: Integrated motor for efficient and quiet operation, providing precise speed control.
- Control Panel: Located on the machine head, used for adjusting speed, stitch length, and activating various functions.
- Needle Bar: Holds the needle and moves it up and down.
- Presser Foot: Holds the fabric firmly against the feed dogs during sewing. Features an automatic lifter.
- Feed Dogs: Located under the presser foot, they move the fabric forward.
- Bobbin Winder: Used to wind thread onto the bobbin.
- Thread Stand: Holds the spools of thread.
- Under Trimmer: Automatically cuts the top and bobbin threads at the end of a seam.
- Stainless Steel Bed: Durable and smooth work surface.
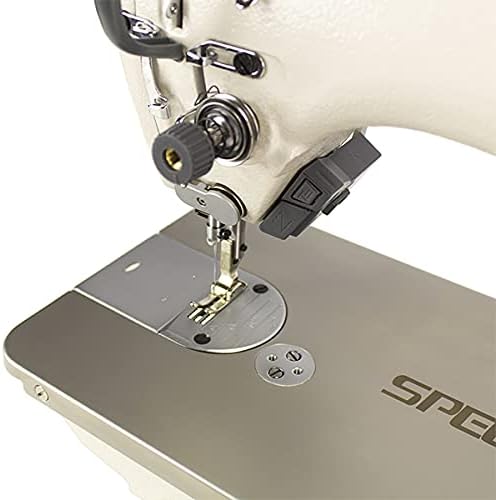
Figure 3.2: Close-up view of the integrated control panel on the Yamata Speedway SW9000-D4-S. This panel allows for precise adjustments of sewing parameters.
4. Setup
4.1 Unpacking and Assembly
Carefully unpack all components. The machine typically arrives in two main packages: the machine head and the stand/table.

Figure 4.1: Packaging and basic assembly diagram. The machine head and the stand/table are typically packaged separately for shipping.
- Assemble the machine stand and table according to the separate assembly instructions provided with the stand.
- Carefully place the machine head into the designated opening on the table. Ensure it is securely seated.
- Connect the power cord from the machine head to a grounded electrical outlet.
4.2 Needle Installation
- Turn off the power switch.
- Loosen the needle clamp screw.
- Insert the new needle with the flat side facing the back of the machine, pushing it up as far as it will go.
- Tighten the needle clamp screw securely.

Figure 4.2: Close-up of the needle, presser foot, and throat plate area. This view is critical for needle installation and threading.
4.3 Bobbin Winding and Insertion
- Place an empty bobbin onto the bobbin winder spindle.
- Guide the thread from the spool through the tension disc of the bobbin winder.
- Wrap the thread a few times around the bobbin.
- Engage the bobbin winder and press the foot pedal to wind the bobbin. Stop when full.
- Open the bobbin case cover, insert the wound bobbin into the bobbin case, ensuring the thread feeds correctly through the tension spring.
- Insert the bobbin case into the shuttle hook assembly.
4.4 Threading the Machine
- Place the thread spool on the thread stand.
- Guide the thread through the upper thread guides.
- Pass the thread through the tension discs.
- Thread the take-up lever from right to left.
- Guide the thread through the remaining thread guides down to the needle.
- Thread the needle from front to back. Pull about 6 inches of thread through the needle eye.
- Hold the needle thread, turn the handwheel towards you to lower and raise the needle, catching the bobbin thread. Pull both threads under the presser foot and towards the back.
5. Operating Instructions
5.1 Power On/Off and Speed Control
- Turn on the main power switch. The control panel display will illuminate.
- Use the '+' and '-' buttons on the control panel to adjust the sewing speed.
- Press the foot pedal to start sewing. Release to stop.
5.2 Stitch Length Adjustment
The stitch length can be adjusted using the dial or buttons on the control panel, as indicated in Figure 3.1. Refer to the specific icons for stitch length control.
5.3 Automatic Foot Lifter
The machine features an automatic foot lifter. This function can typically be activated or adjusted via the control panel settings, allowing the presser foot to lift automatically at the end of a seam or when stopping.
5.4 Under Trimmer Operation
The integrated under trimmer automatically cuts the top and bobbin threads at the end of a sewing cycle. This feature is usually activated by a specific foot pedal action (e.g., pressing the heel) or a button on the control panel. Consult the control panel diagram for the specific trimmer activation method.
5.5 Reverse Stitching
To reinforce seams, press and hold the reverse stitch button (often marked with a reverse arrow) on the control panel while sewing. Release to resume forward stitching.
5.6 Material Handling
The SW9000-D4-S is designed for a wide range of materials, from light-weight to medium-weight denim. Ensure the correct needle size and thread type are used for your specific fabric to achieve optimal stitch quality.
6. Maintenance
Regular maintenance ensures the longevity and optimal performance of your sewing machine.
6.1 Cleaning
- Daily: Use a soft brush to remove lint and dust from the needle plate, feed dogs, and bobbin area.
- Weekly/Bi-weekly: Remove the needle plate and clean thoroughly around the feed dogs and hook area. Use a vacuum cleaner with a small nozzle if available.
- Wipe the exterior of the machine with a soft, dry cloth. Do not use harsh chemicals.
6.2 Lubrication
The Yamata Speedway SW9000-D4-S features an auto-lubrication system. Ensure the oil reservoir is filled to the appropriate level with recommended sewing machine oil. Check the oil level regularly and refill as needed. Refer to the machine's specific oiling points diagram if available in a supplementary manual.
6.3 Needle Replacement
Replace needles frequently, especially when sewing dense fabrics or if you notice skipped stitches or thread breakage. A dull or bent needle can damage fabric and affect stitch quality. Refer to Section 4.2 for installation instructions.
7. Troubleshooting
This section addresses common issues you might encounter. For problems not listed here, contact your dealer or a qualified technician.
| Problem | Possible Cause | Solution |
|---|---|---|
| Skipped Stitches | Incorrect needle installation, bent/dull needle, incorrect needle size for fabric, improper threading. | Reinstall needle correctly, replace needle, use appropriate needle, rethread machine. |
| Thread Breakage (Top Thread) | Improper threading, too much upper tension, burrs on needle eye/thread path, poor quality thread, bent needle. | Rethread machine, reduce upper tension, check thread path for rough spots, use quality thread, replace needle. |
| Thread Breakage (Bobbin Thread) | Improper bobbin winding, incorrect bobbin insertion, too much bobbin tension, lint in bobbin case. | Rewind bobbin evenly, reinsert bobbin correctly, adjust bobbin tension, clean bobbin case. |
| Uneven Stitches | Incorrect tension settings (upper or bobbin), inconsistent fabric feeding, wrong needle/thread combination. | Adjust tension, ensure smooth fabric feeding, verify needle/thread suitability. |
| Machine Not Starting | Power not connected, main switch off, safety features engaged. | Check power cord, turn on switch, ensure all covers are closed and safety mechanisms disengaged. |
8. Specifications
Key specifications for the Yamata Speedway SW9000-D4-S:
- Model: SW9000-D4-S
- Type: Single Needle Lockstitch
- Drive System: Direct Drive Servomotor
- Features: Under Trimmer, Automatic Foot Lifter, Auto Lubrication
- Material: Alloy Steel, Stainless Steel
- Power Source: Corded Electric
- UPC: 363307300021
9. Warranty Information
This Yamata Speedway SW9000-D4-S sewing machine comes with a manufacturer's warranty. Please refer to the warranty card included with your purchase for specific terms, conditions, and duration. Keep your proof of purchase for warranty claims. The warranty typically covers defects in materials and workmanship under normal use.
10. Customer Support
For technical assistance, spare parts, or service inquiries, please contact your authorized Yamata dealer or the manufacturer's customer support. Have your machine model number (SW9000-D4-S) and serial number ready when contacting support.
Contact Information: (Please refer to your purchase documentation for specific contact details.)