
Introduction
This manual provides essential instructions for the installation, operation, maintenance, and troubleshooting of your SCREENARAMA screen replacement for the Lenovo IdeaPad 3 15ITL6 laptop. Please read this manual carefully before proceeding with installation to ensure proper handling and functionality.
Compatibility and Verification
Before installation, it is crucial to verify that this screen is compatible with your specific laptop model and original screen specifications. This replacement screen is designed for the Lenovo IdeaPad 3 15ITL6 with a 15.6-inch FHD (1920x1080) IPS Matte display and a 30-pin video connector.
Important: Mismatched specifications can lead to display issues or damage. Always confirm your original screen's resolution, connector type, and size.

Figure 1: How to Select the Correct Screen. This diagram illustrates the critical parameters to check for compatibility: video connector type (30-pin vs 40-pin), resolution (HD vs FHD vs UHD), touchscreen vs non-touch, and refresh rate. These details can typically be found on labels on the back of the original screen or laptop.

Figure 2: 30-pin Video Connector Location. This image shows the back of a 15.6-inch Full HD screen, highlighting the position of the 30-pin video connector. Ensure your original screen has a similar 30-pin connector.

Figure 3: 30-pin vs. 40-pin Video Connector. This image visually distinguishes between a 30-pin and a 40-pin video connector. This replacement screen requires a 30-pin connector. A 40-pin connector is incompatible.
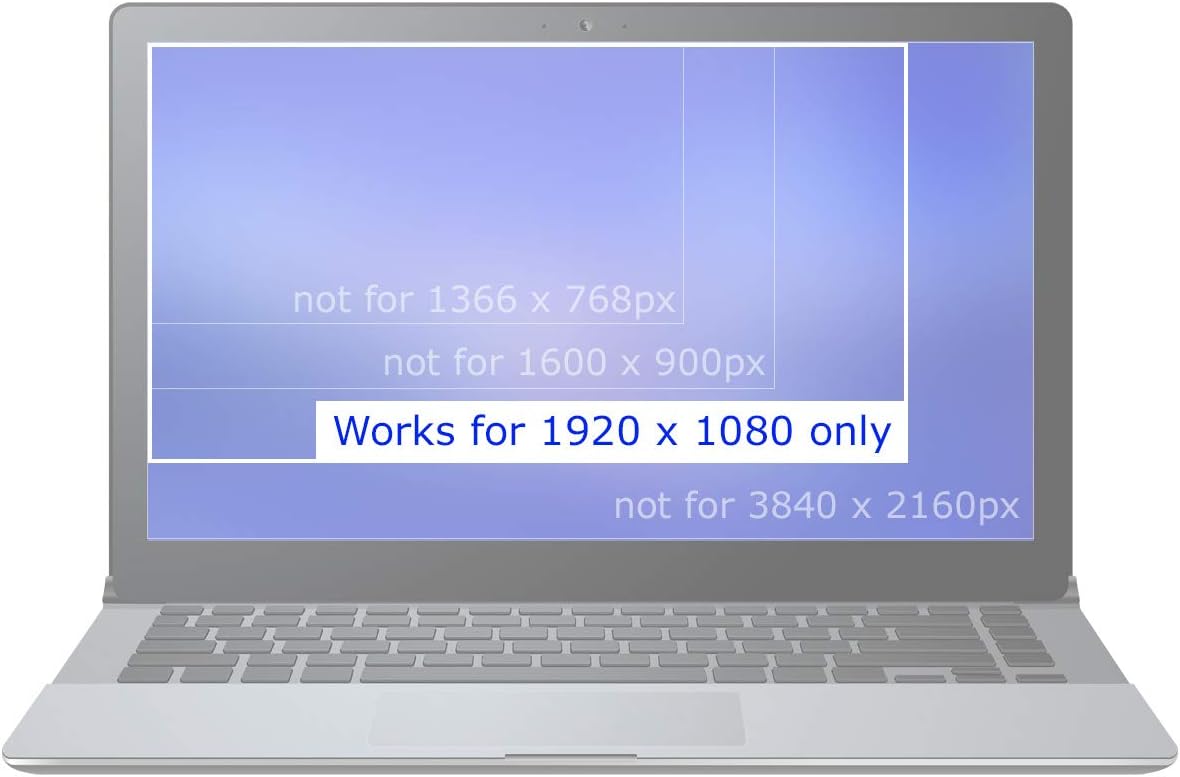
Figure 4: Resolution Compatibility. This graphic clarifies that the replacement screen is compatible only with laptops originally equipped with a 1920x1080 (FHD) resolution display. It is not compatible with other resolutions such as 1366x768, 1600x900, or 3840x2160.

Figure 5: Non-Touchscreen Display. This replacement is an LCD screen only and does not support touchscreen functionality. If your original laptop had a touchscreen, this replacement will not provide that feature.
Package Contents
Your SCREENARAMA screen replacement package includes the following items:
- 1x SCREENARAMA 15.6" FHD (1920x1080) IPS Matte LCD LED Display
- 1x Set of Installation Tools (as pictured below)

Figure 6: Included Installation Tools. The package contains a set of basic tools to assist with the screen replacement process, typically including screwdrivers, tweezers, and plastic prying tools.
Setup and Installation
Replacing a laptop screen requires careful handling and some technical proficiency. If you are not comfortable performing this procedure, it is recommended to seek professional assistance.
Safety Precautions:
- Power Off: Completely shut down your laptop and disconnect it from the power adapter.
- Remove Battery: If your laptop has a removable battery, remove it. For internal batteries, disconnect the battery connector from the motherboard.
- Static Discharge: Work on a clean, static-free surface. Consider using an anti-static wrist strap.
- Gentle Handling: Laptop components are delicate. Apply gentle force when prying or disconnecting parts.
General Installation Steps (Consult Online Resources for Detailed Guides):
- Prepare Workspace: Ensure a clean, well-lit area.
- Remove Bezel: Carefully pry off the plastic bezel surrounding the screen. This may involve removing small screws hidden under rubber covers.
- Unscrew Screen: Remove the screws holding the old screen in place, usually located on the side brackets.
- Disconnect Old Screen: Gently lay the old screen face down on the keyboard. Carefully peel back any tape securing the video cable connector and disconnect the 30-pin cable.
- Connect New Screen: Connect the 30-pin video cable to the new SCREENARAMA display, ensuring it is fully seated and secured with any original tape.
- Test Display: Before reassembling, temporarily connect the battery (if removed) and power on the laptop to verify the new screen functions correctly. Check for display issues, dead pixels, or flickering.
- Reassemble: If the screen functions correctly, secure the new screen with screws, reattach the bezel, and reassemble any other components.
For detailed, step-by-step visual instructions, it is highly recommended to search for specific video tutorials for "Lenovo IdeaPad 3 15ITL6 screen replacement" on platforms like YouTube. Many users have found these resources helpful for a smooth replacement process.
Operating the Display
Once installed, your SCREENARAMA display operates as a standard laptop screen. No special drivers or software are typically required beyond your operating system's default display management.
Adjusting Display Settings:
- Brightness: Adjust screen brightness using your laptop's function keys (e.g., Fn + F5/F6) or through your operating system's display settings.
- Resolution: Ensure the display resolution is set to 1920x1080 (FHD) for optimal clarity. This can be adjusted in your operating system's display settings.
- Color Calibration: If desired, you can calibrate the display colors using your operating system's built-in tools or third-party software.
Maintenance and Care
Proper care will extend the lifespan and maintain the visual quality of your SCREENARAMA display.
Cleaning the Screen:
- Power Off: Always turn off your laptop before cleaning the screen.
- Soft Cloth: Use a soft, lint-free microfiber cloth.
- Gentle Wiping: Gently wipe the screen in one direction to remove dust and smudges. Avoid circular motions.
- Cleaning Solutions: For stubborn marks, lightly dampen the cloth with distilled water or a screen-specific cleaning solution. Never spray liquid directly onto the screen. Avoid harsh chemicals, alcohol, or ammonia-based cleaners, as these can damage the matte finish.
General Care:
- Avoid applying pressure to the screen surface.
- Keep the laptop closed when not in use to protect the screen from dust and accidental damage.
- Transport your laptop in a protective sleeve or bag.
Troubleshooting
If you encounter issues after installing your new screen, refer to the following common problems and solutions:
| Problem | Possible Cause | Solution |
|---|---|---|
| No display / Black screen |
|
|
| Flickering or distorted image |
|
|
| Incorrect resolution or blurry text |
|
|
| Dead pixels or lines on screen |
|
|
If these solutions do not resolve your issue, please contact SCREENARAMA customer support for further assistance.
Specifications
| Brand | SCREENARAMA |
| Compatible Model | Lenovo IdeaPad 3 15ITL6 (Model 82H8) |
| Screen Size | 15.6 inches |
| Resolution | FHD (Full High Definition) 1920x1080 |
| Panel Type | IPS (In-Plane Switching), Wide View |
| Surface Finish | Matte |
| Video Connector | 30-pin |
| Bezel Type | Narrow bezel |
| Touchscreen | No (LCD Screen Only) |
Warranty Information
This SCREENARAMA screen replacement comes with a 2-year warranty. This warranty covers manufacturing defects and ensures guaranteed compatibility as per the product specifications.
For warranty claims or detailed terms and conditions, please retain your proof of purchase and contact SCREENARAMA customer support.
Customer Support
If you have any questions, require assistance with installation, or need to make a warranty claim, please contact SCREENARAMA customer support.
Please refer to the seller's contact information on the platform where you purchased the product for the most direct support channels.