
1. Introduction
This manual provides instructions for the safe and efficient installation, operation, and maintenance of the VENTS-US OV1 250-10 Inch Through-the-wall Exhaust Fan. Please read these instructions thoroughly before installation and use, and retain for future reference.
2. Safety Information
Always observe basic safety precautions when installing, operating, or maintaining electrical appliances to reduce the risk of fire, electric shock, and injury to persons.
- Disconnect power before servicing or cleaning.
- Ensure proper grounding to prevent electric shock.
- Do not operate any fan with a damaged cord or plug.
- Do not use this fan with any solid-state speed control device unless specifically designed for it.
- Installation should be performed by a qualified electrician in accordance with all local and national electrical codes.
- Keep fingers and foreign objects away from the fan blades and grille during operation.
3. Product Features
- Designed for direct air exhaust through walls.
- Axial through-the-wall fan with a 10 5/16-inch diameter.
- Suitable for ventilation in parking garages, agricultural facilities, stores, greenhouses, warehouses, and manufacturing plants.
- Features an asynchronous motor on ball bearings for smooth operation.
- Equipped with thermal protection for enhanced safety.
- The fan body is constructed from steel with a polymeric coating.
- Impeller is made of aluminum for quiet and balanced performance.
4. Specifications
| Specification | Detail |
|---|---|
| Brand | VENTS |
| Model Name | VENTS OV1 250 (120V/60Hz) |
| Size | OV1 250 (10 Inch Wall Exhaust Fan) |
| Color | Black |
| Electric Fan Design | Exhaust Fan |
| Power Source | AC |
| Voltage | 120 Volts (AC) |
| Wattage | 60 watts |
| Speed | 1200 RPM |
| Noise Level | 4 Sones |
| Product Dimensions | 5.5"D x 14.56"W x 14.56"H |
| Item Weight | 11.38 pounds |
| Finish Type | Polymeric Coated |
| Motor Type | Brushless (Asynchronous motor on ball bearings) |
| Installation Type | Wall Mounted |
| Mounting Type | Wall Mount |
| Indoor/Outdoor Usage | Indoor |
| Control Method | App (Note: Functionality may require additional accessories or specific setup.) |
| Specification Met | HVI, UL, cUL |
5. Setup and Installation
The VENTS-US OV1 250 fan is designed for through-the-wall installation. Proper installation is crucial for optimal performance and safety. It is recommended that installation be performed by a qualified professional.
5.1 Pre-Installation Checks
- Verify that the power supply matches the fan's specifications (120V/60Hz).
- Ensure the mounting surface is structurally sound and can support the fan's weight.
- Confirm adequate clearance around the installation area for airflow and maintenance.
5.2 Installation Steps (General)
- Prepare the Opening: Create a circular opening in the wall with the appropriate diameter (approximately 10 5/16 inches) to accommodate the fan's duct.
- Mount the Fan: Secure the fan's mounting plate to the wall using appropriate fasteners. Ensure the fan is level and securely attached.
- Electrical Connection: Connect the fan to the electrical supply. This must be done by a qualified electrician following all local and national electrical codes. Ensure proper grounding.
- Test Operation: After installation, briefly power on the fan to ensure it operates correctly and quietly.
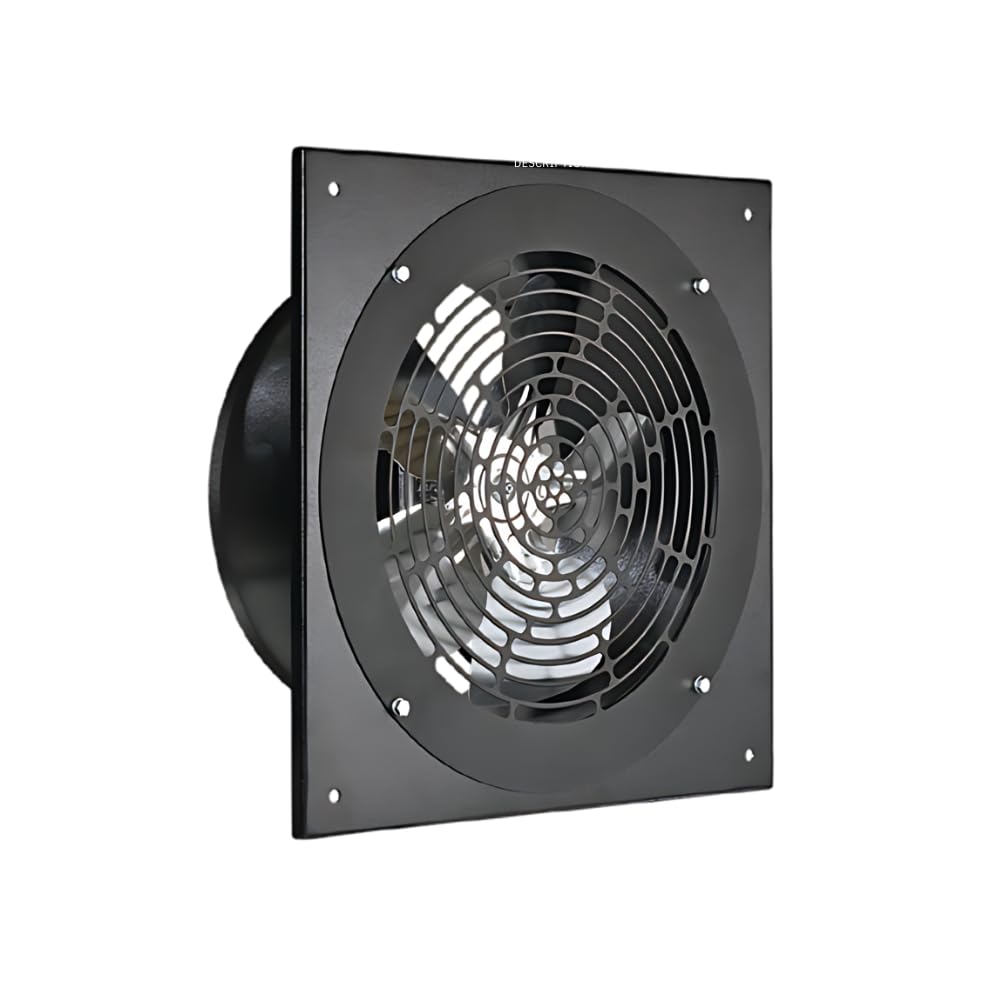
Figure 1: Front view of the VENTS-US OV1 250 exhaust fan. This image shows the protective grille and the overall square frame design of the fan.
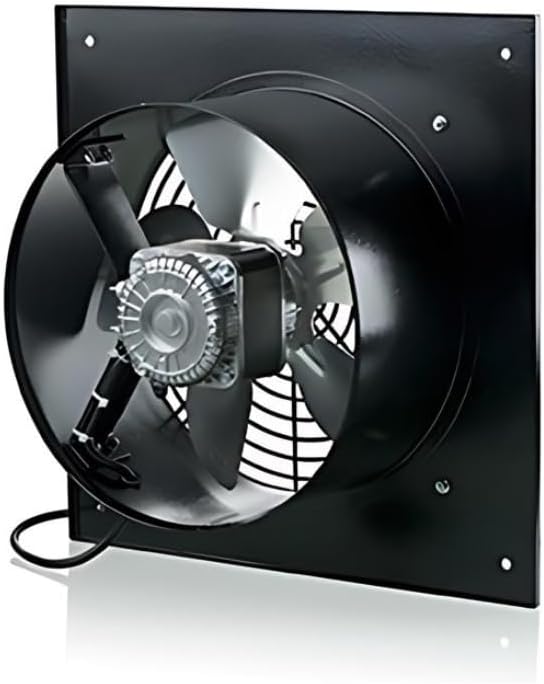
Figure 2: Rear view of the VENTS-US OV1 250 exhaust fan. This image highlights the motor assembly, fan blades, and the electrical connection box at the bottom.

Figure 3: Dimensional drawing of the VENTS-US OV1 250 exhaust fan. This diagram provides key measurements for installation, including the overall width (B), duct diameter (D), and depth (L).
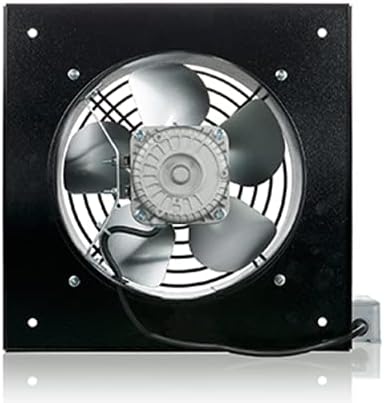
Figure 4: Table of dimensions for VENTS OV1 series models. This table lists various measurements (D, D1, D2, d, L) for OV1 200, OV1 250, and OV1 315 models, aiding in selecting the correct size and planning installation.
6. Operating Instructions
The VENTS-US OV1 250 fan is designed for straightforward operation. Once properly installed and connected to power, the fan can be activated via its designated switch (e.g., push button, wall switch, or app control if applicable).
- Power On/Off: Use the connected switch to turn the fan on or off.
- Airflow Direction: Ensure the fan is installed to exhaust air in the desired direction. The OV1 series is specifically for direct air exhaust.
- Continuous Operation: This fan is built for environments requiring constant performance.
Video 1: A view of the OV1-250 Through-the-Wall Exhaust Fan. This video provides a visual overview of the fan's design and components, demonstrating its physical characteristics and how it appears from different angles.
Video 2: VENTS-US OV1 Axial Fan Series Overview. This video offers a broader look at the OV1 series, showcasing its features and applications across different models, including the OV1 250.
7. Maintenance
Regular maintenance ensures the longevity and efficient operation of your VENTS-US OV1 250 exhaust fan.
7.1 Cleaning
- Frequency: Inspect and clean the fan blades and grille periodically, depending on the operating environment and dust accumulation.
- Procedure:
- Disconnect Power: Always turn off and disconnect power to the fan before cleaning.
- Remove Grille: Carefully remove any protective grilles or covers.
- Clean Blades and Housing: Use a soft cloth or brush to remove dust and debris from the fan blades and interior housing. For stubborn dirt, a mild detergent solution can be used, ensuring no liquid enters the motor or electrical components.
- Reassemble: Once clean and dry, reattach the grilles and covers securely.
7.2 Inspection
- Periodically check for any signs of wear, damage, or loose connections.
- Listen for unusual noises during operation, which may indicate a problem.
8. Troubleshooting
If you encounter issues with your VENTS-US OV1 250 fan, refer to the following common troubleshooting steps:
| Problem | Possible Cause | Solution |
|---|---|---|
| Fan does not turn on | No power supply, loose wiring, faulty switch, motor issue. | Check power connection, circuit breaker. Verify wiring connections. Test the switch. If motor issue suspected, contact support. |
| Reduced airflow | Blocked grille or fan blades, motor running slow. | Clean fan blades and grille. Ensure no obstructions. If motor is slow, contact support. |
| Excessive noise or vibration | Loose mounting, unbalanced impeller, foreign object in fan. | Check mounting screws for tightness. Inspect for foreign objects. If impeller is unbalanced, contact support. |
| Overheating | Blocked airflow, motor overload. | Ensure clear airflow paths. If fan continues to overheat, disconnect power and contact support. |
For issues not resolved by these steps, please contact VENTS-US customer support.
9. Warranty and Support
For warranty information and customer support, please refer to the documentation included with your purchase or visit the official VENTS-US website. Keep your purchase receipt for warranty claims.