
Introduction
This manual provides detailed instructions for the safe installation, operation, and maintenance of your Z-Lite 3033-6MB Emily Chandelier. Please read all instructions carefully before beginning installation and retain this manual for future reference.

Figure 1: Z-Lite 3033-6MB Emily Chandelier in a living room setting.
Safety Information
WARNING: RISK OF ELECTRIC SHOCK. Ensure power is turned off at the main circuit breaker or fuse box before installation or servicing. Consult a qualified electrician if you are unsure about wiring procedures.
- Read all instructions before assembly and installation.
- All electrical connections must be in accordance with local codes, ordinances, or the National Electric Code (NEC).
- Use only UL/cUL listed wire connectors.
- Do not exceed the maximum wattage specified for the bulbs.
- Fixture is intended for indoor use only.
Package Contents
Carefully unpack your chandelier and identify all parts. Keep all packaging materials until you are certain all parts are present and in good condition. If any parts are missing or damaged, do not attempt to assemble or install the fixture.
- Chandelier Fixture Body (1)
- Fabric Shades (6)
- Mounting Hardware Kit (Canopy, Mounting Plate, Screws, Wire Nuts)
- Instruction Manual (1)
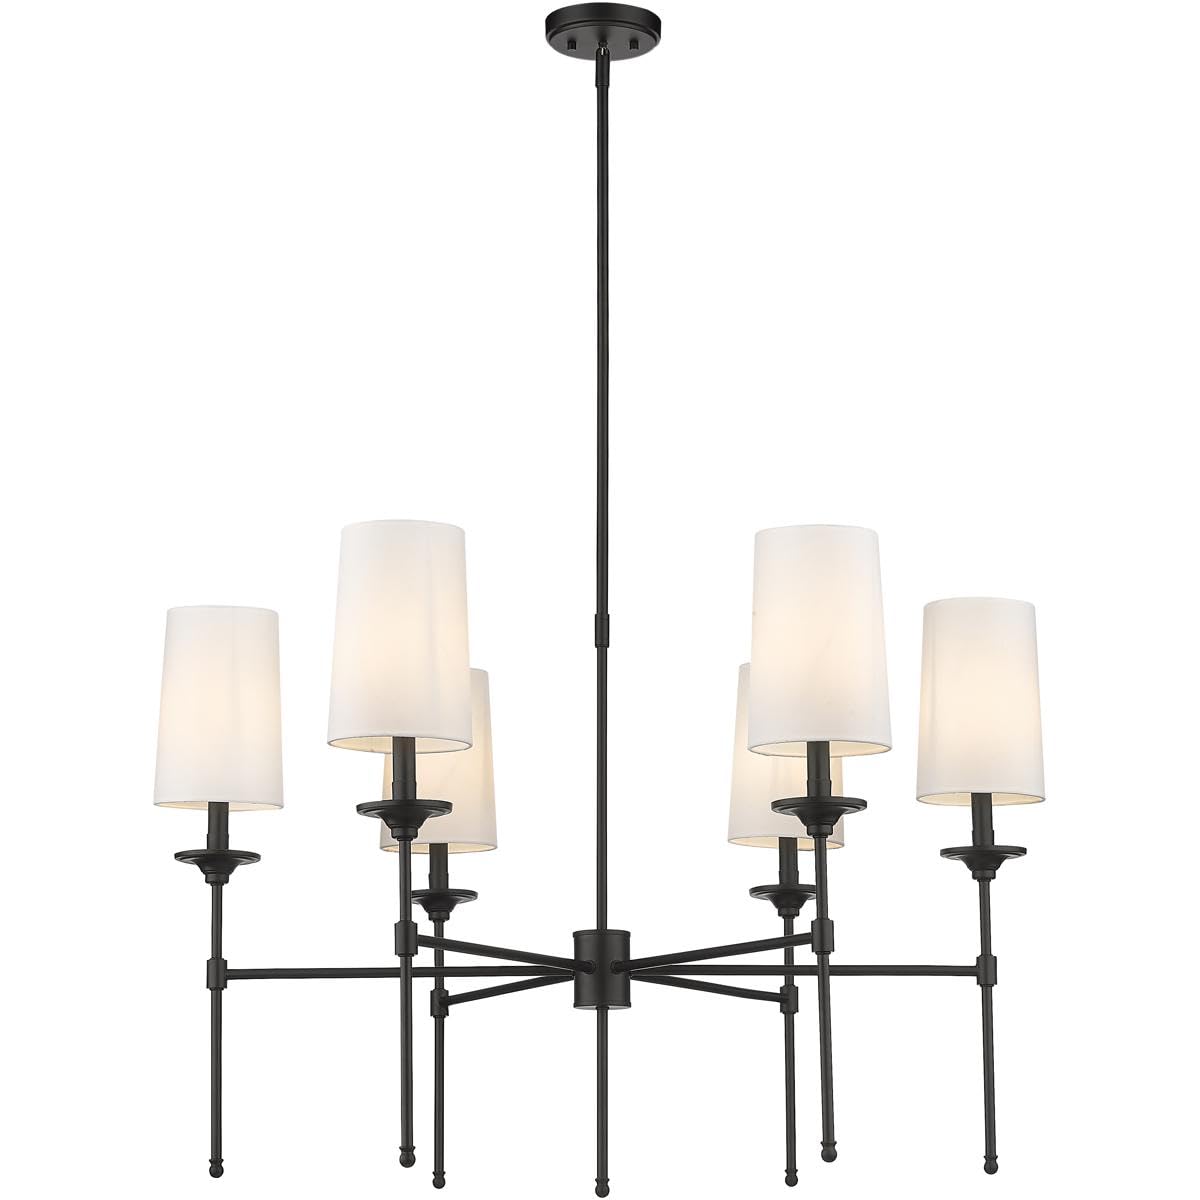
Figure 2: Chandelier fixture body (bulbs and shades not shown).
Setup and Installation
Professional installation is recommended. Ensure you have the necessary tools: screwdriver, wire strippers, electrical tape, and safety glasses.
Step 1: Prepare for Installation
- Turn off power at the circuit breaker or fuse box.
- Remove the old fixture (if applicable).
- Carefully unpack the new fixture and lay out all parts on a clean surface.
Step 2: Mount the Fixture
- Attach the mounting plate to the junction box in the ceiling using the provided screws.
- Thread the fixture wires through the center hole of the mounting plate.
Step 3: Wiring Connections
- Connect the black fixture wire to the black supply wire (Live) using a wire nut.
- Connect the white fixture wire to the white supply wire (Neutral) using a wire nut.
- Connect the ground wire (bare copper or green) from the fixture to the ground wire from the junction box using a wire nut.
- Carefully tuck all wires into the junction box.
Step 4: Secure the Canopy and Attach Shades
- Align the fixture canopy with the mounting plate and secure it with the provided screws or decorative nuts.
- Install six (6) E12 base incandescent bulbs (not included) into the sockets. Do not exceed 60 watts per bulb.
- Place the fabric shades over each bulb socket.

Figure 3: Chandelier dimensions and structural overview (Model 3033-6).

Figure 4: Chandelier with shades installed.
Operating Instructions
Once installed, restore power at the circuit breaker. The Z-Lite 3033-6MB Emily Chandelier is designed to be operated via a standard wall switch or a compatible remote control system (if installed separately).
- Power On/Off: Use the wall switch connected to the fixture to turn the chandelier on or off.
- Remote Control: If a remote control system is integrated with your home's lighting, follow the instructions provided with your remote control for pairing and operation.
- Bulb Replacement: Ensure power is off before replacing bulbs. Allow bulbs to cool completely before touching.
Maintenance
Regular maintenance will help preserve the appearance and functionality of your chandelier.
- Cleaning: Dust the fixture regularly with a soft, dry cloth. For more thorough cleaning, wipe with a damp cloth using mild soap and water. Avoid abrasive cleaners or solvents, as these can damage the finish.
- Bulb Replacement: Always turn off power before replacing bulbs. Use only E12 base incandescent bulbs, not exceeding 60 watts per bulb.
- Inspection: Periodically check all connections and mounting hardware to ensure they remain secure.
Troubleshooting
If your chandelier is not functioning correctly, refer to the following common issues and solutions:
| Problem | Possible Cause | Solution |
|---|---|---|
| Light does not turn on. | No power to the fixture. | Check circuit breaker or fuse. Ensure wall switch is on. |
| Light bulbs are faulty. | Replace bulbs with new ones. | |
| Loose wire connection. | Turn off power and check all wire connections. Tighten if necessary. | |
| Flickering lights. | Loose bulb or connection. | Ensure bulbs are screwed in tightly. Check wire connections. |
| Incorrect bulb type/wattage. | Ensure bulbs are E12 base and do not exceed 60 watts. |
Specifications
| Feature | Detail |
|---|---|
| Model Number | 3033-6MB |
| Brand | Z-Lite |
| Finish | Matte Black |
| Material | Brass, Alloy Steel (Shade) |
| Number of Lights | 6 |
| Bulb Base | E12 |
| Max Wattage per Bulb | 60 watts |
| Voltage | 120 volts |
| Dimensions (L x W x H) | 38" x 38" x 25.5" |
| Item Weight | 15 pounds |
| Mounting Type | Ceiling Mount |
| Indoor/Outdoor Usage | Indoor |
| Certification | UL, cUL |
Warranty Information
The Z-Lite 3033-6MB Emily Chandelier is covered by a 1-year manufacturer's warranty from the date of purchase. This warranty covers defects in materials and workmanship under normal use. It does not cover damage resulting from improper installation, accident, misuse, abuse, or unauthorized modifications. Please retain your proof of purchase for warranty claims.
Support
For technical assistance, missing parts, or warranty inquiries, please contact Z-Lite customer support. Refer to the contact information provided on the product packaging or the official Z-Lite website.
Website: www.z-lite.com (Example link, please verify official website)