1. Introduction
Thank you for choosing the HOMEFORT 6-Tier Shoe Rack. This manual provides essential information for the safe assembly, proper use, and maintenance of your new shoe rack. Please read these instructions carefully before assembly and retain them for future reference.
This versatile and compact shoe rack is designed to provide efficient storage for shoes, boots, high heels, and sneakers, helping to organize your entryway, front door, hallway, or bedroom. Its industrial design with a rustic brown wood accent tabletop makes it a decorative addition to any home.
2. Safety Information
WARNING: Do not overload shelves. Ensure proper installation, including the use of the tilt protection device, to prevent tipping and potential injury.
Always place the shoe rack on a flat, stable surface. Keep small parts away from children during assembly.
3. Package Contents
Before beginning assembly, ensure all parts listed below are present and undamaged:
- 1 x 6-Tier Shoe Rack (main components)
- 1 x Accessory Pack (screws, tools, etc.)
- 1 x Tilt Protection Device
- 1 x Assembly Instruction in English Version
4. Assembly Instructions
The HOMEFORT 6-Tier Shoe Rack is designed for quick and easy assembly. Follow the detailed, well-illustrated instructions provided in your package. All assembly parts are clearly labeled to simplify the process.
4.1 Assembly Overview
Video: A general product detail video for the Industrial Shoe Rack in Rustic Brown, demonstrating its features and potential assembly steps.
4.2 Key Components and Dimensions

Image: Detailed dimensions of the HOMEFORT 6-Tier Shoe Rack, crucial for planning placement and understanding component sizes during assembly.
4.3 Detailed Assembly Steps
- Unpack and Identify Parts: Carefully unpack all components and lay them out. Refer to the parts list in your included instruction manual to identify each piece.
- Assemble the Frame: Connect the metal side frames using the provided screws and tools. Ensure all connections are secure but do not overtighten until the entire frame is assembled.
- Install Shelves: Slide the wire shelves into the designated slots on the frame. Ensure they are properly seated and level.
- Attach the Top Panel: Secure the rustic brown wood tabletop to the top of the metal frame using the appropriate screws.
- Install Anti-Tipping Device: For enhanced stability and safety, attach the tilt protection device to the top rear of the shoe rack and secure it to a wall stud according to the instructions.

Image: A close-up view illustrating the connection point between the industrial wood tabletop and the sturdy metal frame, highlighting the retro accent design.

Image: A detailed view of the shelf spacing, indicating approximately 7.87 inches (20 cm) between each tier, which is suitable for various shoe types.

Image: A close-up of the base of the shoe rack, showing the adjustable feet that help ensure stability on uneven floors.
5. Usage Instructions
Once assembled, your HOMEFORT 6-Tier Shoe Rack is ready for use. Its design is ideal for narrow spaces, making it a perfect storage solution for various areas in your home.
5.1 Shoe Storage
- Each metal shelf is designed to hold approximately three pairs of regular shoes.
- The sturdy metal frame ensures enhanced stability, with each tier capable of holding up to 11 lbs.
- The top flat tabletop can be used to place decorative items, a mail basket, purse, backpack, or hand sanitizer.

Image: The 6-tier shoe rack neatly organized in an entryway, showcasing its capacity for different types of footwear and the functional tabletop.
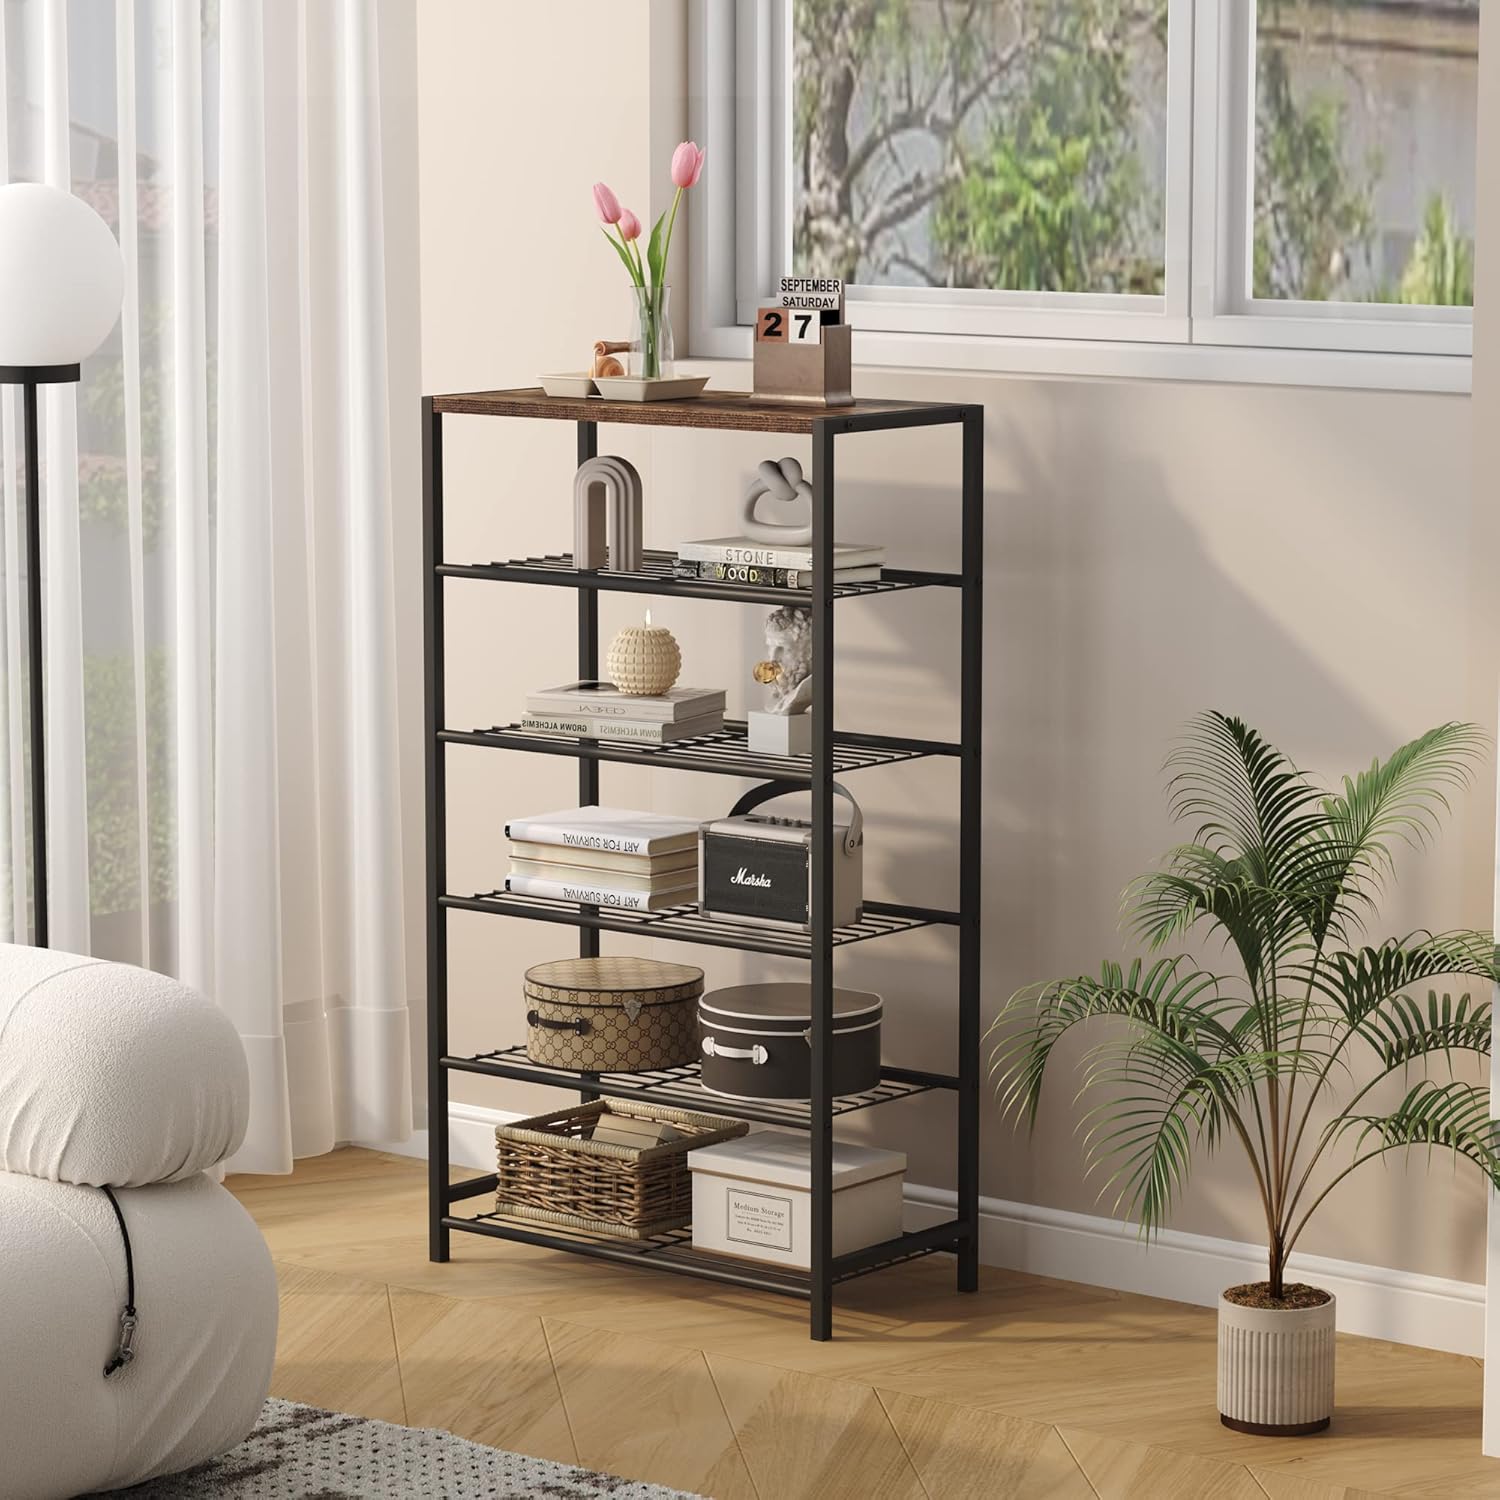
Image: The shoe rack repurposed as a general storage shelf in a living room, demonstrating its versatility beyond just shoes.
5.2 Placement Recommendations
The compact dimensions (11.8"D x 23.23"W x 40.55"H) make this shoe shelf ideal for:
- Entryways and front doors
- Hallways
- Closets
- Bedrooms
- Dormitories
- Garages

Image: A visual representation of the shoe rack's adaptability, showing it effectively utilized in a hallway, bedroom, and balcony to maximize narrow corner spaces.
Video: A demonstration of the HOMEFORT Shoe Rack Organizer, showing its use in a front door entrance and highlighting its organizational benefits.
6. Maintenance
To keep your HOMEFORT 6-Tier Shoe Rack in optimal condition:
- Wipe with a dry cloth regularly to remove dust and dirt.
- Avoid using harsh chemicals or abrasive cleaners, as these may damage the finish.
- Periodically check all screws and connections to ensure they remain tight.
7. Troubleshooting
If you encounter any issues with your shoe rack, please refer to the following common solutions:
- Wobbly Rack: Ensure all screws are tightened securely. Check that the rack is placed on a level surface. Adjust the leveling feet if necessary.
- Missing Parts: Double-check the package contents against the parts list. If any parts are genuinely missing, contact customer support.
- Difficulty Assembling: Review the assembly instructions carefully. Ensure you are using the correct screws for each step. Do not force parts together.
8. Specifications
| Brand | HOMEFORT |
| Model Name | PG-ASR010A |
| Product Dimensions | 11.8"D x 23.23"W x 40.55"H |
| Number of Shelves | 6 |
| Material | Engineered Wood, Metal |
| Color | Rustic Brown |
| Item Weight | 10.78 Pounds |
| Special Features | Durable, Portable, Scratch Resistant, Space Saving |
| Assembly Required | Yes |
| Recommended Uses | Shoe Storage |
9. Warranty and Support
For warranty information or customer support, please refer to the contact details provided with your purchase documentation or visit the official HOMEFORT website. Keep your proof of purchase for any warranty claims.


