1. Introduction
This manual provides essential information for the safe and efficient operation, installation, and maintenance of your THOR Kitchen Professional 36-inch Cooktop/Rangetop, Model TGC3601. Please read all instructions thoroughly before using the appliance to ensure proper function and to prevent potential hazards. Keep this manual for future reference.
2. Safety Information
WARNING: Gas appliances can cause minor exposure to benzene, which is a natural byproduct of gas fuel. This is known to the State of California to cause cancer and reproductive toxicity. For more information, visit www.P65Warnings.ca.gov.
- Gas Leaks: If you smell gas, immediately shut off the gas supply to the appliance and evacuate the area. Do not operate any electrical switches or phones. Contact your gas supplier or fire department.
- Ventilation: Ensure adequate ventilation in the kitchen area when operating the cooktop.
- Flammable Materials: Keep flammable materials, such as clothing, paper, and aerosols, away from the cooktop surface.
- Children Safety: Do not allow children to operate or play near the cooktop. Always supervise children when the appliance is in use.
- Hot Surfaces: Burners and cooktop surfaces become hot during use. Avoid touching hot surfaces without protection.
- Proper Installation: This appliance must be installed by a qualified installer in accordance with all local codes and ordinances.
3. Product Overview
The THOR Kitchen Professional 36-inch Cooktop/Rangetop is designed for efficient and versatile cooking. It features six sealed burners, including high-intensity power burners, continuous cast iron grates, and professional illuminated knobs.
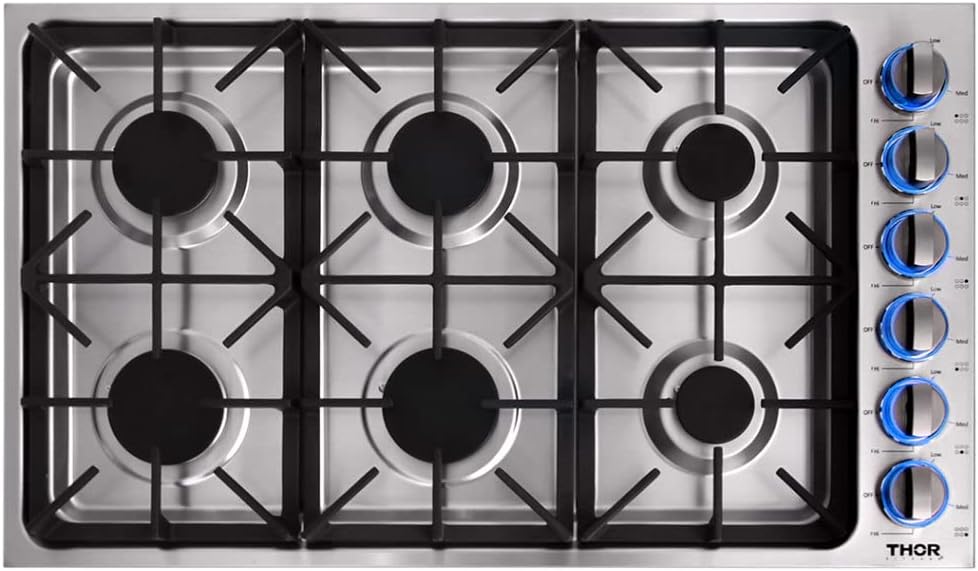
Figure 3.1: Top view of the THOR Kitchen 36-inch Cooktop, showcasing the six burners, continuous grates, and the distinctive blue illumination of the control knobs.
Key Features:
- Six High-Intensity Burners: Includes two 18,000 BTU power burners for rapid heating and four standard burners. Sealed burners contain spills for easier cleaning.
- Professional Illuminated Knobs: Metal constructed knobs provide precise flame control and illuminate with a striking blue light when in operation.
- Stainless Steel Cooktop: A single piece of stainless steel forms the cooktop surface, designed for durability and easy cleaning of spills and grease.
- Continuous Cast Iron Grates: Heavy-duty, porcelain-coated cast iron grates extend from edge-to-edge, allowing for smooth movement of cookware across burners.
- Automatic Electric Ignition: Eliminates the need for manual lighting, enhancing safety and convenience.
- Liquid Propane (LP) Option: The unit is LP convertible, and a liquid propane conversion kit is included.
- Wok Ring: Features a wok ring for stable support of round-bottom woks.

Figure 3.2: Detail view of the cooktop's control panel, highlighting the metal knobs with blue LED illumination, indicating active burners.

Figure 3.3: The included wok ring, designed to provide stability for round-bottom woks on the cooktop's grates.
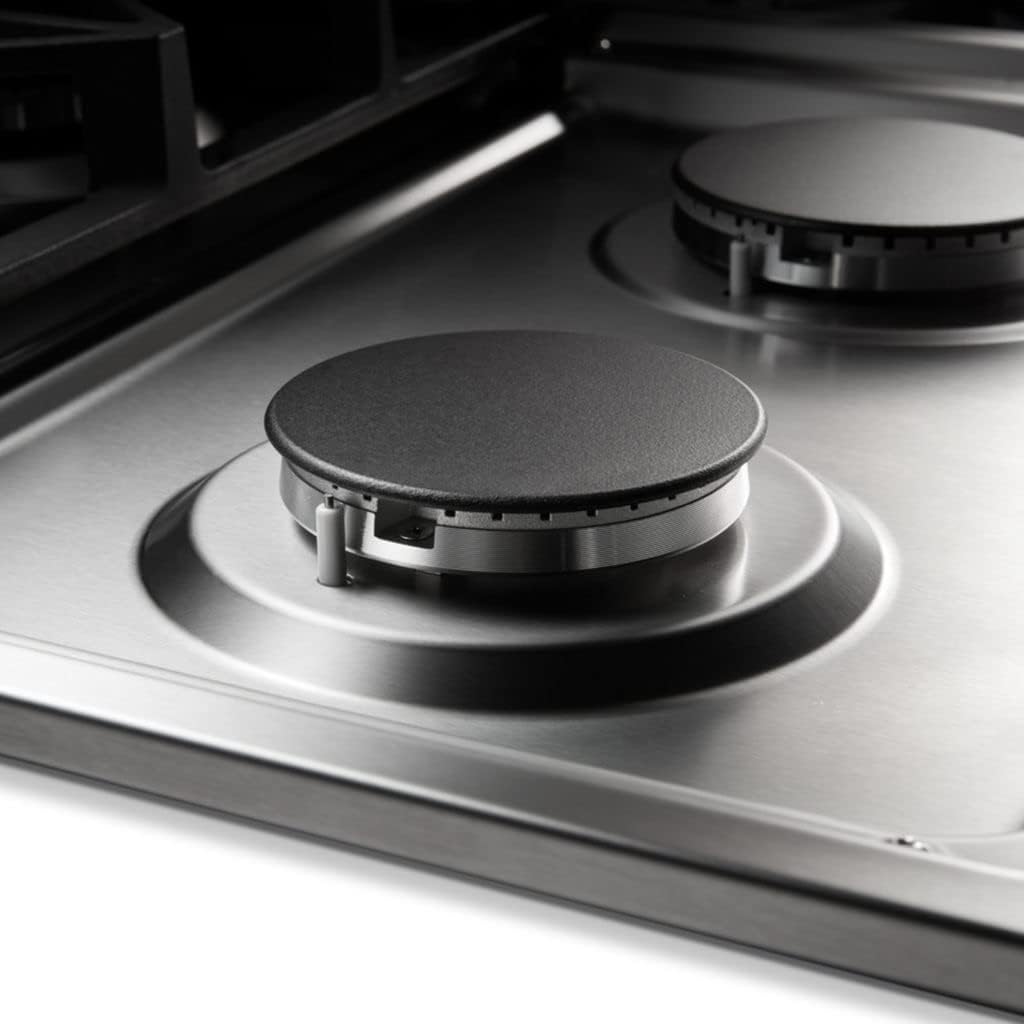
Figure 3.4: A detailed view of a sealed burner, illustrating its design for containing spills and simplifying cleanup.
4. Installation and Setup
Proper installation is crucial for the safe and optimal performance of your cooktop. It is highly recommended that installation be performed by a qualified professional.
Pre-Installation Checks:
- Verify that the gas supply (Natural Gas or LP) matches the appliance requirements. The unit is factory-set for Natural Gas but includes an LP conversion kit.
- Ensure the installation area has adequate ventilation.
- Confirm that the electrical supply meets the cooktop's requirements for the automatic ignition system.
Cut-Out Dimensions:
Refer to the diagram below for precise cut-out and product dimensions to ensure a proper fit in your countertop.

Figure 4.1: Technical drawing detailing the product width, depth, height, and the required countertop cut-out dimensions for installation.
- Product Dimensions: 21"D x 36"W x 4.4"H
- Cut-Out Left to Right Width: 34 5/8"
- Cut-Out Front to Back Depth: 19 1/2"
- Cut-Out Height: 4"
5. Operating Instructions
Your THOR Kitchen cooktop is designed for ease of use. Follow these steps for safe and effective operation.

Figure 5.1: Overhead view of the cooktop, with each of the six burners individually numbered for easy reference in operational instructions.
Igniting a Burner:
- Place your cookware on the desired burner grate.
- Push in the corresponding control knob and turn it counter-clockwise to the 'HI' position. You will hear a clicking sound as the automatic electric ignition sparks.
- Once the burner ignites, continue to hold the knob in for a few seconds to allow the flame sensor to activate.
- Release the knob and adjust the flame to your desired cooking intensity (HI, MED, LOW). The knob will illuminate blue when the burner is active.
Using the Wok Ring:
For cooking with round-bottom woks, place the wok ring securely over one of the burner grates before placing the wok. This provides stability and ensures even heat distribution.
Turning Off a Burner:
Push in the control knob and turn it clockwise to the 'OFF' position. The blue illumination will turn off, indicating the burner is no longer active.
6. Maintenance and Cleaning
Regular cleaning and maintenance will prolong the life and appearance of your cooktop.
Stainless Steel Cooktop Surface:
- Clean spills immediately to prevent staining.
- Use a soft cloth with warm, soapy water or a specialized stainless steel cleaner.
- Always wipe in the direction of the grain to avoid scratching.
- Rinse thoroughly and dry with a clean, soft cloth to prevent water spots.
Cast Iron Grates:
- Allow grates to cool completely before cleaning.
- Remove grates and wash with warm, soapy water. For stubborn food residue, use a non-abrasive scrubber.
- Dry thoroughly to prevent rust.
Burner Caps and Bases:
- Remove burner caps and bases when cool.
- Clean with warm, soapy water. Ensure burner ports are clear of food debris.
- Dry completely before reassembling. Ensure burner caps are correctly seated on their bases.
Control Knobs:
- Pull knobs straight off to remove.
- Wash with warm, soapy water and dry thoroughly.
- Do not use abrasive cleaners or pads on the knobs.
7. Troubleshooting
If you encounter issues with your cooktop, refer to the following common problems and solutions before contacting service.
| Problem | Possible Cause | Solution |
|---|---|---|
| Burner does not ignite or sparks continuously. | Gas supply off; burner ports clogged; igniter wet or dirty; power outage. | Check gas supply valve. Clean burner ports and igniter. Ensure burner cap is correctly seated. Check household circuit breaker. |
| Flame is uneven or yellow. | Burner ports clogged; incorrect gas type; air shutter adjustment needed. | Clean burner ports. Verify correct gas type (Natural Gas/LP). Contact a qualified technician for air shutter adjustment if necessary. |
| Control knob is stiff or difficult to turn. | Food debris or grease buildup around the knob shaft. | Remove knob and clean the area around the shaft with warm, soapy water. Ensure no debris obstructs movement. |
| Blue illumination on knob not working. | LED malfunction. | Contact customer support for assistance. |
8. Specifications
Detailed technical specifications for the THOR Kitchen Professional 36-inch Cooktop/Rangetop, Model TGC3601.
| Specification | Detail |
|---|---|
| Product Dimensions | 21 x 36 x 4.4 inches |
| Item Weight | 52.8 pounds |
| Manufacturer | Thor Kitchen |
| Model Number | TGC3601 |
| Brand | Thor Kitchen |
| Heating Elements | 6 |
| Color | Stainless Steel |
| Power Source | Gas Powered |
| Fuel Type | Natural Gas (LP convertible with kit included) |
| Special Features | Continuous Cast Iron Grates, Illuminated Knobs, Sealed Burners, Wok Ring |
| Heater Surface Material | Stainless Steel |
| Material | Stainless Steel |
| Burner Type | Gas |
9. Warranty and Support
For warranty information, service requests, or technical support, please contact Thor Kitchen directly. Refer to your purchase documentation or the official Thor Kitchen website for the most current contact details and warranty terms.


