
Ymiko Ymikoovkyd1aq4g4300
Ymiko Digital Car TV Tuner User Manual
Model: Ymikoovkyd1aq4g4300
Introduction
This user manual provides comprehensive instructions for the installation, operation, and maintenance of your Ymiko Digital Car TV Tuner. This device is designed to provide high-definition digital television reception in your vehicle, supporting MPEG-4 H.264 standards for a clear viewing experience on the go.
Safety Information
- Ensure the device is installed by a qualified professional to prevent damage to the vehicle's electrical system.
- Do not attempt to disassemble or modify the device. This may void the warranty and pose a safety risk.
- Always ensure secure connections for all cables to prevent signal loss or short circuits.
- Operating the device while driving should only be done by passengers. The driver must remain focused on the road.
Package Contents
Please check the package for the following items:
- 1 x Car Digital TV Tuner
- 1 x User Manual
- 1 x Remote Control (Battery not included - requires CR2025)
- 1 x USB Cable
- 1 x 12V Power Cable
- 2 x Antenna Signal Receiving Lines
- 1 x AV Wiring (RCA cables)
- 1 x Infrared Extension Cable

Image: The Ymiko Digital Car TV Tuner box shown with its complete set of accessories, including the remote control, various cables, and antennas.
Product Overview
The Ymiko Digital Car TV Tuner is a compact and robust device designed for in-car entertainment. It features a dual-tuner diversity structure for stable reception, even at high speeds.
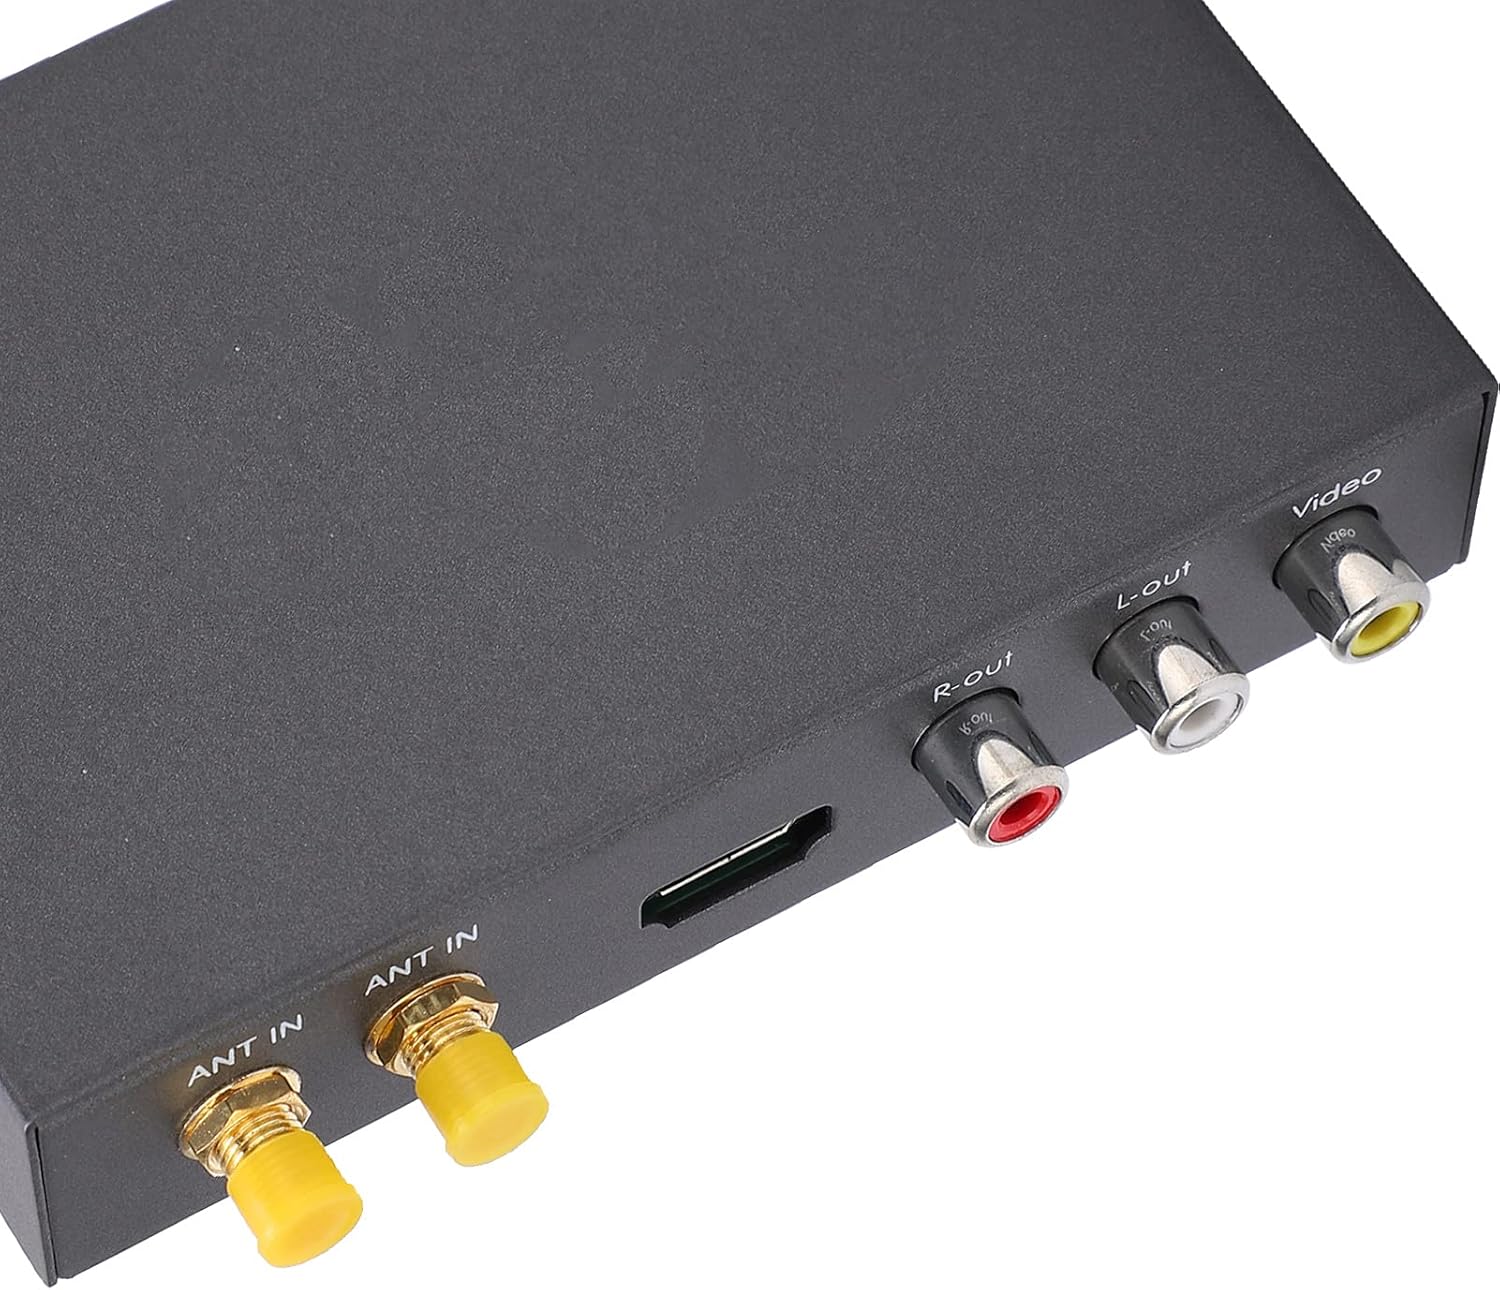
Image: A close-up view of the Ymiko Digital Car TV Tuner's rear panel, showing the dual antenna inputs (ANT IN), HDMI port, R-out, L-out, and Video RCA output ports.
Key Features:
- Full compliance with EN300 744 and EN302 755 standards.
- Supports ultra-fast hardware decoding of JPEG images and multiple OSD language menus.
- Compact design with easy installation.
- True dual-tuner diversity structure for enhanced signal stability.
- Supports MPEG-1, MPEG-2, MPEG-4, and H.264 decoders, with a maximum resolution of 1920 x 1080P.
- Capable of maintaining stable reception at vehicle speeds exceeding 160 km/h.
- Constructed from durable metal and PVC materials for stable performance and high resolution.

Image: The Ymiko Digital Car TV Tuner is shown in a car interior setting, illustrating its capability to provide stable television reception even when the vehicle is traveling at high speeds (over 160 km/h).
Specifications
| Feature | Specification |
|---|---|
| Tuner Module | EN300 744/EN302 755 V1.3.1 Standard |
| RF Input | UHF: 470MHz~862MHz, VHF: 174MHz~230MHz |
| Input Impedance | 50Ω |
| Signal Level | -80dBm~-10dBm |
| Connector Type | 2 x SMA-Type Terminal |
| Channel Bandwidth | 6M/7M/8M |
| FFT Size | 1K, 2K, 4K, 8K (normal), 8K (extended), 16K (normal), 16K (extended), 32K (normal, 32K (extended) |
| Modulation Method | QPSK, 16QAM, 64QAM, 128QAM, 256QAM |
| Guard Interval | 1/128, 1/32, 1/16, 19/256, 1/8, 19/128, 1/4 |
| Pilot Mode | PP1 to PP7 |
| Transport Stream | MPEG-4AVC/H.264 at L4, MPEG-2 MP at HL/ML |
| Video Ratio | 4:3/16:9 |
| Video System | PAL/NTSC |
| Video Output | 1±0.3Vpp |
| Video Resolution | HD Resolution: 720 x 576 at 25 fps / 720 x 480 at 30 fps / HD, 1920 x 1080P / 1920 x 1080i |
| Audio Decoder | MPEG-2/HE AAC (DD/DD +Option) |
| Audio Channel | R/L/ST |
| Audio Output | 1Vpp 47Kohm adjustable E-volume |
| Power Supply | DC+10V~24V±10% |
| Compatible Devices | TV, Laptop, Desktop, Smartphone, Tablet, Radio |
| Connectivity Technology | RCA, USB, S-AV |
Setup and Installation
Follow these steps for proper installation of your Ymiko Digital Car TV Tuner. It is recommended to have this installed by a professional.
-
Power Connection: Connect the 12V power cable to the tuner's DC+12~24V input. Ensure proper polarity (DC+, ACC, Ground).
- DC+12~24V Input
- ACC (Administrative Coordination Committee)
- Ground
- NC (Not Connected)
-
Antenna Connection: Connect the two antenna signal receiving lines to the "ANT IN" SMA-type terminals on the tuner. Position the antennas for optimal reception, typically on the windshield or rear window.

Image: The Ymiko Digital Car TV Tuner unit, clearly showing the two "ANT IN" ports for connecting the signal receiving antennas, ensuring full conformity with DVB-T/T2 standards.
-
Video/Audio Output: Connect the AV wiring (RCA cables) from the tuner's A/V output interface to your car's display unit.
- Video RCA interface x 1
- Audio RCA interface (R/L) x 2

Image: The included RCA AV cables, used for connecting the Ymiko Digital Car TV Tuner to a car's display and audio system.
- Infrared Extension: Connect the infrared extension cable to the IR extension jack on the tuner. Position the IR receiver in a location where it can receive signals from the remote control.
- USB Connection: The USB interface can be used for software upgrades and multimedia playback.
-
Remote Control Battery: Insert a CR2025 battery into the remote control.

Image: The remote control for the Ymiko Digital Car TV Tuner, alongside the infrared extension cable, power cable, and USB cable.
Operating Instructions
- Power On/Off: Once installed and connected to the car's power, the unit will power on with the car's ignition (if wired to ACC). Use the remote control's power button to turn the unit on or off.
-
Channel Scan:
- Access the main menu using the "MENU" button on the remote.
- Navigate to "Channel Search" or "Auto Scan".
- Select "Start Scan" to search for available digital TV channels in your area. This process may take several minutes.
- Ensure your vehicle is stationary during the initial scan for best results.
- Channel Selection: Use the "CH+" and "CH-" buttons on the remote to change channels. You can also enter channel numbers directly using the numeric keypad.
- Volume Control: Adjust the volume using the "VOL+" and "VOL-" buttons.
- OSD Menu: The On-Screen Display (OSD) menu allows you to configure various settings such as language, video output, time, and parental controls. Navigate using the arrow keys and confirm with "ENTER".
- Multimedia Playback: If you connect a USB drive to the USB port, you can access multimedia files (e.g., JPEG pictures, supported video/audio formats) through the "Multimedia" or "USB" option in the main menu.
Troubleshooting
| Problem | Possible Cause | Solution |
|---|---|---|
| No picture/sound | Loose cables, incorrect input selected on car display, no signal. | Check all cable connections (power, AV/HDMI, antennas). Ensure the car display is set to the correct input source. Perform a channel scan. |
| Poor signal/pixelation | Weak signal strength, antenna placement, interference. | Reposition antennas for better reception. Ensure antennas are not obstructed. Rescan channels. Check if you are in a low signal area. |
| Remote control not working | Dead battery, IR receiver blocked, remote out of range. | Replace CR2025 battery. Ensure the IR extension cable's receiver is not blocked and is pointed towards the remote. Reduce distance to the receiver. |
| Device not powering on | No power supply, incorrect wiring. | Check power cable connection and fuse. Verify wiring to car's electrical system (DC+, ACC, Ground). Consult an auto electrician if unsure. |
Maintenance
- Keep the device clean by wiping it with a soft, dry cloth. Do not use liquid cleaners or aerosols.
- Ensure all cables are securely connected and free from damage.
- Avoid exposing the unit to extreme temperatures or humidity.
- Periodically check for firmware updates via the USB port on the manufacturer's website (if available).
Warranty and Support
For warranty information and technical support, please refer to the warranty card included with your product or visit the official Ymiko website. Keep your purchase receipt as proof of purchase.
Manufacturer: Ymiko
ASIN: B09H2ZXK9R
Model Reference: Ymikoovkyd1aq4g4300
For further assistance, you may contact Ymiko customer service through their official channels.
Ask a question about this manual
Ask about setup, troubleshooting, compatibility, parts, safety, or missing instructions. Manuals+ will review the question and use this page’s manual context to help answer it.