
1. Introduction
This manual provides detailed instructions for the DR1TECH DR10042 Shock Pad Wireless Controller. Please read this manual carefully before using the product to ensure proper operation and to maximize your gaming experience. This controller is designed for compatibility with PlayStation 4, PlayStation 3, PC, and iOS devices, and supports PlayStation 4 generation games on PlayStation 5.
2. Product Overview
The DR1TECH DR10042 Shock Pad is a wireless gaming controller featuring dual vibration feedback, a touch pad, and a rechargeable lithium-ion battery. It offers a comfortable design for extended gaming sessions.
2.1 Controller Components
- Analog Sticks: Two clickable analog sticks for precise movement and camera control.
- Directional Pad (D-Pad): For directional input.
- Action Buttons: Triangle, Circle, Cross, Square buttons.
- SHARE Button: For sharing gameplay content.
- OPTIONS Button: For in-game menus and options.
- Home Button: To access system menus.
- Touch Pad: Interactive surface for specific game functions.
- L1/R1 Buttons: Shoulder buttons.
- L2/R2 Triggers: Analog triggers.
- TURBO Button: For rapid fire functionality.
- EXT Port: Expansion port.
- Headphone Jack: For audio output.
- USB Charging Port: For charging the controller.
- RESET Button: Small button on the back for resetting the controller.
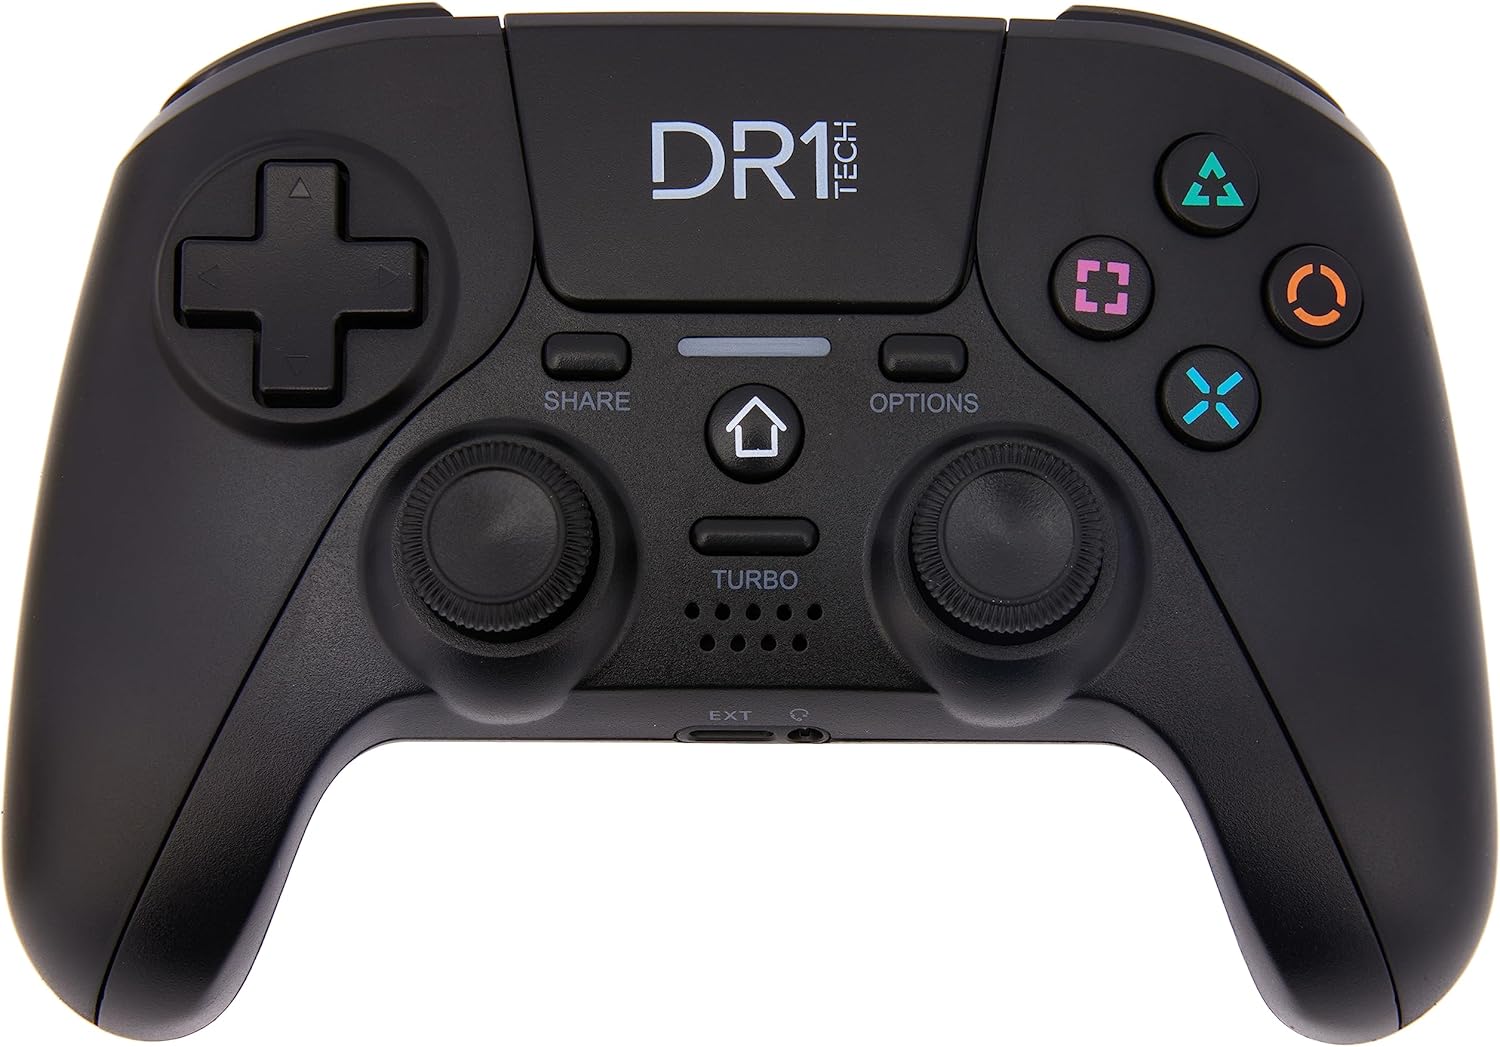
Figure 1: Front view of the DR1TECH DR10042 Shock Pad Wireless Controller, showing all buttons, analog sticks, and the touch pad.

Figure 2: Back view of the DR1TECH DR10042 Shock Pad Wireless Controller, showing the product label and reset button.

Figure 3: Close-up of the EXT port and headphone jack located on the bottom edge of the controller.

Figure 4: Close-up of the USB charging port located on the front edge of the controller.
3. Setup
3.1 Charging the Controller
The controller is equipped with a rechargeable Lithium-Ion battery. Before first use, fully charge the controller.
- Connect the supplied USB charging cable to the controller's USB port.
- Connect the other end of the USB cable to a powered USB port (e.g., console, PC, or USB wall adapter).
- The indicator light on the controller will show charging status. A flashing signal indicates a low battery level.

Figure 5: The USB charging cable included with the controller.
3.2 Pairing with PS4/PS3
To pair the controller wirelessly with your PlayStation 4 or PlayStation 3 console:
- Ensure your console is powered on.
- Press and hold the SHARE button and the Home button simultaneously for approximately 3 seconds.
- The indicator light on the controller will begin to flash rapidly, indicating it is in pairing mode.
- On your console, navigate to the Bluetooth device settings and select the DR1TECH controller from the list of available devices to complete the pairing process.
3.3 Connecting to PC
The controller can be connected to a PC via USB cable or wirelessly via Bluetooth.
- USB Connection: Connect the controller to your PC using the supplied USB cable. The PC should automatically detect and install the necessary drivers.
- Bluetooth Connection: Follow the pairing steps for PS4/PS3 (Section 3.2), then enable Bluetooth on your PC and search for the controller in your Bluetooth settings to pair.
3.4 Connecting to iOS Devices (iPhone/iPad)
To connect the controller to your iPhone or iPad:
- Ensure Bluetooth is enabled on your iOS device.
- Press and hold the SHARE button and the Home button simultaneously for approximately 3 seconds on the controller.
- The indicator light on the controller will flash rapidly.
- On your iOS device, go to Settings > Bluetooth and select the DR1TECH controller from the list of available devices.
4. Operating Instructions
4.1 Basic Controls
The DR1TECH Shock Pad functions similarly to standard gaming controllers. Refer to your game's instructions for specific button assignments.
4.2 Special Features
- Dual Vibration: The controller features dual vibration motors that provide tactile feedback during gameplay, enhancing immersion.
- Touch Pad: The integrated touch pad can be used for navigation or specific in-game actions, depending on the game's design.
- SHARE Button: Allows users to quickly share screenshots or video clips of their gameplay.
- OPTIONS Button: Typically used to access in-game menus, pause games, or view options.
- TURBO Function: Press and hold the TURBO button, then press the desired action button (e.g., Cross, Square) to enable rapid-fire functionality for that button. Press TURBO and the action button again to disable.

Figure 6: Illustration of analog stick movement capabilities.

Figure 7: Diagram showing the placement of internal vibration motors for haptic feedback.

Figure 8: Visual representation of key features: wide compatibility, long-lasting rechargeable battery, and responsive analog sticks.
5. Maintenance
5.1 Battery Care
- Avoid fully discharging the battery frequently.
- Charge the controller regularly, even if not in use for extended periods, to maintain battery health.
- Store the controller in a cool, dry place.
5.2 Cleaning
To clean the controller, use a soft, dry cloth. Do not use harsh chemicals or abrasive materials, as these can damage the surface or internal components.
6. Troubleshooting
- Controller not pairing: Ensure the controller is charged. Repeat the pairing process (Section 3.2). Make sure no other Bluetooth devices are interfering.
- Controller unresponsive: Try resetting the controller by inserting a small pin or paperclip into the RESET button hole on the back of the controller.
- Buttons or joysticks not responding correctly: Ensure the controller is fully charged. If issues persist, try resetting the controller.
- Charging issues: Verify the USB cable is securely connected to both the controller and the power source. Try a different USB port or cable.
- Audio quality from headphone jack is poor: Ensure the headphone plug is fully inserted. Test with different headphones.
7. Specifications
| Feature | Specification |
|---|---|
| Brand | DR1TECH |
| Model | DR10042 |
| Connectivity | Bluetooth |
| Compatible Devices | PS4, PS3, PS5 (PS4 games), PC, iOS |
| Special Features | Dual Vibration (Rumble), Touch Pad |
| Power Source | Battery Powered |
| Battery Type | Lithium-Ion (rechargeable, included) |
| Number of Buttons | 17 |
| Product Dimensions | 15 x 5.2 x 9.9 cm |
| Item Weight | 220 g |
| Manufacturer | DR1TECH |
8. Warranty and Support
For warranty information or technical support, please refer to the official DR1TECH website or contact their customer service directly. Keep your purchase receipt as proof of purchase.
9. Official Product Videos
No official product videos from the seller are available for embedding in this manual.
