1. Introduction
Thank you for choosing the Proster Pinless Wood Moisture Meter. This device is designed for non-destructive detection of moisture content in various materials such as hardwood, softwood, wallboard, and masonry. Its pinless design protects surfaces while providing accurate readings up to 3/4 inch (19 mm) below the surface. This manual provides detailed instructions for safe and effective use of your moisture meter.
Package Contents:
- Proster Pinless Wood Moisture Meter (Model PST199-P)
- 9V Battery
- Storage Bag
- User Guide (this manual)

This image displays the main components included with the Proster Pinless Wood Moisture Meter: the meter itself, a 9V battery, and a protective storage bag.
2. Safety Information
Please read all safety warnings and instructions before using this product to ensure safe operation and prevent damage to the device or injury.
General Safety:
- Do not attempt to modify or disassemble the device.
- Keep the device away from water and high humidity environments to prevent damage.
- Avoid exposing the device to extreme temperatures or direct sunlight.
- Do not use the device near strong electromagnetic fields.
- This device is not a toy. Keep out of reach of children.
Battery Safety:
- Use only the specified 9V alkaline battery.
- Ensure correct polarity when installing the battery.
- Remove the battery if the device will not be used for an extended period to prevent leakage.
- Dispose of used batteries according to local regulations. Do not incinerate.
3. Product Overview
Familiarize yourself with the components and display of your Proster Pinless Wood Moisture Meter.

This image highlights the key features on the front of the moisture meter, including the backlit LCD screen, the MODE, HOLD, and Power buttons, and the 3-color LED bar graph for moisture level indication.
Key Components:
- LCD Display: Backlit color screen showing moisture percentage, material mode, and other indicators.
- LED Bar Graph: 3-color (Green, Yellow, Red) visual indicator for moisture levels (Dry, Mid, Wet).
- MODE Button: Selects material type (Wall, Masonry, Soft Wood, Hard Wood).
- HOLD Button: Freezes the current reading on the display.
- Power Button: Turns the device on or off.
- Sensor Panel: Located on the back, used for non-destructive moisture detection.
- Flashlight: Built-in light for use in low-light conditions.

This image illustrates the location of the sensor panel on the back of the moisture meter, which is crucial for its non-destructive measurement capability.
4. Setup
4.1 Battery Installation
- Locate the battery compartment cover on the back of the device.
- Slide or unclip the cover to open the compartment.
- Insert the provided 9V battery, ensuring the correct polarity (+ and - terminals match).
- Close the battery compartment cover securely.
The device is now ready for use.
5. Operating Instructions
5.1 Power On/Off
- To turn on: Press the Power button (
 ) once. The LCD will light up.
 - To turn off: Press and hold the Power button for approximately 2 seconds. The device features an auto-power-off function to conserve battery if inactive for a period.
5.2 Material Mode Selection
The meter has different modes for various materials. Press the MODE button to cycle through the options:
- WALL: For wallboard and similar materials. (Range: 5-70%)
- MASONRY: For brick, concrete, and other masonry. (Range: 5-70%)
- SOFT WOOD: For softwoods. (Range: 5-75%)
- HARD WOOD: For hardwoods. (Range: 5-75%)

This image demonstrates how the meter's display changes to indicate the selected material mode (Wall, Masonry, Soft Wood, Hard Wood) and the corresponding moisture level.
5.3 Taking Measurements
- Select the appropriate material mode using the MODE button.
- Place the sensor panel (on the back of the meter) flat against the surface of the material you wish to measure. Ensure full contact.
- For accurate readings, place your finger on the rubber grip area on the side of the meter.
- The moisture percentage will be displayed on the LCD screen. The 3-color LED bar graph will also indicate the moisture level (Green for Dry, Yellow for Mid, Red for Wet).
- Move the meter across the surface to scan for variations in moisture content.

This image demonstrates the correct way to hold the moisture meter against a surface, ensuring the sensor panel makes full contact and illustrating the measurement depth of up to 19mm (0.75 inches).
Important: The meter detects moisture up to 19 mm (0.75 inches) below the surface. Ensure the object's depth is greater than this for reliable readings. Avoid measuring near metal objects (screws, nails, pipes) as they can affect accuracy.
This image visually compares a correct measurement on a brick wall with an incorrect measurement near metal, screws, or nails, emphasizing that metal can interfere with accurate readings.
5.4 Interpreting Readings and Alarms
The meter provides both visual and audible indications of moisture levels.
- Visual LED Alarm:
- Green LEDs: Indicate a dry moisture level.
- Yellow LEDs: Indicate a moderate moisture level.
- Red LEDs: Indicate a wet moisture level.
- Audible Alarm: The meter will emit a high-pitched tone when moisture content exceeds certain thresholds:
- Wood: Above 16% moisture content.
- Drywall/Masonry: More than 53% wet.
This image shows the meter's display indicating a moisture reading of 28.6% on a wall, accompanied by an icon representing the audible alarm, which activates when moisture levels exceed predefined thresholds for wood or masonry.
5.5 Hold Function
Press the HOLD button to freeze the current reading on the display. This is useful for taking readings in hard-to-reach areas where direct viewing of the screen is difficult. Press the HOLD button again to release the reading and resume live measurement.
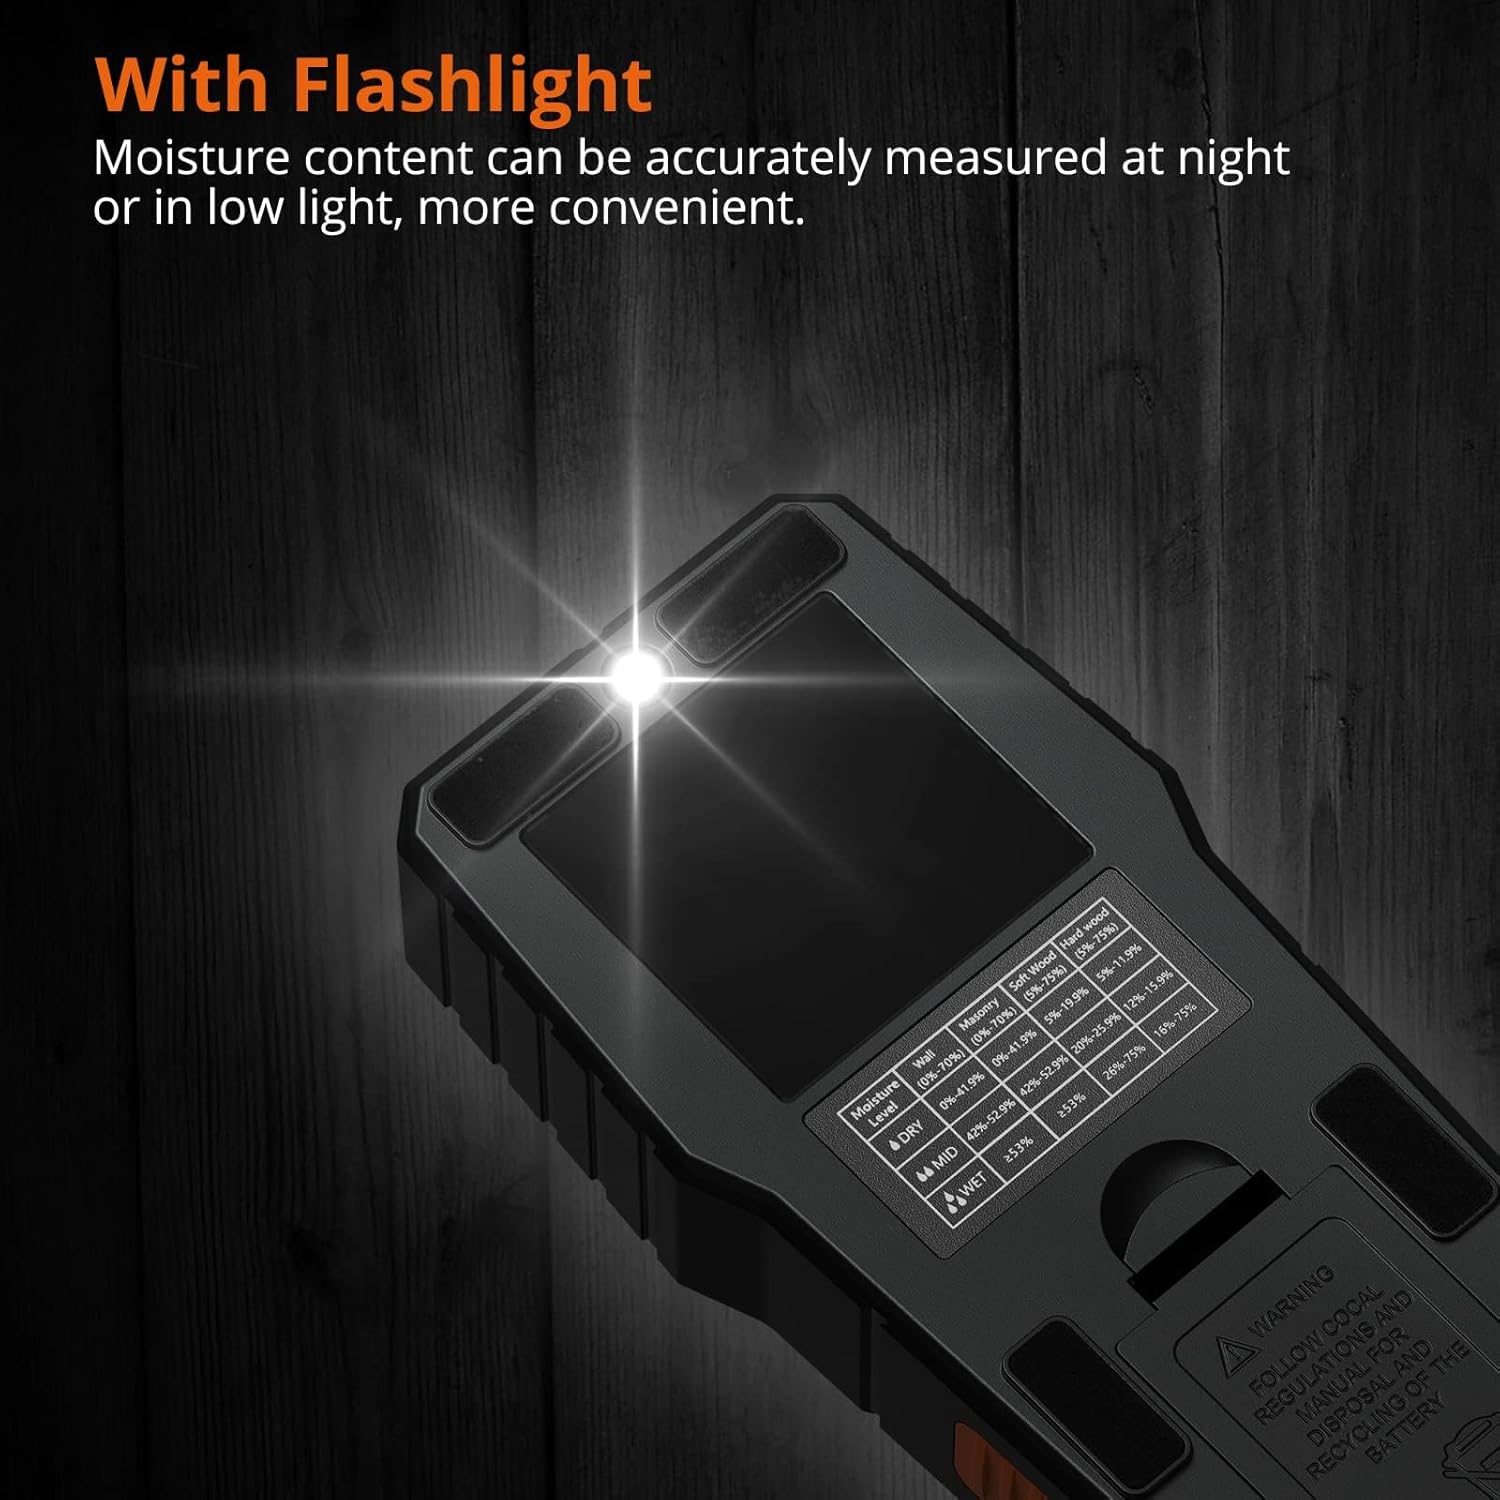
5.6 Flashlight Function
The built-in flashlight can be activated to assist with measurements in dimly lit environments. Refer to the product overview for the flashlight button location (often integrated with the power button or a separate dedicated button).

This image demonstrates the integrated flashlight feature of the moisture meter, highlighting its utility for taking accurate measurements in low-light conditions.
6. Maintenance
- Cleaning: Wipe the device with a soft, dry cloth. Do not use abrasive cleaners or solvents.
- Storage: Store the meter in its protective storage bag in a cool, dry place when not in use. Remove the battery if storing for extended periods.
- Battery Replacement: Replace the 9V battery when the low battery indicator appears on the display.
7. Troubleshooting
| Problem | Possible Cause | Solution |
|---|---|---|
| Device does not power on. | Battery is dead or incorrectly installed. | Check battery polarity or replace with a new 9V battery. |
| Inaccurate or inconsistent readings. |
|
|
| Audible alarm constantly sounds. | High moisture content detected. | This indicates a genuinely wet area. Continue scanning to identify the extent of moisture. |
| Display is dim or flickering. | Low battery. | Replace the 9V battery. |
8. Specifications
| Feature | Detail |
|---|---|
| Model Number | PST199-P |
| Measurement Principle | Electromagnetic Induction (Pinless, Non-destructive) |
| Measurement Depth | Up to 19 mm (0.75 inches) below surface |
| Material Modes & Ranges |
|
| Display | Backlit Color LCD with 3-color LED bar graph |
| Alarms | Visual (LEDs) and Audible (Beeper for out-of-range) |
| Functions | HOLD, Auto Power-Off, Flashlight |
| Power Source | 1 x 9V Alkaline Battery (included) |
| Operating Temperature | 0°C to 40°C (32°F to 104°F) |
| Product Dimensions | Approximately 1.57"W x 1.57"H (Note: This dimension may be partial) |
| Item Weight | 270 Grams (9.5 ounces) |
9. Warranty and Support
Proster products are designed for reliability and performance. For warranty information or technical support, please refer to the contact details provided with your purchase or visit the official Proster website. Keep your purchase receipt as proof of purchase.
For further assistance, you may contact Proster customer service at proster-uk@outlook.com.


