
1. Introduction
Thank you for choosing the Mebus 19422 Radio-Controlled Wall Clock. This clock is designed to provide accurate timekeeping through its radio-controlled movement, automatically synchronizing with a time signal. It also features a digital display for date, month, and indoor temperature. Please read this manual carefully to ensure proper setup and operation.
2. Safety Information
- Keep the clock away from extreme temperatures, direct sunlight, and high humidity.
- Do not expose the clock to water or other liquids.
- Use only the specified battery type. Ensure correct polarity when inserting batteries.
- Remove batteries if the clock will not be used for an extended period.
- Do not attempt to disassemble or repair the clock yourself. Contact qualified service personnel.
- Keep batteries out of reach of children.
3. Product Overview
The Mebus 19422 is a round wall clock with a classic analog display for time and a digital LCD display for additional information. It features a silver-colored frame and a white dial with clear black numerals.
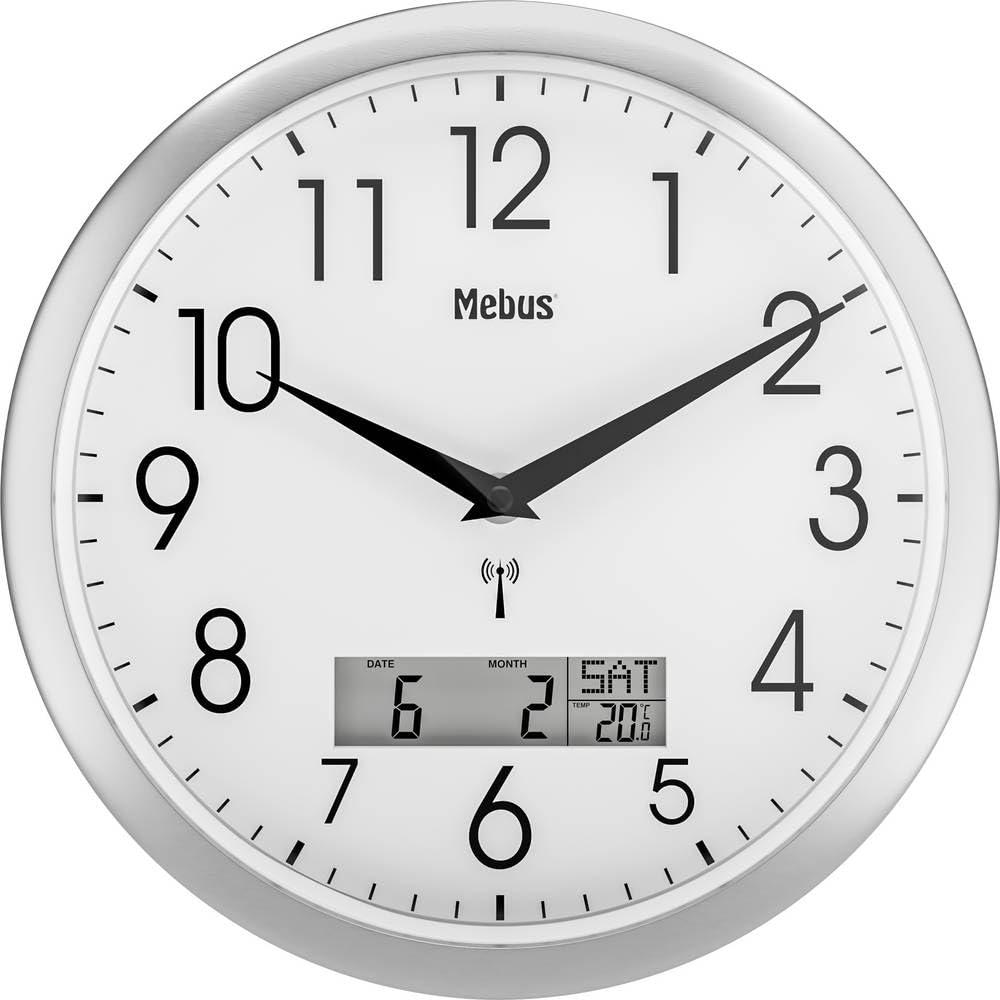
Figure 1: Mebus 19422 Radio-Controlled Wall Clock. This image shows the front view of the clock, highlighting its analog time display with hour, minute, and second hands, and the integrated digital LCD panel at the bottom displaying the date, month, and current indoor temperature in Celsius. A radio signal icon is visible above the digital display, indicating its radio-controlled feature. The clock has a silver-colored bezel and a white face with large, easy-to-read black numerals.
3.1 Package Contents
- 1 x Mebus 19422 Radio-Controlled Wall Clock
- 1 x User Manual (this document)
- Note: Batteries are not included and must be purchased separately.
4. Setup
4.1 Battery Installation
- Locate the battery compartment on the back of the clock.
- Open the battery compartment cover.
- Insert the required batteries (typically AA or AAA, check compartment markings) according to the polarity indicators (+ and -).
- Close the battery compartment cover securely.
4.2 Initial Radio Signal Reception
After battery installation, the clock will automatically attempt to receive the radio time signal (DCF77 in Europe). This process may take several minutes to several hours, depending on your location and environmental conditions.
- Place the clock near a window, away from electronic devices that may cause interference.
- The analog hands will move to the 12 o'clock position and then start searching for the signal.
- Once the signal is received, the clock hands will automatically adjust to the correct time. The digital display will also show the correct date, month, and temperature.
- A radio signal icon (often a small antenna or wave symbol) on the digital display indicates successful reception.
4.3 Manual Time Setting (If Radio Signal is Unavailable)
If the radio signal cannot be received, or if you are outside the reception area, you may need to set the time manually. Refer to the buttons on the back of the clock for specific setting instructions. Typically, there is a button to initiate manual time setting and buttons to adjust hours and minutes.
4.4 Date and Temperature Display
The digital display automatically shows the date, month, and indoor temperature once the radio signal is received. If manual adjustment is needed for the date (as some user reviews suggest), consult the specific buttons on the back of the clock, usually labeled "DATE" or "MONTH" as seen on the display.
5. Operation
5.1 Reading the Time and Date
- Analog Display: The large hands indicate the current hour, minute, and second.
- Digital Display: The LCD panel shows the current date (day of month), month, and indoor temperature in Celsius. The radio signal icon confirms active reception.
5.2 Alarm Function
This clock includes an alarm function. To set or activate the alarm, locate the alarm setting buttons on the back of the clock. Typically, there will be buttons for setting the alarm time and an ON/OFF switch or button to activate/deactivate the alarm. Refer to the specific markings on your clock for detailed instructions.
6. Maintenance
6.1 Cleaning
To clean the clock, use a soft, dry cloth. Do not use abrasive cleaners, solvents, or chemical sprays, as these can damage the clock's finish or internal components.
6.2 Battery Replacement
When the clock's display dims or the hands stop moving, it's time to replace the batteries. Follow the battery installation steps in Section 4.1. Always replace all batteries at the same time with new ones of the same type.
7. Troubleshooting
| Problem | Possible Cause | Solution |
|---|---|---|
| Clock hands do not move or show incorrect time. |
|
|
| Digital display is blank or dim. |
|
|
| Date or month is incorrect. |
|
|
8. Specifications
- Brand: Mebus
- Model Number: 19422 (Internal: 672037)
- Type: Radio-Controlled Wall Clock
- Display Type: Analog (Time), Digital (Date, Month, Temperature)
- Movement Type: Quartz, Radio-controlled
- Power Source: Battery-powered (Batteries not included)
- Material: Acrylonitrile Butadiene Styrene (ABS), Plastic
- Color: White (Dial), Silver (Frame)
- Weight: 790 Grams
- Special Features: Radio-controlled movement, Alarm function, Indoor temperature display
- Usage: Indoor
9. Warranty and Support
Mebus provides a manufacturer's warranty for this product. Please refer to the warranty card included with your purchase for specific terms and conditions. Spare parts availability is indicated for 1 year.
For technical support or warranty claims, please contact your retailer or the Mebus customer service department. Contact information can typically be found on the product packaging or the official Mebus website.


