
ACT AC6015
ACT USB Smart Card Reader AC6015 User Manual
Model: AC6015
1. Introduction
This manual provides detailed instructions for the installation, operation, and maintenance of the ACT AC6015 USB Smart Card Reader. This device is designed for reading eID and Smart Cards, facilitating digital signatures, authentication, and access protection. It is compatible with Windows and macOS operating systems.
The AC6015 is CAC approved and complies with PC/SC and WHQL standards, supporting all common Smart Card standards in ID-1 card format.
2. Product Overview

Figure 2.1: The ACT AC6015 Smart Card Reader connected to a laptop via its USB cable, with a smart card partially inserted into the reader slot. This image illustrates the device in a typical usage scenario.
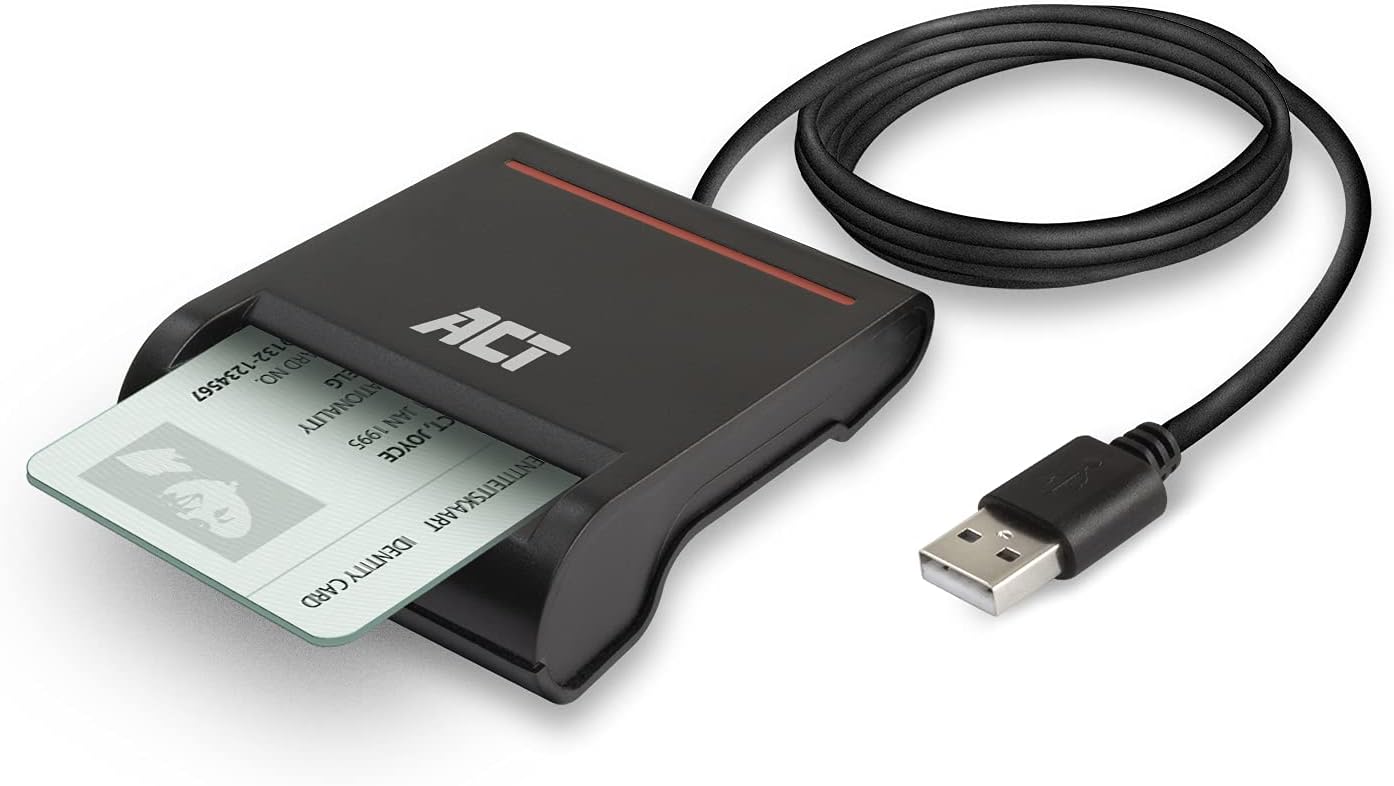
Figure 2.2: A close-up view of the ACT AC6015 Smart Card Reader with a smart card fully inserted into its slot. The USB cable is coiled next to the device, highlighting its compact design.

Figure 2.3: An illustration of the ACT AC6015 Smart Card Reader's compatibility with various eID cards, specifically highlighting its suitability for Belgian eID and Italian CIE cards. It also indicates non-compatibility with AusweisApp2.

Figure 2.4: A schematic diagram illustrating the connection flow: Smart Card connects to Reader, Reader connects to USB, and USB connects to a computer (desktop or laptop). This visualizes the simple setup process.
Key Features:
- Reads ID Cards: Suitable for ID Cards in ID-1 card format, including personal identification cards. CAC approved. Works with Belgium eID cards.
- Digital Signature: Use ID card reader for digital signature for e-commerce, e-business, authentication and access protection.
- Meets Certifications: ISO 7816, T=0 or T=1 protocols. The card reader complies with PC/SC 1.0/2.0, EMV 4.1 and WHQL.
- USB Powered: No power adapter needed; powered through USB 2.0. Cable length is 1m.
- Compact Design: Takes minimal space, easy to transport.
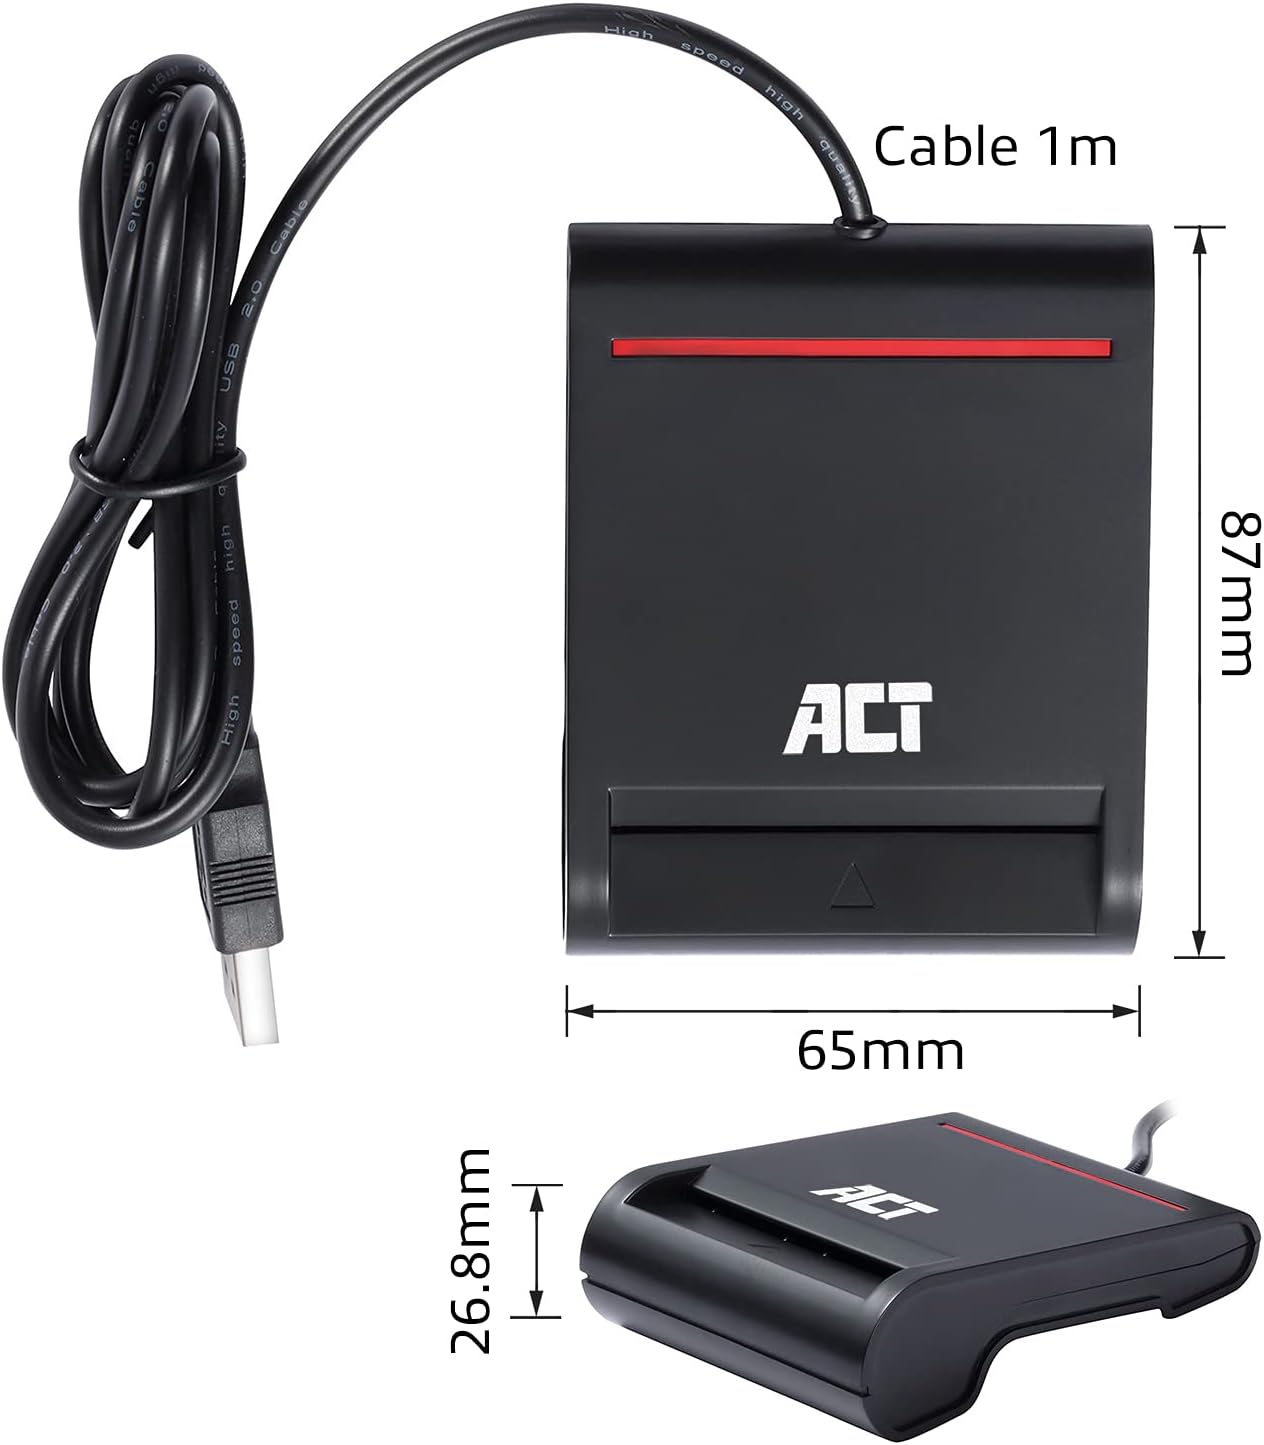
Figure 2.5: An image displaying the physical dimensions of the ACT AC6015 Smart Card Reader. The length is 65mm, height is 87mm, and thickness is 26.8mm, with a 1m USB cable.

Figure 2.6: The ACT AC6015 Smart Card Reader accompanied by icons indicating its key features: compatibility with Smart or eID Cards, support for Digital Signatures, and compatibility with Windows & macOS operating systems.
3. Setup and Installation
System Requirements:
- Operating System: Windows (all common versions), macOS (all common versions)
- Available USB 2.0 port
Installation Steps:
- Connect the Reader: Plug the USB connector of the AC6015 Smart Card Reader into an available USB port on your computer.
- Driver Installation: The device is typically plug-and-play. Your operating system (Windows or macOS) should automatically detect the device and install the necessary drivers. No additional driver installation is usually required.
- Verification: Once connected, the Power LED (Red color) on the reader should illuminate, indicating it is powered.
- Software Installation (if required): For specific eID or Smart Card applications (e.g., Belgium eID software), you may need to install additional software provided by your card issuer or relevant authority. Refer to their documentation for details.
Note: The AC6015 is bus-powered, meaning it draws power directly from the USB port. No external power adapter is needed.
4. Operating Instructions
Inserting a Smart Card:
- Locate the card slot on the front of the AC6015 reader.
- Identify the chip on your Smart Card.
- Insert the Smart Card into the slot with the chip facing upwards and towards the reader, as shown in Figure 4.1. Ensure the card is fully inserted until it clicks into place or feels secure.
- The Activity LED (Green & Red color) on the reader may flash or change color to indicate card detection and activity.

Figure 4.1: A diagram illustrating the correct orientation for inserting a smart card into the reader. The chip on the card should face upwards and be inserted first into the slot.
Using the Reader:
- Once the card is inserted and recognized, you can use it with compatible applications for tasks such as:
- Online banking and e-commerce transactions
- Digital signatures
- Accessing secure websites or networks
- Personal identification and authentication (e.g., eID cards)
- Follow the instructions provided by your specific application or service for using the smart card.
Removing a Smart Card:
Gently pull the Smart Card out of the slot when you are finished using it. Ensure any active processes or applications using the card are closed before removal to prevent data corruption.
5. Troubleshooting
| Problem | Possible Cause | Solution |
|---|---|---|
| Reader not detected by computer. | USB cable not properly connected; Faulty USB port; Driver issue. |
|
| Smart Card not recognized. | Card inserted incorrectly; Dirty or damaged card chip; Incompatible card; Software issue. |
|
| Power LED is off. | No power from USB port; Reader malfunction. |
|
6. Technical Specifications
| Feature | Detail |
|---|---|
| Model Number | AC6015 |
| Interface | USB 2.0 (USB 1.1 compliant) |
| Standards | ISO 7816, EMV 4.1 (EMV 2000 Level 1) |
| Protocols | T=0 or T=1 protocols |
| Power | USB powered (Bus-powered) |
| Power LED | Red color |
| Activity LED | Green & Red color |
| Cable Length | 1 meter |
| Dimensions (WxHxD) | 65 x 26.8 x 87 mm |
| Weight | 100 g |
| Operating System Compatibility | Windows, macOS |
Package Content:
- ACT AC6015 USB Smart Card Reader
- Quick Install Guide (typically included)
7. Care and Maintenance
- Cleaning: Use a soft, dry cloth to clean the exterior of the reader. Do not use liquid cleaners or aerosols.
- Storage: Store the reader in a cool, dry place away from direct sunlight and extreme temperatures.
- Handling: Avoid dropping the device or subjecting it to strong impacts. Do not force cards into the slot.
- Cable Care: Do not bend or crimp the USB cable excessively.
8. Warranty and Support
ACT products are designed for reliability and quality. The ACT AC6015 Smart Card Reader comes with a manufacturer warranty. For specific warranty terms and duration, please refer to the documentation included with your purchase or visit the official ACT website.
For technical support, troubleshooting assistance beyond this manual, or warranty claims, please contact ACT customer support through their official channels. Contact information can typically be found on the ACT website or on the product packaging.
Note: Unauthorized repairs or modifications may void your warranty.
Related documentsAC6015


Ask a question about this manual
Ask about setup, troubleshooting, compatibility, parts, safety, or missing instructions. Manuals+ will review the question and use this page’s manual context to help answer it.