
Sainlogic SC088
Sainlogic Wireless Weather Station User Manual
Model: SC088
Brand: Sainlogic
1. Introduction
This manual provides detailed instructions for the setup, operation, and maintenance of your Sainlogic Wireless Weather Station. This advanced system offers comprehensive real-time indoor and outdoor weather data, including temperature, humidity, wind direction, wind speed, rainfall, and air pressure. Designed for ease of use and accuracy, it helps you monitor local weather conditions effectively.

Figure 1: Sainlogic Wireless Weather Station components.
The image displays the main components of the Sainlogic Wireless Weather Station: the outdoor 7-in-1 sensor unit and the indoor display console. The display shows various weather parameters like temperature, humidity, wind speed, and rain.
2. Setup Instructions
2.1 Unboxing and Component Check
Carefully unpack all components and verify against the packing list. Ensure you have the Display Console, Outdoor Sensor, Power Adapter, User Manual, and mounting hardware.
Video 1: Unboxing and overview of the Sainlogic Weather Station.
This video provides a visual guide to unboxing the Sainlogic Wireless Weather Station, showcasing its main components including the outdoor sensor and indoor display unit.
2.2 Outdoor Sensor Installation
The 7-in-1 outdoor sensor is designed for comprehensive data collection. It includes an antenna, rain gauge, solar panel, wind vane, anemometer, water level indicator, hygrometer, and radiation shield. For optimal performance, install the sensor in an open area, away from obstructions like buildings, trees, or high voltage lines, to ensure accurate wind and rain measurements. The sensor has a transmission range of up to 328 feet (100 meters) to the display console.
- Powering the Sensor: Install 3 AAA batteries (not included) into the outdoor sensor's battery compartment.
- Mounting: Use the included bracket and screws to securely mount the sensor. Ensure it is level for accurate rain and wind direction readings.
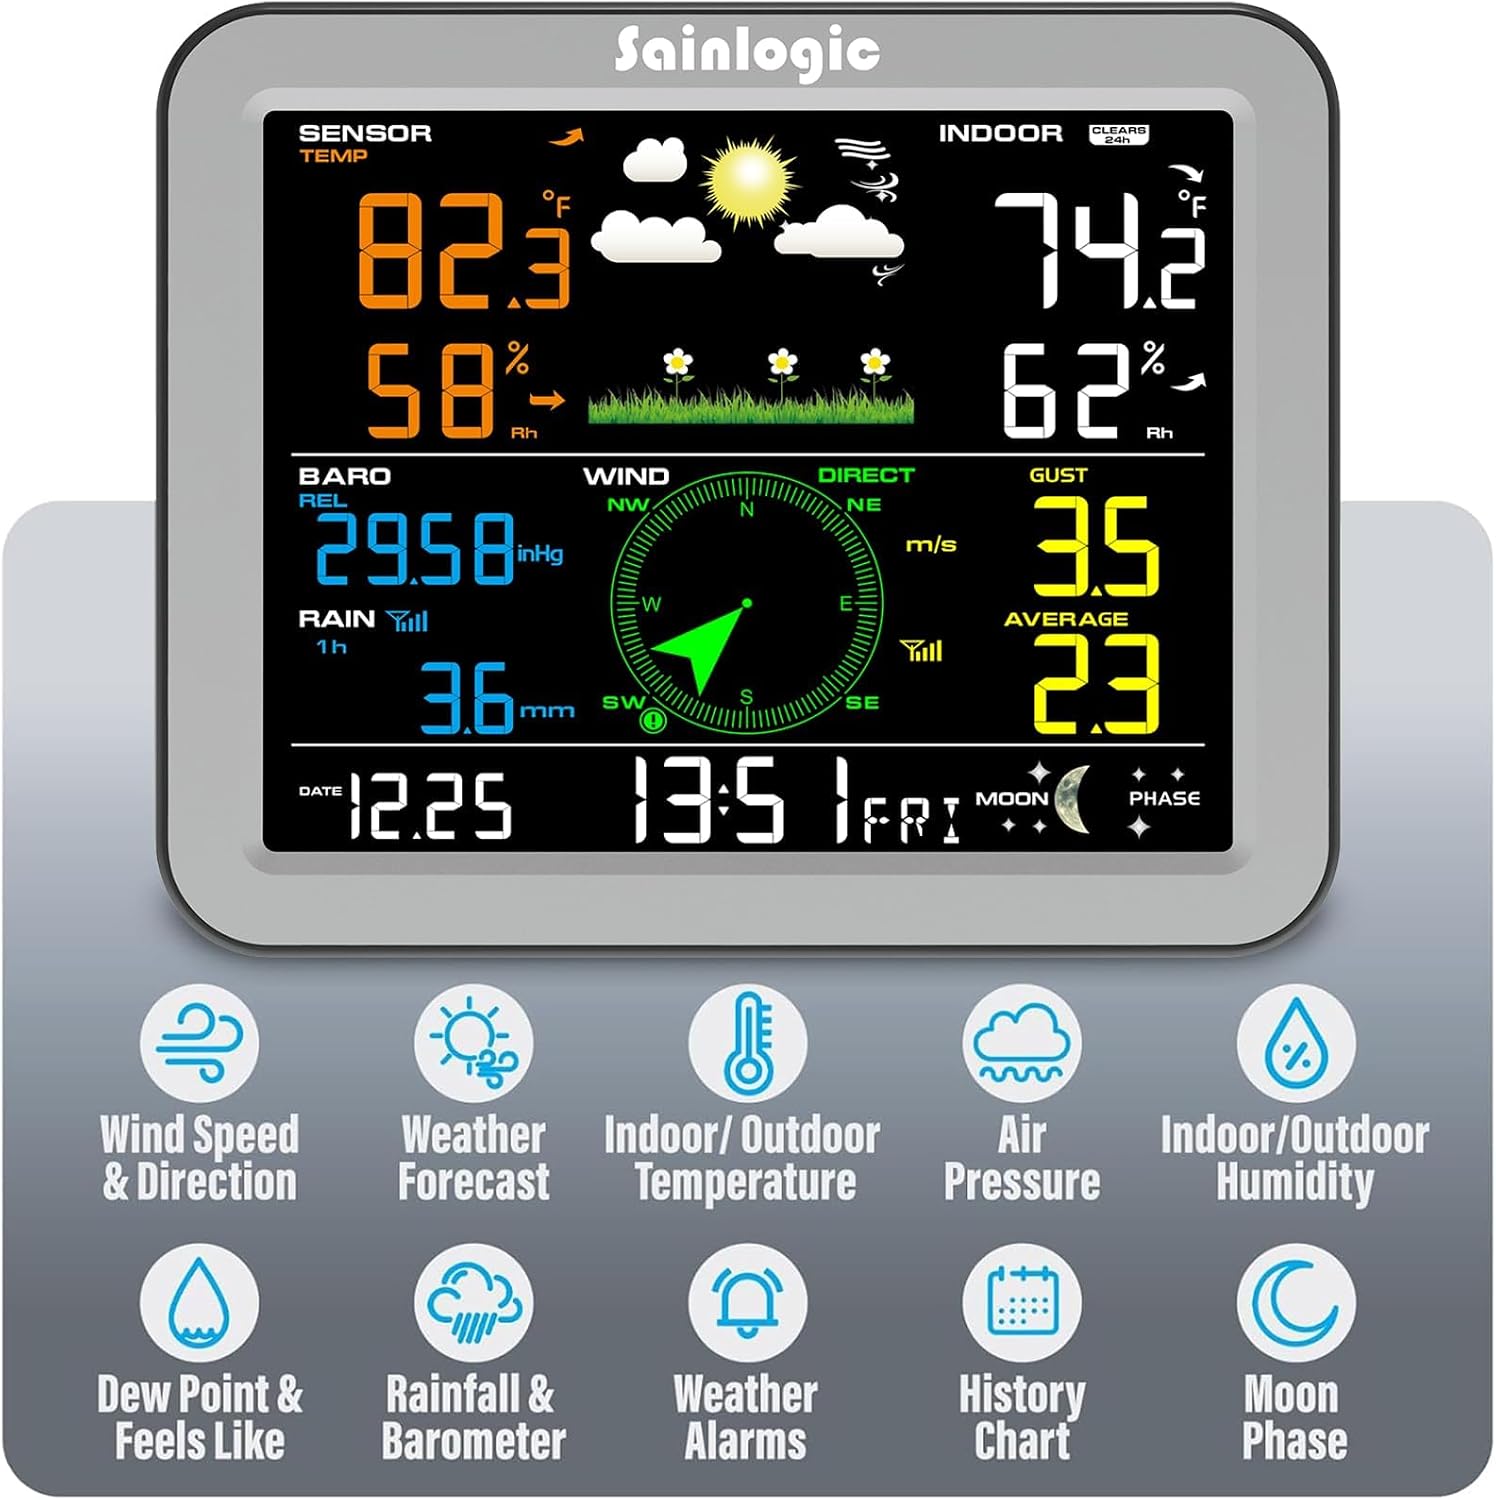
Figure 2: Detailed view of the 7-in-1 outdoor sensor.
This image highlights the various components of the 7-in-1 outdoor sensor, including the rain collector, wind cups, solar panel, wind vane, antenna, level indicator, and thermo-hygrometer radiation shield.

Figure 3: Various installation options for the outdoor sensor.
The image illustrates different mounting possibilities for the outdoor sensor, demonstrating its flexibility for placement in various outdoor environments like rooftops, poles, or fences, ensuring optimal signal transmission.
2.3 Display Console Setup
The display console features a 7.5-inch LCD screen with adjustable backlighting for clear readability. It can be powered by the included power adapter or by 3 AAA batteries (not included) for backup.
- Powering the Console: Plug the power adapter into the console and a wall outlet. Insert 3 AAA batteries for power backup.
- Initial Pairing: Once both the sensor and console are powered, they should automatically pair. Allow a few minutes for the data to synchronize.
- Placement: Place the display console indoors in a central location to ensure good reception from the outdoor sensor.

Figure 4: Display console showing adjustable brightness levels.
This image demonstrates the 3-level dimming feature of the 7.5-inch LCD display, allowing users to adjust brightness for optimal viewing in various lighting conditions, day or night.

Figure 5: Rear and front view of the display console with labeled features.
The image provides a detailed look at the display console, labeling its various indicators such as indoor/outdoor temperature, wind direction, pressure, rainfall, wind speed, weather tendency, humidity, date, time, and moon phase. It also shows the rear with hanging holes, battery compartment, and desktop stand.
3. Operating Instructions
3.1 Display Overview
The display console provides a comprehensive overview of current and historical weather data. Key information includes:
- Indoor/Outdoor Temperature & Humidity: Real-time readings for both environments.
- Wind Speed & Direction: Current wind conditions and direction.
- Rainfall: Daily, weekly, or monthly rainfall accumulation.
- Barometric Pressure: Current air pressure readings.
- Weather Forecast: Icons indicating predicted weather conditions (sunny, cloudy, rainy).
- Moon Phase: Current moon phase display.
- Time & Date: Automatically updated time and date.

Figure 6: Comprehensive display of weather parameters.
This image showcases the full range of weather data displayed on the console, including wind speed & direction, weather forecast, indoor/outdoor temperature, air pressure, indoor/outdoor humidity, dew point & feels like temperature, rainfall & barometer, weather alarms, history chart, and moon phase.
3.2 Setting Alarms
The weather station supports multiple alarm modes for various weather parameters, including time, wind gust, wind average, outdoor/indoor temperature, outdoor/indoor humidity, outdoor dew point, 24-hour rainfall, and absolute/relative pressure. Refer to the detailed user manual for specific instructions on setting each alarm type.
4. Maintenance
- Cleaning the Outdoor Sensor: Periodically clean the rain collector funnel and wind cups to prevent debris buildup, which can affect accuracy. Use a soft, damp cloth.
- Battery Replacement: Replace batteries in both the outdoor sensor and display console as needed. For the outdoor sensor, use 3 AAA batteries. For the display console, 3 AAA batteries are for backup power.
- Solar Panel: Ensure the solar panel on the outdoor sensor is clean and free from obstructions to maximize charging efficiency.
5. Troubleshooting
- No Outdoor Data Displayed:
- Check if the outdoor sensor batteries are correctly installed and charged.
- Ensure the outdoor sensor is within the 328-ft transmission range of the display console.
- Verify there are no major obstructions (thick walls, large metal objects) between the sensor and console.
- Try re-pairing the sensor and console by resetting both units.
- Inaccurate Readings:
- Temperature/Humidity: Ensure the sensor is not in direct sunlight or near heat sources. The radiation shield helps, but extreme conditions can affect readings.
- Wind Speed/Direction: Check for obstructions around the anemometer and wind vane. Ensure the sensor is mounted level.
- Rainfall: Clean the rain collector funnel to ensure no debris is blocking the tipping bucket mechanism.
- Display Console Not Responding:
- Check the power adapter connection.
- Replace the backup batteries.
- Perform a hard reset if necessary (refer to the full user manual for specific reset procedures).
6. Specifications
| Feature | Detail |
|---|---|
| Brand | Sainlogic |
| Model Number | SC088 |
| Outdoor Temperature Range | -40°C to +60°C (-40°F to 140°F) |
| Indoor Temperature Range | 0°C to +60°C (32°F to 140°F) |
| Humidity Range | 10% to 99% (1% resolution) |
| Wind Speed Range | 0 to 112 mph |
| Rainfall Range | 0 to 9999mm (0 to 396 inches) |
| Barometric Pressure Range | 300 to 1100 hPa (8.85-32.5 inHg) |
| Transmission Range | Up to 328 feet (100 meters) outdoors (line of sight) |
| Display Type | LCD with adjustable backlight |
| Power Source (Console) | Power Adapter (included), 3 AAA batteries (not included) |
| Power Source (Sensor) | Solar Panel, 3 AAA batteries (not included) |
7. Warranty and Support
Sainlogic products are designed for durability and performance. This weather station typically comes with a standard warranty. For specific warranty details and to claim a 1-year free extension, please refer to the warranty information provided with your product or visit the official Sainlogic website.
For further assistance, technical support, or to download the full user guide, please visit the Sainlogic support page or refer to the provided PDF manual:
Ask a question about this manual
Ask about setup, troubleshooting, compatibility, parts, safety, or missing instructions. Manuals+ will review the question and use this page’s manual context to help answer it.