1. Introduction
The Cuifati RX888 MKII is a Software Defined Radio (SDR) receiver module designed for exploring a wide range of radio frequencies. This device allows users to tune into various radio signals, from amateur radio to shortwave broadcasts, utilizing its advanced features and robust construction. This manual provides essential information for the proper setup, operation, maintenance, and troubleshooting of your RX888 MKII module.
2. Safety Information
To ensure safe and optimal operation of your RX888 MKII module, please observe the following precautions:
- Do not overload the device.
- Avoid using the device under excessive pressure.
- Ensure the device is not subjected to overcurrent conditions.
- Always connect the device to a compatible power source and host computer.
3. Product Overview
The RX888 MKII is a 16-bit Software Defined Radio with a direct sampling receiver architecture. It features an aluminum alloy casing for durability and enhanced heat dissipation.

Figure 3.1: Front view of the Cuifati RX888 MKII SDR Receiver Module, showcasing its compact design and heat sinks.
Key Features:
- Wide Frequency Range: Operates from 1kHz to 64Mhz, with a high-frequency range extending from 64Mhz to 1700Mhz.
- Enhanced LPF: Utilizes an enhanced 64M LPF (Low Pass Filter) for improved image suppression.
- Adjustable VGA: Features a Variable Gain Amplifier (VGA) with an adjustment range of -10dB to +33dB, replacing the fixed low noise amplifier of previous models.
- Durable Construction: Encased in an aluminum alloy, coated with anti-corrosion paint for extended service life.
- Versatile Application: Suitable for scientific research, amateur radio, and other specialized applications.

Figure 3.2: The RX888 MKII highlighting the VGA adjustment capability, which offers a gain range of -10dB to +33dB.
4. Setup
Setting up your RX888 MKII module involves connecting it to a host computer and installing the necessary software.
4.1 System Requirements
- USB Port: A USB 3.0 port is recommended for optimal performance and data transfer rates.
- Computer: A fast computer is advisable to handle the processing demands of software-defined radio applications.
- Operating System: Compatible with various operating systems, typically Windows, Linux, and macOS (driver availability may vary).
4.2 Hardware Connection
- Connect Antenna: Attach your desired antenna to the appropriate antenna port(s) on the RX888 MKII. The module typically features two antenna ports, labeled 'H' and 'V' for horizontal and vertical polarization, or for different frequency ranges.
- Connect USB Cable: Connect the provided USB cable from the RX888 MKII's USB 3.0 port to a USB 3.0 port on your computer.
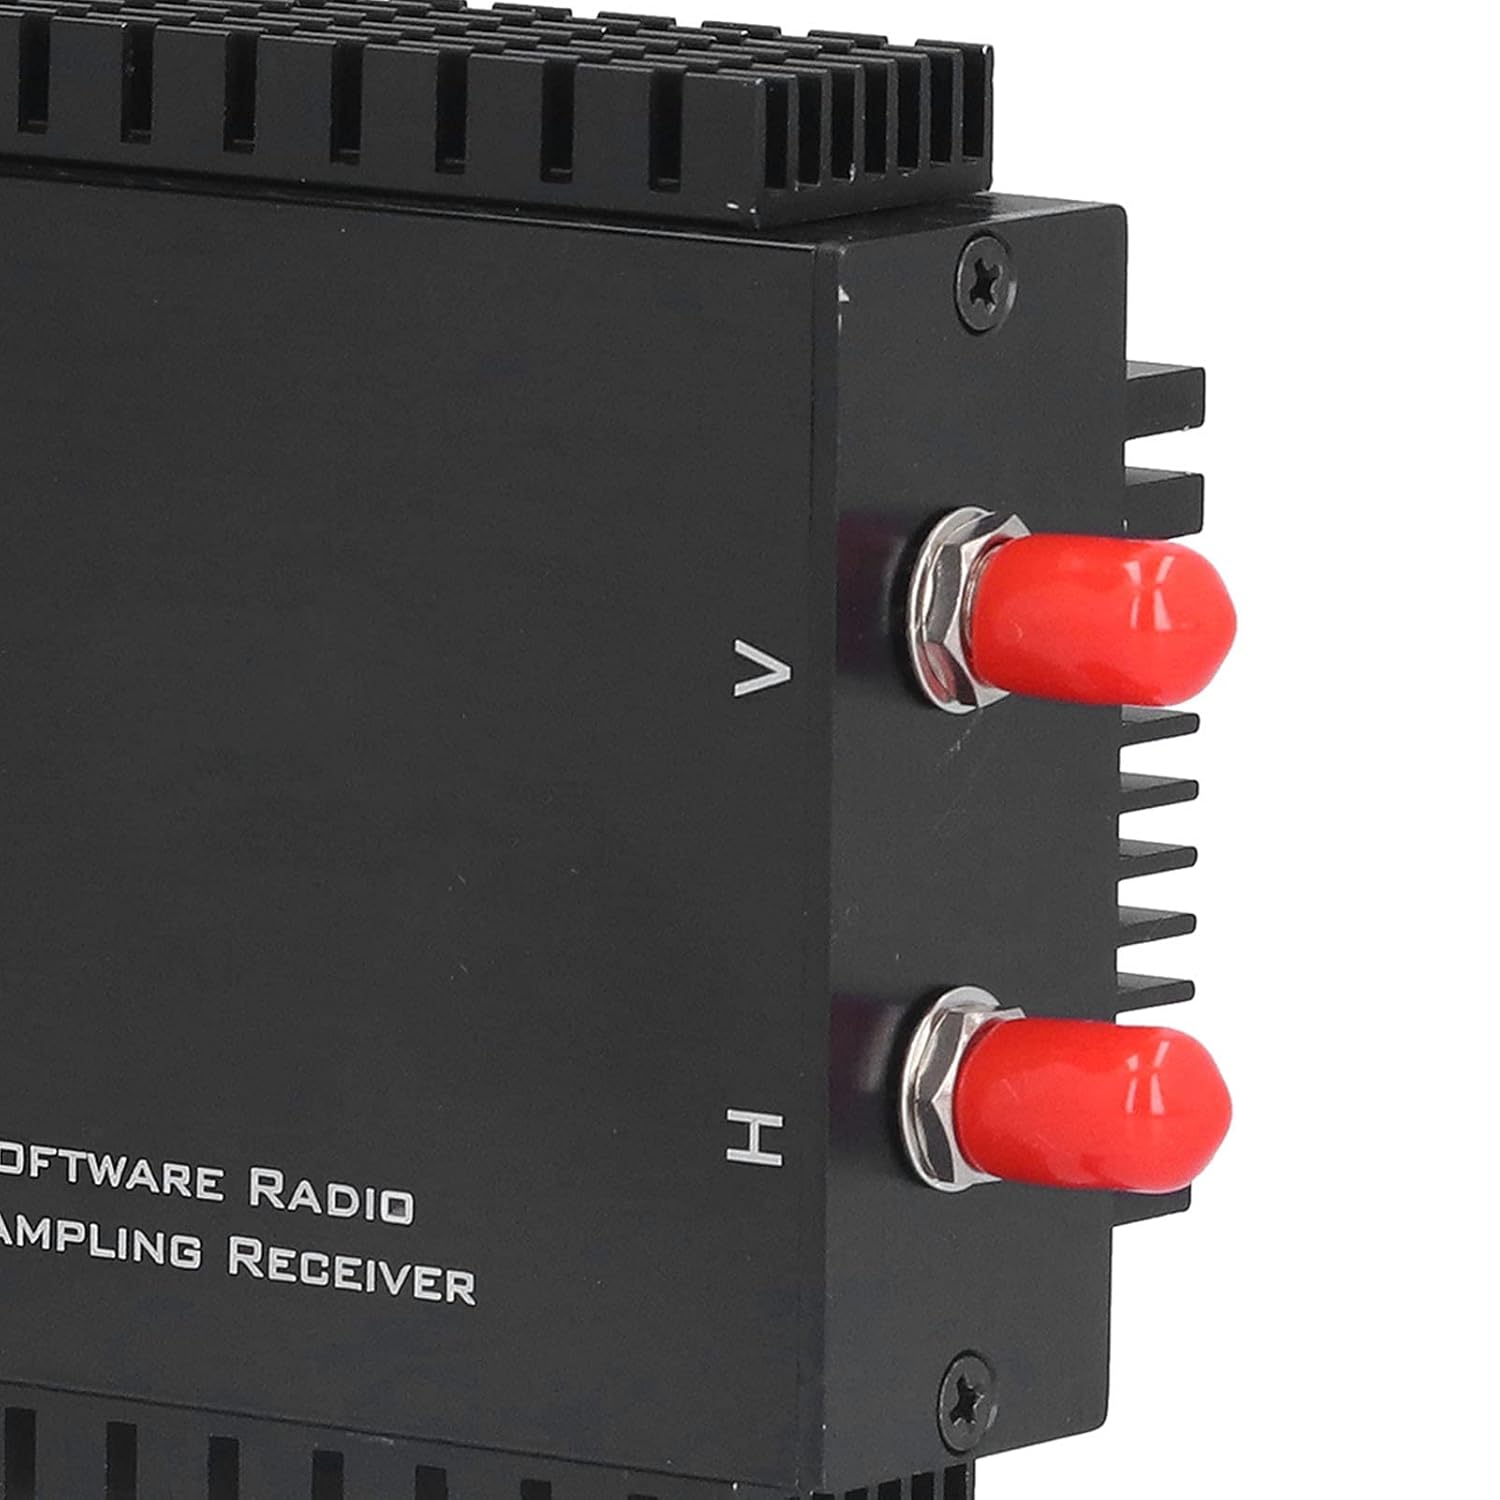
Figure 4.1: Close-up view of the antenna input ports, typically labeled H and V.

Figure 4.2: The USB 3.0 port on the side of the RX888 MKII module for data and power connection.
4.3 Software Installation
The RX888 MKII requires specific drivers and SDR software to function. Refer to the manufacturer's website or included documentation for the latest driver downloads and recommended SDR applications (e.g., SDR Console, SDR#). Follow the provided instructions for driver installation. It is crucial to ensure drivers are correctly installed for the device to be recognized by your computer.
5. Operating Instructions
Once the hardware is connected and software is installed, you can begin operating your RX888 MKII.
- Launch SDR Software: Open your preferred SDR application (e.g., SDR Console).
- Select Device: Within the software, select the RX888 MKII as your input device.
- Configure Settings: Adjust settings such as sample rate, gain (VGA), and filter bandwidth according to your reception needs. The VGA offers a range of -10dB to +33dB for optimizing signal reception.
- Tune to Frequency: Enter the desired frequency to begin listening.
- Monitor Spectrum: Utilize the spectrum analyzer and waterfall display within the SDR software to visualize radio signals.
6. Maintenance
Proper maintenance ensures the longevity and performance of your RX888 MKII module.
- Cleaning: Use a soft, dry cloth to clean the exterior of the module. Avoid liquid cleaners or abrasive materials.
- Storage: Store the device in a cool, dry place away from direct sunlight and extreme temperatures when not in use.
- Firmware/Software Updates: Regularly check the manufacturer's website for any firmware or driver updates to ensure optimal performance and compatibility.
- Cable Management: Ensure USB and antenna cables are not kinked or strained to prevent damage.
7. Troubleshooting
If you encounter issues with your RX888 MKII, refer to the following troubleshooting steps:
- Device Not Recognized:
- Ensure the USB cable is securely connected to both the module and a USB 3.0 port on your computer.
- Try plugging and unplugging the device multiple times.
- Verify that the correct drivers are installed. Check Device Manager (Windows) or equivalent for driver status.
- Test with a different USB port or computer if possible.
- Poor Reception/No Signal:
- Check antenna connections and ensure the antenna is appropriate for the frequency range you are trying to receive.
- Adjust the VGA gain settings within your SDR software.
- Ensure no local interference sources are affecting reception.
- Verify the frequency entered in the SDR software is correct.
- Software Crashes/Instability:
- Ensure your SDR software is up to date.
- Verify that your computer meets the recommended system requirements, especially regarding processor speed and RAM.
- Reinstall drivers and SDR software if necessary.
8. Specifications
| Feature | Detail |
|---|---|
| Model | RX888 MKII |
| Material | Aluminum Alloy |
| Frequency Range | 1kHz - 64Mhz |
| High Frequency Range | 64M - 1700Mhz |
| ATT Adjustment Range | -32dB to 0dB |
| VGA Adjustment Range | -10dB to +33dB |
| Package Dimensions | 7.68 x 4.29 x 2.72 inches |
| Weight | 10.58 ounces |
| Number of Channels | 2 |
9. Package Contents
The standard package for the Cuifati RX888 MKII Software Defined Radio Receiver Module includes:
- 1 x Cuifati RX888 MKII Software Defined Radio Receiver Module
- 1 x Connection Line (USB cable)
- 1 x User Manual (this document)
10. Warranty and Support
For warranty information, technical support, or service inquiries, please contact the seller or manufacturer directly. Keep your purchase receipt as proof of purchase for any warranty claims.


