
Assark HL-E 20W
Assark HL-E 20W Hot Glue Gun User Manual
Model: HL-E 20W
1. Safety Instructions
Read all instructions before using the hot glue gun. Failure to follow these instructions may result in electric shock, fire, or serious injury. Keep this manual for future reference.
- Keep out of reach of children: This appliance is not intended for use by persons (including children) with reduced physical, sensory or mental capabilities, or lack of experience and knowledge, unless they have been given supervision or instruction concerning use of the appliance by a person responsible for their safety.
- Hot Nozzle: The nozzle and melted glue become very hot during operation. Avoid direct contact with skin to prevent burns. Use caution and wear protective gloves if necessary.
- Power Source: Ensure the voltage indicated on the appliance (120 Volts) matches your local power supply before plugging in.
- Unplug When Not in Use: Always unplug the glue gun from the power outlet when not in use, before cleaning, or before changing glue sticks.
- Ventilation: Use the glue gun in a well-ventilated area.
- Flammable Materials: Do not use near flammable liquids, gases, or materials.
- Storage: Store the glue gun in a dry place, away from moisture and extreme temperatures.
- Do Not Force Glue Sticks: Only use glue sticks of the correct diameter (7mm/0.28in). Do not force oversized glue sticks into the gun.
- Do Not Pull Out Glue Sticks: Never pull out a partially used glue stick from the back of the gun while it is hot, as this can damage the heating element.
- Avoid Lifting by Nozzle: Do not lift the glue gun by its nozzle when hot. Always use the handle.

Figure 1: Important safety tips for hot glue gun operation.
2. Product Overview
The Assark HL-E 20W Hot Glue Gun is designed for various crafting, DIY projects, and quick repairs. It features a compact design, quick heating, and a stable stand for ease of use.

Figure 2: Components of the Assark HL-E 20W Hot Glue Gun.
Key Features:
- Heat-Resistant Silicone Cap: Provides protection against accidental contact with the hot nozzle.
- Safe Power Switch: Allows for easy on/off control without needing to unplug the device.
- Status Indicator: A light that illuminates when the glue gun is powered on and heating.
- Stable Stand Holder: A retractable metal stand to safely rest the glue gun when not in active use, preventing glue from touching the work surface.
- Quick Warm-Up: Heats up efficiently, ready for use in approximately 1-3 minutes.
- Anti-Leak Nozzle: Engineered to minimize dripping and ensure precise glue application.
3. Setup
- Insert Glue Stick: Insert a 7mm (0.28 inch) diameter glue stick into the circular opening at the back of the glue gun. Push it gently until it stops.
- Position Stand: Flip down the metal stand holder to ensure the glue gun rests stably on a flat, heat-resistant surface.
- Connect Power: Plug the power cord into a standard electrical outlet (120 Volts).
- Power On: Flip the power switch to the "ON" position. The status indicator light will illuminate, signaling that the gun is heating.

Figure 3: Initial setup and operation steps.
4. Operating Instructions
- Preheating: Allow the glue gun to preheat for approximately 1-3 minutes. The glue stick will soften and be ready for use when a gentle squeeze of the trigger dispenses glue.
- Apply Glue: Gently squeeze the trigger to dispense melted glue from the nozzle. Apply glue to the desired surface or material.
- Bonding: Press the two surfaces together immediately after applying glue, as hot glue sets quickly. Hold firmly for a few seconds to ensure a strong bond.
- Continuous Use: As glue is dispensed, push the glue stick further into the gun. When the current stick is nearly used up, insert a new one from the back to continue operation.
- Finishing: When finished with your task, release the trigger and place the glue gun back on its stand.
- Power Off: Flip the power switch to the "OFF" position and unplug the power cord from the electrical outlet.
- Cool Down: Allow the glue gun to cool completely before handling or storing.
Compatible Materials:
This hot glue gun is suitable for bonding a wide variety of materials, making it ideal for diverse projects:
- Paper
- Plastic
- Wood
- Leather
- Ceramic
- Circuit Boards
- Fabric
- Shell
- Stone
- Glass
- Rubber
- Metal (for light applications)
- Carton

Figure 4: Examples of materials compatible with the hot glue gun.
5. Maintenance
- Cleaning: Ensure the glue gun is unplugged and completely cool before cleaning. Wipe the exterior with a clean, damp cloth. Do not use abrasive cleaners or solvents, as these can damage the plastic housing.
- Nozzle Care: Do not attempt to clean the nozzle while the gun is hot. Any dried glue around the nozzle can be carefully removed once the gun is cold using a non-abrasive tool.
- Storage: Store the glue gun in a dry, safe place, away from dust, moisture, and direct sunlight. Ensure the power cord is not kinked, twisted, or damaged during storage.
- Inspection: Periodically inspect the power cord and plug for any signs of damage, such as cuts, fraying, or exposed wires. If damaged, do not use the glue gun and seek professional repair or replacement.
6. Troubleshooting
| Problem | Possible Cause | Solution |
|---|---|---|
| Glue gun does not heat up. | Not plugged in; Power switch off; Faulty electrical outlet; Damaged internal components. | Ensure plug is fully inserted into a working outlet. Turn power switch ON. Test outlet with another device. If still not working, discontinue use and contact support. |
| Glue not dispensing. | Not preheated long enough; Glue stick not fully inserted; Incorrect size glue stick; Nozzle clogged. | Allow more preheating time (1-3 minutes). Push glue stick firmly into the feed chamber. Ensure 7mm diameter glue sticks are used. Do not attempt to clear a hot nozzle; allow to cool and carefully remove dried glue. |
| Glue dripping from nozzle. | Minor dripping is normal during heating/cooling cycles; Overheating (rare). | A small amount of dripping is normal for hot glue guns. Ensure the gun is on its stand when not in active use. If excessive, ensure proper voltage and discontinue use if it persists. |
| Glue gun smoking. | Dust or debris inside the heating element; Overheating due to prolonged use or incorrect voltage. | Immediately unplug the glue gun. Allow it to cool completely in a well-ventilated area. If smoking persists upon re-use, discontinue use and contact support. |
7. Specifications
| Model Number | HL-E 20W |
| Brand | Assark |
| Power | 30 Watts |
| Voltage | 120 Volts |
| Warm-Up Time | 1-3 minutes |
| Compatible Glue Stick Diameter | 7mm (0.28 inches) |
| Dimensions (L x W x H) | 17 x 14 x 3 cm (approximately 6.7 x 5.5 x 1.2 inches) |
| Weight | 308 grams (approximately 0.68 lbs) |
| Material | Plastic |
| Power Source | Corded Electric |
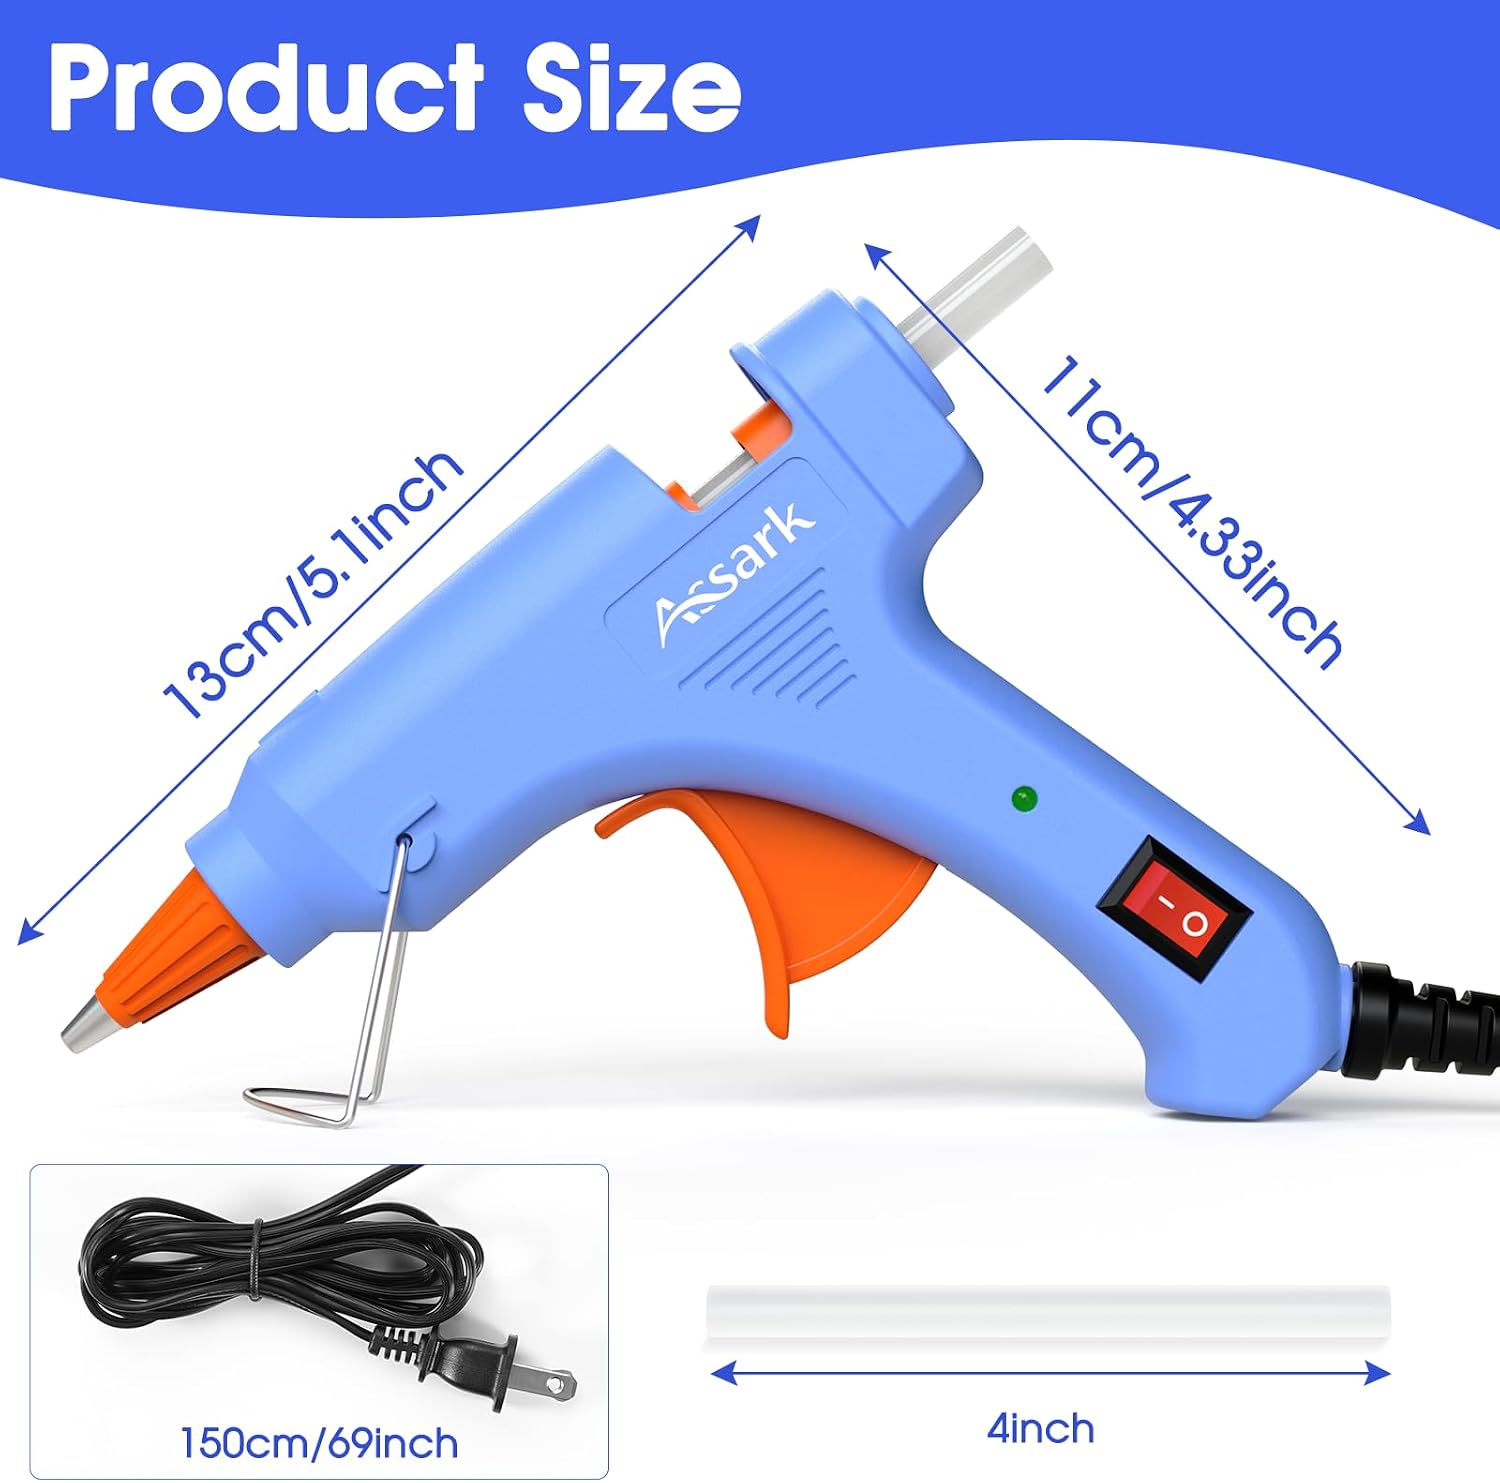
Figure 5: Product dimensions and power cord length.
8. Warranty and Support
For warranty information or technical support, please refer to the product packaging or contact the manufacturer directly. Keep your purchase receipt as proof of purchase for any warranty claims.
Ask a question about this manual
Ask about setup, troubleshooting, compatibility, parts, safety, or missing instructions. Manuals+ will review the question and use this page’s manual context to help answer it.