
Product Overview
This product is a screen replacement kit specifically designed for the Logic T10L 10.1-inch Tablet. It includes the digitizer panel (touch glass) and essential tools for repair. Please note that this kit does not include the LCD display. It is intended to replace faulty touch screens, addressing issues such as cracked glass, non-responsive touch, or other touch-related malfunctions.

Image: The complete screen replacement kit, showing the digitizer panel, various screwdrivers, prying tools, suction cup, and adhesive tape.
Package Contents
Upon opening your package, please verify that all the following components are included:
- 1x Black Digitizer for Logic T10L Touch Screen Replacement
- 1x Opening Tools Kit (typically includes screwdrivers, prying tools, suction cup)
- 1x Adhesive Tape
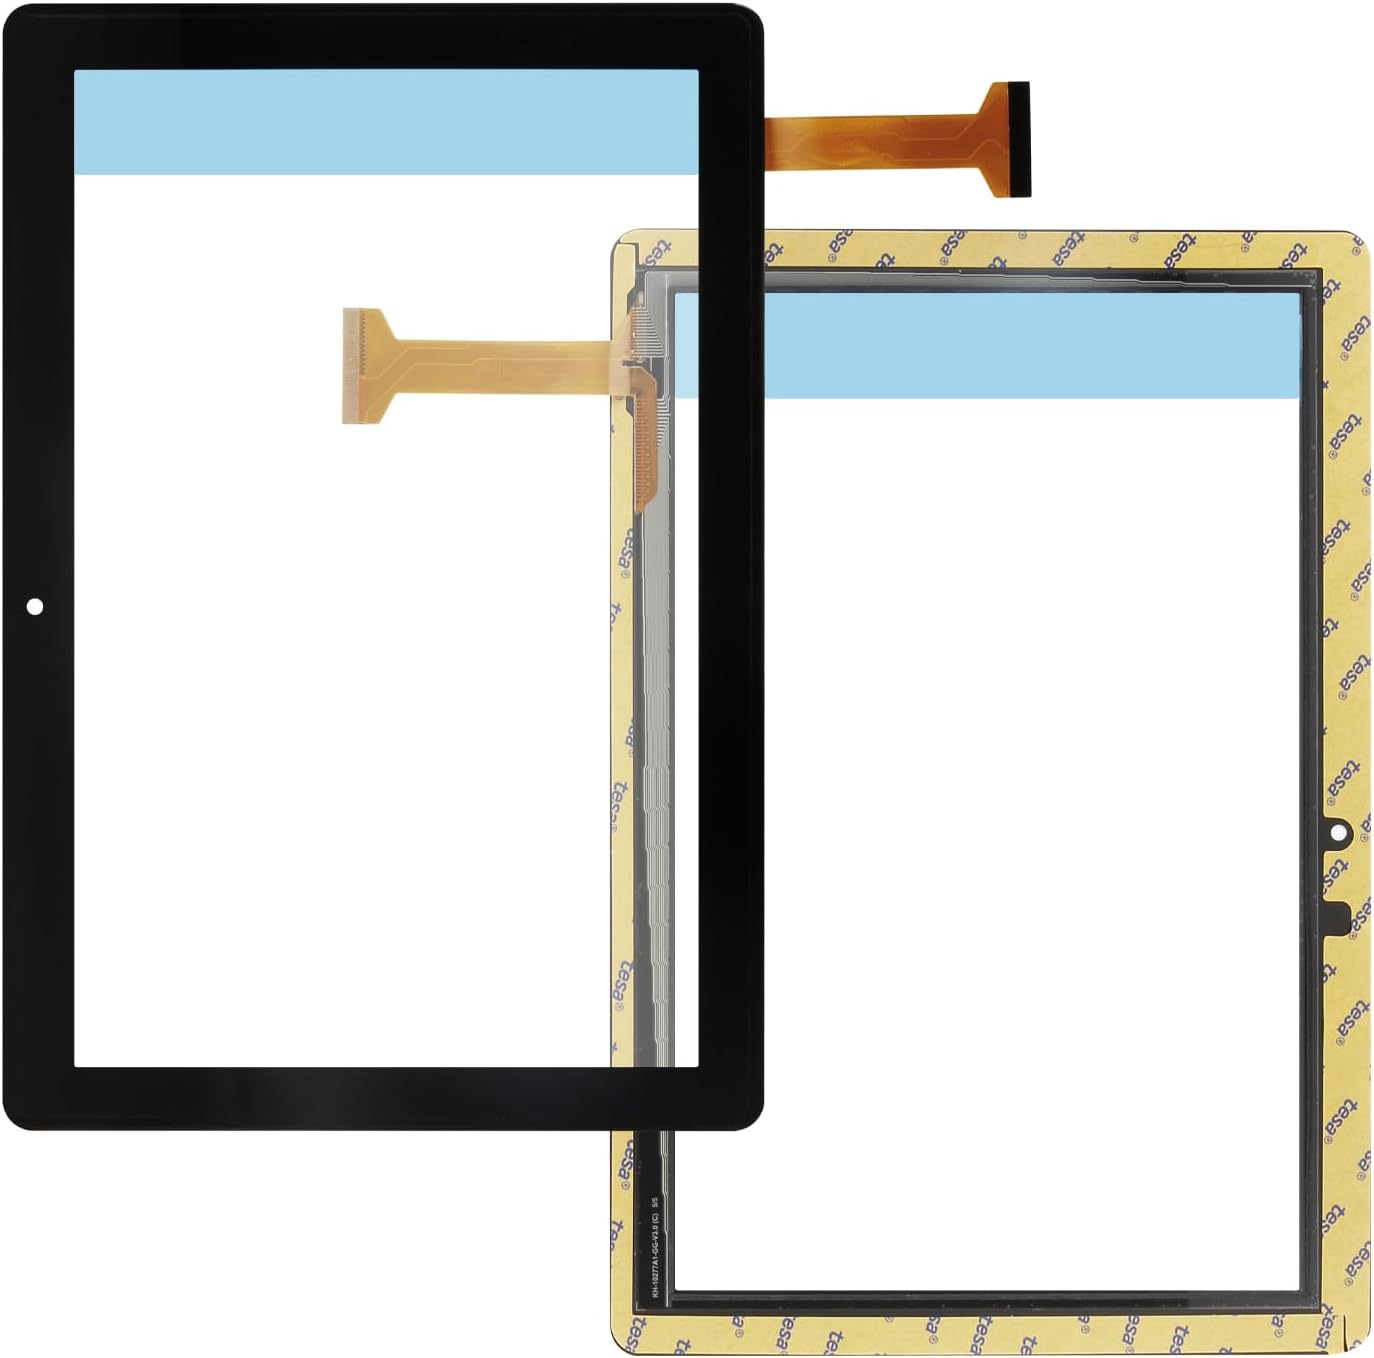
Image: A clear view of the Logic T10L digitizer panel, highlighting its design and the adhesive strips around the edges.
Important Pre-Installation Considerations
Replacing a tablet screen requires precision and technical knowledge. Please read the following points carefully before attempting installation:
- Professional Installation Recommended: If you lack experience in repairing electronic equipment, it is strongly advised to seek assistance from a professional repair center. Attempting self-repair without adequate skills may lead to further damage to your device or the new screen. Damages incurred during installation are not covered under warranty.
- Pre-Installation Testing: Before permanently installing the new screen with adhesive, it is crucial to test its functionality.
- Remove the battery from your tablet.
- Connect the flex cable of the new digitizer to the tablet's motherboard.
- Reconnect the battery and power on the device.
- Thoroughly test the touch functionality across the entire screen. Ensure there are no dead spots or unresponsive areas.
Do not apply the adhesive or fully install the screen until you have confirmed it works perfectly. Once adhesive is applied, returns or refunds for functional issues may not be accepted.
- Fragile Component: The screen is made of glass. Handle it with extreme care during unpacking and installation to prevent damage.

Image: Detailed view of the digitizer's flex cable connection point and the pre-applied Tesa adhesive tape along the edges, crucial for proper installation.
Installation Guidance
This section provides general guidance for the installation process. Specific step-by-step instructions are beyond the scope of this manual due to the technical nature of the repair. It is highly recommended to consult professional repair guides or videos for your specific tablet model (Logic T10L) before proceeding.
- Disassembly: Carefully disassemble your Logic T10L tablet to access the damaged screen. This typically involves heating the edges to soften adhesive and using prying tools to separate components.
- Old Screen Removal: Gently remove the old, damaged digitizer from the LCD display. This often requires separating the two components using specialized tools and heat. Ensure no glass fragments remain on the LCD.
- Cleanliness: Thoroughly clean the LCD and the tablet frame to remove any old adhesive residue or dust. A clean surface is essential for proper adhesion and display clarity.
- Connect New Digitizer: Carefully connect the flex cable of the new digitizer to the corresponding connector on the tablet's motherboard. Ensure it is seated correctly and securely.
- Test Functionality: As mentioned in the "Pre-Installation Considerations" section, perform a full functionality test before applying adhesive.
- Adhesion: Once tested and confirmed working, carefully remove the protective films from the adhesive tape on the new digitizer. Align the digitizer precisely with the tablet frame and press firmly around the edges to secure it.
- Reassembly: Reassemble the tablet, ensuring all components are correctly placed and secured.

Image: A detailed view of the digitizer's flex cable, showing the delicate circuitry that connects the touch panel to the tablet's main board. Proper handling of this component is critical during installation.
Maintenance
Proper maintenance can extend the lifespan of your tablet's screen:
- Cleaning: Use a soft, lint-free cloth, preferably microfiber, to clean the screen. For stubborn smudges, slightly dampen the cloth with water or a screen-specific cleaning solution. Avoid harsh chemicals or abrasive materials.
- Protection: Consider using a screen protector to guard against scratches and minor impacts.
- Handling: Avoid placing heavy objects on the screen or applying excessive pressure, which can lead to cracks or internal damage.
Troubleshooting
If you encounter issues after installation, consider the following:
- Touch Not Working / Unresponsive:
- Ensure the flex cable is securely and correctly connected to the motherboard. A loose or misaligned connection is a common cause.
- Verify that the digitizer itself is not damaged. Inspect for any visible cracks or bends on the flex cable or glass.
- If the issue persists, it may indicate a faulty digitizer or an underlying issue with the tablet's motherboard. Professional diagnosis is recommended.
- Screen Not Fitting Properly:
- Ensure all old adhesive residue has been completely removed from the tablet frame.
- Verify that you have the correct model screen replacement for your Logic T10L tablet.
- Visible Dust/Debris Under Screen:
- This usually occurs during installation. If significant, the screen may need to be carefully removed, cleaned, and reinstalled in a dust-free environment.
For complex issues or if troubleshooting steps do not resolve the problem, please contact customer support or a professional repair service.
Product Specifications
| Model Number | Screen Replacement For Logic T10L |
| Screen Type | Touch Digitizer Panel (Glass only, LCD not included) |
| Size | 10.1 inch |
| Color | Black |
| Item Weight | 8.8 ounces |
| Package Dimensions | 10.87 x 8.5 x 1.26 inches |
| Manufacturer | A-MIND |

Image: Visual representation of key features including HD clarity, touch digitizer functionality, scratchproof and anti-fingerprint properties, and 10.1-inch size.
Warranty and Support
A-MIND provides a 3-month warranty for this product. This warranty covers manufacturing defects and functional issues under normal use, provided there is no man-made or physical damage to the screen.
All products undergo quality control testing before shipping to ensure proper functionality.
If you encounter any problems with your order or the product, please do not hesitate to contact our customer service team. We aim to provide assistance within 24 hours.
Contact Information: Please refer to your purchase platform (e.g., Amazon message system) to contact our customer service team directly.