
1. Introduction
The Aokin ESP32 ESP-32S NodeMCU-32S ESP-WROOM-32 Development Board is a versatile microcontroller designed for various applications requiring Wi-Fi and Bluetooth connectivity. It integrates antenna switches, RF balun, power amplifiers, low noise amplifiers, filters, and power management modules, all within a compact form factor. This board is ideal for IoT projects, smart home devices, and other embedded systems due to its dual-core processor and low-power 40nm technology.
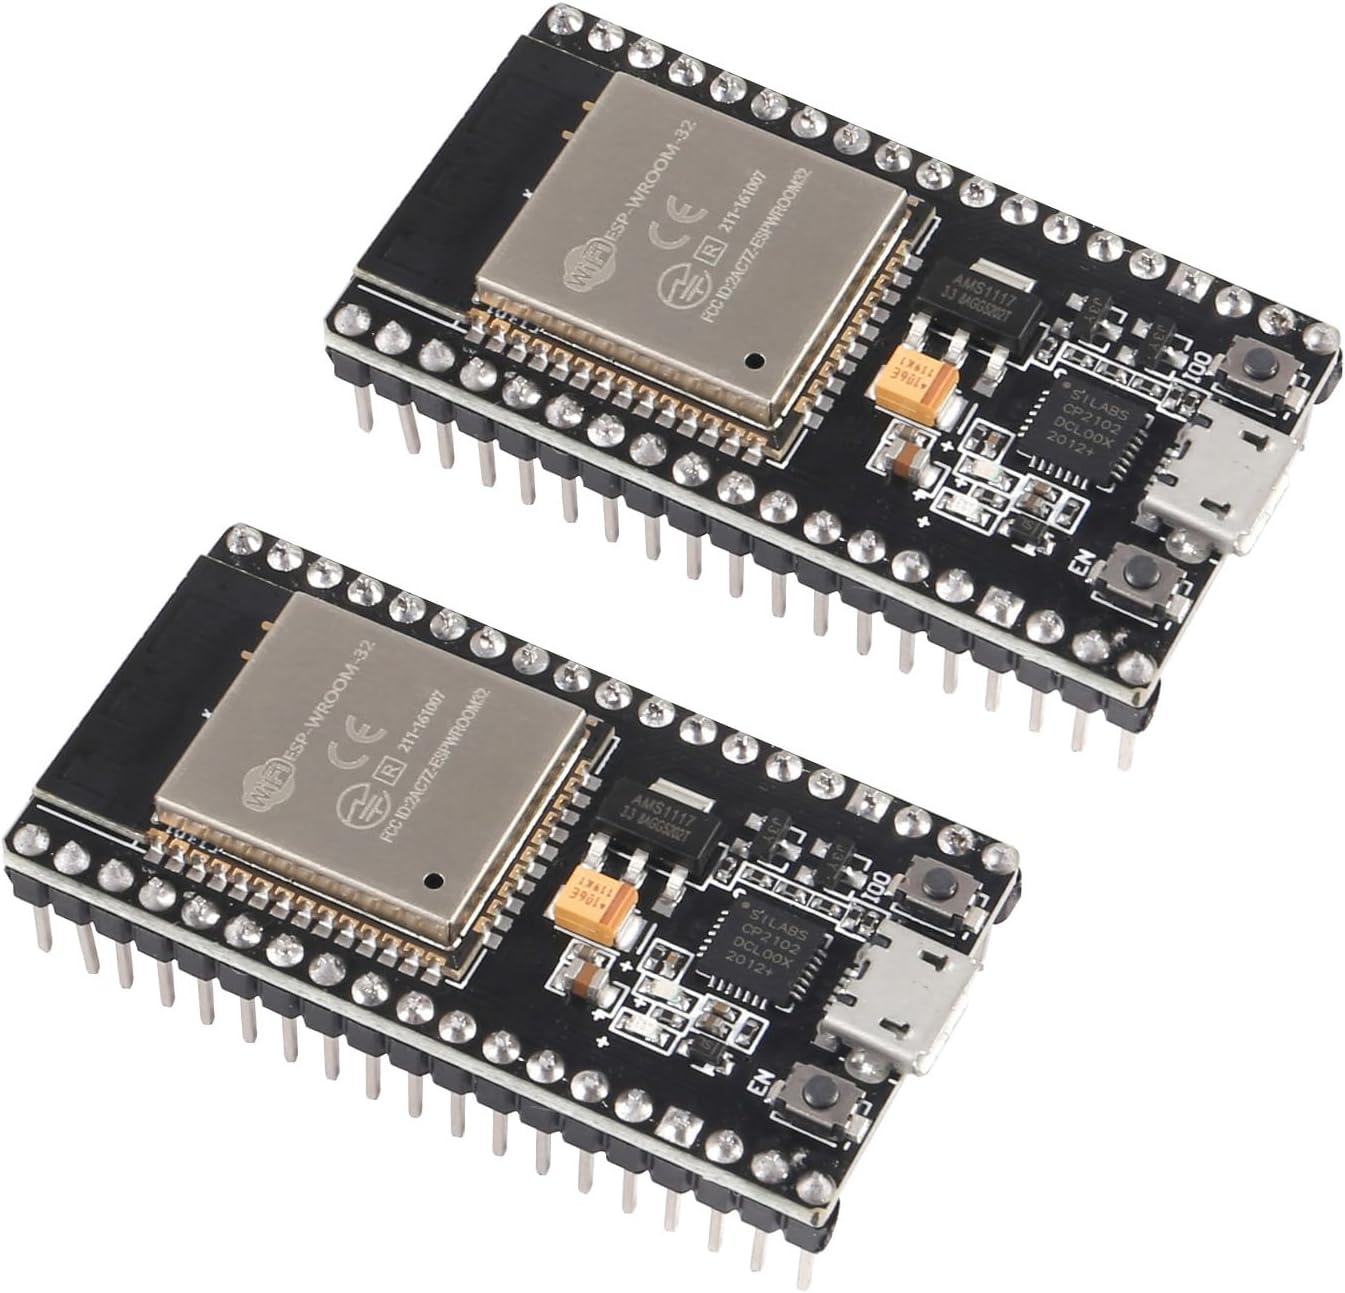
Figure 1: Two Aokin ESP32 ESP-32S NodeMCU-32S Development Boards.
2. Key Features
- Dual-Mode Connectivity: Features 2.4 GHz Wi-Fi and Bluetooth for versatile wireless communication.
- Integrated Flash Memory: Equipped with 4 MB of flash memory for program storage.
- Compact Design: Small volume and powerful capabilities, designed to fit on a solderless breadboard.
- Protocol Support: Supports LWIP protocol and FreeRTOS.
- Operating Modes: Supports three modes: Access Point (AP), Station (STA), and AP+STA coexistence mode.
- Programming Compatibility: Compatible with Arduino, NodeMCU, and MicroPython. Can be programmed using the Arduino IDE and Lua.
- Low Power Consumption: Utilizes low-power 40nm technology for optimal power efficiency and RF performance.
3. Product Specifications
| Specification | Value |
|---|---|
| Brand | Aokin |
| Model Name | ESP32 ESP-32S NodeMCU-32S Development Board |
| Connectivity Technology | Bluetooth, Wi-Fi |
| Memory Storage Capacity | 4 MB |
| Item Weight | 0.634 ounces |
| Package Dimensions | 4.57 x 3.07 x 0.67 inches |
| Date First Available | September 8, 2021 |
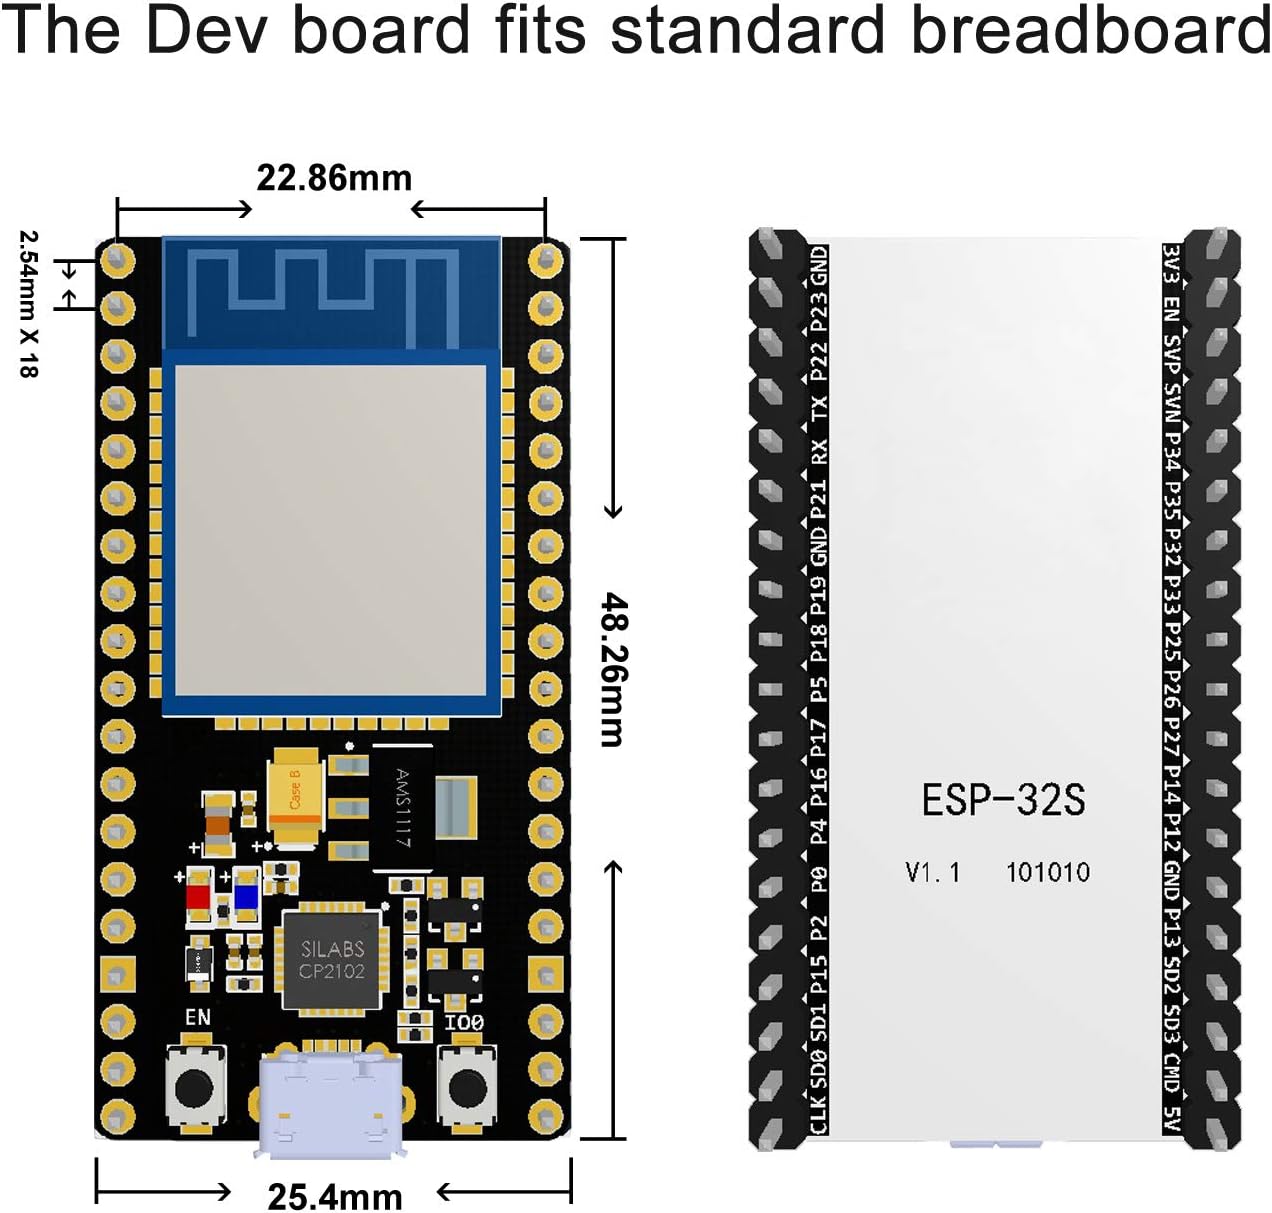
Figure 2: Dimensions of the ESP32 Development Board, indicating its compact size suitable for breadboards.

Figure 3: Detailed view of the ESP32 board's key components.
4. Setup Guide
Before using your Aokin ESP32 development board, follow these steps to ensure proper setup:
4.1 Driver Installation
The board uses a CP2102 USB to UART bridge. You may need to install the appropriate drivers for your operating system. Drivers can typically be found on the Silicon Labs website:
4.2 Connecting the Board
Connect the ESP32 board to your computer using a micro-USB cable. The board is designed to fit on a standard solderless breadboard, making prototyping convenient.

Figure 4: Top and bottom views of the ESP32 board, highlighting pin labels on the underside.
4.3 Initial Program Download (Important Tip)
When downloading a program to the development board, it is often necessary to manually put the board into programming mode. This typically involves pressing and holding the IO0 button for 1-2 seconds during the upload process, especially when the Arduino IDE or similar tools indicate the start of the upload sequence.
5. Operating Instructions
The Aokin ESP32 board offers flexible operating capabilities for various embedded projects.
5.1 Programming Environments
The board is compatible with popular development environments:
- Arduino IDE: Widely used for its simplicity and extensive library support.
- NodeMCU (Lua): For Lua-based scripting and rapid prototyping.
- MicroPython: For Python-based programming on microcontrollers.
5.2 Wi-Fi and Bluetooth Modes
The ESP32 supports three primary Wi-Fi operating modes:
- Station (STA) Mode: The ESP32 connects to an existing Wi-Fi network (e.g., your home router).
- Access Point (AP) Mode: The ESP32 creates its own Wi-Fi network, allowing other devices to connect to it.
- AP+STA Coexistence Mode: The ESP32 operates as both an Access Point and a Station simultaneously.
5.3 Pinout Diagram
Understanding the pinout is crucial for connecting external components and sensors. Refer to the diagram below for the pin assignments.

Figure 5: ESP32 Development Board Pinout Diagram.
6. Maintenance
The Aokin ESP32 development board is designed for durability and requires minimal maintenance. Keep the board clean and free from dust and moisture. Avoid exposing it to extreme temperatures or static electricity. No user-serviceable parts are inside the module itself.
7. Troubleshooting
If you encounter issues with your ESP32 development board, consider the following common troubleshooting steps:
7.1 Program Upload Issues
- IO0 Button: If your program fails to upload, ensure you are pressing and holding the IO0 button (sometimes labeled "BOOT" or "FLASH") during the upload process, especially when the IDE indicates it's attempting to connect or upload. Release the button once the upload begins.
- USB Cable/Port: Try a different USB cable or a different USB port on your computer. Faulty cables or insufficient power from a USB port can cause upload failures.
- Driver Issues: Verify that the CP2102 drivers are correctly installed and recognized by your operating system.
- Board Selection: In your IDE (e.g., Arduino IDE), ensure you have selected the correct board model (e.g., "ESP32 Dev Module" or similar) and COM port.
7.2 Physical Defects
- Bent Pins: Carefully inspect the pins on the board. If any are bent, gently straighten them.
- Solder Bridges: In rare cases, small solder bridges between pins can occur during manufacturing. Visually inspect the pins for any unintended connections and carefully remove them if found (e.g., with a fine soldering iron tip).
8. Support and Resources
For further assistance and detailed technical documentation, please refer to the following resources:
- CP2102 Driver: silabs.com/products/development-tools/software/usb-to-uart-bridge-vcp-drivers
- ESP32-WROOM-32 Datasheet: espressif.com/sites/default/files/documentation/esp32-wroom-32_datasheet_en.pdf
- NodeMCU Firmware (ESP32): github.com/nodemcu/nodemcu-firmware/tree/dev-esp32
- NodeMCU Lua (Nicholas3388): github.com/Nicholas3388/LuaNode
- Manufacturer: Aokin
Note: This board has pin labeling on the bottom side. The product package may include a printed sheet with additional information and pin labels.
