1. Introduction
This manual provides essential instructions for the proper installation, operation, and maintenance of your USPEEDA Carburetor and Air Filter Replacement Kit. This kit is designed to replace part number 753-06423 and is compatible with Hyper Tough H 2500 (41ADZ01C735) and H 2510 (41ADZ02C735) string trimmers. Please read this manual thoroughly before attempting any installation or maintenance to ensure safe and effective use.
2. Safety Information
Always prioritize safety when working with power tools and their components. Failure to follow safety instructions can result in serious injury or damage to equipment.
- Disconnect Spark Plug: Before beginning any work, always disconnect the spark plug wire to prevent accidental engine startup.
- Wear Protective Gear: Use appropriate personal protective equipment, including safety glasses and gloves.
- Work in a Well-Ventilated Area: Ensure adequate ventilation, especially when dealing with fuel.
- Handle Fuel Safely: Fuel is highly flammable. Store it in approved containers and handle it away from open flames or ignition sources.
- Refer to Trimmer Manual: Consult your string trimmer's original instruction manual for specific disassembly and reassembly procedures.
- Keep Children and Bystanders Away: Ensure the work area is clear of unauthorized personnel.
3. Package Contents
Verify that all components listed below are present in your package:
- 1 x Carburetor
- 2 x Gaskets
- 2 x Primer Bulbs
- 2 x Air Filters
- 1 x Fuel Line
- 1 x Screwdriver
- 1 x Spark Plug

Image 1: Overview of the USPEEDA Carburetor and Air Filter Replacement Kit, showing all included components: carburetor, gaskets, primer bulbs, air filters, fuel line, screwdriver, and spark plug.
4. Setup and Installation
This section outlines the general steps for replacing the carburetor and related components. Specific disassembly and reassembly steps may vary slightly depending on your exact trimmer model. Always refer to your trimmer's original service manual for detailed instructions.
4.1 Preparation
- Ensure the trimmer engine is cool.
- Disconnect the spark plug wire.
- Drain any remaining fuel from the fuel tank into an approved container.
- Clean the area around the carburetor to prevent debris from entering the engine.
4.2 Removing the Old Carburetor
- Locate the carburetor on your string trimmer. It is typically found between the air filter housing and the engine.
- Carefully disconnect the fuel lines from the carburetor. Note their positions for reinstallation.
- Disconnect the throttle linkage and choke rod from the carburetor.
- Unscrew the mounting bolts or nuts that secure the carburetor to the engine.
- Remove the old carburetor and any old gaskets. Inspect the intake manifold for damage.
4.3 Installing the New Carburetor and Components
- Place new gaskets on the engine side and air filter side of the carburetor. Ensure they are correctly aligned.
- Mount the new carburetor onto the engine, aligning it with the mounting studs/holes.
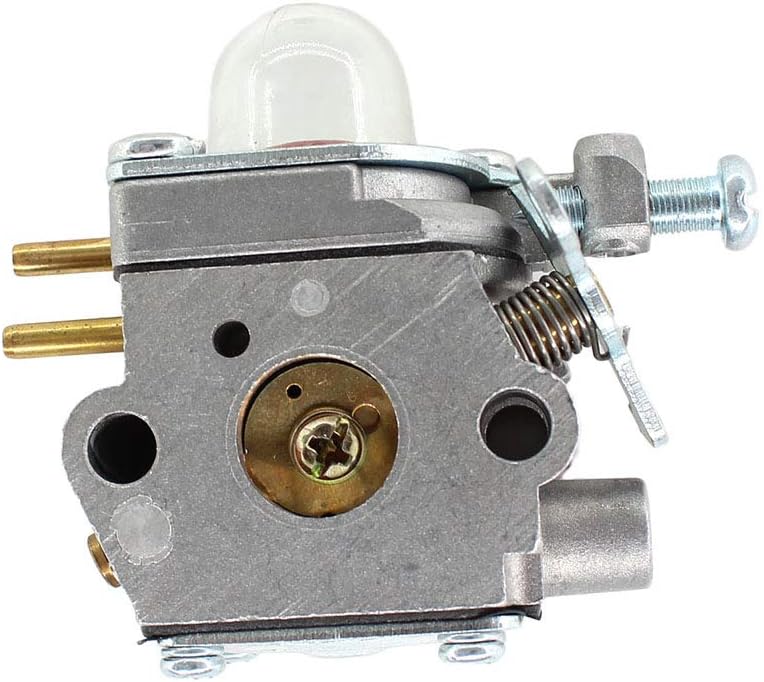
Image 2: Side view of the USPEEDA replacement carburetor, showing fuel line connections and adjustment screws.
- Secure the carburetor with the mounting bolts/nuts. Do not overtighten.
- Reconnect the throttle linkage and choke rod. Ensure they move freely.
- Install the new fuel line, connecting it to the appropriate ports on the carburetor and fuel tank. Replace primer bulbs if necessary.

Image 3: Another side view of the USPEEDA replacement carburetor, highlighting the air intake and internal components.
- Replace the old air filter with one of the new air filters provided. Ensure it fits snugly in the air filter housing.
- If replacing the spark plug, use the provided spark plug. Ensure it is properly gapped according to your trimmer's specifications (refer to your trimmer manual).

Image 4: Top-angle view of the USPEEDA replacement carburetor, showing the primer bulb and various ports.

Image 5: Bottom-angle view of the USPEEDA replacement carburetor, detailing the fuel inlet and mounting points.
5. Operating Considerations
After installing the new carburetor, follow these steps for initial startup and operation:
- Refill Fuel Tank: Add fresh, properly mixed fuel (if applicable for 2-stroke engines) to the fuel tank.
- Prime the Carburetor: Press the primer bulb several times until fuel is visible and flows freely through the fuel lines, and the bulb is firm.
- Reconnect Spark Plug: Reconnect the spark plug wire securely.
- Start the Engine: Follow your trimmer's specific starting procedure (e.g., set choke, pull starter cord).
- Adjust Carburetor (if necessary): The carburetor is pre-tuned for general use. If the engine runs rough, stalls, or lacks power, minor adjustments to the idle speed or fuel mixture screws may be required. Refer to your trimmer's manual or consult a qualified technician for carburetor tuning.
6. Maintenance
Regular maintenance ensures optimal performance and extends the life of your trimmer components.
- Air Filter: Inspect the air filter regularly (e.g., every 10-20 hours of operation or seasonally). Clean or replace it if it appears dirty or clogged. A dirty air filter restricts airflow, leading to poor engine performance.
- Fuel System: Use fresh fuel and avoid leaving fuel in the tank for extended periods, especially during off-season storage. Stale fuel can clog the carburetor.
- Spark Plug: Inspect the spark plug annually or every 50 hours of operation. Clean or replace it if electrodes are fouled or worn.
- General Cleaning: Keep the exterior of the carburetor and engine clean from dirt and debris.
7. Troubleshooting
If your trimmer experiences issues after carburetor replacement, consider the following common problems and solutions:
- Engine Will Not Start:
- Check for proper fuel flow and ensure the primer bulb is firm.
- Verify the spark plug wire is securely connected.
- Ensure the spark plug is clean and gapped correctly.
- Confirm the choke is set correctly for starting.
- Engine Runs Rough or Stalls:
- Inspect the air filter for clogs.
- Check for air leaks around the carburetor gaskets.
- Ensure fuel lines are not kinked or obstructed.
- Consider minor carburetor adjustments (idle speed, fuel mixture).
- Lack of Power:
- Check the air filter for cleanliness.
- Inspect the spark plug.
- Ensure the fuel is fresh and properly mixed.
If issues persist, it is recommended to consult a qualified small engine technician.
8. Specifications
- Product Dimensions: Approximately 4.33 x 4.33 x 2.76 inches (for the carburetor kit as packaged)
- Manufacturer: USPEEDA
- Replacement Part Number: 753-06423
- Compatible Trimmer Models: Hyper Tough H 2500 (41ADZ01C735), Hyper Tough H 2510 (41ADZ02C735)
9. Warranty and Support
For information regarding warranty coverage or technical support, please refer to the seller's policies or contact USPEEDA customer service directly through the platform where the product was purchased. Specific warranty details are not provided in this manual.