
1. Introduction
Thank you for choosing the Hama 118490 Fullmotion Double Arm Monitor Desk Mount Stand. This product is designed to securely hold two TFT/LCD/LED screens with a diagonal size of 33 cm to 81 cm (13" to 32"). It provides an ergonomic and tidy workstation by allowing flexible positioning of your monitors. Please read this manual carefully before installation and use to ensure safe and correct operation.
2. Safety Instructions
- Weight Capacity: Do not exceed the maximum load capacity of 12 kg (26.4 lbs) per supporting arm. Overloading can cause damage or injury.
- Screen Size: Ensure your monitors are within the supported screen size range of 33 cm to 81 cm (13" to 32").
- Desk Thickness: The table clamp is suitable for desk thicknesses between 1 cm and 8.5 cm. Verify your desk meets this requirement.
- Stability: Ensure the desk mount is securely fastened to a stable desk surface before attaching any monitors.
- Assembly: Assemble the product according to the instructions. Incorrect assembly can lead to product failure or injury.
- Adjustments: When adjusting the monitor position, hold the monitor firmly to prevent it from falling.
- Children: Keep packaging materials away from children due to the risk of suffocation.
- Damage: Do not use the product if it is visibly damaged. Contact customer support for assistance.
3. Package Contents
Please check that all components are present and undamaged before beginning installation.
- Main pole with desk clamp
- Two articulated monitor arms with VESA plates
- Cable management clips/covers
- Mounting hardware (screws, washers, spacers)
- Hex keys for adjustment
- Protective foam pad for desk
- Instruction manual (this document)
4. Setup and Installation
4.1 Attaching the Desk Clamp
- Place the protective foam pad on your desk surface where the clamp will be positioned to prevent scratches.
- Position the main pole with the integrated desk clamp at the desired location on your desk.
- Tighten the clamping screw firmly until the mount is stable and secure. Ensure the desk thickness is between 1 cm and 8.5 cm.

Figure 4.1: Desk clamp installation.
4.2 Assembling the Monitor Arms
The articulated arms slide onto the main pole. Adjust their height as needed and secure them with the provided screws or clamps.

Figure 4.2: Assembled monitor arm on the main pole.
4.3 Attaching the Monitors
- Ensure your monitor is compatible with VESA 75x75 or 100x100 mounting patterns.
- The VESA plate on the monitor arm is removable for easier mounting. Detach it from the arm if necessary.
- Attach the VESA plate to the back of your monitor using the appropriate screws from the mounting hardware kit. Do not overtighten.
- Carefully re-attach the monitor with the VESA plate to the articulated arm. Ensure it clicks securely into place or is fastened with the locking mechanism.
- Repeat for the second monitor.

Figure 4.3: Attaching a monitor to the VESA plate.

Figure 4.4: Adjusting a mounted monitor.
4.4 Cable Management
Route your monitor cables through the integrated cable covers or clips on the monitor arms and main pole. This helps maintain a tidy workspace and prevents cable damage.
5. Operating Instructions
The Hama 118490 mount offers full motion adjustability for optimal viewing comfort.
5.1 Height Adjustment
The integrated gas spring allows for continuous vertical height adjustment of up to 57 cm. Gently push or pull the monitor to the desired height. If the monitor does not stay in position, you may need to adjust the gas spring tension using the provided hex key (refer to the specific adjustment screw on the arm).
5.2 Tilt Adjustment
Monitors can be tilted up to +/- 45 degrees. Loosen the tilt adjustment screw on the VESA plate, adjust the monitor to your preferred angle, and then re-tighten the screw to secure it.
5.3 Swivel and Rotation
The articulated arms allow for extensive swivel movement, enabling you to position your monitors at various angles relative to your desk. The VESA plate also allows for 360-degree rotation, enabling portrait or landscape orientation of your screens.

Figure 5.1: Example of monitor swivel adjustment.
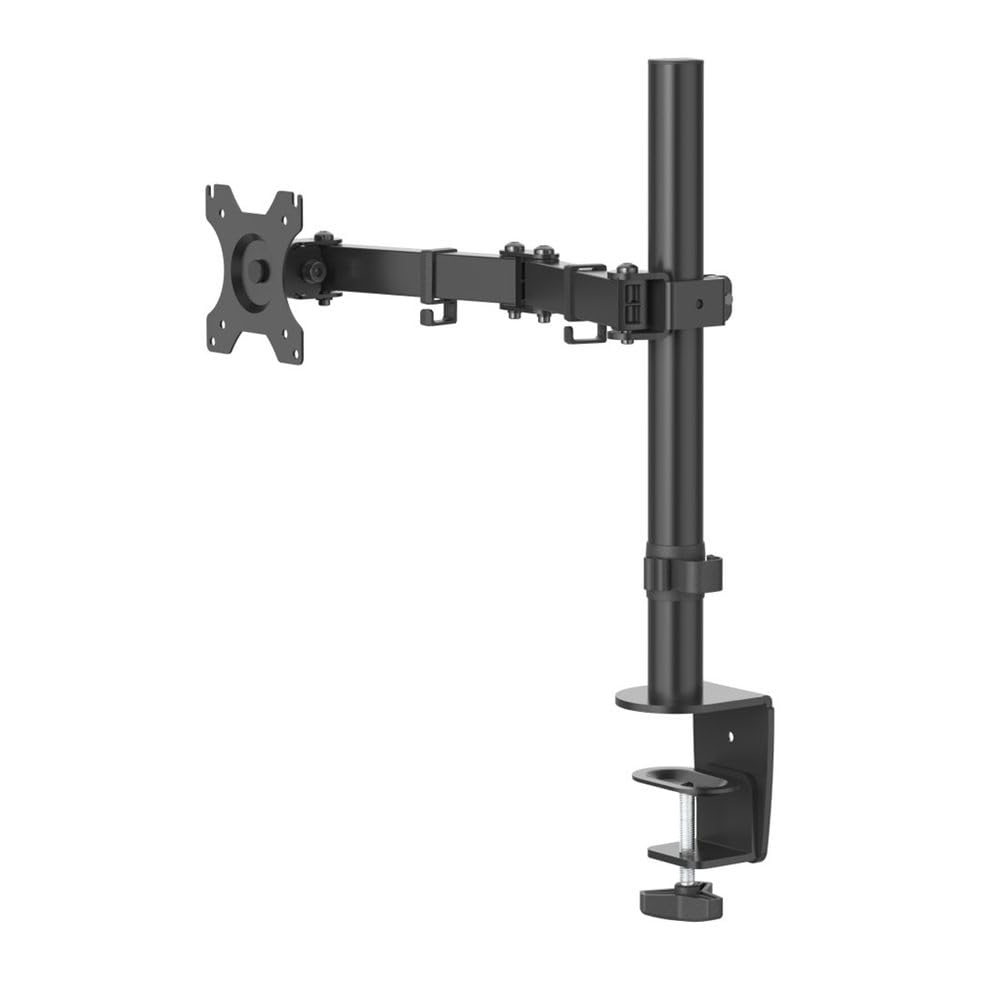
Figure 5.2: Example of monitor forward positioning.
6. Maintenance
- Cleaning: Clean the mount with a soft, damp cloth. Do not use abrasive cleaners or solvents.
- Check Connections: Periodically check all screws and connections to ensure they remain tight and secure. Re-tighten if necessary.
- Gas Spring Adjustment: If the monitor sags or rises too easily, adjust the gas spring tension according to the instructions provided with the mount (usually a screw on the arm).
7. Troubleshooting
| Problem | Possible Cause | Solution |
|---|---|---|
| Monitor sags or does not stay at desired height. | Gas spring tension is too low for the monitor's weight. | Adjust the gas spring tension screw on the arm using the provided hex key. Turn clockwise to increase tension for heavier monitors, counter-clockwise for lighter monitors. |
| Monitor is difficult to move vertically. | Gas spring tension is too high. | Adjust the gas spring tension screw on the arm. Turn counter-clockwise to decrease tension. |
| Mount feels unstable or wobbly. | Desk clamp is not tightened sufficiently or desk surface is unsuitable. | Ensure the desk clamp is fully tightened. Verify your desk thickness is within the specified range (1 cm to 8.5 cm) and that the desk itself is stable. |
| Monitor cannot be tilted or swiveled. | Adjustment screws are too tight. | Loosen the relevant adjustment screws slightly to allow movement, then re-tighten to secure the position. |
8. Specifications
- Model: Hama 118490
- Mounting Type: Tabletop Mount (Clamp)
- Supported Screen Size: 33 cm - 81 cm (13" - 32")
- Maximum Load Capacity: 12 kg (26.4 lbs) per arm
- VESA Compatibility: 75x75 mm, 100x100 mm
- Tilt Angle: +/- 45 degrees
- Swivel: Full motion (articulated arms)
- Rotation: 360 degrees (portrait/landscape)
- Height Adjustment: Continuous, up to 57 cm
- Desk Clamp Thickness: 1 cm - 8.5 cm
- Color: Black
- Item Weight: Approximately 2310.8 Grams
9. Warranty and Support
For warranty information, technical support, or service inquiries, please refer to the official Hama website or contact your local Hama distributor. Keep your proof of purchase for any warranty claims.
Manufacturer: Hama GmbH & Co KG


