1. Product Overview
The GOOVIS Lite is a personal 3D viewer designed to provide an immersive visual experience. It features 1080P OLED dual displays with high pixel density, offering a clear and expansive virtual screen. The headset is lightweight and includes adjustable vision correction for hyperopia and myopia, as well as interpupillary distance (IPD) adjustment.
2. Package Contents
Before setup, ensure all components are present in the package:
- GOOVIS Lite Headset
- Instruction Book (User Manual)
- Lens Cleaning Cloth
- HDMI Cable with USB (for power and signal)
- Relief Headband
- Packing Box

3. Setup and Assembly
3.1 Attaching the Headband
The GOOVIS Lite headset comes with a soft headband for comfortable wear. Follow these steps to attach it:
- Unpack the relief headband from its plastic packaging.
- Locate the attachment points on the headset and the headband.
- Securely attach the headband to the headset. Ensure it is firmly connected for stability during use.
3.2 Connecting to Devices
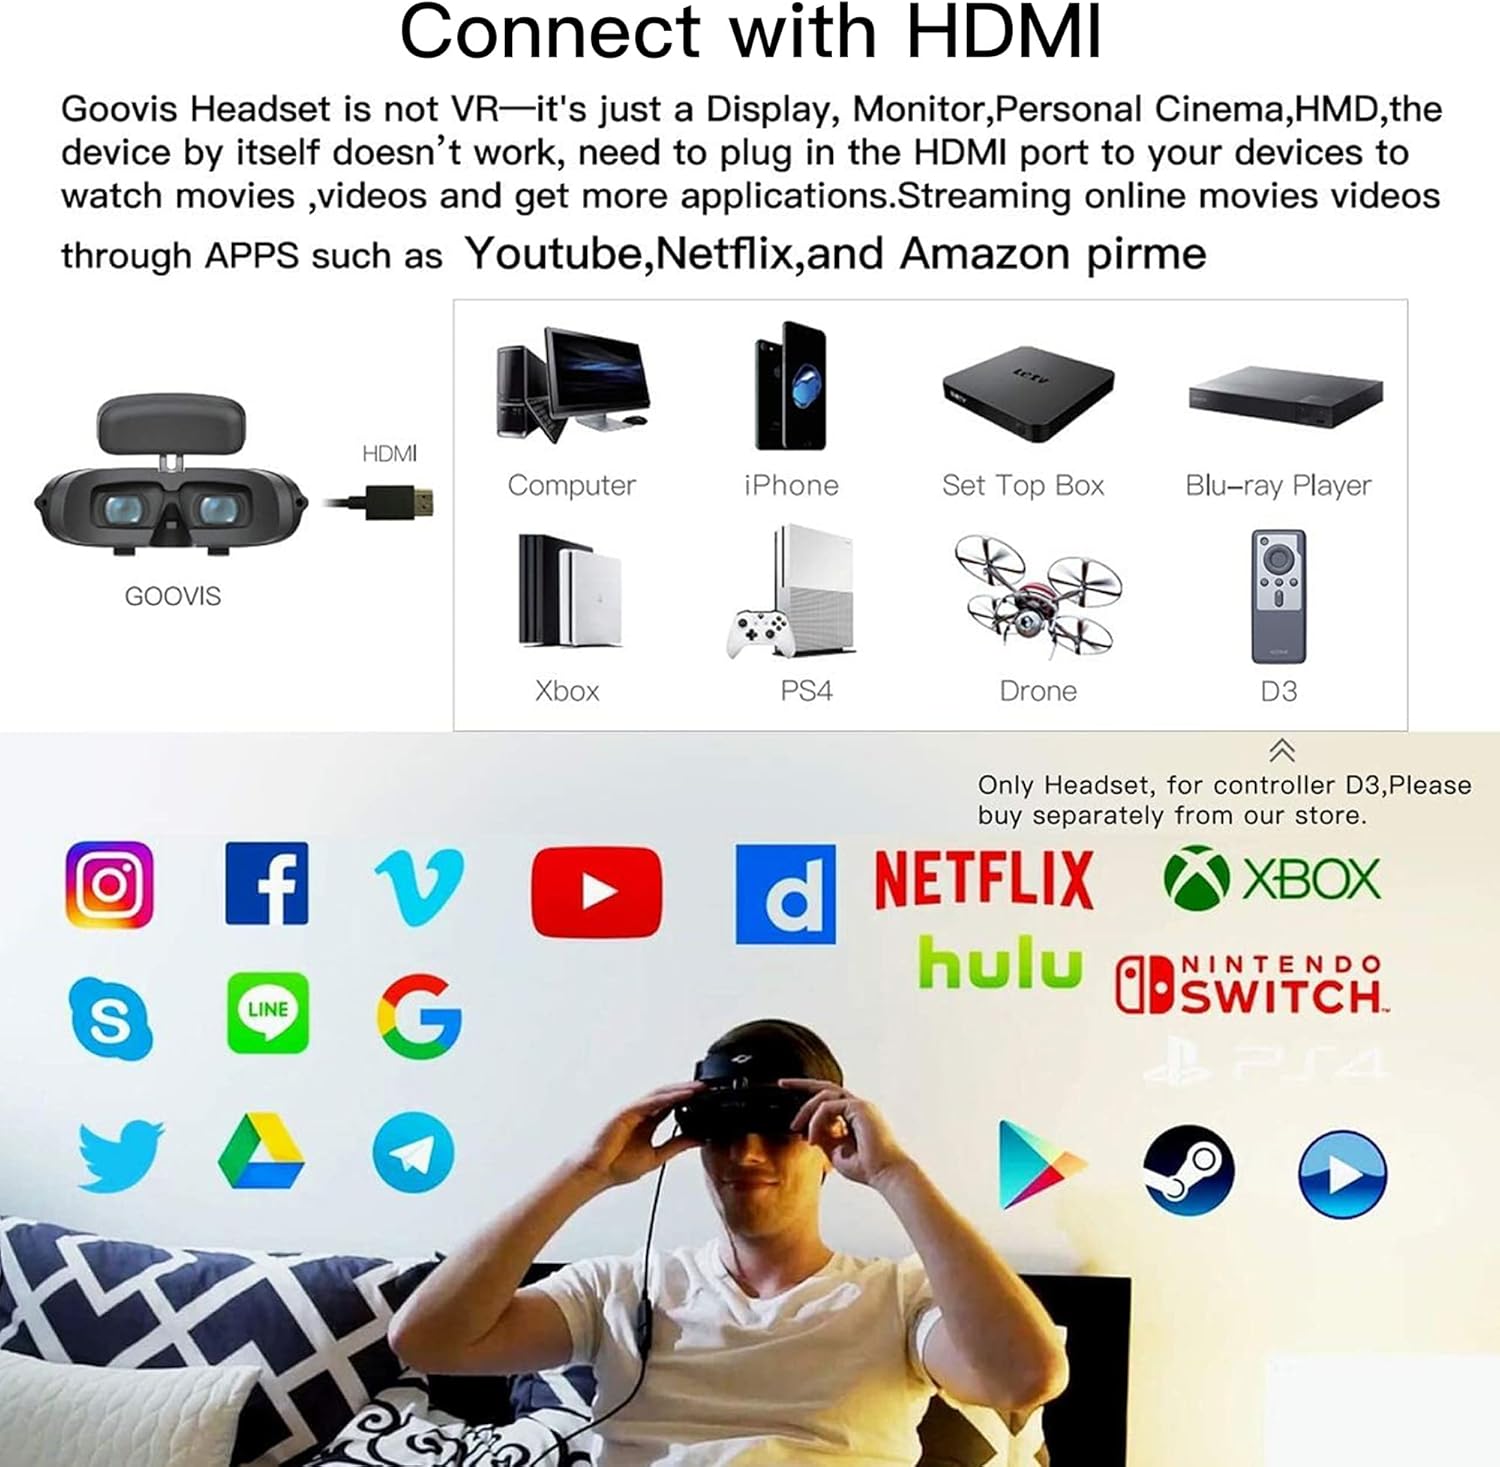
The GOOVIS Lite headset does not have an internal power switch and is powered by the connected device. It connects via HDMI for video and USB for power.
3.2.1 Direct HDMI Connection (e.g., PC, Game Console)
Connect the headset's HDMI cable directly to the HDMI output port of your device (e.g., PC, laptop, PS4, Xbox, set-top box). Ensure the USB power cable is also connected to a 5V USB power source (e.g., a USB port on your device or a wall adapter).
3.2.2 Connecting to DJI Mavic 2 Drone
For DJI Mavic 2 Smart Screen Remote Control, there are two connection methods:
- Direct Type-C Connection: Plug the GOOVIS Young Type-C interface directly into the DJI Mavic 2 screen Remote Control.
- Video Adapter Connection: For a more stable and reliable long-term connection, use a video adapter (e.g., GOOVIS Video adapter HC2.0). Connect the video adapter to the HDMI port and a 5V USB power source on the Mavic 2 remote control, then connect the GOOVIS Lite to the adapter.
4. Operating the Headset
4.1 Vision Adjustment
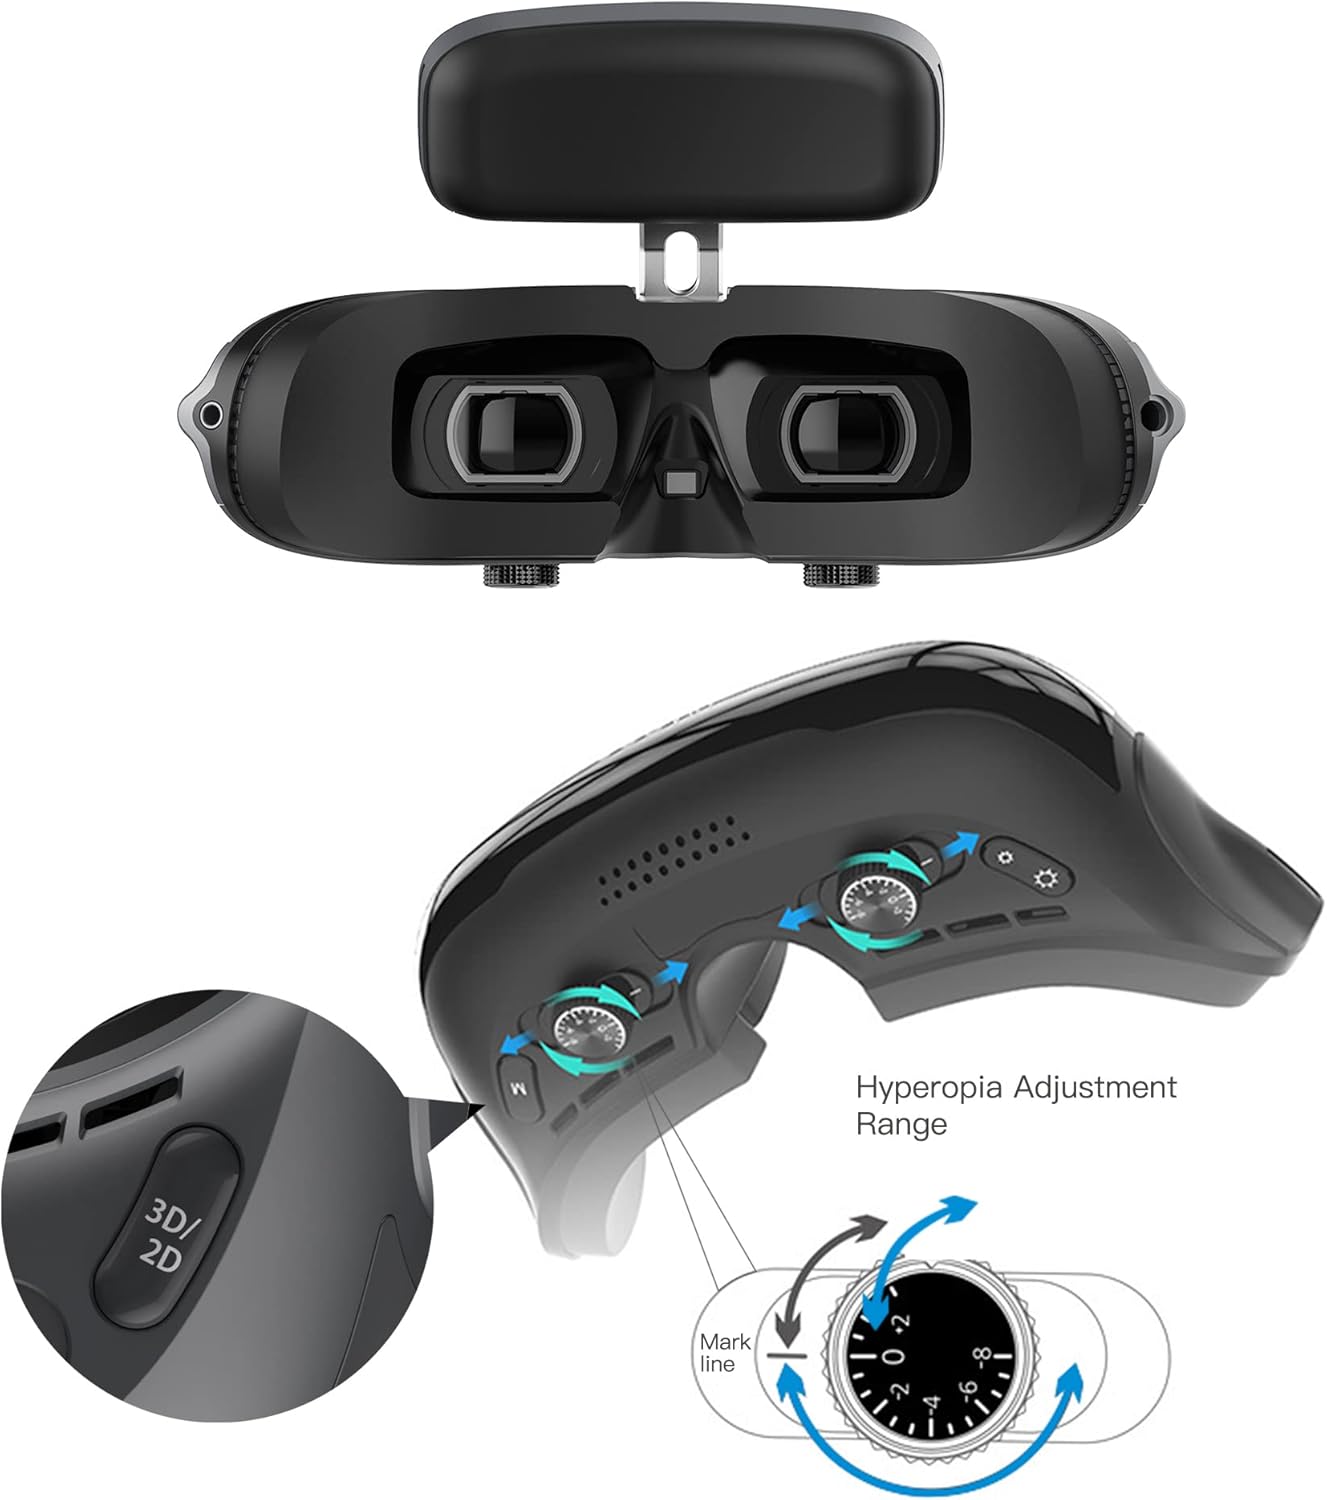
The GOOVIS Lite features individual diopter adjustment for each eye, accommodating users with hyperopia (+2D) to myopia (-7D). It also allows for interpupillary distance (IPD) adjustment from 56mm to 72mm. Use the adjustment dials located on the underside of the headset to achieve optimal clarity.

4.2 2D/3D Mode Selection
A dedicated button on the headset allows you to switch between 2D and 3D viewing modes, depending on the content you are watching.
4.3 Brightness Control
Adjust the display brightness using the dedicated controls on the headset to suit your viewing environment and preference.
4.4 Audio Connection
The GOOVIS Lite headset does not have built-in speakers. To experience audio, connect wired headphones to the 3.5mm audio jack located on the headset.
5. Maintenance
5.1 Cleaning the Lenses
Use the provided lens cleaning cloth to gently wipe the headset lenses. Avoid using abrasive materials or chemical cleaners that could damage the optical surfaces.5.2 Anti-Fog Feature
The GOOVIS Lite is designed with an anti-fog feature to prevent condensation on the lenses, ensuring a clear viewing experience even during extended use.
6. Troubleshooting
6.1 No Display/Power
Ensure the headset's USB power cable is connected to a sufficient 5V power source. The headset draws power from the connected device or an external USB adapter.
6.2 Blurry Image
Adjust the individual diopter dials for each eye until the image is clear. Also, adjust the IPD dials to match your eye distance.
6.3 Loose Connection with DJI Mavic 2
If experiencing intermittent connection issues with the DJI Mavic 2's Type-C port after long-term use, consider using the GOOVIS Video adapter HC2.0 for a more stable connection via the HDMI port.
7. Specifications
- Display Technology: 1080P OLED Dual Display
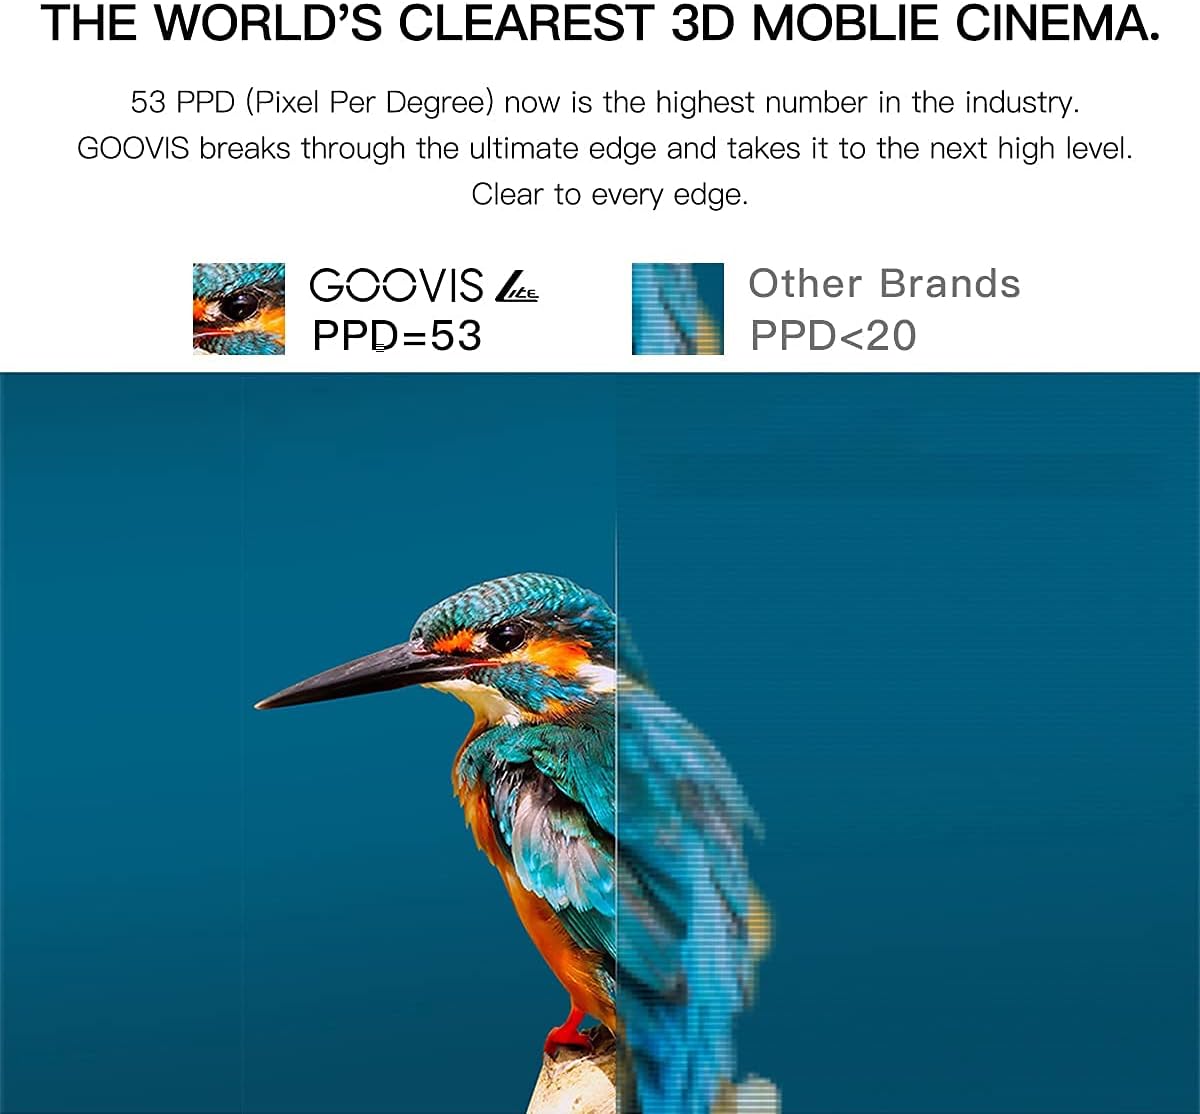
- Pixel Density: 53 PPD, 4496 PPI
- Virtual Screen Size: Equivalent to a 150-inch screen at 4 meters
- Weight: 200g (7.1 ounces)
- Vision Adjustment: +2D Hyperopia to -7D Myopia (individual eye adjustment)
- Interpupillary Distance (IPD): 56mm to 72mm
- Connectivity: HDMI (for video), USB (for power)
- Compatible Devices: Smartphones, PCs, Laptops, Tablets, Game Consoles (PS4, Xbox), Set-top Boxes, Drones (e.g., DJI Mavic 2), GOOVIS D3 Controller
- Special Feature: Micrometer adjustment for vision
8. Warranty and Support
8.1 Warranty Information
The GOOVIS Lite typically comes with a 1-year warranty. Please refer to your purchase documentation for specific terms and conditions.
8.2 Customer Support
If you encounter any problems or have questions regarding your GOOVIS Lite headset, please contact Goovis customer support for assistance. Contact details can usually be found in the product packaging or on the official Goovis website.


