
Introduction
Thank you for choosing the Restokki Wireless Weather Station Digital Alarm Clock. This manual provides comprehensive instructions for the proper setup, operation, and maintenance of your device. Please read this manual thoroughly before use to ensure optimal performance and longevity of your weather station.
Package Contents
Please check the package contents to ensure all items are present and in good condition:
- 1 x Main Host Unit (Batteries not included)
- 1 x Wireless Remote Sensor (Batteries not included)
- 1 x User Manual
Product Overview
The Restokki Wireless Weather Station is designed to provide accurate indoor and outdoor temperature and humidity readings, along with weather forecasts and alarm clock functionalities. Key features include:
- Wide Range Measurement: Weather forecasts are calculated based on atmospheric pressure data from the wireless outdoor sensor, with a maximum transmission range of 60 meters (200 feet) in open areas.
- Multifunctional Display: Supports weather forecasting, alarm clock, and displays indoor/outdoor temperature and humidity.
- Indoor and Outdoor Use: Temperature display is switchable between Celsius (°C) and Fahrenheit (°F), and supports minimum/maximum value display.
- Safety Protection: An outdoor frost alarm activates when the outdoor temperature is between -1°C and 2.8°C.
- Digital Clock: Features an LCD display for clear, large digital readings, easily visible from various angles.
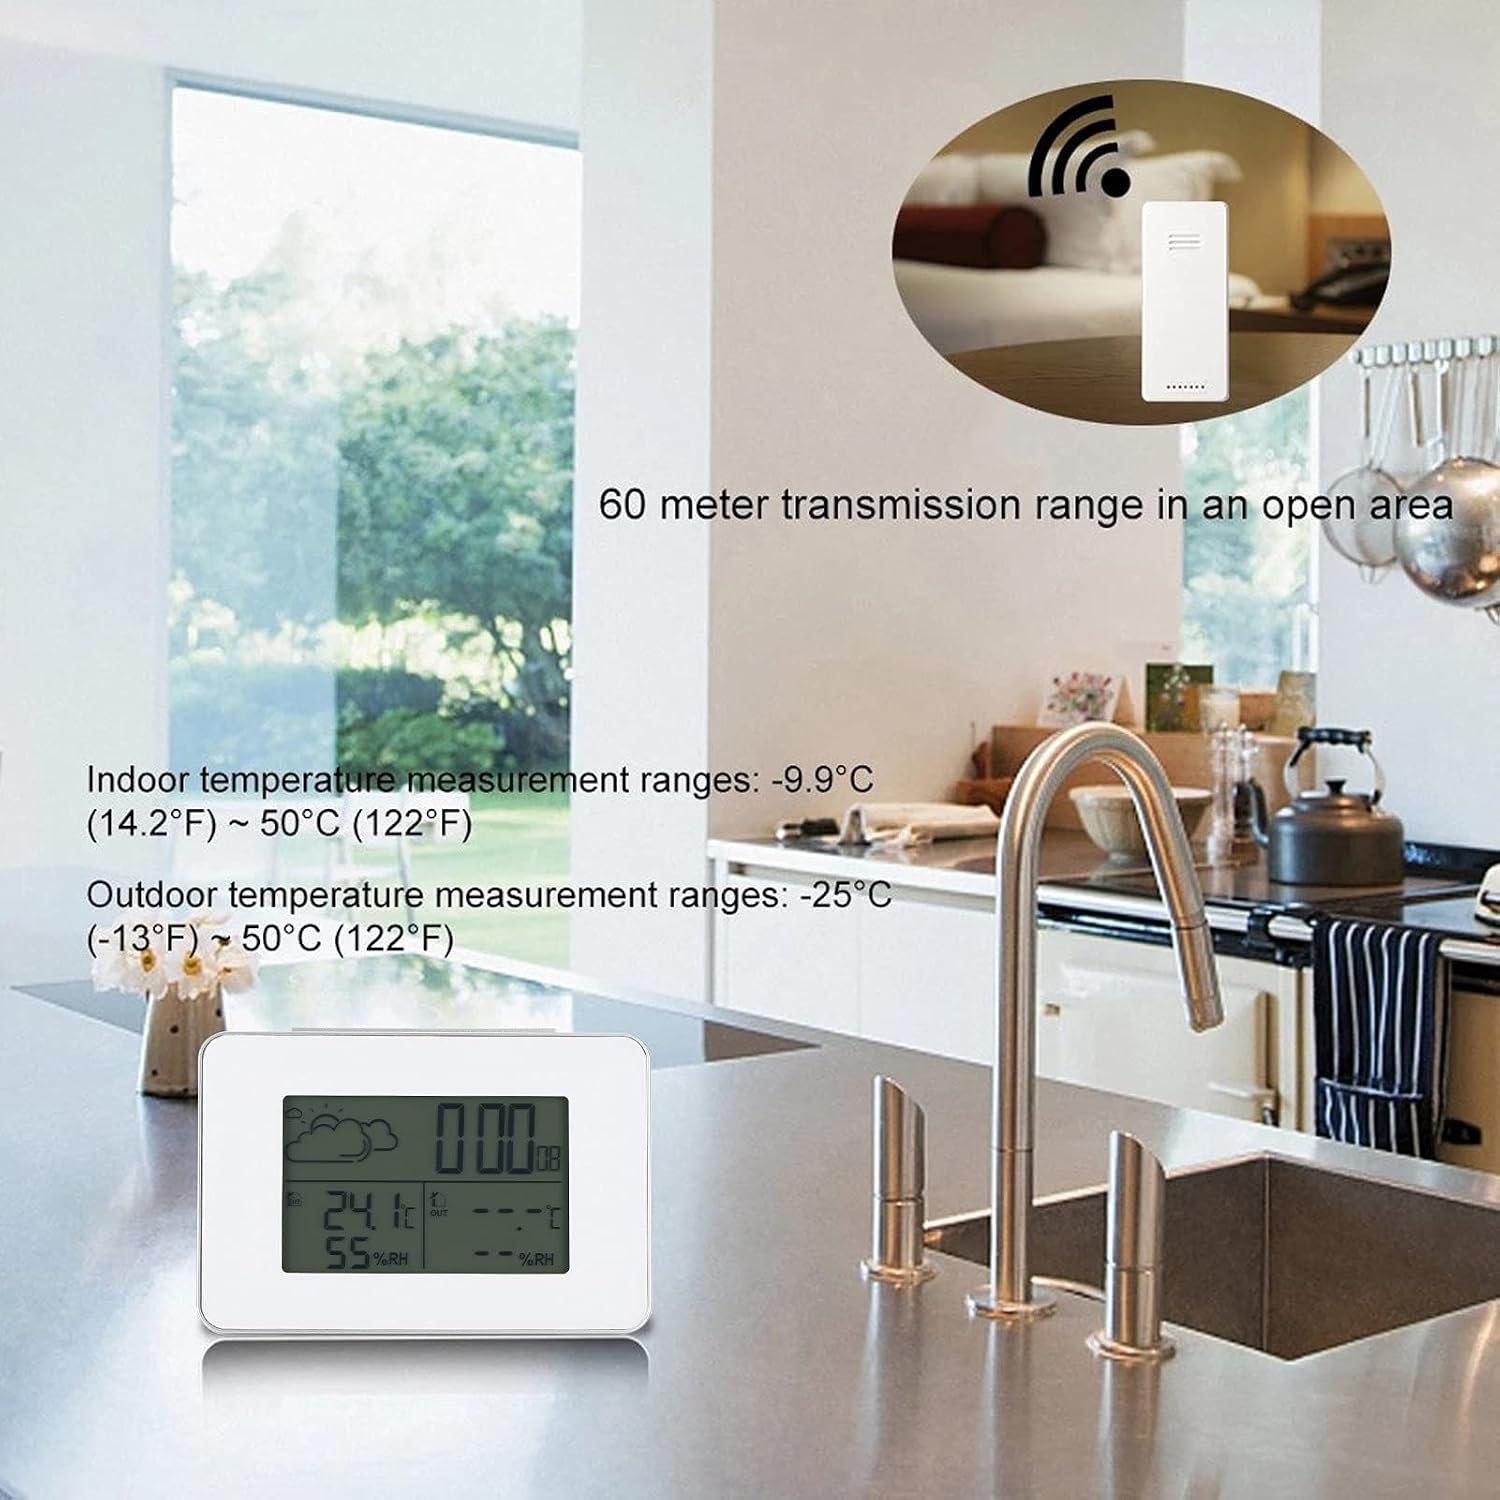
Image: The main weather station unit displayed on a kitchen counter, with an inset showing the wireless remote sensor and its 60-meter transmission range in an open area. The display shows indoor temperature and humidity, with outdoor readings indicated as 'OUT'.

Image: A diagram highlighting the key features of the weather station, including 12/24 hour time format, snooze function, weather forecast icons, temperature and humidity display, and DCF Radio control time (German region).

Image: The digital clock display of the weather station shown on a bedside table, illustrating its clear LCD screen and readability from various angles.

Image: A detailed view of the weather station's LCD display with labels pointing to the weather forecast, time, indoor temperature, indoor humidity, outdoor temperature, and outdoor humidity sections.
Setup
Battery Installation
The main unit and remote sensor require batteries for operation. Ensure you use the correct battery types and insert them with the correct polarity.
- Main Unit: Open the battery compartment cover on the back of the main unit. Insert 2 x AA batteries (not included) according to the polarity markings (+/-). Close the cover securely.
- Remote Sensor: Open the battery compartment cover on the back of the remote sensor. Insert 2 x AAA batteries (not included) according to the polarity markings (+/-). Close the cover securely.

Image: A close-up view of the battery compartment on the back of the main weather station unit, showing the slots for two AA batteries and polarity indicators.
Initial Synchronization
After installing batteries in both the main unit and the remote sensor, the devices will attempt to synchronize automatically. Place the remote sensor within range of the main unit. The outdoor temperature and humidity readings should appear on the main unit's display within a few minutes. If synchronization fails, remove and reinsert the batteries in both units, ensuring the remote sensor is powered on first.
Operating Instructions
Setting Time and Date
Refer to the buttons on the back of the main unit (SET, MEM, +, -). Press the 'SET' button to enter time setting mode. Use the '+' and '-' buttons to adjust values, and 'SET' again to confirm and move to the next setting (e.g., hour, minute, 12/24 hour format, year, month, day).
Temperature Unit Selection
To switch between Celsius (°C) and Fahrenheit (°F), locate the °C/°F button (often combined with another button like '+') and press it. The display will change accordingly.
Alarm Clock and Snooze Function
To set the alarm, press the 'MODE' or 'ALARM' button (if available) to enter alarm setting mode. Use '+' and '-' to adjust the alarm time. Press the 'SNOOZE/LIGHT' button on the top of the unit to activate the snooze function when the alarm sounds.
Weather Forecast Display
The weather station displays weather forecast icons (e.g., sunny, cloudy, rainy) based on changes in atmospheric pressure. These are predictions and may not always perfectly match current conditions.
Minimum/Maximum Temperature and Humidity
Press the 'MEM' button to view the recorded minimum and maximum indoor/outdoor temperature and humidity values. Press 'MEM' again to cycle through min, max, and current readings. To clear the recorded values, press and hold the 'MEM' button.
Maintenance
Cleaning
Wipe the main unit and remote sensor with a soft, dry cloth. Do not use abrasive cleaners, alcohol, or other chemical solvents, as these may damage the plastic surfaces or LCD display.
Battery Replacement
Replace batteries in both the main unit and remote sensor when the low battery indicator appears on the display, or when the display becomes dim. Always replace all batteries at the same time with new ones of the same type.
Troubleshooting
- No Display / Dim Display:
Ensure batteries are inserted correctly with the correct polarity. Replace old batteries with new ones. - Outdoor Sensor Not Connecting:
Ensure the remote sensor is within the 60-meter transmission range of the main unit. Check batteries in the remote sensor. Try re-synchronizing by removing and reinserting batteries in both units, powering the sensor first. Avoid placing the sensor near large metal objects or strong electromagnetic interference sources. - Inaccurate Readings:
Ensure the remote sensor is placed in a shaded, well-ventilated area, away from direct sunlight or heat sources, which can affect temperature readings. Allow time for the sensor to stabilize after placement. - Weather Forecast Inaccurate:
Weather forecasts are based on atmospheric pressure trends and are predictions. They may not always reflect immediate local weather conditions.
Specifications
| Specification | Value |
|---|---|
| Type | Alarm Clock / Weather Station |
| Material | Plastic |
| Main Unit Power Source | 2 x AA Batteries (not included) |
| Remote Sensor Power Source | 2 x AAA Batteries (not included) |
| Weight | Approx. 211g / 7.4oz |
| Main Unit Size | Approx. 8.5 x 12.7 x 4cm / 3.3 x 5.0 x 1.6 inches |
| Remote Sensor Size | Approx. 9.1 x 4 x 2cm / 3.6 x 1.6 x 0.8 inches |
| Indoor Temperature Range | -9.9°C (14.2°F) ~ 50°C (122°F) |
| Outdoor Temperature Range | -25°C (-13°F) ~ 50°C (122°F) |
| Wireless Transmission Range | Up to 60 meters (200 feet) in open area |
| Display Type | LCD |
| Manufacturer Part Number | Restokkiumygo8qtd7-12 |
Warranty and Support
For warranty information or technical support, please refer to the documentation provided at the time of purchase or contact your retailer. If you have any issues or questions regarding your Restokki Wireless Weather Station, please reach out to the manufacturer or seller for assistance.