
1. Introduction
Thank you for choosing the Strpump 9-inch Android 10.0 Car Radio Stereo. This head unit is specifically designed to fit Suzuki Swift models from 2011 to 2015, providing advanced navigation, entertainment, and connectivity features. This manual provides essential information for installation, operation, and maintenance to ensure optimal performance and user satisfaction.
This device features an Android 10.0 operating system, an Octa-Core CPU, 2GB RAM, and 32GB ROM, ensuring smooth performance. The 9-inch QLED screen offers a 1280x720 HD resolution for clear visuals. Integrated Carplay and Android Auto, along with 4G and 5G WiFi support, provide seamless smartphone integration and internet access. A built-in 32-band EQ DSP processor enhances audio quality.
2. Safety Information
- Read all instructions carefully before installation and operation.
- Installation should be performed by a qualified professional to prevent damage to the vehicle or the unit.
- Do not operate the device in a manner that distracts you from driving. Always prioritize road safety.
- Avoid exposing the unit to extreme temperatures, direct sunlight for prolonged periods, or excessive moisture.
- Use only specified accessories and parts.
- Disconnect the vehicle's battery before starting any electrical work.
3. Package Contents
Please check the package for the following items:

Figure 3.1: Included Accessories List
- Main Head Unit (Machine)
- GPS Antenna
- Radio Fascia (Specific to your car model)
- USB Cables (x2)
- CAM In Cable
- Installation Tool Kit
- 4G SIM RCA Cable
- 4G Antenna
- External Microphone
- Power Harness (Specific to your car model)
- Can bus module (Optional, some models may not require it)
4. Setup and Installation
4.1 Pre-installation Considerations
- This unit is designed for a plug-and-play, non-destructive installation.
- If your vehicle is equipped with a factory JBL amplifier or an OEM camera, please contact the seller for specific wiring instructions or additional adapters.
4.2 Installation Overview
The installation process involves removing the original car radio and installing the new head unit with the provided fascia and wiring harness. Ensure all connections are secure before reassembling the dashboard.
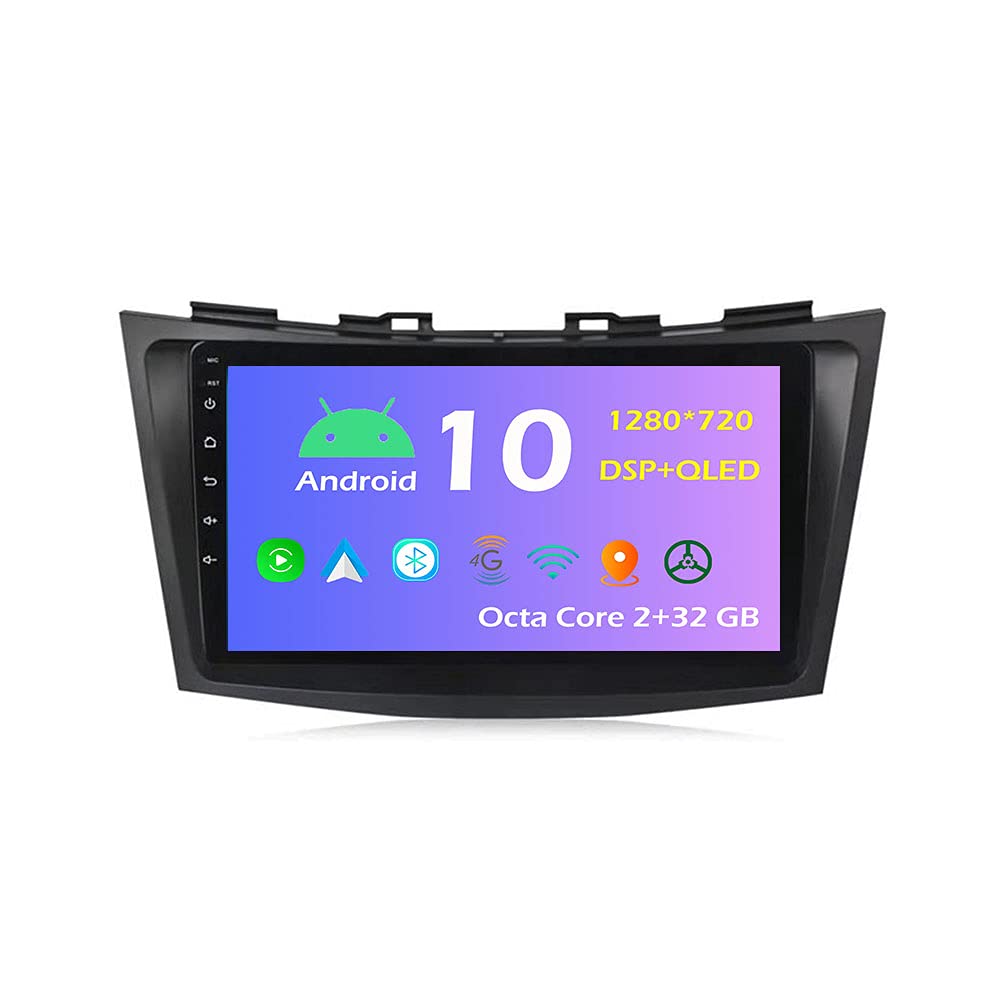
Figure 4.1: Before and After Installation Comparison
4.3 Wiring Connections
Connect the power harness, USB cables, CAM In cable, 4G SIM RCA cable, 4G antenna, and external microphone to their respective ports on the head unit and vehicle wiring. Refer to the wiring diagram provided with your specific unit for detailed connections.
5. Operating Instructions
5.1 Basic Operation
- Power On/Off: Press and hold the power button (usually located on the front panel or as a soft button on the screen) to turn the unit on or off. A short press typically mutes or unmutes the audio.
- Volume Control: Adjust volume using the physical buttons or on-screen controls.
- Touchscreen Interface: Navigate the Android 10.0 interface by tapping, swiping, and pinching on the QLED touchscreen.
5.2 Main Interface and Features

Figure 5.1: Main User Interface
5.3 GPS Navigation
The unit supports both online and pre-installed offline maps. Access the navigation application from the main menu. Ensure the GPS antenna is properly installed for accurate positioning.
5.4 CarPlay & Android Auto
Connect your iPhone or Android smartphone via USB to activate CarPlay or Android Auto. This allows seamless integration of your phone's apps, navigation, music, and messaging directly onto the head unit's screen.

Figure 5.2: CarPlay and Android Auto Integration
5.5 Bluetooth Connectivity
Pair your smartphone via Bluetooth for hands-free calling and A2DP music streaming. The external microphone ensures clear call quality.

Figure 5.3: Bluetooth Phone Dialer
5.6 Wi-Fi / 4G Connectivity
Connect to a Wi-Fi hotspot or insert a 4G SIM card (if using an optional 4G modem) to access online features, stream content, and download apps from the Google Play Store.
5.7 Audio Settings (DSP & EQ)
Utilize the built-in 32-band EQ DSP processor to fine-tune your audio experience. Adjust frequency bands, field, surround sound, bass enhancement, and sound filters to match your preferences.

Figure 5.4: Audio Equalizer Settings
5.8 Radio Function
Access the FM radio tuner to listen to your favorite stations. The interface allows for easy station scanning and preset management.

Figure 5.5: FM Radio Interface
5.9 Other Features
- Split Screen: Run two applications simultaneously on the screen.
- Google Play Store: Download and install additional applications.
- Media Playback: Supports lossless music, online video, TV, movies, music, radio, and YouTube.
- Steering Wheel Control: Compatible with existing steering wheel controls for convenience.
- Camera Support: Supports front and rear cameras, including HD AHD cameras.
- Subwoofer Output: Dedicated output for connecting a subwoofer.
- AUX-IN and Cam-IN: Auxiliary input and camera input.
- Boot Logos: Customizable boot logos.
- 3D Games: Supports 3D gaming.
- Social Media: Access to Twitter, Facebook, Gtalk, Gmail, and other services.
- Optional Accessories Support: Compatible with OBDII, TPMS, DVR, TV Tuner, DAB (accessories sold separately).
6. Maintenance
- Cleaning: Use a soft, dry cloth to clean the screen and unit. Avoid abrasive cleaners or solvents.
- Software Updates: Periodically check for system updates to ensure optimal performance and access to new features. Updates can usually be found in the system settings menu.
- Avoid Liquids: Do not spill liquids on the unit.
7. Troubleshooting
| Problem | Possible Cause | Solution |
|---|---|---|
| Unit does not power on. | Loose power connection, blown fuse, vehicle battery issue. | Check power harness connections. Inspect vehicle fuses. Ensure vehicle battery is charged. |
| No sound. | Volume muted, speaker wires disconnected, incorrect audio settings. | Check volume level and mute status. Verify speaker wire connections. Adjust audio output settings. |
| GPS signal lost or inaccurate. | GPS antenna improperly installed or obstructed. | Ensure GPS antenna is securely connected and placed in a clear line of sight to the sky. |
| Bluetooth not connecting. | Device not in pairing mode, incorrect pairing code, interference. | Ensure Bluetooth is enabled on both devices and in pairing mode. Re-attempt pairing. |
| Touchscreen unresponsive. | Temporary software glitch. | Restart the unit. If issue persists, perform a factory reset (note: this will erase data). |
8. Specifications

Figure 8.1: Screen Technology Comparison
| Feature | Detail |
|---|---|
| Brand | Strpump |
| Model | B09DT322Z8 |
| Operating System | Android 10.0 |
| CPU | Octa Core Processor |
| RAM | 2GB |
| ROM (Memory Storage) | 32GB |
| Screen Size | 9 inches |
| Display Type | 2.5D+IPS, HD QLED Screen |
| Resolution | 1280 x 720 |
| Connectivity Technology | Wi-Fi (5G supported), 4G (optional modem) |
| Special Features | Bluetooth, Built-in Carplay & Android Auto, 32 Band EQ DSP Processor, Split Screen, GPS Navigation |
| Audio Output Mode | AUX, Stereo, Subwoofer Output |
| Compatible Devices | Smartphone |
| Vehicle Service Type | Car (Suzuki Swift 2011-2015) |
| Map Type | North America (pre-installed offline maps) |
| Human-Interface Input | Microphone, Touchscreen |
9. Warranty and Support
9.1 Warranty Information
Please refer to the warranty card included with your product or contact the seller for detailed warranty terms and conditions. Standard warranty typically covers manufacturing defects for a specified period from the date of purchase.
9.2 Customer Support
For technical assistance, troubleshooting, or inquiries regarding optional accessories, please contact Strpump customer support. You can typically find contact information on the seller's page or through the official Strpump website.
Visit the Strpump Store on Amazon for more information and support resources.