
Introduction
Thank you for choosing the Godox V860III-N TTL Li-Ion Camera Flash. This instruction manual provides detailed information on the features, setup, and operation of your new flash unit. Please read this manual carefully before use to ensure proper operation and to achieve optimal results. This flash is designed for use with Nikon cameras.
Safety Information
Please observe the following safety precautions to prevent damage to the product or injury to yourself or others:
- Do not disassemble or modify this product. Internal high-voltage components can cause electric shock.
- Keep this product dry. Do not handle with wet hands or immerse in water.
- Do not use the flash unit in the presence of flammable gases, chemicals, or other materials.
- Do not touch the flash tube after continuous firing to avoid burns.
- Keep out of reach of children.
- Use only the specified battery and charger. Incorrect use may lead to fire or explosion.
- Avoid direct eye exposure to the flash, especially at close range, as it may impair vision.
Package Contents
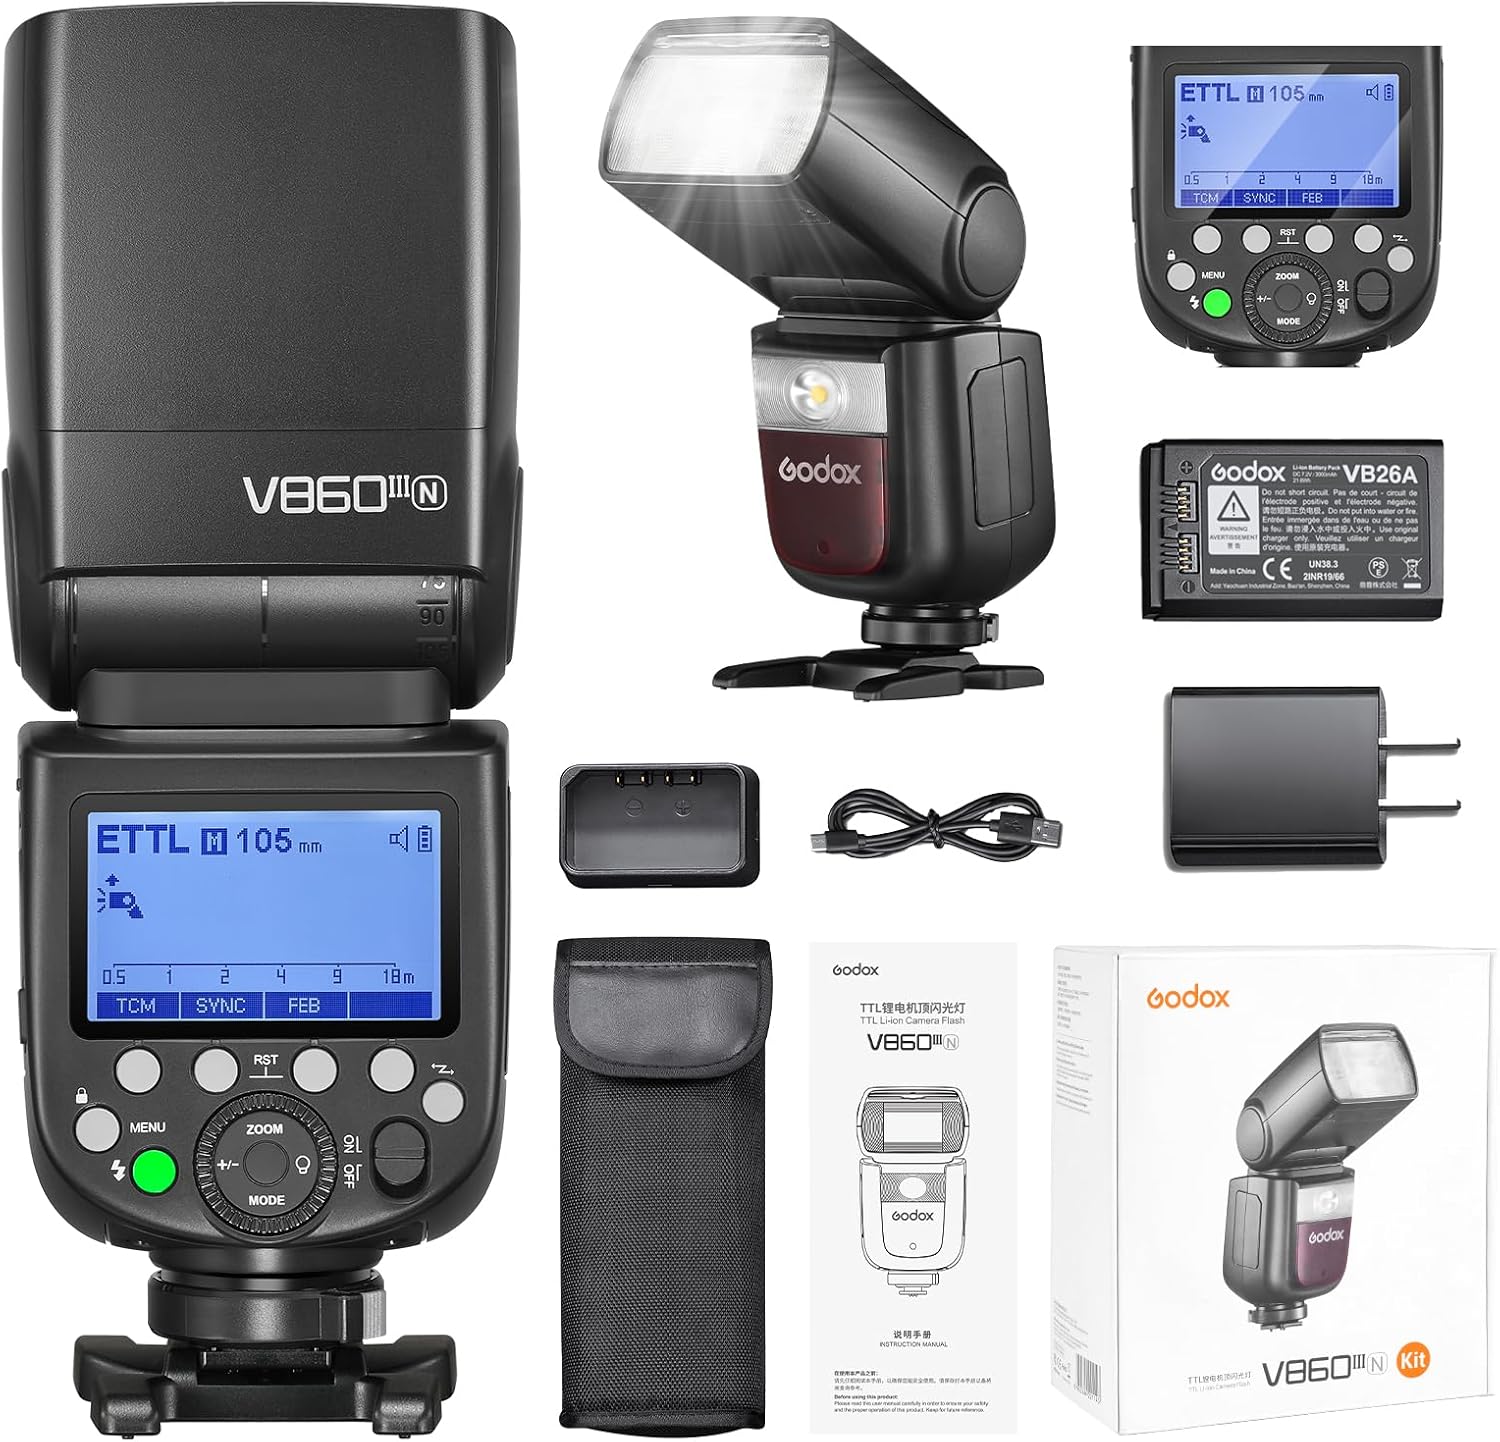
Verify that all items listed below are included in your package:
- Godox V860III-N Flash Unit
- Li-ion Battery (7.2V/2600mAh)
- Battery Charger
- USB-C Cable
- Mini Stand
- Protective Case
- Instruction Manual
Setup
1. Battery Installation and Charging
The V860III-N uses a dedicated 7.2V/2600mAh Li-ion battery. Ensure the battery is fully charged before first use.
- Open the battery compartment cover on the flash unit.
- Insert the Li-ion battery, ensuring correct polarity.
- Close the battery compartment cover securely.
- To charge, connect the battery to the included charger and plug into a power source. The charging indicator will show the charging status.

2. Mounting to Camera
Attach the flash unit to your Nikon camera's hot shoe.
- Slide the flash unit's mounting foot into the camera's hot shoe.
- Secure the flash by rotating the quick-release lock clockwise until it is firm.

Operating Instructions
1. Power On/Off
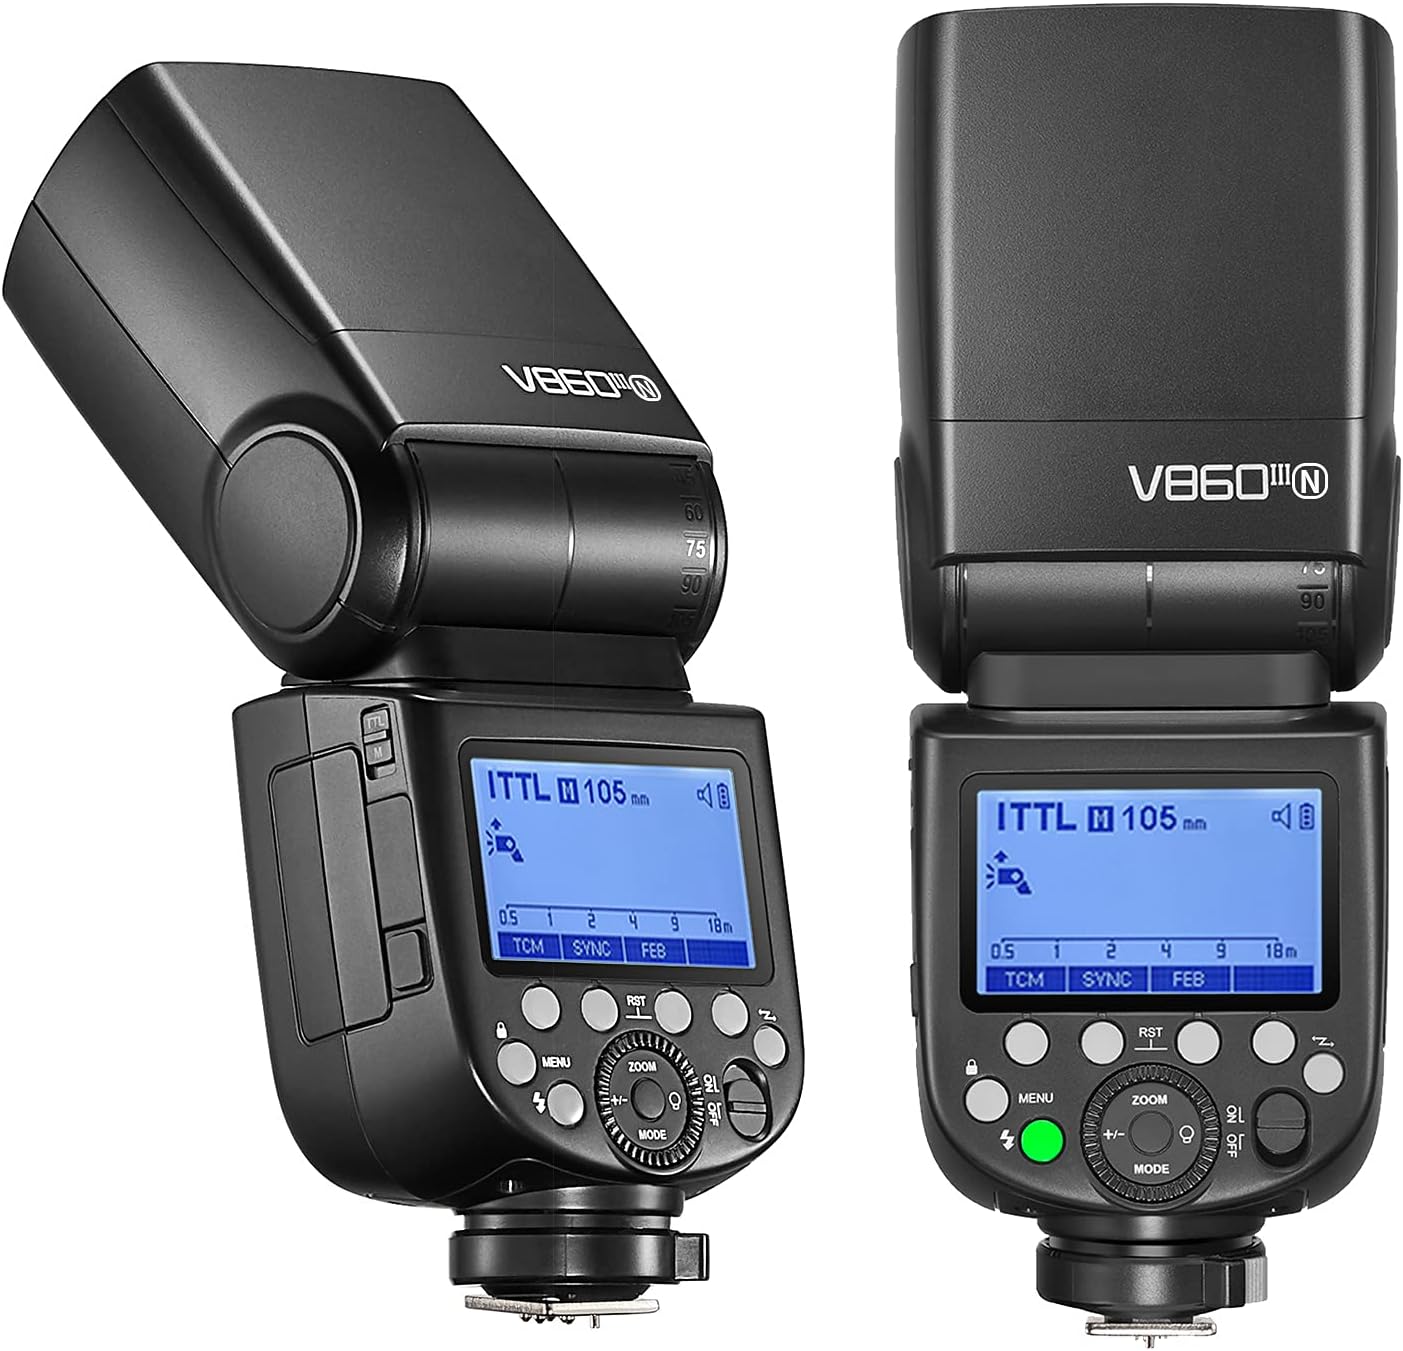
Press the power button to turn the flash unit on or off. The LCD screen will illuminate upon power-on.
2. Flash Modes
The V860III-N supports various flash modes for diverse photographic needs:
- I-TTL Auto Flash Mode: The flash automatically adjusts its output for correct exposure.
- Manual Flash Mode (M): Allows manual control over flash power output.
- Multi Flash Mode: Fires a series of rapid flashes to capture multiple movements in a single image.
To switch between modes, press the MODE button on the control panel.


3. High-Speed Sync (HSS)
The V860III-N supports High-Speed Sync up to 1/8000s, allowing you to use wider apertures in bright conditions or freeze fast-moving subjects with flash.
4. Built-in Godox 2.4G Wireless X System
The integrated 2.4G wireless X system enables the V860III-N to function as both a master and slave unit in a wireless flash setup. It is compatible with Godox X system triggers (e.g., X1, X2, Xpro Transmitters).
- As Transmitter Unit: The V860III-N can control other Godox X system flashes.
- As Receiver Unit: The V860III-N can be triggered by a Godox X system transmitter.

5. Modeling Light
The V860III-N features an LED modeling light with 10-level dimmable brightness. This allows for pre-visualization of the light effect before taking the shot.
- Press the modeling light button to turn it on/off.
- Rotate the select dial to adjust the brightness from 1 to 10 levels.

6. Zoomable Flash Head
The flash head can be zoomed from 20mm to 200mm, either automatically or manually, to match the lens focal length and control light spread.
- Auto Zoom: The flash automatically adjusts the zoom position based on the camera's focal length.
- Manual Zoom: Press the ZOOM button and rotate the select dial to manually adjust the zoom position.

7. Flexible Shooting Angle
The flash head offers a wide range of movement for bounce flash and creative lighting:
- Horizontal rotation: 0° to 330°
- Vertical tilt: -7° to 120°

Maintenance
- Clean the flash unit regularly with a soft, dry cloth. Do not use solvents or harsh chemicals.
- Avoid exposing the unit to extreme temperatures or high humidity.
- Store the flash unit in its protective case when not in use to prevent dust and damage.
- If the unit requires repair, contact authorized service personnel.
Troubleshooting
| Problem | Possible Cause | Solution |
|---|---|---|
| Flash does not fire. | Low battery; Incorrect mode; Flash not securely mounted. | Charge battery; Select appropriate flash mode; Re-mount flash securely. |
| Flash output is too dark/bright. | Incorrect exposure compensation; Manual power setting too low/high. | Adjust exposure compensation; Adjust manual power setting. |
| Wireless trigger not working. | Incorrect channel/ID; Flash not in receiver mode; Distance too far. | Verify channel/ID settings; Set flash to receiver mode; Reduce distance between units. |
| Flash head movement is stiff. | Normal operation; May loosen with use. | Continue use; Do not force movement. |
Specifications
| Feature | Detail |
|---|---|
| Model | V860III-N |
| Compatible Mountings | Nikon |
| Flash Sync Speed | 1/8000s (High-Speed Sync) |
| Flash Modes | I-TTL Auto Flash, Manual Flash, Multi Flash |
| Wireless System | Built-in Godox 2.4G Wireless X System |
| Zoom Range | 20mm to 200mm (Auto/Manual) |
| Modeling Light | LED, 10-level dimmable |
| Battery | 7.2V/2600mAh Li-ion Battery |
| Recycling Time | Approx. 1.5s (at full power) |
| Full Power Flashes | Approx. 480 |
| Product Dimensions | 7.7 x 2.3 x 3 inches |
| Item Weight | 2.33 pounds |
Warranty & Support
Warranty Information
This Godox V860III-N flash unit is typically covered by a 1-year product warranty when purchased from an authorized distributor. For specific warranty details and terms, please refer to the warranty card included with your product or contact your point of purchase. Some distributors, such as Conxture, may offer extended warranty periods or additional support.
Customer Support
For technical assistance, troubleshooting, or service inquiries, please contact the retailer or authorized distributor from whom you purchased the product. You may also visit the official Godox website for further support resources, firmware updates, and contact information.


