
K KERNOWO 929D-V Desoldering Iron
K KERNOWO 929D-V Electric Desoldering Soldering Iron Sucker User Manual
Model: 929D-V Desoldering Iron
1. Introduction
The K KERNOWO 929D-V Electric Desoldering Soldering Iron Sucker is a versatile 2-in-1 tool designed for efficient and precise solder removal and application. It combines heating and desoldering functions into a single, easy-to-use device, eliminating the need to juggle multiple tools. Its ergonomic design with a built-in heat deflector ensures comfortable one-handed operation, even during extended use. This comprehensive kit is ideal for various electronic repair tasks, from clearing excess solder and removing solder bridges to handling through-hole desoldering with precision.
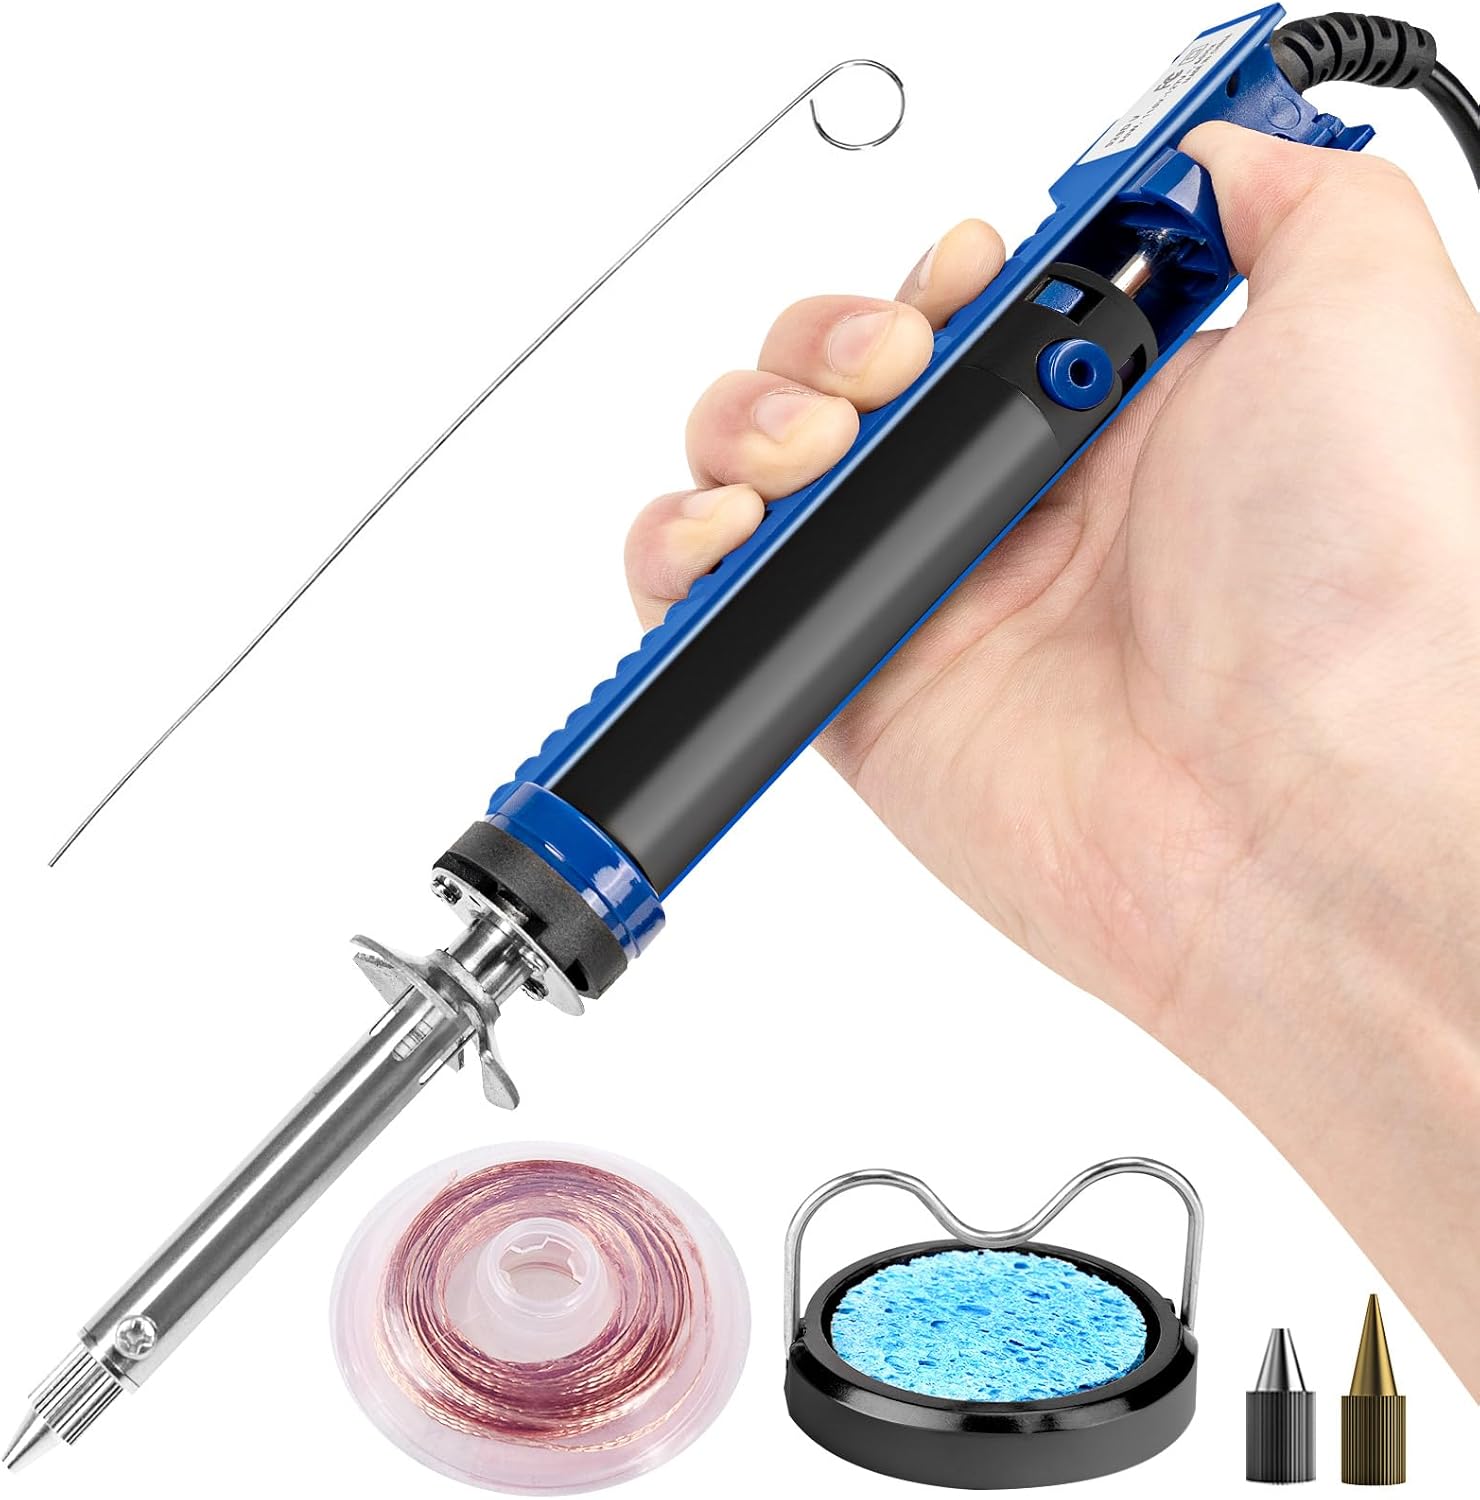
Figure 1: K KERNOWO 929D-V Electric Desoldering Soldering Iron Sucker with included accessories.
2. Safety Instructions
- Always ensure the tool is unplugged and cooled before cleaning or changing nozzles.
- Use in a well-ventilated area. Initial use may produce white fumes for up to 20 minutes due to mica heating. This is normal.
- The tip of the desoldering iron becomes extremely hot. Avoid direct contact with skin or flammable materials.
- Use the provided stand to safely rest the hot iron when not in use.
- Wear appropriate personal protective equipment, such as safety glasses, when operating the tool.
- This tool is designed for 110-127V with a standard U.S. power plug. Do not use with incompatible power sources.
- Keep out of reach of children.
3. Package Contents
Verify that all items are present in the package:
- 1 x K KERNOWO 929D-V Electric Desoldering Iron
- 1 x Solder Sucker Tool (integrated)
- 1 x Solder Wick
- 1 x Cleaning Sponge
- 1 x Cleaning Pin
- 2 x Interchangeable Desoldering Nozzles (1.0mm & 1.2mm)
- 1 x Soldering Tip

Figure 2: All components included in the K KERNOWO 929D-V kit.
4. Setup
4.1 Attaching Nozzles/Tips
The desoldering iron comes with interchangeable nozzles for desoldering and a separate soldering tip. Ensure the tool is unplugged and cool before changing tips.
- Unscrew the retaining nut at the front of the iron to remove the current nozzle/tip.
- Select the desired 1.0mm or 1.2mm desoldering nozzle, or the soldering tip.
- Carefully insert the chosen nozzle/tip and secure it by tightening the retaining nut.
4.2 Preparing the Stand
Place the provided stand on a stable, heat-resistant surface. The blue sponge should be moistened with water before use to aid in cleaning the tip.

Figure 3: Exploded view of the desoldering iron components, including interchangeable nozzles and soldering tip.
5. Operating Instructions
5.1 Powering On and Preheating
- Connect the power plug to a standard 110-127V U.S. power outlet.
- The iron will begin to heat up automatically. Allow approximately 3-5 minutes for the tool to reach optimal operating temperature. The integrated heat deflector will help manage heat transfer to your hand.
- During initial use, it is normal for the product to emit white fumes for up to 20 minutes due to mica heating. Ensure adequate ventilation.

Figure 4: Preheat the desoldering iron for 3-5 minutes before use. Note on initial white fumes.
5.2 Desoldering Operation (One-Handed)
This tool is designed for seamless one-handed desoldering:
- Ensure the appropriate desoldering nozzle is attached.
- Press the nozzle handle and aim the front of the nozzle at the solder joint to be removed.
- Once the solder is completely melted, press the release button to activate the vacuum pump and suck up the molten solder.
- Lift the tool away from the joint.

Figure 5: Step-by-step guide for easy desoldering and cleanup.

Figure 6: The K KERNOWO 929D-V enables efficient one-handed desoldering.
5.3 Soldering Operation
To use the tool as a 30W soldering iron:
- Ensure the soldering tip is attached.
- Allow the tool to preheat as described in Section 5.1.
- Apply the heated tip to the component and solder wire to create a new solder joint.
Video 1: Demonstration of the K KERNOWO 929D-V Electric Desoldering Soldering Iron Sucker in action, highlighting its dual functionality for both desoldering and soldering tasks.
6. Maintenance
6.1 Cleaning the Nozzle/Tip
- Regularly wipe the hot tip on the moistened cleaning sponge to remove excess solder and oxidation.
- For stubborn residue, use the cleaning pin to clear the heating element and nozzle opening.
6.2 Emptying the Waste Storage Tube
The removable waste storage tube simplifies cleanup of collected solder:
- Ensure the desoldering iron has cooled completely.
- Locate the removable waste storage tube section on the tool.
- Carefully remove the tube and dispose of the scrap solder.
- Reattach the tube securely before next use.
7. Troubleshooting
| Problem | Possible Cause | Solution |
|---|---|---|
| Tool not heating up. | Not plugged in; faulty outlet; internal issue. | Check power connection; try a different outlet; contact customer support. |
| Poor solder suction. | Nozzle clogged; waste tube full; improper seal. | Clean nozzle with cleaning pin; empty waste tube; ensure nozzle is securely attached. |
| Excessive fumes during use (after initial break-in). | Improper solder type; poor ventilation. | Ensure using appropriate solder; improve ventilation in work area. |
8. Specifications
| Brand | K KERNOWO |
| Model | 929D-V Desoldering Iron |
| Power Source | Corded Electric |
| Wattage | 30W |
| Voltage | 110-127V |
| Upper Temperature Rating | 450°C |
| Item Weight | 9.9 ounces |
| Item Length | 7.62 Inches |
| Color | Blue |
| Handle Material | Plastic |
| Burner Type | Ceramic |
9. Warranty & Support
K KERNOWO stands by the quality of our desoldering iron. For any questions, concerns, or support needs, please contact our customer service team. We offer 24/7 customer support to ensure a hassle-free experience.
Please refer to your purchase documentation for specific warranty details.
Ask a question about this manual
Ask about setup, troubleshooting, compatibility, parts, safety, or missing instructions. Manuals+ will review the question and use this page’s manual context to help answer it.