1. Introduction
The Geevon Water Leak Detector is designed to provide early warning of water leaks and potential flooding in your home or property. Equipped with a highly sensitive sensor and a loud 100dB alarm, it alerts you immediately when water is detected, helping to prevent significant water damage. This manual provides essential information for the proper installation, operation, and maintenance of your water leak detectors.

Image: Two Geevon water leak detectors and two 9V batteries, as included in the package.
2. Safety Precautions
- Do not immerse the entire device in water. The device is designed to detect water at its base, not to be fully submerged.
- Keep out of reach of children.
- Use only the specified 9V battery.
- Do not attempt to disassemble or repair the device yourself. Refer to qualified personnel for service.
- Ensure the battery compartment is securely closed after battery installation.
3. Package Contents
Each package contains the following items:
- 2 x Geevon Water Leak Detectors
- 2 x 9V Batteries
- 1 x User Manual (this document)
4. Product Structure and Features
The Geevon Water Leak Detector is a compact, circular device designed for easy placement. Its primary components include a loud buzzer for audible alerts and sensitive metal prongs at the base for water detection.
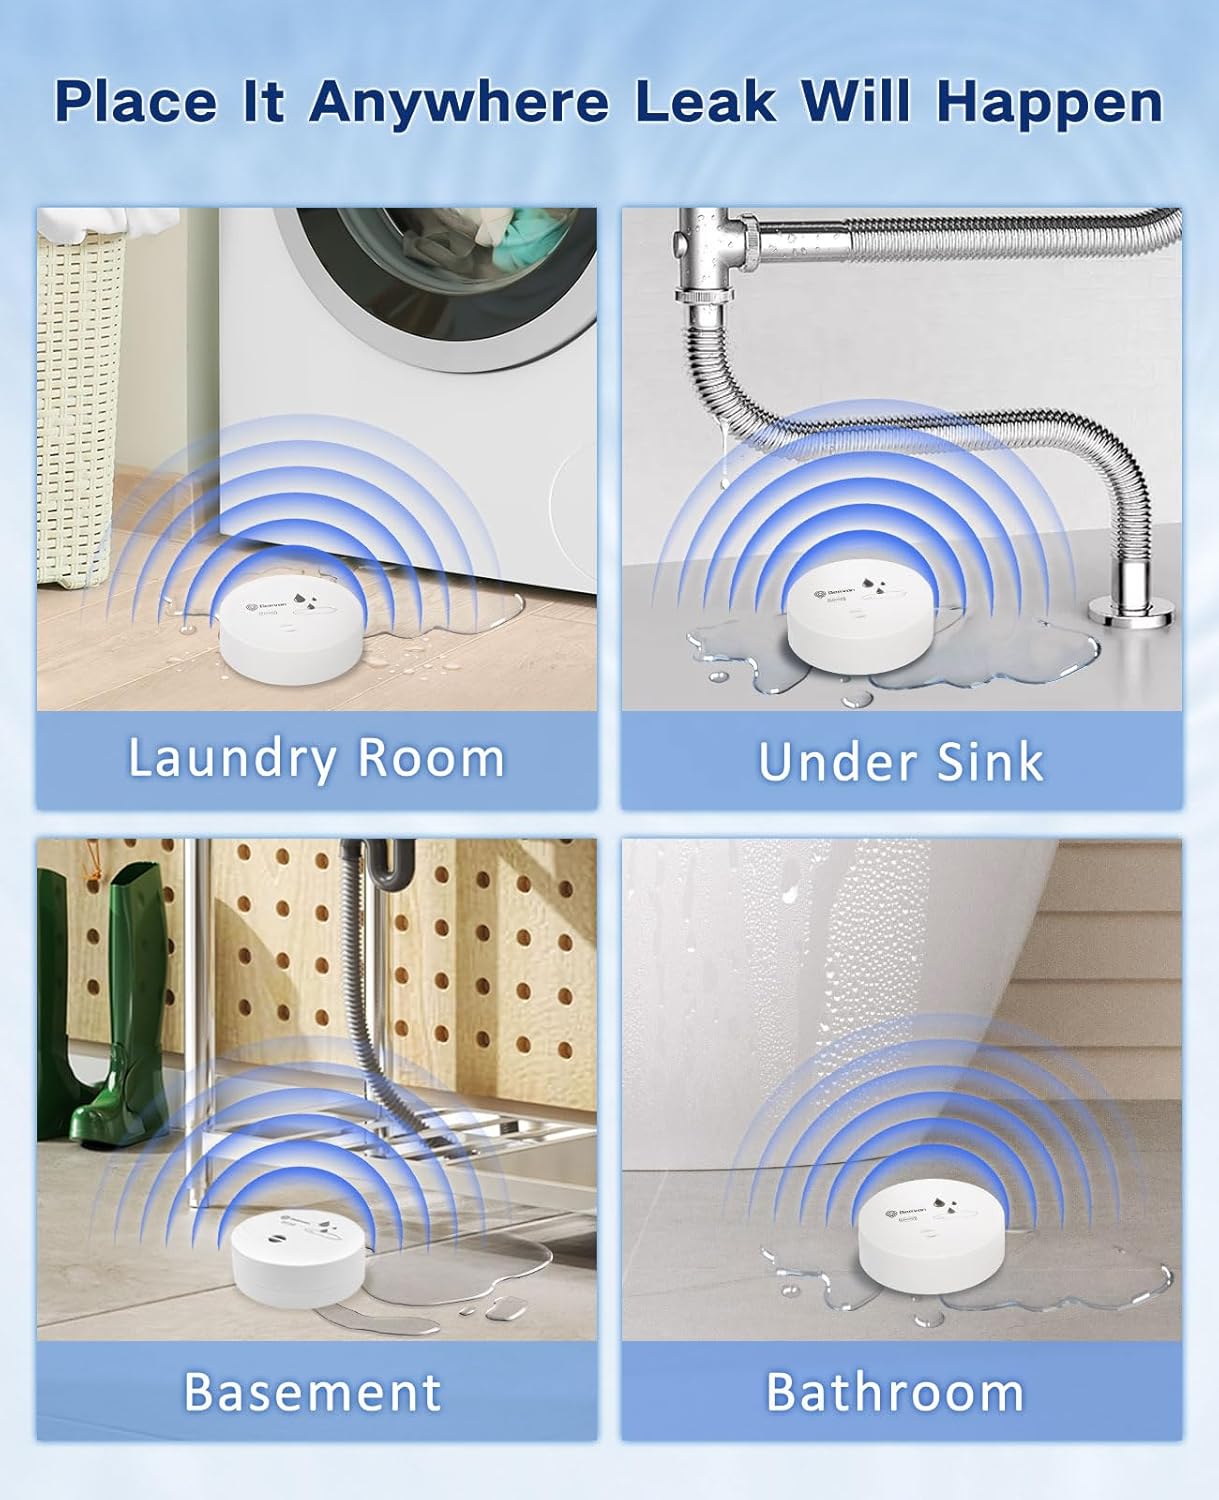
Image: Internal structure of the Geevon water leak detector, highlighting the 100dB buzzer, 9V battery compartment, and the water leak sensor prongs at the bottom. Dimensions are approximately 8 cm (3.15 inches) in diameter and 3 cm (1.18 inches) in height.
Key Features:
- Loud 100dB Alarm: Emits a powerful audible alert when water is detected, ensuring it can be heard throughout most homes.
- Highly Sensitive Sensor: Features three metal prongs on the bottom that detect even small amounts of water.
- Battery-Operated: Uses a standard 9V battery (included), requiring no wiring or complex installation.
- Compact Design: Small footprint allows for discreet placement in various locations.
- IPX4 Waterproof: Designed to withstand splashes and float on water, but not for full submersion.

Image: An overhead view of a house floor plan with a Geevon water leak detector in the foreground, illustrating how its 100dB alarm can be heard across different rooms.
5. Setup and Installation
The Geevon Water Leak Detector is designed for quick and easy setup without the need for special tools.
Battery Installation:
- Open the Cover: Gently twist the top cover of the detector counter-clockwise to unlock and remove it.
- Confirm Polarity: Observe the positive (+) and negative (-) terminals inside the battery compartment and on the 9V battery.
- Install Battery: Connect the 9V battery to the battery clip, ensuring correct polarity. Place the battery into the compartment.
- Close the Cover: Align the cover with the base and twist clockwise until it locks securely into place.
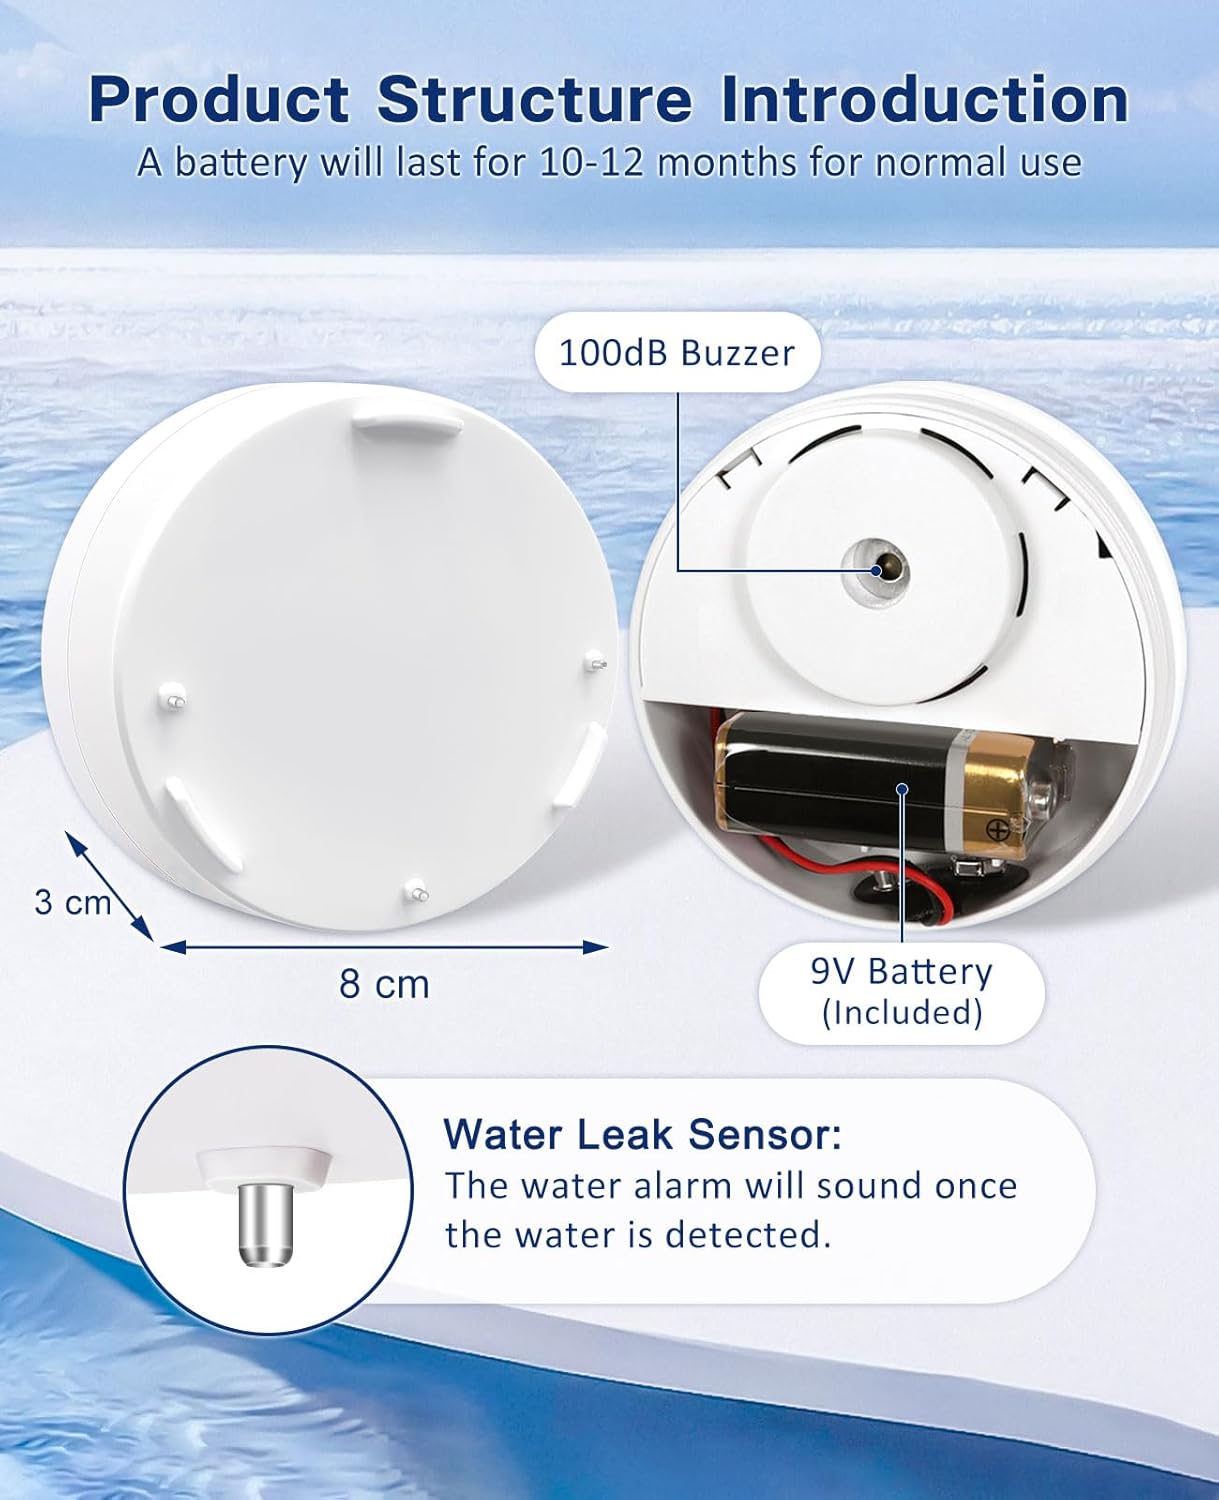
Image: A four-panel guide demonstrating the battery installation process: 1. Twisting the cover counter-clockwise to open. 2. Confirming positive/negative poles of the battery. 3. Installing the 9V battery. 4. Tightening the cover clockwise to close.
6. Placement Guidelines
Place the water leak detector in areas where water leaks are likely to occur or where water damage could be costly. Ensure the metal prongs on the bottom of the detector are in direct contact with the surface where water might accumulate.
Recommended Locations:
- Basements (near water heaters, sump pumps, or foundation walls)
- Laundry Rooms (near washing machines, utility sinks)
- Bathrooms (near toilets, bathtubs, showers, under sinks)
- Kitchens (under sinks, near dishwashers, refrigerators with ice makers)
- Garages (near water pipes, water softeners)
- Attics (near HVAC units, water tanks)

Image: Four panels showing ideal placement locations for the water leak detector: in a laundry room near a washing machine, under a kitchen sink, in a basement, and in a bathroom near a toilet.
7. Operation
Once the battery is installed and the detector is placed, it is ready to operate. The device remains in a standby state, continuously monitoring for water.
Alarm Activation:
When water comes into contact with the three metal prongs on the bottom of the detector, it completes an electrical circuit, triggering the 100dB alarm. The alarm will continue to sound until the water is no longer detected by the prongs.

Image: A Geevon water leak detector positioned on a bathroom countertop, with water splashing from a faucet, illustrating its function in detecting water presence.
8. Maintenance
Stopping the Alarm:
To stop the alarm, remove the detector from the water and dry the metal prongs completely with a cloth. The alarm will cease once the prongs are dry.

Image: A person holding a Geevon water leak detector, giving a thumbs-up, with the detector shown on the floor under a sink, indicating the process of removing and drying the device to silence the alarm.
Battery Replacement:
The 9V battery typically lasts for approximately 1 year under normal use. When the battery is low, the alarm may emit a weak or intermittent sound, or stop functioning. Replace the battery by following the installation steps outlined in Section 5.
Cleaning:
Wipe the exterior of the detector with a soft, dry cloth. If the metal prongs become dirty, clean them gently to ensure proper conductivity. Do not use abrasive cleaners or immerse the device in cleaning solutions.

Image: A Geevon water leak detector floating on the surface of water, demonstrating its IPX4 waterproof rating. A warning states: "Do not soak the whole sensor in water."
9. Troubleshooting
| Problem | Possible Cause | Solution |
|---|---|---|
| Alarm does not sound when water is detected. | Battery is dead or incorrectly installed. Prongs are not making contact with water. Device is faulty. | Check and replace battery. Ensure prongs are fully in contact with water. Contact customer support if issue persists. |
| Alarm sounds continuously without water. | Prongs are wet or dirty. High humidity causing condensation. | Dry the prongs thoroughly. Clean the prongs. Move the detector to a less humid environment. |
| Alarm is too quiet. | Low battery. Obstruction covering the buzzer. | Replace the battery. Ensure the buzzer opening is clear. |
10. Technical Specifications
| Specification | Detail |
|---|---|
| Model Number | 21601 |
| Power Source | 1 x 9V Battery (included) |
| Alarm Volume | 100 dB |
| Product Dimensions | 3.15 x 3.15 x 1.18 inches (8 x 8 x 3 cm) |
| Item Weight | 3.2 ounces (approx. 90.7g) |
| Material | ABS, Metal, Plastic |
| Sensor Technology | Contact Sensor |
| Mounting Type | Floor Mount |
| Average Battery Life | 1 year |
11. Warranty and Support
Geevon offers a 1-year warranty for this product, covering manufacturing defects from the date of purchase. For warranty claims or technical support, please contact Geevon customer service. Please retain your proof of purchase for warranty validation.
For further assistance, you may visit the official Geevon store on Amazon: Geevon Store.
Note on Videos: No official product videos from the seller were available for embedding in this manual.


