Product Overview
The EVERSECU Outdoor Motion Sensor Solar Light is a versatile 2-in-1 device combining a powerful solar-powered floodlight with a realistic dummy security camera. Designed for outdoor use, it features 77 bright LEDs, motion activation, and a sleek, low-profile design to enhance security and illumination around your property.
This unit is built with high-quality ABS plastic and boasts an IP66 waterproof rating, ensuring durability against various weather conditions, from extreme heat to cold.

Image: The EVERSECU Outdoor Motion Sensor Solar Light, showcasing its design and included remote control.
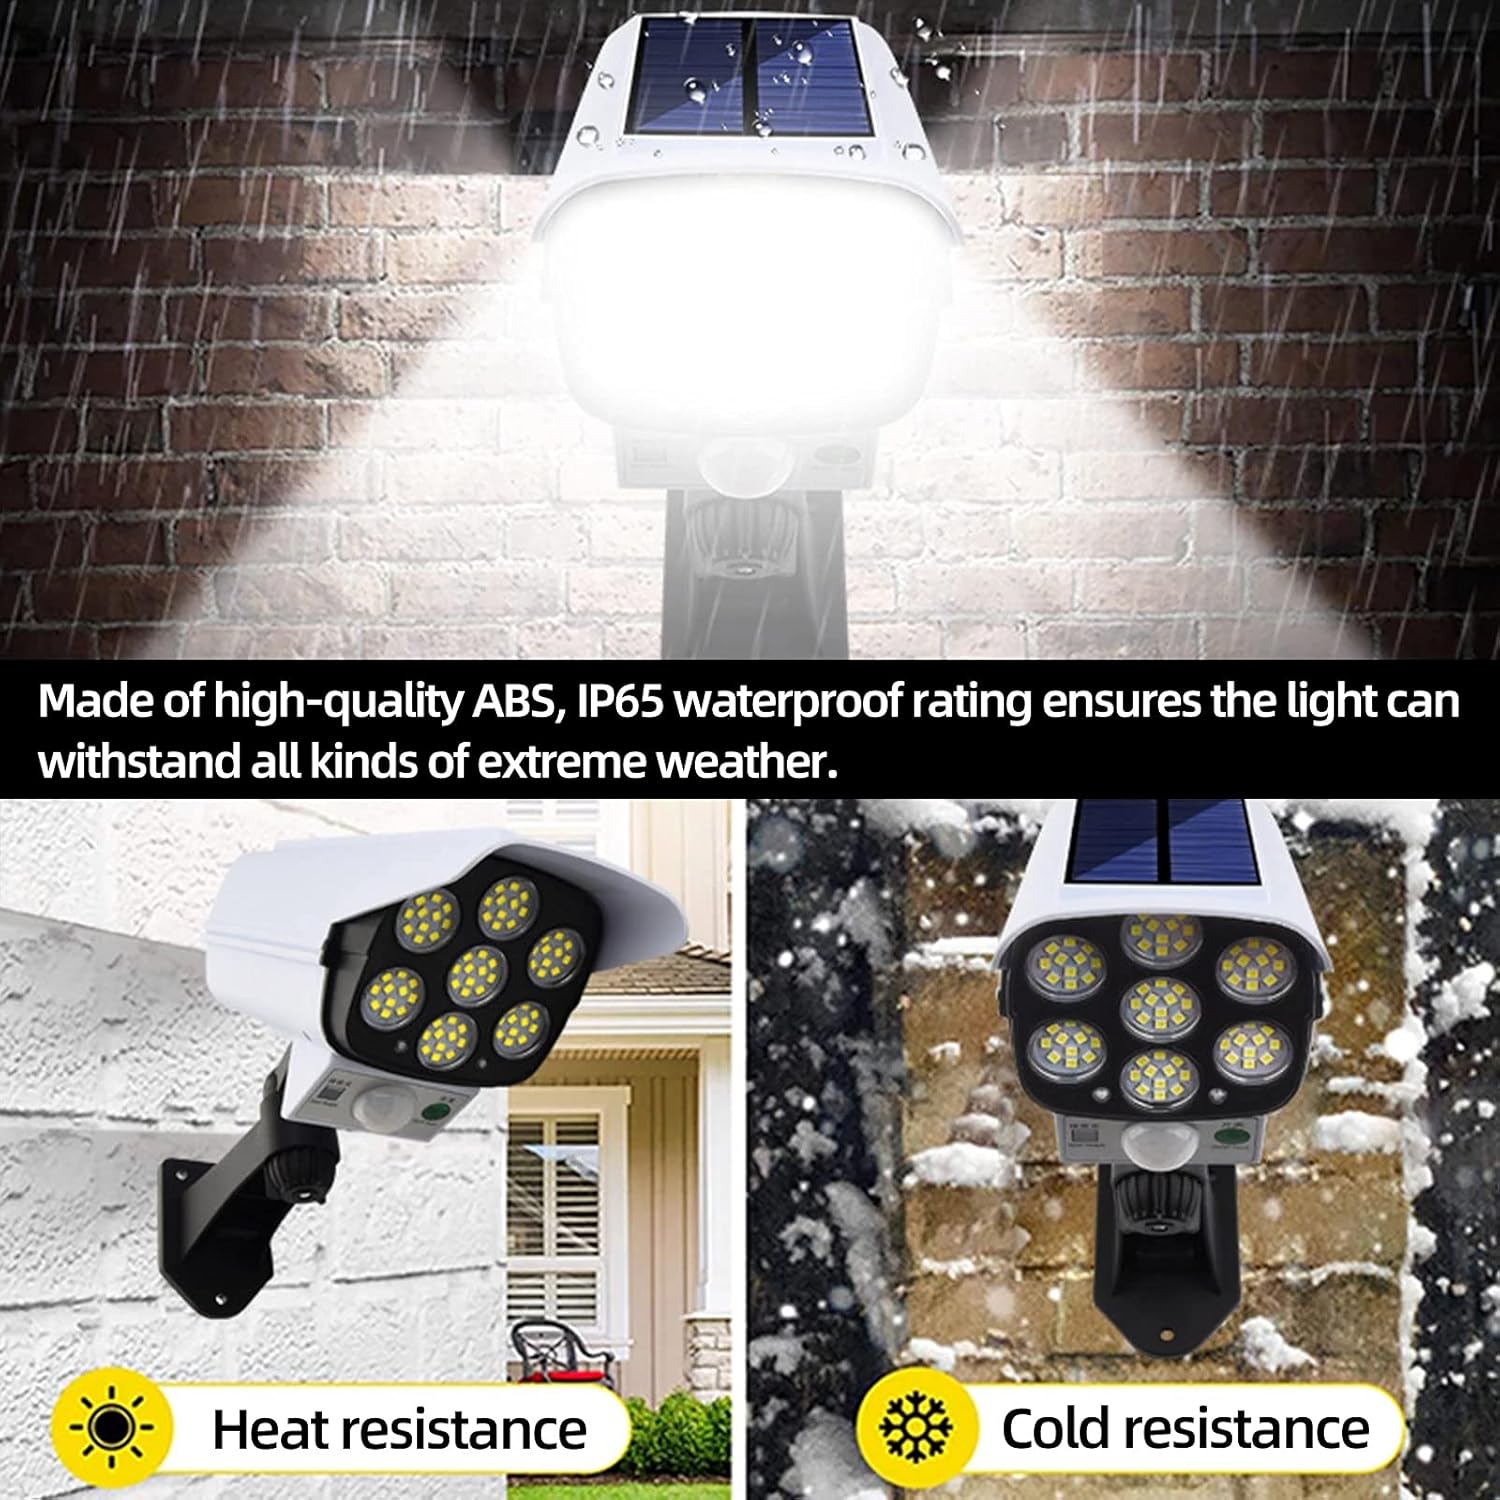
Image: The solar light demonstrating its resilience to both heat and cold, highlighting its IP66 waterproof rating.
What's in the Box
- 1 x Solar Motion Sensor Light
- 1 x Remote Control
Video: An unboxing and demonstration of the solar light, showing its components and basic functionality.
Specifications
| Feature | Detail |
|---|---|
| Solar Panel | 5V 2W Max |
| Li-ion Battery | 3.7V 2600mAh (1 Lithium Ion battery included) |
| LED Quantity | 77 LEDs |
| Color Temperature | White (6500k) |
| Brightness | 2000 Lumens |
| Time Delay (Motion Sensor) | 15-20 seconds |
| Motion Angle | 120 degrees |
| Motion Distance | Up to 26 ft (8 meters) |
| Material | ABS Plastic |
| Weight | 0.37 kg (0.81 lb) |
| Dimensions | 20 x 9 x 9.5 cm (7.8 x 3.5 x 3.7 inches) |
| Working Temperature | -10 to 60 Celsius degree |
| Water Resistance | IP66 Waterproof |
| Installation Type | Wall Mount |
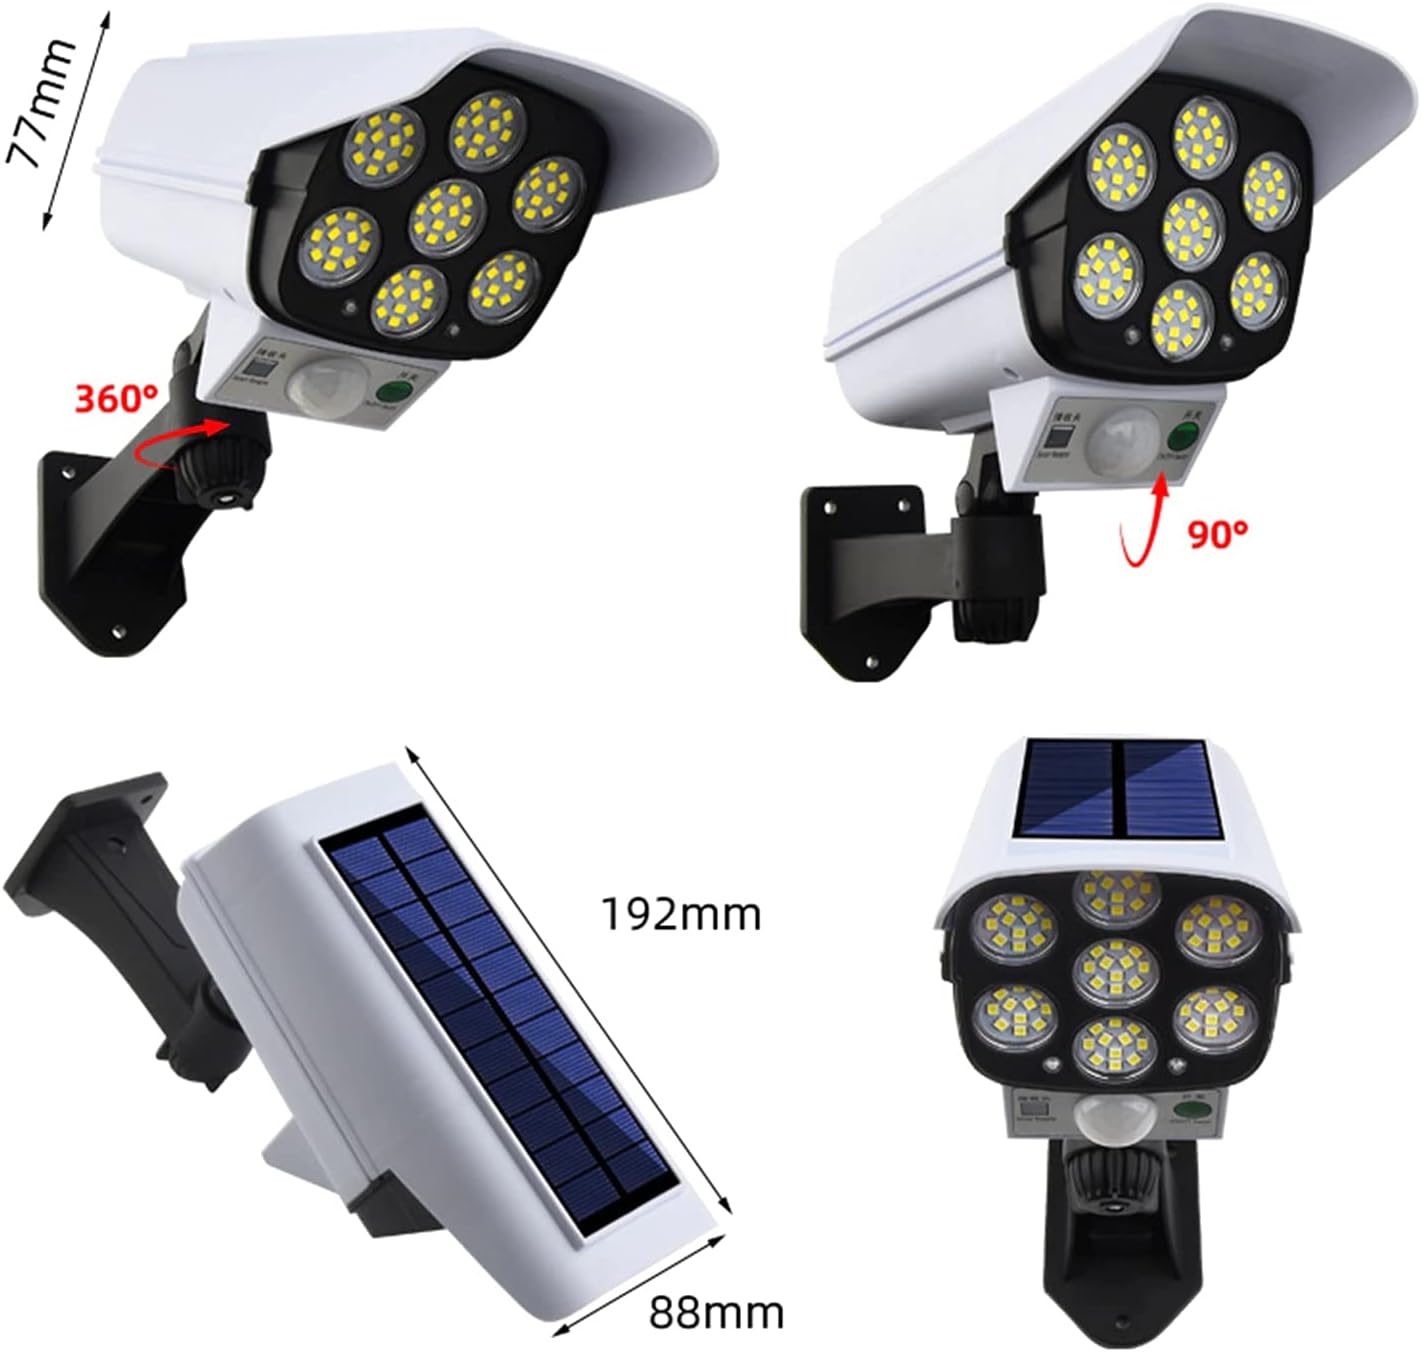
Image: Detailed diagram illustrating the dimensions and adjustable rotation (360 degrees horizontally, 90 degrees vertically) of the solar light.
Setup and Installation
Important Notes Before Installation:
- Please fully charge the solar panel light in direct sunshine before initial use.
- Working power will be influenced by weather conditions, location, and sunlight exposure.
- If not used for a long time, fully charge the unit in the sunshine every 3 months to maintain battery life.
- Avoid turning over and folding the solar panel too hard or too frequently.
- Install the solar flood light in a location that receives direct sunlight without any shelter or obstruction.
- During periods of low sunshine or in winter, charging time may be longer.
Installation Steps:
- Choose a suitable location: Select an outdoor area where the solar panel can receive maximum direct sunlight throughout the day. Ensure there are no obstructions like trees or buildings blocking the sun.
- Mark drilling points: Hold the light's mounting bracket against the wall or desired surface and mark the positions for the screws.
- Drill holes: Use an appropriate drill bit to create holes at the marked positions.
- Insert wall plugs: If installing on masonry or concrete, insert the provided wall plugs into the drilled holes.
- Mount the light: Align the mounting bracket with the holes and secure the light using the provided screws.
- Adjust the angle: The light features a 5-axis rotation, allowing you to adjust both the illumination angle and the solar panel angle for optimal sunlight absorption and light coverage.
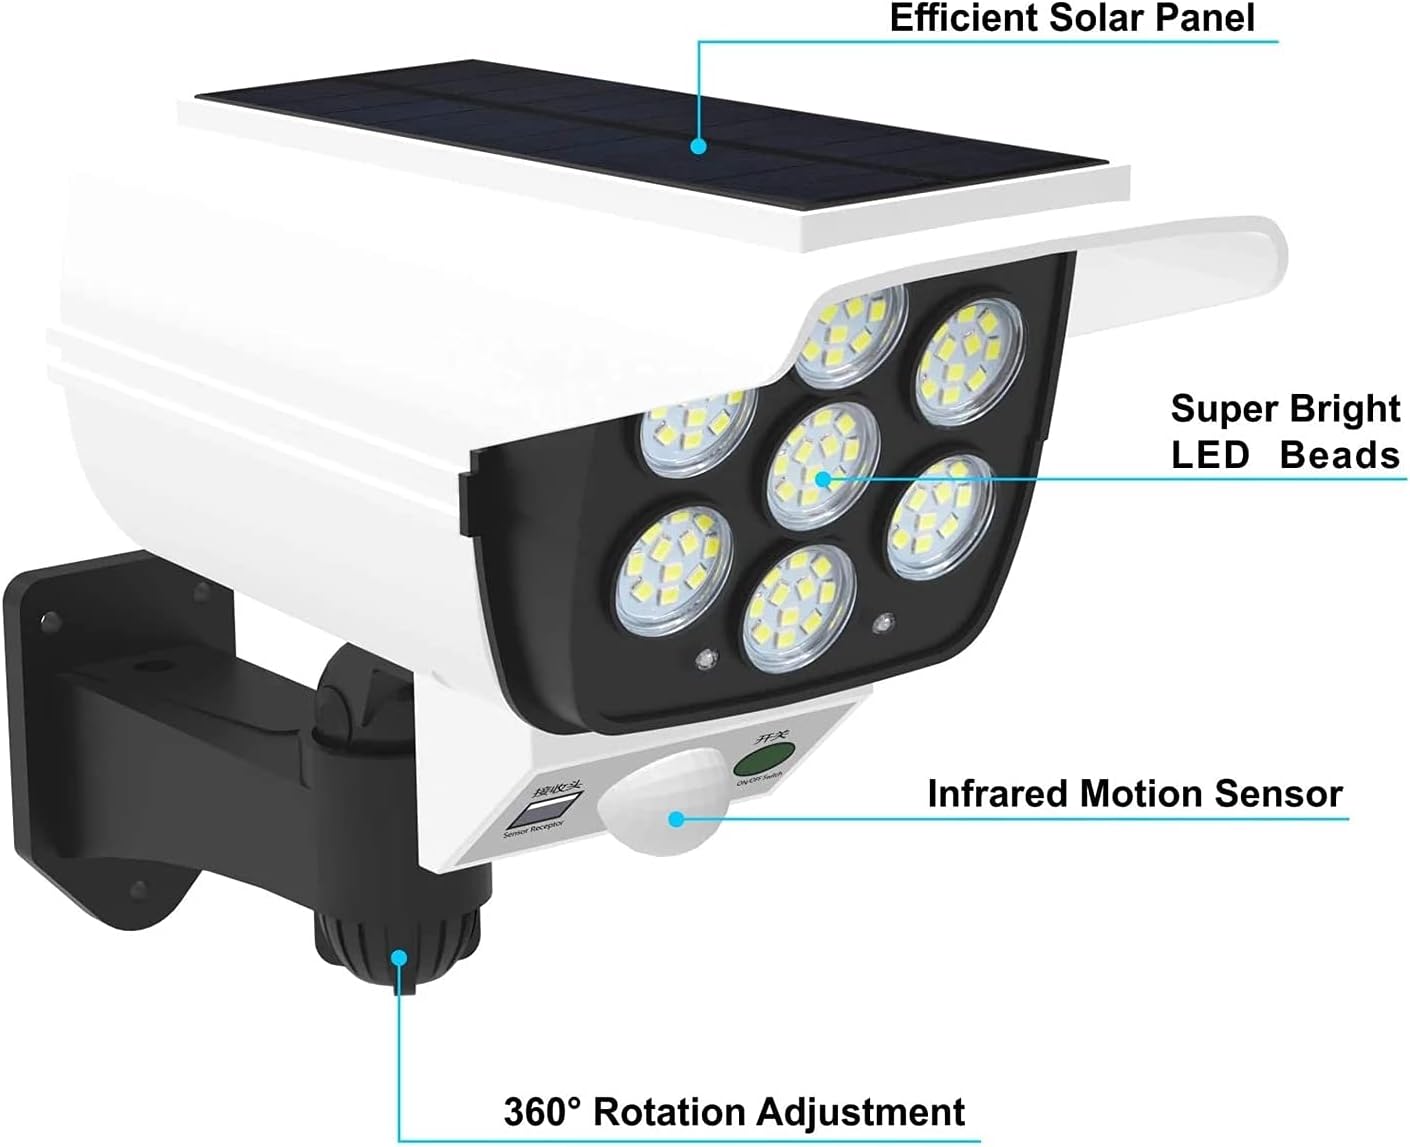
Image: An exploded view highlighting the efficient solar panel, super bright LED beads, infrared motion sensor, and 360-degree rotation adjustment feature.
Operating Instructions
The EVERSECU Solar Light can be operated using the integrated switch and the included remote control. It features three distinct lighting modes to suit various needs.
Switching Modes:
- To turn on the light: Long press the power button on the unit for 3 seconds.
- To switch between modes: Short press the power button on the unit for 1 second, or use the corresponding mode buttons on the remote control.
Lighting Modes:
- Mode 1 (Motion Sensor Mode): The light remains off until motion is detected. Upon detection, it illuminates at strong light mode for 15-20 seconds, then turns off again.
- Mode 2 (Dim Light + Motion Sensor Mode): The light stays on at a weak (dim) light mode at night. When motion is detected, it switches to strong light mode for 15-20 seconds, then returns to dim light.
- Mode 3 (Always On Dim Light Mode): The light stays on at a continuous dim light mode throughout the night. This mode provides up to 40 hours of use time on a full charge.

Image: Visual representation of the three distinct lighting modes: Motion Detected High Light (Mode 1), Dim Light with Motion Detected High Light (Mode 2), and Stay Dim Light All Night (Mode 3).
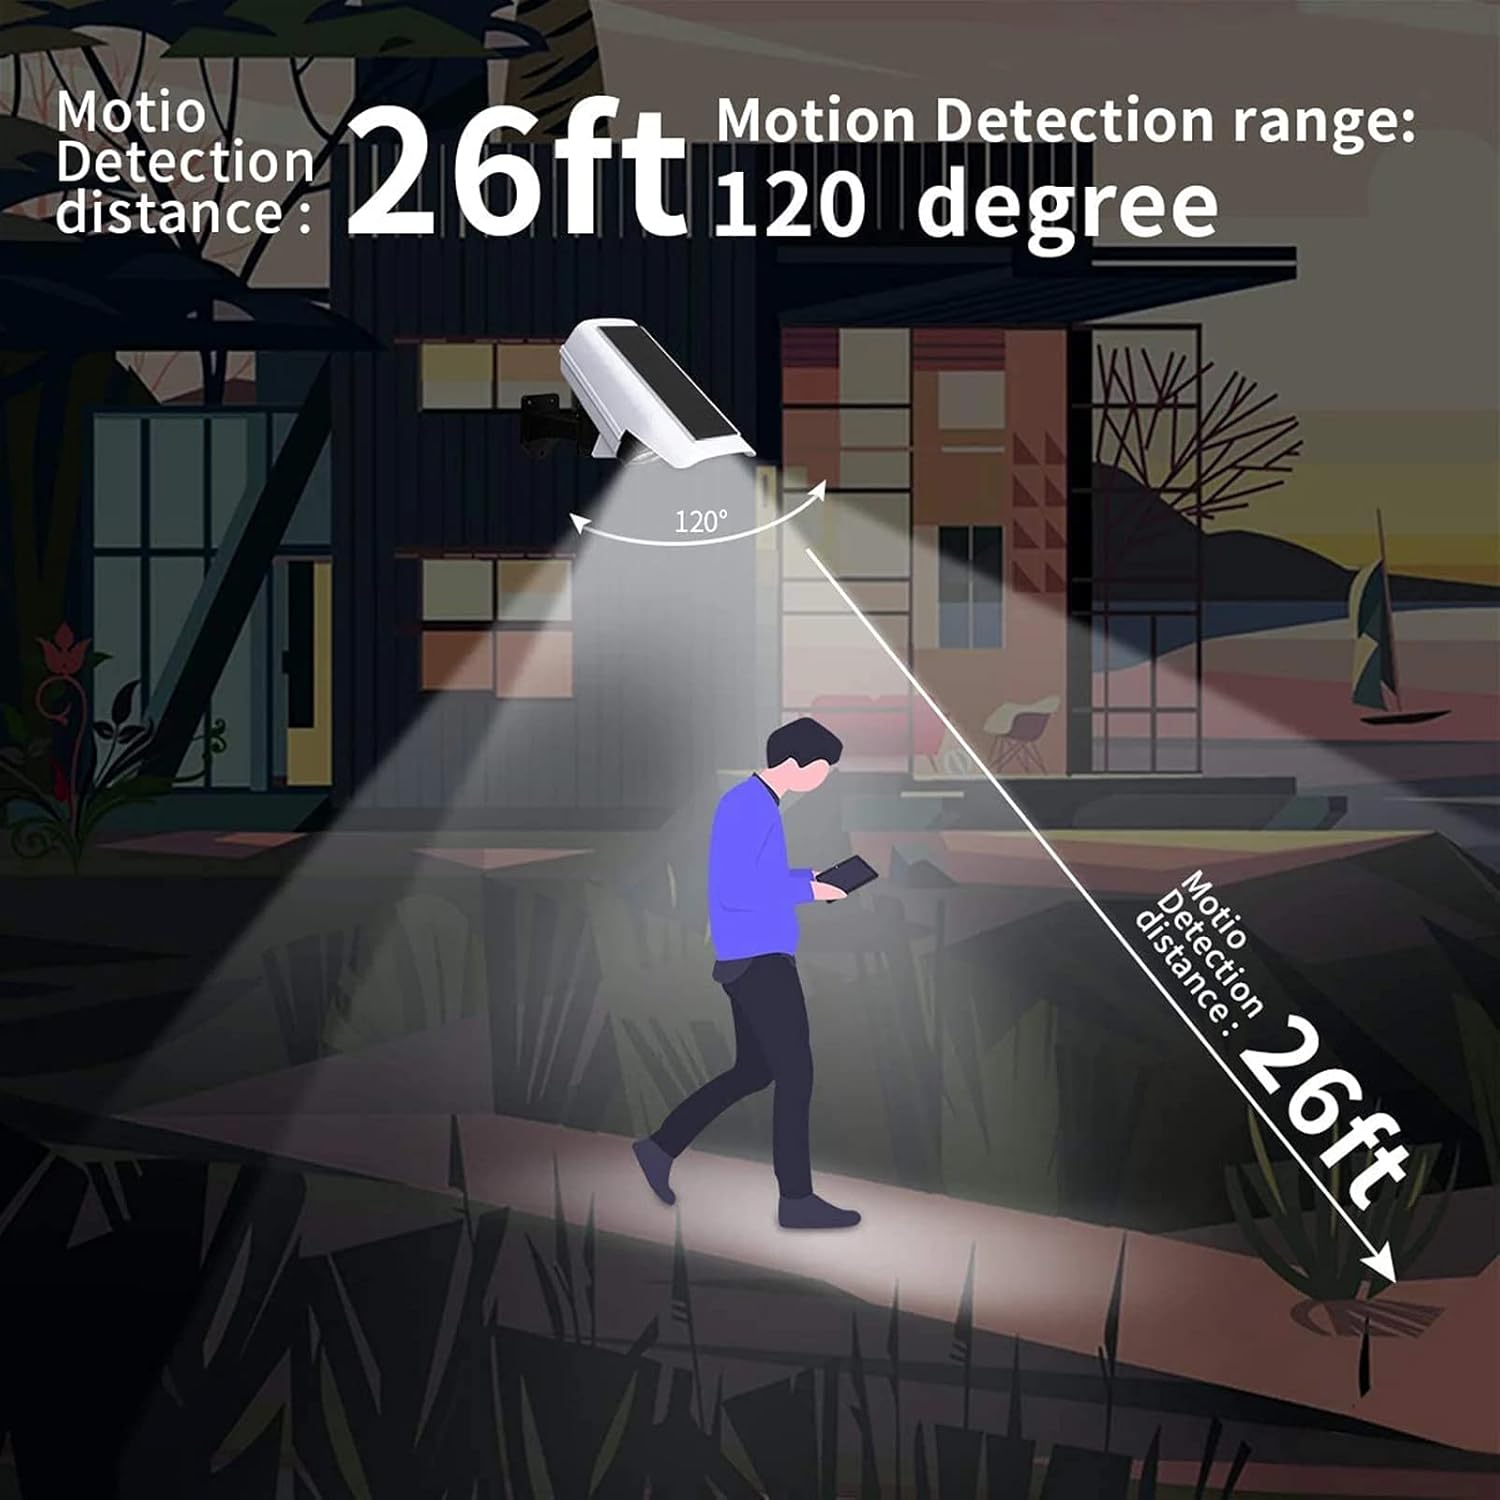
Image: An illustration demonstrating the motion detection range of 26 feet and a 120-degree angle.
Video: A demonstration of the solar light's operation, including turning it on/off and cycling through the three lighting modes using the remote control.
Maintenance
- Cleaning: Regularly wipe the solar panel and LED surface with a soft, damp cloth to remove dust, dirt, or debris. A clean solar panel ensures efficient charging.
- Battery Care: As mentioned in setup, if the light is stored or not used for extended periods, ensure it is fully charged every 3 months to prolong battery life.
- Inspection: Periodically check the mounting screws and bracket to ensure the light remains securely attached.
- Environmental Factors: Be aware that extreme weather conditions (heavy snow, prolonged cloudy periods) may affect the light's performance and charging efficiency.
Troubleshooting
| Problem | Possible Cause | Solution |
|---|---|---|
| Light does not turn on at night. | Insufficient solar charge. | Ensure the solar panel is in direct sunlight for at least 6-8 hours. Relocate if necessary to an unshaded area. |
| Light flickers or is dim. | Low battery charge or dirty solar panel. | Allow the light to charge fully in direct sunlight. Clean the solar panel surface. |
| Motion sensor not working. | Sensor obstructed or incorrect mode. | Ensure the sensor is clear of obstructions. Check that the light is set to Mode 1 or Mode 2. |
| Remote control not responding. | Remote battery low or line of sight issue. | Ensure the remote control has a working battery. Point the remote directly at the light's receiver. |
Warranty and Support
For warranty information or technical support, please refer to the product packaging or contact EVERSECU customer service directly. You can find more information and contact details on the official EVERSECU store page on Amazon.
EVERSECU Store: Visit the EVERSECU Store on Amazon
